Kombucha, Som, Pok Pok and a new Kitchen

Dear friends! As you can tell, I’ve been on a bit of a writing hiatus the past few… months! Works been busy, personal life has been busy, there’s been travel and apparently it’s important to sleep every now and then?! What a cramp on a busy gals schedule hey? But i’ve dearly miss and you and even though I haven’t been posting, I have still been cooking up a storm and gathering new recipes to share! We had the weekly staples- batches of kombucha,and almond butter.We traveled to visit our family and threw in a few beer soaked grilled bratwurst, paleo chocolate chip banana bread and Pecan Pies with fresh homemade crust (of course!). I can’t visit without baking a few pies! One of my favorite parts about visiting family is playing the role of both ‘imported resident chef’ and ‘kitchen instructor’. I have So much fun teaching the niece and nephews to cook! We had a ball in the kitchen and they do great!
photoBut, as I was saying. This entire summer has been booked SOLID with both work and play. And just when I thought things would calm down in the fall, our landlord decided to sell the condo after four years of renting so we had to find a new place. Luckily, we found a place that we just LOVE and we move this weekend. THIS WEEKEND! A matter of hours away! I’m so excited I can barely handle it! I can’t wait to unpack and organize the new kitchen! With the fast pace of the last 3 months, cooking as been more of a chore than it usually is. I’ve really leaned on simple recipes, the local pho restaurant, and cereal for dinner. But with a new kitchen comes new recipes and excitement to cook! Which brings me to my fall and winter sports.

I HATE to, and won’t, drive in snow and/or ice… so my fall/winter sports consist of cooking, baking, menu planning from the ridiculous amount of time I spend on Pinterest (A Byte of Life boards here), testing out my wine cellar, catching up on all the shows that everyones been raving about and listening to the rain falling outside. Oh, and pumpkins! I LOVE PUMPKIN!  I’ll eat slow roasted pumpkin right off the baking sheet! And Gingerbread. I LOVE gingerbread! But back to the point- my winter sports are gingerbread and/or pumpkin flavored, with a side of wine, and a good show in the background.

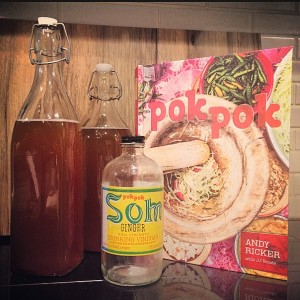
This year, I have a new hobby to add to the list. Pok Pok. If you’ve NEVER been to Pok Pok, you HAVE to go to either Portland or New York and experience their wings and one of their drinks with their drinking vinegar called som. Som is a drinking vinegar that has been an age old practice in many cultures around the world for it’s health benefits. Pok Pok has been serving their drinking vinegars since 2005, both as a cocktail mixer and diluted with soda as a soft drink. They use organic cane sugar for sweetener and let me tell you, while I’m not a soft drink person in the slightest, this stuff is downright addicting! You can purchase the Pok Pok Som online form both Pok Pok and ChefShop.com. A girlfriend and I just took an amazing cooking class at ChefShop.com so you can expect future blog post about them too!

Well, their chicken wings are known nation wide, and their cocktails are red-eye flight worthy. This, coming from a confirmed wine and anti-chicken wing girl. Let’s just keep this short and say that Pok Pok changed my life, as evidenced by the fact that after the first bite I waived down the waiter and asked if I could PLEASE purchase their cookbook but only if the amazing chicken wings were included. He handed me a copy to review. Each page coated in plastic which was an amazing idea because I was pouring over it as I was elbow deep in eating amazing chicken wings,The Pok Pok cookbook holds a special spot on my shelf , I personally confirmed that the chicken wing recipe is included, and it has been added to the list of fall and winter hobbies.

Tune in for more amazing thai inspired recipes from the Pok Pok cookbook, updates from this years International Food Bloggers conference (last years post) and to see how the Som Kombucha turns out! I had a bit of Som leftover and had a batch of kombucha ready tonight so I figured I’d do a little variation on my blueberry ginger kombucha and try some ginger som kombucha. I’ll let you know how it goes!
Blueberry Ginger Kombucha

photoContrary to what you might think, making your own Kombucha is NOT that hard. It’s actually QUITE easy. You simply brew some tea, add organic sugar, let it cool to room temperature and then pour into a jug with your SCOBY and let it chill for a week or two. Viola, homemade Kombucha! I’ve been making my own kombucha for almost two years now and decided that it was time to start experimenting with some flavoring. Regular brewed kombucha is completely drinkable, but it’s just that… drinkable. Not super exciting. So, it was time to add some excitement to my kombucha making routine! Watch out kids, magic is about to happen!

Remembering back to when I first started drinking kombucha I LOVED the Gingerberry flavor from Synergy Organic. Off to the inter-webs I flew and found some great tips from a website called Cultures for health. Their  Kombucha FAQ listed some delicious recipes, pointers on second fermentation and flavoring, and many other kombucha resources as well as a place to purchase your SCOBY. Well, I blueberry juice and gingered up and have been trying my hand at a few batches of homemade gingerberry kombucha. The second fermentation process is a great way to add some flavor to your brewed kombucha. “A byproduct of fermentation is that the sugar is turned into carbon dioxide giving the kombucha the fizzy texture it is often known for.” ( Quote from the  Kombucha FAQ ). I have two glass bottles that I use for my second fermentation. There is no rhyme or reason to these bottles, or pro/con of using one over the other can I can tell so far. One is the KORKEN bottle from Ikea. It’s $3.99 and is a nice round shape that should fit in the door of most refrigerators. The other is the square glass bottle from Cost Plus which is $5.99 and is a bit taller yet equally as useful. Bottle shape and size is really up to your personal preference. Just make sure it’s a glass bottle and that it has the sling top, which allows the bottle to burp (lovely description, I know!) and release the carbon dioxide as it ferments. If you don’t have a bottle that burps, you’ll have a bottle that bursts. I for one don’t need to come home to glass and kombucha scented kitchen. You can find some GREAT tips on second fermentation from Cultures for Health: Flavoring and Bottling Kombucha. They’re a GREAT resource that I’ve used many times along my Kombucha journeys. I am also lucky enough to have my very own kombucha guru on speed dial who can answer my “am I going to die if I drink this” and “should it look like that” questions. That is one of the MAJOR benefits of having friends that are also obsessed with making their own kombucha and I highly  recommend having a few on retainer! The “if flavoring with…use…” below is from the Cultures for Health website and remember, the flavor will develop during the second fermentation period so go easy on flavoring the first time you make it and adjust on the second batch. If flavoring with…use…

  • Fresh, frozen, or dried fruit…start with 10% to 30% fruit and 70% to 90% Kombucha.  Fresh fruit yields the best flavor.
  • Juice… start with 10-20% juice and 80-90% Kombucha.
  • Herbs… the variety and strength of herbs varies so greatly, experiment and come up with the best ratios and combinations for your taste preferences.
  • Flavor extracts such as almond extract or vanilla extract… start with 1/4 teaspoon extract per cup of kombucha and adjust to taste.

I’ve only used fruit juice and various types of ginger so far, so please comment and let me know what flavors you try!!! Blueberry Ginger Kombucha  1/2 c 100% blueberry juice 1 tsp chopped ginger 7 c  Homemade Kombucha 2 sling top glass bottles Mix half the blueberry juice and ginger in  each of the glass bottles and shake to mix. Add 3 1/2 cups of the homemade kombucha to each bottle, making sure that you leave room in the bottle between the kombucha and the opening. Leave on the counter for 2-14 days. Once you achieve the desired flavor and carbonation, re-bottle and keep in refrigerator to consume at your leisure.

Butternut Squash Couscous (Vegetarian, Vegan, Meat Free, Dairy Free)

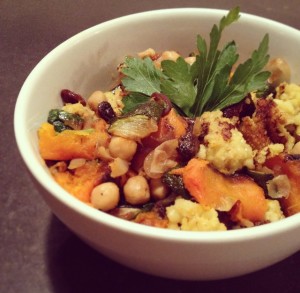
photoThe way that I describe this dish, is a middle eastern version of fried rice. It’s a great meal the throw together and one that you can experiment with spices that you don’t likely use in your daily cooking. The original recipe calls for a steaming method of cooking, which is the traditional method. I neglected to read the directions before I started the recipe and didn’t think we even owned a steamer! Well, after I completely revamped the entire cooking method, I realized that we DO have a steamer so I guess I’ll try that next time!

Couscous is very low in fat, and has about the same in protein, fiber and carbs as quinoa. Quinoa beats couscous in the mineral content, but couscous packs an amazing 87% of your daily suggested intake. About 55mcg is suggested daily and couscous has 43mcg per once cup serving. Selenium has antioxidant properties, can help the body regulate the thyroid hormones, support a healthy immune system, and aid in metabolism. One of selenium’s most important roles is as an antioxidant helping to prevent cell damage due to free radicals. (Sources: WebMD and Eating Well)

One VERY important thing that I did not note, until I’d already washed and set aside four cups of couscous, is the water to couscous ratio in this recipe. Much like rice or quinoa, there is a two to one ratio for water to couscous. Now, this recipe called for 4 cups of dry couscous. Four cups of dry couscous is quite a large portion, borderline obscene actually. I only realized this fact at the very moment where I was pouring the 8 cups of water and 4 cups of couscous  into my stove top pan and it was nearly brimming over. And, I hadn’t event started it boiling yet! My denial for the amount of couscous I was in the middle of making could no longer be indulged and I pulled out the large stock pot and transferred my absurd amount of couscous into the larger pot. While there was much more couscous than I would normally cook, about 9 servings worth, the ratio of the other ingredients worked perfectly. The only thing I would change is to maybe try cutting the couscous by half. 

To serve, mix the roasted zucchini and butternut squash, chickpeas, raisins and sautéed onion together in a bowl and add a little more chopped parsley. (Typically, chickpeas from a can are already cooked but double-check.) Add in the couscous and stir well. The couscous will be a little gummy which is possibly due to my cooking method and not steaming it as directed. Garnish with more fresh  parsley if you wish. You can also add grilled chicken or tofu to this if you want more protein like I usually do.

Squash Couscous
Yield: 9 cups of couscous + a good amount of veggies for 4 people 
Recipe and method adapted from the recipe on Canadian Living
*Note: Due to preference and feeding two people versus 6, I suggest cutting the couscous, chicken stock and water in half. If you LOVE couscous or have a lot of people to feed, keep the recipe as is!

Ingredients
1 1/2 lb (one medium large)  butternut squash, peeled and chopped in 2 inch cubed
2 large zucchini, sliced into 2 inch cubes
1 medium yellow onion, diced
1/2 cup raisins
2 cups  ( 1  15 oz can)  chickpeas, drained and rinsed
1/4 c chicken bullion paste for chicken stock
8 cups water
2 tbsp chopped fresh parsley
1 tsp ground ginger
1/2 tsp pepper
1/4 tsp salt
1/2 tsp turmeric
4 cups Israeli couscous ( I only had 3 cups, so I added one cup of the golden small couscous
additional parsley to garnish

Directions
Wash and chop the zucchini and butternut squash. Don’t forget to de-seed the squash. Lay out on aluminum foil on a baking sheet and roast at 450 for 30-45 minutes. Turning every 10 -15 min. Wash the couscous and set aside.

Chop the onion and fry it on the stove with some olive oil in a large stock pot. Set aside in a large bowl which you’ll use to mix up the rest of the ingredients. Drain and rinse the chickpeas and add to the bowl, along with the raisins and some more parsley (to taste). Add the zucchini and butternut squash to this bowl once they’re browned on all sides.

Bring 8 cups of water to a boil in the large stock pot you used for the onions. Stir in the 1/4 cup of bullion, parsley, ginger, pepper, salt, and turmeric. Let boil together for a few minutes. Add the couscous and let it come back to a boil. Be sure to stir it all up every few minutes. Cook until the couscous soaks up the broth and get’s to a consistency you like.

Add the couscous to your large bowl with the onions, raisins and chickpeas, zucchini and butternut squash and stir. Garnish with additional parsley if you wish.

Tonight we’re eating this with some delicious bone in pork chops that are currently brining, but you can serve with grilled chicken, boiled eggs, firm tofu, or grilled steak. The options are endless!

Pumpkin Pie

DSC_0787

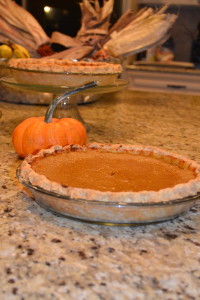
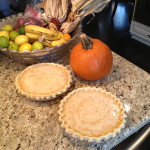
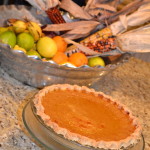
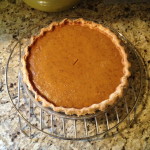
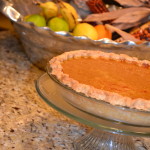
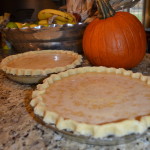
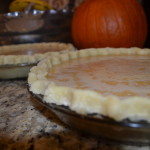
There is a special feeling of accomplishment and “arrival”reserved for the moment when you look at your LOVELY freshly baked pumpkin pie cooling on the rack,  knowing that you both roasted the pumpkins used in the pie AND made the crust from scratch. You “can” use the canned stuff, but roasting your own pumpkins just puts this already delicious recipe over the edge of deliciousness! Roasting pumpkins isn’t as hard as you may think and it truly is worth the time for some AMAZING tasting pumpkin pie! You can find my simple recipe HERE.

I like to use organic local pumpkins whenever available. The nice thing about doing pumpkin pie, is that you can roast extra pumpkin and use it later in the week! I usually roast a pumpkin to make puree for the pie, and roast a pumpkin to roast in chunks to use with toasted quinoa and roasted chickpeas for dinner, or tossed in a salad.

Pumpkin Pie

Prep:15 mins |Cooking: 55 mins

Ingredients

3/4 cup granulated sugar
1 teaspoon ground cinnamon
1/2 teaspoon salt
1/2 teaspoon ground ginger
1/4 teaspoon ground cloves
2 large eggs
1  15 oz. canned Pumpkin or 1 3/4 cups pumpkin puree
1 12 fl. oz. can Evaporated Milk
1 unbaked 9-inch deep-dish pie shell (homemade recipe HERE)
Whipped cream (optional)

Directions

Mix sugar, cinnamon, salt, ginger and cloves in small bowl. Beat eggs in large bowl. Stir in pumpkin and sugar-spice mixture. Gradually stir in evaporated milk.
POUR into unbaked pie shell.
BAKE in preheated 425° F oven for 15 minutes.
Reduce temperature to 350° F; bake for 40 to 50 minutes or until knife inserted near center comes out clean.
Cool on wire rack for 2 hours.


RECIPE TIPS
Pie is done when center reaches 200°F. Tap center surface of pie lightly – it should spring back when done. For easy clean up, spray pie pan with cooking spray before placing pie crust in pan. If pie crust is over browning, cover edges with foil.
To use prepared frozen pie crust: Place cookie sheet in oven and pre-heat oven as directed. Pour filling into frozen crust and bake on preheated cookie sheet.
High Altitude Adjustments: Reduce sugar to 2/3 cup and increase butter to 3 tablespoons. Reduce oven temperature to 325°F.

Gingerbread Cookies

photoLast year I posted my recipe for gluten-free gingerbread cookies. This year, we get the good old-fashioned gluten goodness version! Any of you that had a flash back to Will and Grace, and remembered Grace’s “Good Old Fashioned” parties… you just earned an extra gingerbread cookie for being amazing! I LOVE Christmas time. I love the cheer, bundling up with mittens and scarves, waterproofing my boots and pulling out the long jackets, that first red Starbucks Holiday cup, the smell of Christmas trees, and the ever-present smell of amazing baked goods. During the holidays, we can endure much stress. Between hosting, cleaning, shopping, decorating, hosting again, attending, participating, family, guests, New Year New You, drinking, and the ever-present baked treats…we seem to endure quite a bit of bodily and mental stress during the 8 weeks between pre-Thanksgiving to post New Years Resolutions. We need extra care, rest, and vitamins during this time.

Lucky for you, I know exactly the remedy for holiday stress. My dad was always so good about taking is vitamins. My mother would call from the living room, “And WHAT are YOU getting into!”.  To which my father , who, inevitably at that point would have one hand elbow deep in the cookie jar, would reply, “Oh, just taking my vitamins darling” then he’d wink at me and take a bite of the first of TWO successfully pilfered cookies. To this day, I can’t look at a cookie without first thinking of the word, “VITAMIN!”. So, during these potentially stressful times, we need to be sure to take our vitamins and my vitamin of choice are gingerbread cookies. Each year, I do a holiday party where I bake a ridiculous amount of gingerbread, fashion them into little men, women, dog bones, Christmas trees and a multitude of other shapes and invite 20 of my closest friends over to decorate them. Little, do they know… and some of them read this blog so my secret is out now… but I somehow always thankfully end up with about 4 plates of extra cookies! Some people might pull the “oh I wish it wasn’t in the house” card and, on other sweets I might say the same. But NOT for gingerbread cookies.

Cookies These are my vitamins! I literally eat a gingerbread cookie most days annually between December-February. THis is one way to beat the holiday stress, make sure to take your vitamins each day! If gingerbread is also your “vitamin” of choice, I’ll give you a life tip, they’re equally as good with coffee in the morning as they are with a glass of good red wine in the evening! Second (shameless plug ahead) is to read my article that was originally posted on LevoLeague.com and picked up by the Huffington Post; Holiday Stress 7 Ways to Ditch the Worry.  Now, my fine feathered friends, you are ready for the holiday season! Stock up on the red wine and bubbly, practice your 7 holiday stress tips and eat your “vitamins” daily!!


Gingerbread Cookies

Ingredients
2 1/2 cups  flour
1 1/2 tsp double-acting baking powder
1/2 tsp baking soda
1 tsp ginger
1 tsp ground cloves
1/2 tsp nutmeg
1/2 tsp salt

1/2 cup sugar
1/2 cup shortening
1/2 cup light molasses
1 egg

Ornamental Cookie Frosting (also listed in this post below)

In a small bowl, stir together the flour, baking powder, baking soda, ginger, cloves, nutmeg, and salt and set aside.
In a medium bowl, place the remaining ingredients, and stir to combine.
Add the dry ingredients to the wet ingredients and stir well to combine.
Cover the bowl, place it in the refrigerator, and chill the dough for 1 hour or more.
Lightly oil (or mist with olive oil in a Misto Sprayer) two non-stick cookie sheets and set aside.

Sprinkle a little flour over a work surface where you can roll out the cookies.
Divide the chilled dough into quarters, work with only one-quarter of the dough at a time, and keep the remaining dough covered and chilled until needed.
Working in batches, roll out the quarter of dough to 1/4-inch thickness, and cut into desired shapes with cookie cutters.

Carefully transfer the cut cookies to the prepared cookie sheet and bake at 350 degrees.

For softer cookies: bake 6 minutes (the cookies will feel slightly soft to the touch) and allow them to cool on the baking sheet 2-3 minutes before transferring them to the cooling rack.

For crispier cookies: bake 9-10 minutes and transfer to cooling rack right away. We prefer the crispy cookies!

Repeat the rolling and cutting-out procedure for the remaining cookie dough.

Store the cookies in an airtight container for up to a week.

Ornamental Cookie Frosting
from: Good Housekeeping Cookbook

1 1/4 c confectioners sugar (or powdered sugar)
1/8 tsp cream of tartar
1 egg white

Just before using, pull out your kitchen aid standing mixer or hand mixer and a bowl. Mix the sugar and cream of tartar together. Add the egg white and mix at high-speed until it’s so stiff that a knife drawn through leaves a clean path.

Divide into small bowls and add your food coloring. Use directly from the bowls or you can place into pastry bags or grab a freezer style ziplock bag and cut one side of the bag.

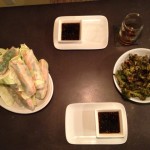
Garlic Ginger Dipping Sauce

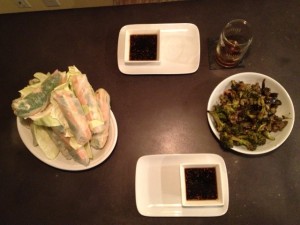
Dinner is served
Dinner is served

Garlic Ginger Dipping Sauce

Yield enough for about 6-8 spring rolls
3 cloves fresh garlic, minced (or 1 1/2 tsp jarred minced garlic)
1- 1 1/2 tbsp fresh ginger (or 1 1/2 tsp dried ginger)
1 tbsp toasted sesame oil
1/3 low sodium soy sauce
1/4  c.rice vinegar (or white wine vinegar works as well)
1/4 c. tsp crushed red pepper flakes ( unless you like it SPICY, stick to this ratio or it might overpower the rolls)
1 tbsp sugar

Combine all ingredients in small pot and cook over low heat until mixture bubbles. Can be stored in airtight container and refrigerated for up to three days after making.

Pairs well with Chicken Spring Rolls or you can marinate chicken in it and bake in the oven or grill!


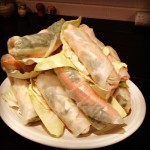
Healthy Spring Rolls with Garlic Ginger Dipping Sauce (Vegetarian Option)

Spring has sprung friends! As the weather turns from the chilly winter to crisp spring I start to crave the lighter fare: chicken salads, grilled fish and veggies, Rose and bubbly wines, strawberries and all other fresh spring/summer fruit. A few weeks ago, my mother invited me along to a cooking class from Culinary Events Northwest. The class met at the Lynnwood Albert Lee Appliance store so off we went to learn our “Wraps Around the World”. There were a few different interesting offerings, such as crepes with buckwheat flour and strawberry balsamic drizzle. But my favorite from the class was the Vietnamese Style Spring Rolls.

We love ordering these when we eat out but I had NEVER before thought about trying to make them myself! To celebrate the first day of spring it was time to try my hand at some homemade spring rolls for dinner! The hardest part of this project is the prep! Once you get everything washed, chopped and arranged in an assembly line it’s easy peasy and I had 12 of these bad boys made before I knew it!

The report from mister Byte of life: Success! His only regret for the meal was that he didn’t have a larger stomach. Chef, happy! Even the next morning at breakfast he was talking about how good they were and how excited he was to be hungry later so he could eat more! These little guys are great as appetizers or served with grilled or steamed veggies for dinner. They make great next day lunches or afternoon snacks. I’ve included a few other ingredient ideas below. What are some of your favorite spring roll ingredients or ones you’d like to try! Also, please feel free to post other dipping sauce recipes!

Healthy Chicken Veggie Spring Rolls
These can be vegetarian by simply omitting the chicken!
Yield you’ll have to play around with the ratios of ingredients but this is a general guideline of ratios from my assembly line. 

12  8 or 9 inch rice-paper sheets
1 c fresh mint, chopped
1 c fresh cilantro, chopped
1 c fresh basil, chopped
1 – 1 1/2 c finely chopped green cabbage
extra full cabbage leaves to separate the spring rolls on your display plate (the rice-paper wrappings will stick to each other)
1 c matchstick-sized cucumber, peeled first
1 c matchstick-sized carrots, peeled first
2 cooked chicken breasts
1 pan, diameter wide enough to soak rice-paper sheets
1 dry dish towel and either a plate or cutting board to turn rice-paper onto

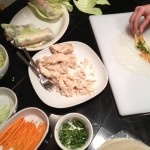
  1. Prep all herbs and veggies into separate bowls and create your assembly line. Carrots and cucumber first followed by the herbs, then your protein and cabbage at the end. Have a plate ready to place your completed spring rolls on, as well the cabbage to separate the spring rolls as the paper wrappers love to stick to each other.  (If you are making ahead and storing, you can also cover with a damp paper towel and plastic wrap, then place directly in fridge)*If you are making the sauce below, prep those veggies after chopping the spring roll ingredients then make the sauce before starting your spring roll assembly line.
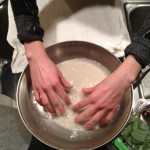
  2. Fill your pan with 2-3 inches room temperature to slightly warm water and place at the beginning of your assembly line with the dry dish towel and cutting board or plate where you will be assembling your spring rolls.
  3. Soak the first rice-paper wrapper in the water until it looses it’s rigidity, about 30 seconds, but is still slightly firm. You’ll just have to try a few times and sacrifice a few rice-papers to get the hang of seeing and feeling when the rice paper is ready to be rolled. You don’t want it TOO soft or else it will easily tear. 
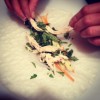
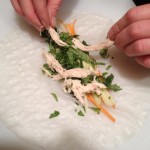
  4. Once the rice paper is ready to be rolled, move onto the paper towel and place another rice paper in the water. Gently dab off the water from the rice paper, it will still be damp and wet but it shouldn’t be soaked. Gently transfer to the cutting board and fill with your ingredients. Arrange a few carrots and cucumber centered in the top 1/3 of the rice paper closest to you, leaving about 3/4 – 1 inch border on each side for rolling. Place the herbs, protein and cabbage in the roll making sure to not fill TOO large to wrap. Fold the top of the rice paper closest to you over the heap of ingredients as tightly as you can without breaking the rice paper. Delicately fold in each side of the rice-paper burrito style and roll away from you to wrap up the spring roll, making sure to keep the rice-paper as taut/tight to the ingredients as you can. You might need to fold in the sides another time or two as you get to the end of the rolling process. The spring roll will seal itself against the rest of the rice-paper.* be sure to keep an eye on the sauce, stirring every few minutes to mix the ingredients together 
  5. Place on one of the large cabbage leaves on your display plate and repeat step 4 until you’re done making spring rolls.

Other roll ideas:
Marinated Baked Tofu with bean sprouts and sliced red peppers
Sashimi with pickled ginger & wasabi or wasabi dipping sauce
Asian Marinated flank steak with fresh ginger and garlic ginger dipping sauce

Garlic Ginger Dipping Sauce
Yield enough for about 6-8 spring rolls
3 cloves fresh garlic, minced (or 1 1/2 tsp jarred minced garlic)
1- 1 1/2 tbsp fresh ginger (or 1 1/2 tsp dried ginger)
1 tbsp toasted sesame oil
1/3 low sodium soy sauce
1/4  c.rice vinegar (or white wine vinegar works as well)
1/4 c. tsp crushed red pepper flakes ( unless you like it SPICY, stick to this ratio or it might overpower the rolls)
1 tbsp sugar

Combine all ingredients in small pot and cook over low heat until mixture bubbles. Can be stored in airtight container and refrigerated for up to three days after making.