Quick & Easy Fall Meal: Delicata Squash, Quinoa, Chicken

Screen Shot 2014-09-17 at 8.54.40 PMThere are nights that you get home and the LAST thing you want to do is cook. But, a bowl of cereal just isn’t going to cut it either. Image one of those days then add a three day moving process where so many things wen’t wrong you’ve lost count, and you just want it all to be over. That’s how the past week has been. I’ve been tired before, but I’m pretty sure I’ve never felt this level of exhaustion…falling into bed because I can’t bear to keep my body upright or my eyes open any longer. But I also can’t seem to stomach the idea of consuming another meal that doesn’t come from my own kitchen. I vowed that tonight was be the night, without and idea of what magic would happen to result in a consumable meal.
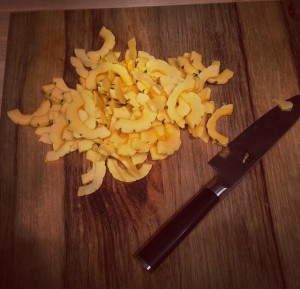
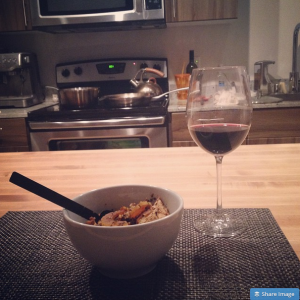
photoA quick triage of the fridge, pantry and cooking dishes quickly indicated that tonight was going to be a “throw together” meal and it was time to get a little creative. This was one of the meals where I just started chopping, sautéing and hoping that adding enough herbs would do the trick to result in a meal that was worth eating. There are a few kitchen staples that are always on hand (a post to come about that!) so that I can throw together a decent meal on little time and minimal ingredients and effort.  One of my go-to fall meals is a simple combination of toasted quinoa, butternut squash and toasted chickpeas. I decided to do a variation on this meal with some delicata squash I picked up at the market and a few frozen chicken breast I had in the freezer. I have to admit, there were a few points in the evening that I started to calculate how quickly a pizza could be delivered but the end result was just delicious! This is for sure getting added to the “fall staples” list! Delicata squash are a city chef’s dream. They’re much smaller than other fall and winter squash (save maybe acorn squash) so you’re not lugging 15 pounds of squash home and you don’t have to peel them! They’re super simple to thin slice and pan cook or roast in the oven on a foil sheet at 425 to get that delicious, caramel, melty, amazing squashey goodness!

To make this recipe vegetarian, substitute the chicken with toasted chickpeas.

Delicata Squash, Quinoa, Chicken

1 medium Delicata squash
2 chicken breast
1/2 cup dry quinoa
Fresh chopped or dried parsley
Cracked pepper to taste
Grapeseed oil

  • In a medium stock pot, toast the quinoa over medium heat, moving the quinoa in the pan, until you see it start to brown. Remove from heat, wash, place back in pan with 1 cup water, cracked pepper and fresh chopped or dried parsley. Cover and bring to a boil then turn off the heat and let it sit until the rest is ready.
  • Meanwhile, pre-heat a pan with grapeseed oil or any other high cooking heat oil. Wash Delicata squash exterior, cut in half, scrape out seeds and slice thin then add to the pre-heated pan with some fresh cracked pepper and parsley. Move in pan until lightly browned.
  • Cube the chicken and add to pan with the squash. Add cracked pepper and parsley to taste.
  • Move contents of pan chicken and squash are browned. Cut one of the pieces of chicken in half to assure it’s cooked throughout.
  • Serve in a bowl with peanut sauce, fig or stone fruit compote, or balsamic drizzle.
Baked Chicken with Tomatos and Basil

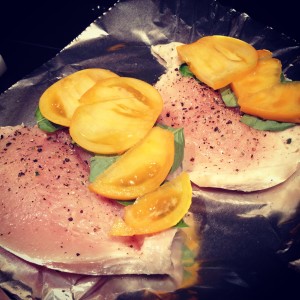
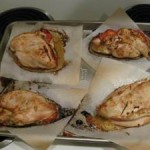
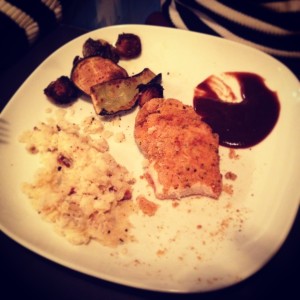
IMG_3795Everyone needs a few of those dishes that can be thrown together and are sure to please. For me, that’s baked chicken. It’s so easy to take a few chicken breasts, spastically cover them in dried herbs and spices, wrap them in aluminum foil and throw it in a pre-heated oven until they reach an internal temperature of 165 degrees. This recipe takes it one step further with a little trick, searing. When you sear the chicken, it locks in the flavor, keeps the chicken most, and  creates a delicious crispy and pretty coating!

Apologies to all of you for not having a better picture of the final product, I got hungry and broke my OWN rule of taking a picture first! I’ll update the post next time I make this dish and have a better “finished product” picture for you!

Baked Chicken with Tomatoes and Basil
Ingredients

  • One chicken breast per guest
  • Heirloom tomatoes (Or Roma tomatoes will work)
  • Optional-one slice of cheese per guest (Fontina or Mozzarella)
  • Fresh Basil
  • Minced Garlic
  • Cracked Pepper and salt
  • Parchment Paper and Baking sheet
  • Frying pan and oil to sear chicken

Directions

1. Wash and dry the basil. Wash the tomatoes and thinly slice them. Pre-heat the oven to 450 degrees. Cut individual sized pieces of parchment paper or aluminum foil to bake the chicken on. Since the chicken has natural juices, you’ll need to think about how you’re cooking the chicken. If you’re cooking it alone (no other veggies on the pan in the oven) a parchment paper is just fine. But, if you’re making other veggies at the same time as I often do, I find it easier to use aluminum foil so I can curl up the sides and contain the chicken juices so that it doesn’t touch the other veggies.

2. Wash the chicken breasts off, and pat them dry. Lay out chicken on a cutting board and “butterfly” it- which means slicing the chicken lengthwise, but don’t cut it enough to separate the two sides. Pre-heat a pan on the stove and cover with cooking spray or some EVOO (Extra Virgin Olive Oil).

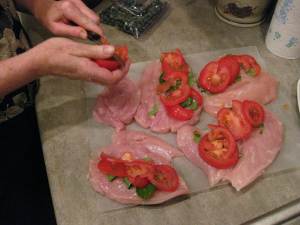
3. Crack fresh pepper over the surface of the chicken. On one side of the chicken, that will be the bottom side, lay the washed basil down, followed by the tomato. (If you want to get really fancy, you can sauté some spinach and garlic and include it in this step). If you’re using cheese, lay it in between the basil and the tomato. Close the top side of the chicken over the bottom side, making sure that the tomato and basil don’t pop out. You can secure them with a tooth pick if needed.

4. Carefully transfer the closed chicken breasts to the pre-heated pan and sear each side until golden brown. I use a wide spatula for this and you have to be careful when turning the chicken breast over so that none of the tomato or basil fall out. When they are seared on both sides, transfer the chicken to the individual pieces of parchment or aluminum foil and secure the openings with a toothpick if they’re still trying to let the tomatoes and basil fall out.

5. Place the chicken on the baking sheet and bake for  for 25-35 minutes or until meat thermometer reads 165 degrees for internal temperature. 

6. Remove the chicken from the oven and serve! I usually like to serve with some toasted quinoa, blasted broccoli, or yam fries.


Healthy Spring Rolls with Garlic Ginger Dipping Sauce (Vegetarian Option)

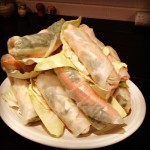
Spring has sprung friends! As the weather turns from the chilly winter to crisp spring I start to crave the lighter fare: chicken salads, grilled fish and veggies, Rose and bubbly wines, strawberries and all other fresh spring/summer fruit. A few weeks ago, my mother invited me along to a cooking class from Culinary Events Northwest. The class met at the Lynnwood Albert Lee Appliance store so off we went to learn our “Wraps Around the World”. There were a few different interesting offerings, such as crepes with buckwheat flour and strawberry balsamic drizzle. But my favorite from the class was the Vietnamese Style Spring Rolls.

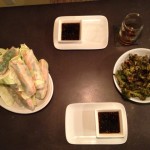
We love ordering these when we eat out but I had NEVER before thought about trying to make them myself! To celebrate the first day of spring it was time to try my hand at some homemade spring rolls for dinner! The hardest part of this project is the prep! Once you get everything washed, chopped and arranged in an assembly line it’s easy peasy and I had 12 of these bad boys made before I knew it!

The report from mister Byte of life: Success! His only regret for the meal was that he didn’t have a larger stomach. Chef, happy! Even the next morning at breakfast he was talking about how good they were and how excited he was to be hungry later so he could eat more! These little guys are great as appetizers or served with grilled or steamed veggies for dinner. They make great next day lunches or afternoon snacks. I’ve included a few other ingredient ideas below. What are some of your favorite spring roll ingredients or ones you’d like to try! Also, please feel free to post other dipping sauce recipes!

Healthy Chicken Veggie Spring Rolls
These can be vegetarian by simply omitting the chicken!
Yield you’ll have to play around with the ratios of ingredients but this is a general guideline of ratios from my assembly line. 

12  8 or 9 inch rice-paper sheets
1 c fresh mint, chopped
1 c fresh cilantro, chopped
1 c fresh basil, chopped
1 – 1 1/2 c finely chopped green cabbage
extra full cabbage leaves to separate the spring rolls on your display plate (the rice-paper wrappings will stick to each other)
1 c matchstick-sized cucumber, peeled first
1 c matchstick-sized carrots, peeled first
2 cooked chicken breasts
1 pan, diameter wide enough to soak rice-paper sheets
1 dry dish towel and either a plate or cutting board to turn rice-paper onto

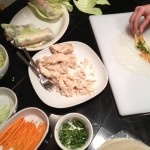
  1. Prep all herbs and veggies into separate bowls and create your assembly line. Carrots and cucumber first followed by the herbs, then your protein and cabbage at the end. Have a plate ready to place your completed spring rolls on, as well the cabbage to separate the spring rolls as the paper wrappers love to stick to each other.  (If you are making ahead and storing, you can also cover with a damp paper towel and plastic wrap, then place directly in fridge)*If you are making the sauce below, prep those veggies after chopping the spring roll ingredients then make the sauce before starting your spring roll assembly line.
  2. Fill your pan with 2-3 inches room temperature to slightly warm water and place at the beginning of your assembly line with the dry dish towel and cutting board or plate where you will be assembling your spring rolls.
  3. Soak the first rice-paper wrapper in the water until it looses it’s rigidity, about 30 seconds, but is still slightly firm. You’ll just have to try a few times and sacrifice a few rice-papers to get the hang of seeing and feeling when the rice paper is ready to be rolled. You don’t want it TOO soft or else it will easily tear. 
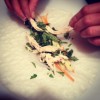
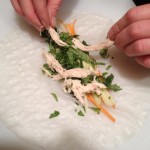
  4. Once the rice paper is ready to be rolled, move onto the paper towel and place another rice paper in the water. Gently dab off the water from the rice paper, it will still be damp and wet but it shouldn’t be soaked. Gently transfer to the cutting board and fill with your ingredients. Arrange a few carrots and cucumber centered in the top 1/3 of the rice paper closest to you, leaving about 3/4 – 1 inch border on each side for rolling. Place the herbs, protein and cabbage in the roll making sure to not fill TOO large to wrap. Fold the top of the rice paper closest to you over the heap of ingredients as tightly as you can without breaking the rice paper. Delicately fold in each side of the rice-paper burrito style and roll away from you to wrap up the spring roll, making sure to keep the rice-paper as taut/tight to the ingredients as you can. You might need to fold in the sides another time or two as you get to the end of the rolling process. The spring roll will seal itself against the rest of the rice-paper.* be sure to keep an eye on the sauce, stirring every few minutes to mix the ingredients together 
  5. Place on one of the large cabbage leaves on your display plate and repeat step 4 until you’re done making spring rolls.

Other roll ideas:
Marinated Baked Tofu with bean sprouts and sliced red peppers
Sashimi with pickled ginger & wasabi or wasabi dipping sauce
Asian Marinated flank steak with fresh ginger and garlic ginger dipping sauce

Garlic Ginger Dipping Sauce
Yield enough for about 6-8 spring rolls
3 cloves fresh garlic, minced (or 1 1/2 tsp jarred minced garlic)
1- 1 1/2 tbsp fresh ginger (or 1 1/2 tsp dried ginger)
1 tbsp toasted sesame oil
1/3 low sodium soy sauce
1/4  c.rice vinegar (or white wine vinegar works as well)
1/4 c. tsp crushed red pepper flakes ( unless you like it SPICY, stick to this ratio or it might overpower the rolls)
1 tbsp sugar

Combine all ingredients in small pot and cook over low heat until mixture bubbles. Can be stored in airtight container and refrigerated for up to three days after making.

Shake & Bake…Homestyle

IMG_0598

We don’t do freezer dinners. Actually, we don’t really use our freezer. If you were to take an inventory you’d find a LOT of homemade Limoncello, Jägermeister, a box of frozen waffles and ice. Hungry man dinners were created for a reason… luckily the man of the house has his own short order chef to replace a TV dinner and microwave love child.

Being little miss do it yourself, I couldn’t bring myself to give up a chance to “make it from scratch”. If it gives you any indication about my infatuation with DIY food, a few of my other make from scratch adventures yet to come: wheat thins, graham crackers, english muffins and beet chips. So, when presented with the request for Shake & Bake, I flew to the bloggosphere and found a recipe to tweak!

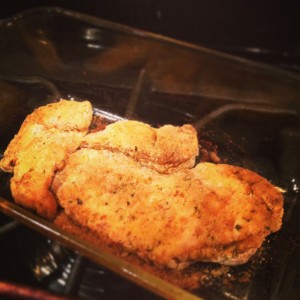
Homestyle Shake & Bake
Yield: 1 cup  = one chicken breast 

IMG_06001 cups dry bread crumbs (can be gluten-free too!!)
1 tsp paprika
few grins of fresh black pepper
1/4 tsp garlic
small pinch of: dried basil, dried parsley. oregano
1 egg, beat with a dash of olive oil
(the recipe also said to include 1 part celery salt to half part garlic salt to 1/4 part minced onion. I had none of these so I simply omitted)


IMG_0599


Preheat the oven to 400 degrees Fahrenheit.

In a large resealable plastic bag combine the crumbs, oil, salt, paprika, celery salt, pepper, garlic salt, minced garlic, minced onion, basil, parsley and oregano.

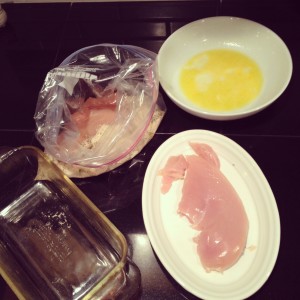
Dip the chicken breast in the egg it in egg.

Place no more than two chicken breasts in bag, seal and shake all ingredients together.

Bake the breasts for 20 minutes if the chicken is boneless, or 45 minutes if it does have bone, or until the internal temperature reaches 165-170.

Cilantro Lime Chicken & Baked Potato Skins

Date night in our house is very important! We happened upon “Thursday nights” one week when we’d gotten home from work, gone to the gym, headed back home and realized that we were NOT in the mood to stay in and do our usual cook at home in pj’s. This, my fine friends, was the birth of date night! From that point forward EVERY THURSDAY we do something special but that doesn’t always mean going out. Since we’re trying to keep a closer budget (thank you new couch which will arrive in 8 weeks!!) and we both love to cook so much the past month or so we’ve been doing date night at home. I also have SO many recipes to cook through that this is a way to assure that I cook through at least one a week!

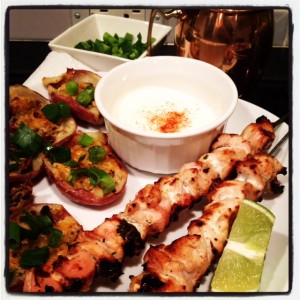
Cilantro Lime Chicken, Baked Potato Skins & Moscow Mules ...gone Sherpa

This date night was really one that made the memory books! I wanted to do something special and as you may have read in my previous post, our “honey do” lists for the house are pretty different…
his= house updates & open jars I can’t man handle open
hers= various dishes and meals he’d like me to cook

Well, I decided to really out do myself this week and built an entire meal around his favorite drink, the Moscow Mule . It’s a vodka based drink traditionally served in Copper serving Mugs and it has the most refreshing blend of ginger beer, mint and lime! We added a little twist to ours, the Sherpa Twist, and you’ll just have to read about it in the Moscow Mule with a Sherpa Twist post!

It took a few iterations of  the menu but I finally gathered a few favorites and decided on cilantro chicken lime skewers and a game day favorite, baked potato skins. These usually have cheese so I tired out a new dairy-free cheese (review here) and was quite pleased with it! You can find Galaxy Rice cheese and their other various produces at Whole Foods. We grilled the chicken skewers  as opposed to baking them because I have a wonderful grill master that’s willing to brave the cold for me. But if you don’t have access to a grill or it’s too cold, you can bake  the chicken in the oven (as a full breast) or grill up in a pan (slice chicken as directed in recipe).

Enjoy this meal with some delicious Moscow Mule with a Sherpa Twist and you’re ready to party!!

Cilantro Lime Chicken Skewers & Baked Red Potato Skins
(For the chicken)
2 1/2 limes,fresh juice
drizzle olive oil
4tbsp minced garlic
Fresh cracked salt and pepper to taste
2 chicken breasts
Fresh Cilantro

(for the potato skins)
Small red potatoes
Milk (Soy Milk for me, half and half if you don’t have allergies)
Fresh cracked salt and pepper to taste
1.5 slices of Apple wood smoked bacon per person
Cheese (I used rice for mine, and regular Tillamook cheddar for my master griller skins)
Garnish Options: Cilantro, chives, salsa, sour cream, salt & pepper to taste

Marinate/Night before

  • Combine lime juice, oil and garlic and fresh chopped cilantro in a large ziplock
  • Rinse chicken and slice into 1in thick strips, season to taste with salt and pepper
  • Add to bag and mix around all the juices and spices mix
  • Marinate chicken overnight, turning once or twice to mix up the juices and spices
  • Wash the potatoes and pat them dry for tomorrow skins and cook up the bacon for the skins

For the Meal

  • Remove chicken from bag and thread onto metal skewers .
  • Make a small batch of the marinade and brush onto skewers while they grill. Start grilling/heat up the grill judging by how long the potatoes take. Chicken should take about 10-15 minutes to grill so once the potatoes go in the oven, send the chicken to the grill.
  • Meanwhile, place potatoes in a zip lock and microwave until soft (depends on potato but I’d judge about 45 seconds per potato just to be sure that they don’t get mushy).
  • Lay potatoes out to cool down, then half and scoop out into a bowl. Splash with soy/milk and season to taste with salt and pepper mix together and crumble in the bacon. (optional add ins: Broccoli, cheese, grilled onions). Scoop the mixture back into the skins, careful to not
  • Pre-heat oven to 400 & send the chicken to the grill
  • Bake the potato skins for 8-11 minutes. Top with cheese to melt and bake 3-5 min more

Chicken Marbella

My mum made this recipe while I was home a few weeks ago and I simply fell in love! The warm flavors filled the house and it was so easy to make, so I decided to try my hand and make it for my Oscars Party. It was a HIT!! This dish is great as an entree or an appetizer and is sure to impress your dinner guests! This recipe comes from The Silver Palate recipe book. Here are a few pictures to make you hungry!


Chicken Marbella

In a large bowl mix the following then marinate in fridge overnight:
2 1/2lbs Chicken (I used breasts only)
1 head of garlic, pureed or minced
1/4 c. dried oregano
Coarse Salt/Pepper to taste
1/2 c. red wine vinegar
1/2-1c. white wine
1/2 c. olive oil
1 c. pitted prunes
1/2 c. pitted Spanish green olives
1/2 c. capers (with a bit of juice)
6 bay leaves

To cook:
Preheat oven to 350F
Arrange chicken in single layer on shallow baking pan with marinade
Sprinkle with a bit of brown sugar
Bake 50 minutes basting with pan juices
Serve on platter with a few spoons of juice over the top and sprinkled with parsley

Simple Tapas Dinner

Everyone has had those days where you’d rather gnaw your own arm off than cook. No matter how much you usually adore it, there is just no inspirational energy left in your body. Those types of days pose a special problem for me because, surprise surprise, I’m picky. I like my food how I like it and when I want it and I want to use fresh ingredients. If you opened my freezer you wouldn’t find any Hungry Man dinners or Lean Cuisine Steamers.

But alas, last night I just did NOT want to cook and was so thankful that I’ve learned to plan ahead and stock the kitchen! It’s NOT hard to eat delicious enriching and nutritious meals, even on those days that come hell or high water you are NOT picking up a pan! Below is an illustration of a simple, healthy meal that I literally “threw” together from what was in the fridge.

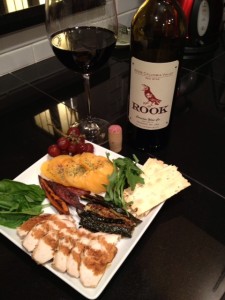
Those are the days I’m thankful that it is so easy to eat wholesome food if you just plan ahead a bit and stock GOOD quality ingredients. Above is a little plate of broiled zucchini and yams, sliced heirloom tomatoes with cracked sea salt and pepper dusted with dried parsley, a few grapes, fresh basil and arugula and some balsamic drizzled grilled chicken breast and a few rosemary crackers. We recently tried a  salad at Bisato in Seattle (my review posted here) with 20 year aged balsamic dressing and it was INCREDIBLE! We wound up ordering another of the salads and that weekend went on a hunt to Pike Place to find a bottle! Stocking your pantry with fresh ingredients and using quality oils/vinegar and spices really does wonders for sprucing up a meal! Even a simple meal like chicken and veggies becomes a work of art with the right flavors!

Shown in this picture at left clockwise from the wine 🙂 is….
Rook Wine
La Panzonella Rosemary Croccantini (Whole Foods stocks them)
Oven Grilled Zucchini
Baked pepper chicken with 20 year balsamic drizzled over the top
Fresh Basil
Oven Grilled Yam Fries
Heirloom tomatoes with fresh cracked salt and pepper
Red Grapes

How do you spruce up a simple meal?