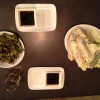
Garlic Ginger Dipping Sauce

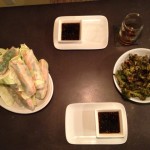
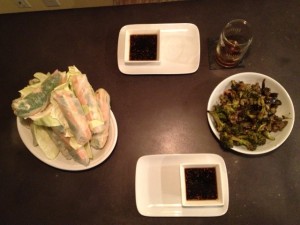
Dinner is served
Dinner is served

Garlic Ginger Dipping Sauce

Yield enough for about 6-8 spring rolls
3 cloves fresh garlic, minced (or 1 1/2 tsp jarred minced garlic)
1- 1 1/2 tbsp fresh ginger (or 1 1/2 tsp dried ginger)
1 tbsp toasted sesame oil
1/3 low sodium soy sauce
1/4  c.rice vinegar (or white wine vinegar works as well)
1/4 c. tsp crushed red pepper flakes ( unless you like it SPICY, stick to this ratio or it might overpower the rolls)
1 tbsp sugar

Combine all ingredients in small pot and cook over low heat until mixture bubbles. Can be stored in airtight container and refrigerated for up to three days after making.

Pairs well with Chicken Spring Rolls or you can marinate chicken in it and bake in the oven or grill!


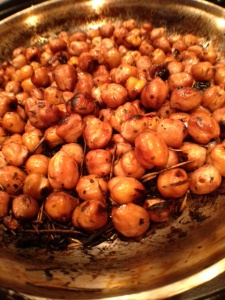
Wine Marinated Crispy Chickpeas (Vegan, Vegetarian, Meat-Free, Dairy-Free)

Simple Tasty Winter Meals(Vegan, Vegetarian, Dairy-Free, Meat-free)
It’s “officially” fall in the Pacific Northwest. All of the normal indications are here: I need sunglasses, a jacket, a scarf, a tank top, gloves and an umbrella all in the course of about five minutes. The sun is setting earlier, waterproofing boots is on my to-do list, and my shorts get packed away.

Another indication that it’s fall is here is the lack of daylight. There is an impending sluggish feeling that starts to set in when we realize that we go to work when it’s dark and leave work it’s dark. Unless you’re one of the lucky few that has a window near your cubicle or in your office, it’s possible to only catch a glimpse of real “light” through ever distant windows on the run from the  much needed afternoon coffee break to back to back afternoon meetings.

When the rain starts, the fall flavor craving starts. These cravings battle the ever sluggish feelings and makes us torn when it comes to dinner. Either it’s the event that keeps me going during the day and I can’t wait to rush home and cook something that I’ve pinned, liked, saved or stashed. Or, the last thing I want to do is be in the kitchen as a continuation of my daily servitude but am conflicted when I mentally explore the ease of ordering pizza.

Marinated Chickpeas

1 can chickpeas, drained
White Wine
Minced garlic
Dried Parsley, garlic, rosemary pepper
EVOO or cooking spray

  1. Open the can of chickpeas, drain and rinse
  2. Marinate the chickpeas in spices, white wine and a few dashes of balsamic in a bowl or tupperware
  3. When you’re about 17 minutes away from the other dishes being ready, pre-heat a pan with some EVOO or cooking spray
  4. Remove the chickpeas from the marinade, I use a slotted spoon to do so, and toast on medium-high until the exterior starts to brown (usually about 10-15 minutes)
  5. Shake the pan every few minutes  to move the chickpeas around so they brown evenly
  6. Once they’re browned to your linking, remove from the heat and serve

I usually pair with baked butternut squash, sauteed garlic kale or kale chips and toasted quinoa.

Cooking Notes:

The Wine:  I NEVER cook with a wine I wouldn’t drink. So, choose whichever you’d like. Anything from a Chardonnay to Riesling works. I usually use a traditional table white wine or a dry Pinot Grigio

Marination Time : Since this is a go-to meal I usually only marinate them for about an hour, but if you can remember in the morning to prepare them it will taste MUCH more delicious

Carne Asada Steak Tacos

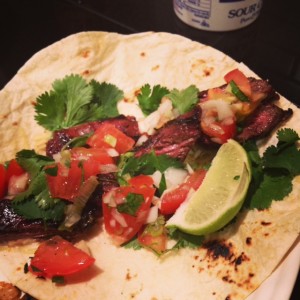
photo 3Taco Tuesday is a long-standing tradition in our house. As we start to get the pockets of good weather in Seattle I get more and more excited about one of my favorite things, roof top grilling. Now, we are not just your casual  everyday grill people. We’re Californian, which means we’re dedicated grillers;  we grill in all-weather! Neither rain, nor sleet nor wind or snow shall keep us from the grill! True story, my dad’s been known to put on his boots and grill in the SNOW! Luckily Taco Tuesday was somewhat sunny so the grilling experience was more leisurely than it is when you’re all out fighting wind or snow.

As you may have seen from this weeks Mango Salsa post, I had some Carne Asada tacos at our local Farmers Market and that started the obsession fever. They were amazing tacos and I had to try my hand at replicating that amazing experience. I’m happy to report, this little recipe made it in the top 5 BEST MEALS EVER list from the mister! Even I was speechless after my first bite…and realized that my biggest problem in life at the moment was that I didn’t have a bigger stomach!

Carne Asada Steak Tacos with Pico De Gallo, Grilled Cabbage Slaw
(Various parts of recipe adapted from Food Network)

Flank Steak: 

2 pounds flank or skirt steak, trimmed of excess fat
1 large baking dish, to prepare
1 large ziplock bag, to marinate
1 recipe Mojo, recipe follows
Olive oil, for coating the grill
Kosher salt and freshly ground black pepper

Mojo:
5 garlic cloves, minced*
1/2 jalapeno, minced
2 large handfuls fresh cilantro leaves, finely chopped
Kosher salt and freshly ground black pepper
2 limes, juiced
1 orange, juiced
2 tablespoons white vinegar
1/4 cup olive oil

For Serving:
Tortillas (We ” Home-Style” flour tortillas)
Cilantro
Lime wedges
Cheese
Pico de Gallo, recipe here
Grilled Cabbage Slaw, recipe here
Mango Salsa, recipe here

*Conversions for garlic if you don’t have the fresh stuff: 1 clove = 1 teaspoon chopped garlic = 1/2 teaspoon minced garlic = 1/8 teaspoon garlic powder = 1/2 teaspoon garlic flakes = 1/4 teaspoon granulated garlic = 1/2 teaspoon garlic juice

Directions
If you are using the Pico de Gallo, Cabbage Slaw, or Mango Salsa prepare all of the herbs and veggies at the same time before you prepare the meat. Getting all the chopping done at once makes the job easier and all of these dishes and side dishes are better when they’re left to marinate for a while!

To make the mojo, wash and chop all ingredients into a bowl and mix well. Lay steak out in a large baking dish and lightly coat with black pepper then pour the mojo over the steak making sure to spread out the clumps of cilantro and garlic. Fold the top of your plastic bag over itself twice, to keep any juices from interfering with the zip lock seal. Fold the meat over itself in quarters, with the mojo on the inside, and place in the plastic bag. Pour remaining mojo juices over the meat. Seal the bag and refrigerate for 1- 8 hours. I prefer a longer marinate time so the juices really soak into the meat, but don’t marinate longer than 8 hours as the citrus in the mojo will break down the delicate cut of meat and render it mushy.

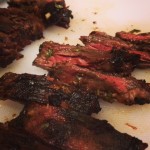
Once you’re ready to cook the meat, pre-heat the grill and start a pan on the stove to cook the cabbage slaw. (You can also broil the meat, but we prefer to grill if that option is available). Brush the grill with olive oil to keep the meat from sticking. Grill (or broil) the steak for 7 to 10 minutes per side, turning once, until medium-rare. (At once you do the first turn, you can get out the toppings and have them ready.) Remove the steak to a cutting board and let it rest for 5 minutes to allow the juices to settle. Thinly slice meat, heat up tortillas over open flame on the stove and assemble a masterpiece!


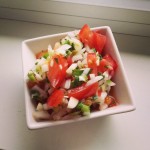
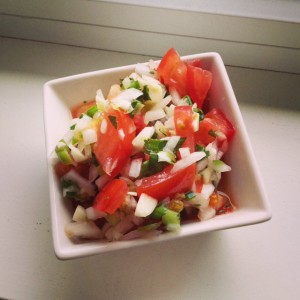
Pico De Gallo

Pico De Gallo
Pico De Gallo

Pico De Gallo
(Recipe adapted from Food Network)
Yield: 2 cups

4 vine-ripe tomatoes, chopped
1/2 medium white or red onion, chopped
2 green onions, white and green parts, sliced
1 Serrano or Jalapeño chile, minced
fresh cilantro leaves, chopped
3 garlic cloves, minced
1 lime, juiced
Salt, to taste (a little goes a long way)

Wash & prep ingredients. Place in large bowl, toss ingredients together. Cover, place in fridge and let the flavors marinate for at 15 minutes before serving.

Healthy Spring Rolls with Garlic Ginger Dipping Sauce (Vegetarian Option)

Spring has sprung friends! As the weather turns from the chilly winter to crisp spring I start to crave the lighter fare: chicken salads, grilled fish and veggies, Rose and bubbly wines, strawberries and all other fresh spring/summer fruit. A few weeks ago, my mother invited me along to a cooking class from Culinary Events Northwest. The class met at the Lynnwood Albert Lee Appliance store so off we went to learn our “Wraps Around the World”. There were a few different interesting offerings, such as crepes with buckwheat flour and strawberry balsamic drizzle. But my favorite from the class was the Vietnamese Style Spring Rolls.

We love ordering these when we eat out but I had NEVER before thought about trying to make them myself! To celebrate the first day of spring it was time to try my hand at some homemade spring rolls for dinner! The hardest part of this project is the prep! Once you get everything washed, chopped and arranged in an assembly line it’s easy peasy and I had 12 of these bad boys made before I knew it!

The report from mister Byte of life: Success! His only regret for the meal was that he didn’t have a larger stomach. Chef, happy! Even the next morning at breakfast he was talking about how good they were and how excited he was to be hungry later so he could eat more! These little guys are great as appetizers or served with grilled or steamed veggies for dinner. They make great next day lunches or afternoon snacks. I’ve included a few other ingredient ideas below. What are some of your favorite spring roll ingredients or ones you’d like to try! Also, please feel free to post other dipping sauce recipes!

Healthy Chicken Veggie Spring Rolls
These can be vegetarian by simply omitting the chicken!
Yield you’ll have to play around with the ratios of ingredients but this is a general guideline of ratios from my assembly line. 

12  8 or 9 inch rice-paper sheets
1 c fresh mint, chopped
1 c fresh cilantro, chopped
1 c fresh basil, chopped
1 – 1 1/2 c finely chopped green cabbage
extra full cabbage leaves to separate the spring rolls on your display plate (the rice-paper wrappings will stick to each other)
1 c matchstick-sized cucumber, peeled first
1 c matchstick-sized carrots, peeled first
2 cooked chicken breasts
1 pan, diameter wide enough to soak rice-paper sheets
1 dry dish towel and either a plate or cutting board to turn rice-paper onto

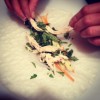
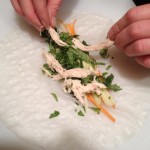
  1. Prep all herbs and veggies into separate bowls and create your assembly line. Carrots and cucumber first followed by the herbs, then your protein and cabbage at the end. Have a plate ready to place your completed spring rolls on, as well the cabbage to separate the spring rolls as the paper wrappers love to stick to each other.  (If you are making ahead and storing, you can also cover with a damp paper towel and plastic wrap, then place directly in fridge)*If you are making the sauce below, prep those veggies after chopping the spring roll ingredients then make the sauce before starting your spring roll assembly line.
  2. Fill your pan with 2-3 inches room temperature to slightly warm water and place at the beginning of your assembly line with the dry dish towel and cutting board or plate where you will be assembling your spring rolls.
  3. Soak the first rice-paper wrapper in the water until it looses it’s rigidity, about 30 seconds, but is still slightly firm. You’ll just have to try a few times and sacrifice a few rice-papers to get the hang of seeing and feeling when the rice paper is ready to be rolled. You don’t want it TOO soft or else it will easily tear. 
  4. Once the rice paper is ready to be rolled, move onto the paper towel and place another rice paper in the water. Gently dab off the water from the rice paper, it will still be damp and wet but it shouldn’t be soaked. Gently transfer to the cutting board and fill with your ingredients. Arrange a few carrots and cucumber centered in the top 1/3 of the rice paper closest to you, leaving about 3/4 – 1 inch border on each side for rolling. Place the herbs, protein and cabbage in the roll making sure to not fill TOO large to wrap. Fold the top of the rice paper closest to you over the heap of ingredients as tightly as you can without breaking the rice paper. Delicately fold in each side of the rice-paper burrito style and roll away from you to wrap up the spring roll, making sure to keep the rice-paper as taut/tight to the ingredients as you can. You might need to fold in the sides another time or two as you get to the end of the rolling process. The spring roll will seal itself against the rest of the rice-paper.* be sure to keep an eye on the sauce, stirring every few minutes to mix the ingredients together 
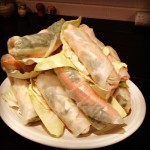
  5. Place on one of the large cabbage leaves on your display plate and repeat step 4 until you’re done making spring rolls.

Other roll ideas:
Marinated Baked Tofu with bean sprouts and sliced red peppers
Sashimi with pickled ginger & wasabi or wasabi dipping sauce
Asian Marinated flank steak with fresh ginger and garlic ginger dipping sauce

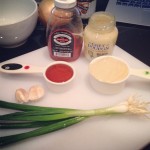
Garlic Ginger Dipping Sauce
Yield enough for about 6-8 spring rolls
3 cloves fresh garlic, minced (or 1 1/2 tsp jarred minced garlic)
1- 1 1/2 tbsp fresh ginger (or 1 1/2 tsp dried ginger)
1 tbsp toasted sesame oil
1/3 low sodium soy sauce
1/4  c.rice vinegar (or white wine vinegar works as well)
1/4 c. tsp crushed red pepper flakes ( unless you like it SPICY, stick to this ratio or it might overpower the rolls)
1 tbsp sugar

Combine all ingredients in small pot and cook over low heat until mixture bubbles. Can be stored in airtight container and refrigerated for up to three days after making.

Slow-Cooker Braised Short Ribs with Honey Garlic Glaze

plated upWell Seattle, we’re back. Back to the rain, wind and grey skies. Three weeks in Hawaii was quite a nice time to thaw out but, until the sad realization that I had to actually trade my daily uniform of shorts, a tank top and my  bathing suit for real clothes pales in comparison to the AMOUNT of real clothes I have to wear hit me. Currently, I’m sipping hot water and alternating sitting on my hands while I sit here in my coat and scarf….I’m INSIDE! What gives!

Cold weather typically sends me reaching for the Crockpot, or curling up in front of the heater without moving. Since I was craving short ribs, the crock pot won. When we were on Kona, we made a …few…trips to Roy’s Waikoloa. Okay okay, we ate there THREE nights in a row! Can you blame us!? They closed our Seattle location so we had to eat all we could get! Well, on night two as we were bellied up to the bar sharing their AMAZING appetizer canoe, (yes, CANOE!) we saw the couple next to us dig into their amazing looking dinner and we flagged down our bartender Brandon (he was AWESOME if you visit that location) and he informed us that it was the Slow Braised Char Broiled Beef Short Ribs. So, night three you know what we ordered?

Yep, Ribs! It was SUCH an incredible dish that when we got home we immediately started searching for the recipe to try our hands at recreating such an impeccable dish! After an absurd time googling various versions and combinations of the words “Roy’s Waikolaa Short Ribs entrée Recipe” I found one that was said to be biased on the Roy’s recipe so I gave it a try! (Original recipe found here) I didn’t have all the ingredients so I altered a bit.

Delicious food deserves pictures…

Slow-Cooker Braised Short Ribs with Honey Garlic Glaze
Adapted from Roy Yamaguchi
Yield: 2 large portions

For the short ribs:
2 pounds bone-in beef short ribs
Salt and pepper
EVOO
Beef stock, enough to fully cover the short ribs (about 32 ounces)
6 cloves garlic, sliced thick
1 large onion, sliced
1 stalk celery, sliced thick
2 carrots, sliced thick
2 bay leaves
1 inch piece of peeled ginger, FRESH ginger

Honey Garlic Glaze:
1/2 cup Dijon mustard
1/4 cup honey
1 clove garlic, minced fine
1/4 cup sliced green onions, both white and green

  1. Allow the ribs to come to room temperature for thirty minutes.  Season all sides of the ribs well with salt and pepper.
  2. Heat olive oil in a medium skillet over high heat.  Brown the ribs well on all sides, about two minutes per side.
  3. In your slow cooker make a bed with the garlic,  onions, carrots, celery, bay leaf and ginger.
  4. Place the browned ribs on top and add enough beef stock to just cover and Cook (Low for 8 hours or High for 4).
  5. Prepare the glaze, cover and refrigerate until meat is done, or you can make it right before you pull it out. I like to have as FEW dishes as possible so I’m a “make ahead” kinda girl! The picture above shows you, if for some reason you wanted to eyeball the dijon, what’s left over after using a half cup. I was worried I’d have too much left over but hey, egg salad here we come!
  6. When the timer goes off, remove the lid and take the initial wiff of your amazing deliciousness! The meat will be very tender and you may lose a few bones (which is a GOOD thing!) Remove the ribs from the slow cooker and, while still warm, pour the glaze over the ribs making sure they are well coated.  Allow the ribs to sit for at least thirty minutes  (or store in the refrigerator overnight).
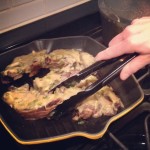
  7. While the ribs rest heat your grill, or a skillet, to medium high heat.  Grill, or sear, the ribs for about one minute per side, or until the glaze sets and the ribs are brown and crusty.
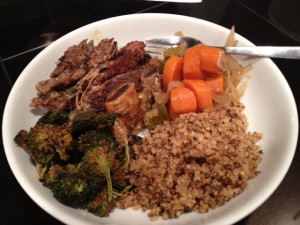
  8. Enjoy! I served with toasted quinoa and Blasted Broccoli

Homemade Pizza

IMG_3399Pizza…is…DELICIOUS! With a plethora of options, toppings, styles, crusts and meals that it can be served for Pizza is pretty much an ultimate food. Eat it cold the next morning or  poach an egg on it and Viola, Breakfast! It’s the perfect brown bag lunch or picnic lunch option. It can be served flatbread style is an appetizer or tapas course, or loaded with amazing toppings and served as a dinner delight! Now, there is some debate between Pizza and flatbread so let’s review the three-step by step criteria for granted a place in the hierarchy of acceptable pies.
IMG_3383CRUST: This can be a chat of endearment or an all out fight in certain areas of the world. There are crust aficionados that take this topic very seriously. Whether you’re in thin crust camp or a lover of the thick bready crust, this is the foundation of the dish. With Pizza it seems that there can be variation in the crust whereas a flatbread will typically be a little thicker on the crust but there could be blurred lines here so let’s proceed.

BASE LAYER: Then you have the cheese vs. sauce or olive oil assessment. I call this the base layer since it seems to set the tone for how the rest of the topping architecture. With the increase in food allergies and culinary progression pizzas without cheese is no longer a cardinal sin. It is now more common to find pizzas and flatbread without cheese, topped with a traditional tomato sauce or simply brushed with olive oil. This too can be a blur in the pizza or flatbread debate, so it seems that we must proceed to the last criteria.
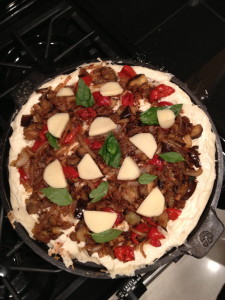
IMG_3603TOPPINGS: Now we have the “finitura” (finishing touch in Italian), the toppings.  If you saw broccoli on a pizza you might do a double take and wonder if your mother was in the kitchen sneaking in your daily dose of veggies. But on a flatbread, you wouldn’t think twice (I would think?) It seems that a flatbread is a trendy version of a pizza? Maybe we just needed to change the name and feel better about eating pizza with our wine, a ritual that is not only perfectly acceptable but the highlight of my week when it occurs!

So my verdict: Flat bread is to pizza what sliders are to burgers…an open interpretation depending on the chef’s whim and creativity.

With that, I give you my current recipe for the crust, now the flatbread or pizza question is up to you to decide! BON APPETIT!!
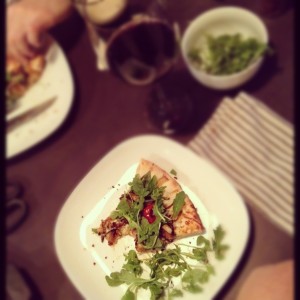
IMG_3398

Homemade Pizza

Prepare the dough according to the directions below
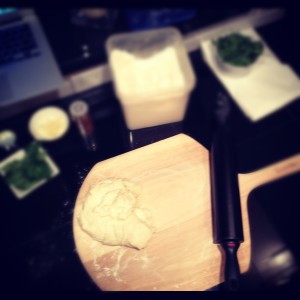
IMG_3604


Cast Iron Pizza Stone
Clean Kitchen shears for cutting
Pizza Paddle (super hand for transfering to the already HOT cast iron!)

Toppings
Onion, sliced
Garlic, thinly sliced or minced
Eggplant, cut in strips or wedges
Peppadew, cut in half out of the jar (I like the flavor of this brand)
Cracked pepper
Fresh or dried parsley
Fresh Basil
Shredded Mozzarella
Scamorza Mozzarella, sliced into medallions
For Serving: Balsamic, olive oil, red pepper flakes, and arugula

Sprayed the cast iron before and pre-heat in the oven on “broil” for 15+ minutes then turn down to 475
In the meantime, chop and saute the onion, garlic, sliced eggplant and peppadew with parsley and cracked pepper on the stove.
When the cast iron is ready dusted it with flour and assemble the pizza right on the pizza stone. It will be HOT and a little hard to spread out the dough so be careful!

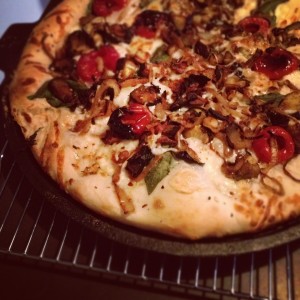
One light layer of shredded mozzarella, then add the sautéed onion, garlic, eggplant and seared peppadew.
Add fresh basil then the medallions of Scamorza cheese and another light layer of Mozzarella.
Cook at 475 for 8-12 minutes, until edges started to bubble up and show signs of crisping.
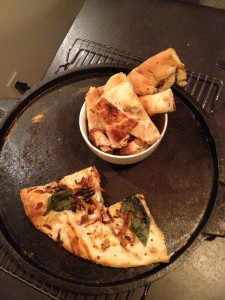
Remove and cut in the traditional style, with clean kitchen scissors.
Serve with balsamic, olive oil, red pepper flakes,  arugula and plates/cooking.

Notes-
We loved that the cast iron kept the pizza warm even 20+minutes after we took it out of the oven!
I used too much of the dough so the crust was too thick so less dough next time and spread the topping to the outer edges.
It was perfectly seared on the bottom and the dough didn’t stick to the cast iron pan as we expected it would, it actually slid right off.
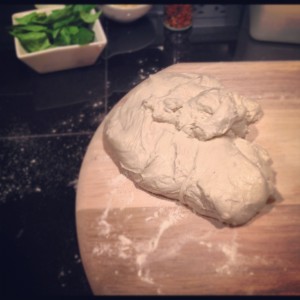
IMG_3607Olive Oil Dough
Makes 4-1 lb loaves
Originally found on http://www.mybakingaddiction.com/no-knead-pizza-dough-recipe/

Ingredients:
2-3/4 cups lukewarm water
1-1/2 tablespoon granulated yeast (2 packets)
1-1/2 tablespoons Kosher salt
1 tablespoon sugar
1/4 cup extra virgin olive oil
6-1/2 cups unbleached all-purpose flour

Directions:

In a 5 quart bowl mix the yeast, salt, sugar, and olive oil with the water without kneading. Think of the motion of a dough hook working the dough and mix that way. You might need to wet your hands a little and mix by hand but I found a spatula to do just fine. (Notes: Original recipe called for using a standing mixer fitted with the dough hook attachment but I don’t have that so I went with the old fashion handmade tactics).

Transfer dough into another large bowl. The dough will be a little sticky but will stick together pretty well. Cover (not airtight), and allow to rest at room temperature until dough rises and collapses (or flattens on top), approximately 2 hours.

The dough can be used immediately after the initial rise, though it is easier to handle when cold. Refrigerate in a lidded (not airtight) container and use over the next 12 days.

If you like more of the deep dish style, and care to explore out of the pizza stone category, here is a cool recipe I found on Flourishing Foodie for Cast Iron Pizzas!


.
 

Simple Winter Soup- Butternut Squash, Yam, Carrot & Garlic

Photo from: “inspiring the everyday” post on butternut squash soup

Somehow the winter season always ages my hobbies by about ten years; knitting, roasting whole pumpkins, baking, canning and the strong desire to bake and make breads and pastas, winter meals, soups, stews… wanting to make everything really. I will admit I recently pins a recipe for homemade Wheat thins! (Stay tuned to see how THAT one goes!)

While chatting last night with my impossibly adorable new hairstylist who is also a foodie, she shared with me a new recipe! Cue ridiculous joy and excitement! We proceed to chat the entire time about her recently discovered hobby of making homemade pasta from scratch (a checkbox on my cooking bucket list), reviewing all of our favorite local restaurants and expounding on 15 uses for sage (It truly is an under appreciated herb)!


Cooking doesn’t have to be hard, we both agreed, you just have to have the ingredients in your pantry and a couple of minutes to make it.

So, along with the recently added item “weather proof boots” on my winter weekend to do list, “roast” to appease the pumpkin on my counter, and “meal plan” to attempt an attack plan to actually COOK all of my recently pinned winter dishes, I shall also be making this soup!

I’ll post my own pictures once I cook it up but for now, enjoy a lovely picture from inspiring the everyday’s post on butternut squash soup.
So, stock up on winter goodness, snuggle into your favorite sweater, pour a glass of wine and and let the winter begin!!

What are your warming winter foods or your go to winter dishes?
Winter Warming Squash Soup

1 butternut squash
carrots, yams and fresh garlic (ratio to your preference)
1 large onion to caramelize
chicken stock/broth


Directions- 

  • Pre-heat the oven to 400 or 450 (depends on how quickly you want the veggies and how your oven  heats) and proceed with prepping the butternut squash as you prefer. Note: There are two methods for butternut squash you can either peel it and bake it or slice in half rub with olive oil and bake.
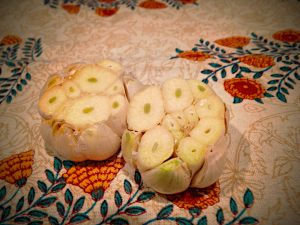
  • Slice the carrots and yams, and chop off the top of your garlic. (I just posted a recipe here on home-roasting your own garlic. You can roast and keep fresh for up to a week, frozen for a few months. It’s GREAT to have on hand for winter meals!)
  • Roast all veggies and garlic in pre-heated oven until golden brown.
  • In the meantime, sauté your onions.
  • Once the squash, veggies and garlic are roasted to your preferred “done-ness”, remove from the oven and blend/ puree in a food processer with some warmed chicken broth and serve warm.


Roasted Garlic

I’m sick. Anyone that know’s me know that’s I’m TERRIBLE at being sick. I mean… TERRIBLE!! I’m grumpy, irritable, independent and needy all at once and just a downright mess. The moment I feel even the slightest hint of energy, I’m off running a marathon. Well, I did it again. Somehow the bug got me something fierce! It just laid me FLAT and thanks to my prince charming with patience as fortified as Knox itself, I was well cared for and starting to feel the slightest bit better today. Which of course meant that I needed to jump into the kitchen and cook up 15 pots of something-or-rather and bake this-and-that.

Made myself soup...someday I'll learn to rest when I'm sick...
Made myself soup…someday I’ll learn to rest when I’m sick…

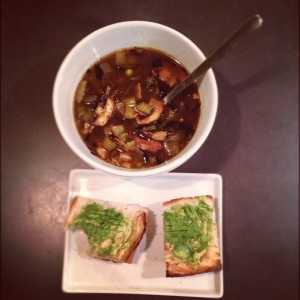
Oh, how very wrong I was! “Simply” whipping up some home roasted garlic turned into chopping two massive leeks, a head of celery, handful of mushrooms, a large onion, a few handfuls of frozen peas and adding a can of white beans to a home prepared chicken stock base with pepper, bay leaves, cayenne and dried parsley (darn not picking up a fresh head at the store!)… see what I mean! I can’t REST! Now, I have to say…the soup smells lovely simmering in the pot but I completely over exerted myself into a grumpy bear and now  I need to go sit in the corner and put myself into what I’m now referring to as an “adult timeout” and think about what I’ve done! New mantra… MUST rest… or at least try harder 🙂

ROASTED GARLIC
Prep: 5 minutes | Cook 30 min
Original recipe from: Simply Recipes – Roasted Garlic
Home Roasted Garlic
Home Roasted Garlic

1. Preheat the oven to 400°F.

2. Peel away the outer layers of the garlic bulb skin, leaving the skins of the individual cloves intact. Using a knife, cut off 1/4 to a 1/2 inch of the top of cloves, exposing the individual cloves of garlic.

3.
 Place the garlic heads in a baking pan (you can use either muffin or small loaf pans as they both work equally well.) Use Misto spray (or you can free hand pour) olive oil on the open garlic tops.


4. Cover with aluminum foil and bake for 30-35 minutes, or until the cloves feel soft when pressed.

5. Allow the garlic to cool 5-10 minutes so you can handle with bare hands. The garlic should simply slip out of the skins. If it doesn’t, simply use your fingers and peel back the skins and slide the garlic out .

Now you have some delicious home roasted garlic! Roasted garlic should last about a week in the fridge in an airtight container, but can also be frozen and used later in soups, pastas, spreads (especially with heirloom tomatoes basil and fresh potato or sourdough bread!) or any other cooking dish that might call for garlic. The only problem you might encounter, as with many other “make yourself” projects… you’ll be spoiled for the homemade and won’t want to use store bought! That’s what happened when I made Home roasted red peppers!

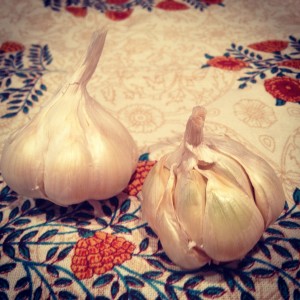
Garlic ready to be roasted!


I LOVE collecting recipes and seeing how others use ingredients! How do you plan to use your home roasted garlic?

Ratatouille

Antigüedades Bar (Sevilla, Spain)

The obsession with Ratatouille started on our recent trip to Seville, Spain. We decided to meander the alleys and streets for the 30 minute walk from our flat to the city center . Bar Antigüedades caught my eye as an adorable little café from the exterior (of course…look at the photos!) and reading the menu board when we passed I made the mental note to come back for lunch. We did, and loved the Ratatouille SOOO much that we returned for dinner and had the exact same meal! It was so warm, hearty, tasty, flavorful and just… well… cozy! We ordered a bowl and cleaned and had I not ordered an actual meal I would have ordered another Ratatouille! As it was I had to refrain from licking the bowl since 1. it’s rude to do in public 2. we were sitting outside and I couldn’t sneak it 3. I’d be pegged as a ridiculous American for SURE! Three sadly legitimate reasons why I had to refrain from one last taste of the very miniscule remains of wonderful veggies. I vowed to make it once we got home.

Sevilla...where it all began
Sevilla…where it all began

Of course, in order to make the dish I first had to find 15 recipes, make an entire Pintrest board devoted to my found ratatouille recipes (yes I’m that ridiculous organized..or maybe obsessive?). Of course I had to print out each recipe, lay them side by side, and pour over each minute difference and detail deciding which was the perfect recipe. Which was possibly closest to recreating the most incredibly wonderful cozy meal. My perfection was finally challenged by my need to make a grocery shopping trip and get ON with the actual MAKING of the dish so I picked one to use as a guideline because, and yes I’m a total girl, the picture looked the yummiest.  The recipe that I landed on was posted on the blog A Lady in France.

A brief history of Ratatoulie. It is usually served as a side dish but can also be a main, which is how we eat it with some crusty potato bread. For protein, I usually poach an egg or sprinkle some cheese on the top.

The hardest part of this meal is letting it cook those last 30 minutes without devouring it from the pan! The house starts to smell of wonderful cooked vegetables and herbs.

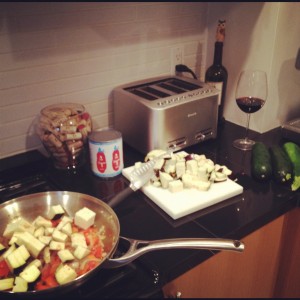
Ratatouille Prep
Ratatouille Prep

Tips:

  • The Pan: be sure to use a large deep pan so that the heat and evenly distribute and cook
  • Saute each round of veggies VERY well! Once you add the tomato it’s really just melding of the flavors and not really “cooking”
  • Don’t go light on the canned tomatoes! This is what makes or breaks the consistency of the Ratatouille. If it seems like the stew is a bit dry add another can of tomates or a 25 oz jar of basil marinera sauce. You’ll realize the consistency within 5-8 minutes and you really need to add within the 5-8 minutes so the consistency and the flavors are able to meld correctly.
  • Cook all the veggies without a lid until you add the tomatoes. The veggies really need to breathe and have the heat to saute up.
  • Liquid: keep stirring to move the liquid around and assure that it’s not too liquidy. If it feels like it’s becoming more soupy than thicker stewey, turn the heat up  and if it’s sticking to the pan turn the head down a bit.
Ratatouille
Ratatouille

Cucina de Kate Ratatouille

½ large onion
2 tsp (heaping) minced garlic
drizzle of olive oil (to cook the onions/garlic)
1 red pepper, chopped
1 good sized eggplant, cut up in to chunks
4 small zucchini, cut up into chunks
1 ½ tbsp. herbs de province
few fresh basil leaf’s
1 ½ c. diced canned tomatoes (I sometimes add a 25oz jar of 365 tomato basil marinera sauce)

Instructions

  1. Heat oil in your large pan while you chop the onions and garlic. Cook until translucent.
  2. Chop and add peppers. When they start to look a little cooked, chop and add the eggplant in medium chunks. I like them a bit larger so they retain some form as opposed to getting a bit more mushy when they’re smaller.
  3. Keep stirring the veggies in the pan until they eggplant starts to look a little cooked, then chop up and add the zucchini. Again, I liked keeping my chunks a bit larger to add to the stew-type texture and avoid a must consistency.
  4. Once the zucchini starts to look like it’s a little cooked, add the herbs and chopped basil and assure it’s all mixed together well. Then add the tomatoes. At this point you’ll have to keep an eye and stir frequently but you can multi-task and just remember to stir every few minutes.
  5. Keep stirring and cook for another 30 minutes (or so) until all the vegies are tender…and of course taste along the way!

Serve with a protein (egg or meat) and some rustic bread (or omit if you’re gluten-free)


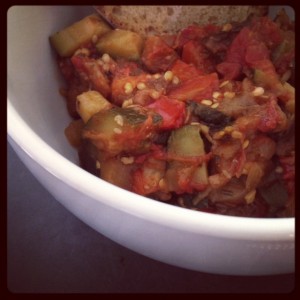
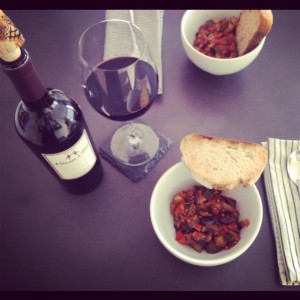
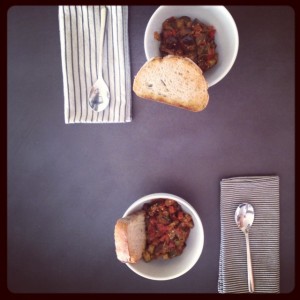
Ratatouille for Dinner
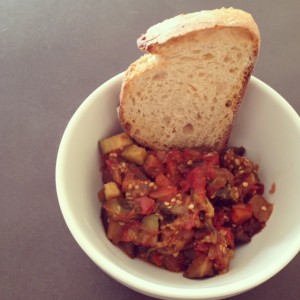
Ratatouille with Rustic Bread


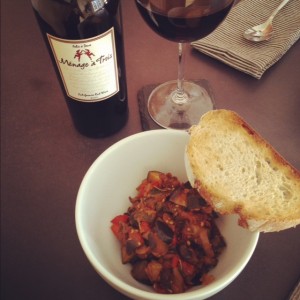
Dinner Table of Ratatouille with Rust Bread and Menage a Trios Red
Ratatouille with Rust Bread for Dinner
Ratatouille with Rust Bread for


Provençal ratatouille