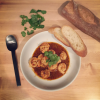
Spiced Cilantro Lime Wild-Caught Shrimp

IMG_2928Whether you like to cook or not, this is one of the most amazing, easy dishes you will ever learn to make.  It is SO simple and SO delicious that it’s almost absurd how easy it is. You can serve these amazing little shrimp as an appetizer or a cocktail party, tossed with pasta , served as an entree with a lovely caesar salad or roasted vegetables, mixed with toasted quinoa or jasmine rice…there are so many options! They pack a spicy, fresh, crisp, earthy, tasty punch all in one single bite of tasty, amazing shrimpy goodness.
IMG_2925

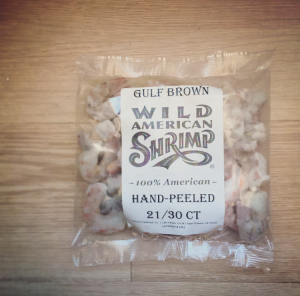
Let’s set the stage here. I LOVE seafood. One of many amazing perks of living in Seattle is the abundance of fresh, local seafood. Having a local variety so readily available I sometimes forget that everyone doesn’t have access to this fresh fare. Some people go through different food phases where their food world, or certain meals, can revolve around one ingredient. For a long time, that one ingredient for me was shrimp. I learned so many different ways to quick cook and consume shrimp but I didn’t look into where that shrimp was from and assumed that purchasing from Whole Foods meant that it was safe. While that might be true, I MUCH prefer to purchase organic and domestic and/or local version whenever possible. My friends over at AmericanShrimp.com asked me if I would be interested in writing a blog post that would feature American wild-caught shrimp and I jumped at the opportunity because I new exactly the recipe I wanted to try.

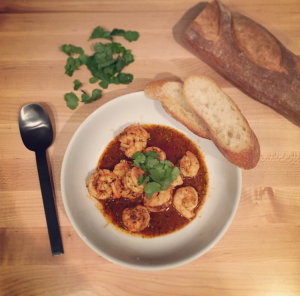
There is a local, renowned steak house in Seattle that has a seafood restaurant as well and they have something they call “Wicked Shrimp”. It is one of my favorite dishes in the entire city- a bowl of shrimp, perfectly sautéed with amazing herbs and spices that deliver both flavor and a spicy punch, with a nice helping of fresh cilantro on top and a side of toasted delicious bread. I had been dying to replicate this dish at home but never had the motivation, until now! As soon as I knew that fresh American wild-caught shrimp was on it’s way I knew that I had to try to make my own version of this amazing dish. Below is my take, and it was an immediate hit!

Spiced Cilantro Wild-Caught Shrimp

Spice Mix
1 tsp Cayenne Pepper
Black Pepper and Salt to taste
1 1/2 tsp Crushed Red Pepper
1 tsp Whole dried thyme
3 tsp Dried Crushed Rosemary
1/4 tsp Dried Oregano

Cilantro Shrimp Ingredients
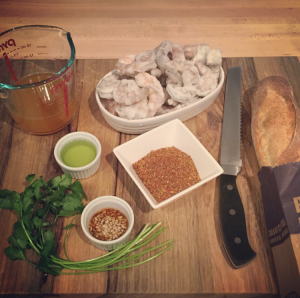
1 lb. American wild-caught shrimp– size 21/30
2oz Grapeseed Oil
1 1/2 tsp. minced garlic
1 1/2 tsp. Worcestershire
1 1/3 Tbs. Spice Mix
1/2 c Fish Stock
1/4 c. Beer Grilled Tuscan Bread Slices
Cilantro (for garnish)

Directions
Make the spice mix. This can also be sprinkled onto chicken and/or meat, eggs, mixed into salad dressing.

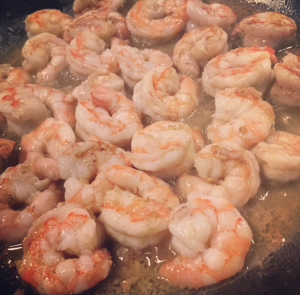
Heat the grapeseed oil in a medium sized pan on med-high heat. Add Wild American Shrimp and sauté for 2 minutes, or until the shrimp color has changed to a white and pink color.

Flip Prawns and stir in the garlic, Worcestershire and spice mix. Once you start to see the liquid caramelize, add the beer and  fish stock and cook for two more 2 minutes. Serve in a bowl or on a platter with grilled bread slices, on toothpicks as an appetizer or tossed with toasted quinoa or with pasta.

IMG_2930IMG_2929


unnamed


Thanks to the American Shrimp Processors Association for sponsoring my writing! When making the decision to cook with shrimp, be sure to check the sourcing. Shrimp purchased in a retailer should proudly state “wild-caught” or “Wild American Shrimp.” For a list of retailers, please visit www.americanshrimp.com.

Roasted Pumpkin Seeds

FullSizeRender_3

The leaves are changing, the mornings are colder, and the urge to get cozy under a blanket with a cup of tea is creeping. This means only one thing…it’s pumpkin season! One of my favorite things about Seattle is that we actually get seasons. Spring is rainy, summer is gorgeous, fall is crisp and cozy and while we don’t get snow every winter it has been known to dump a few inches every few years.

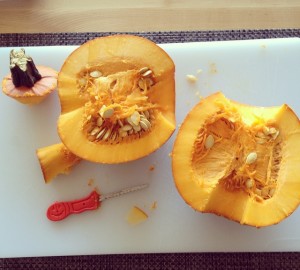
Fall might be my favorite season to cook. So many comfort foods like potato leek soup, Ratatouillebutternut squash and my personal favorite- anything with roasted pumpkin. Most people get excited about carving pumpkins and drinking pumpkin spice lattes. I get equally excited about hacking a pumpkin open and roasting that delicious goodness! Cube it and add to salads, make pumpkin soup, puree it for baked goods, add some sautéed spinach and toasted quinoa and you have a wholesome hearty vegan meal.

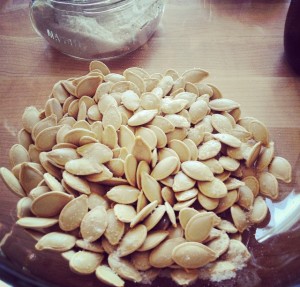
Roasted pumpkin seeds are a great snack, party appetizer, salad addition or kitchen adventure with aspiring little chefs! The recipe is super simple and can be personalized in so many ways!

Roasted Pumpkin Seeds
Prep Time: About 10 minute to scoop out pumpkin and remove stringy parts from seed
Cook Time: Aprox. 20 minutes 

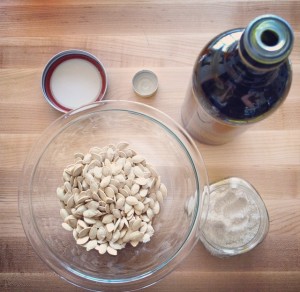
Rice Bran Oil
Pumpkin or squash seeds
Grey or pink salt
Baking tray
Paper towels
Bowl

FullSizeRender_4Scoop out the pumpkin and separate the seeds from the stringy insides. Pinching the seeds while you run the strainer under cold water works to remove most of the stringy parts. Line a baking tray with paper towels. Wash the seeds in a strainer, being sure to remove all the stringy parts, and them flat the lined baking sheet. Pat the top of the seeds with a paper towel, it’s okay if they stick a little! Just remove the seeds from the paper towel and keep patting.

Preheat oven to 350°F. Put the seeds in a bowl and toss with oil. I recommend rice bran oil since it doesn’t have a taste and it has a high burn point ensuring that it’s good for baking and grilling. You can also use grapeseed oil, safflower oil or avocado oil. Those each have their own slight taste so it depends on what flavor your’e going with. Add a few pinches of salt, toss, and add a bit more salt. You can add to taste depending one how much you like salt. I use it sparingly.

Remove the paper towels from your baking tray and spread out the oiled seeds on the tray. You won’t need to add additional oil to the tray. Shake the pan out a bit so that most of the seeds are laying in one single layer. Some of the seeds will overlap, which is just fine!

Place the baking sheet in the oven. Turn seeds after ten minutes then allow them to roast until the corners of thee seeds start to brown. Depending on your oven, this could be between 17-25 minutes.

Remove the tray from the oven and allow the seeds to completely cool. Roasted seeds will keep in an airtight container for up to four days!

FullSizeRenderThe Kitchn has a few amazing ideas for other ways to flavor pumpkin seeds:

Sweet Pumpkin Seeds: Omit or reduce the salt and roast the seeds on parchment-lined baking sheet. Let cool, then toss with brown sugar or a little maple syrup. Not too much, just enough to lightly coat the seeds. You can also add cinnamon, allspice, nutmeg or other ‘sweet’ spices. Toss well to coat evenly. Return the tray to the oven and continue to roast for another 10 to 15 minutes or so.

Sweet-Hot Pumpkin Seeds: Toss the seeds with a little honey and sriracha or chili flakes. A little cumin might be nice, or curry powder. Roast as with sweet seeds.

Savory Pumpkin Seeds: Add herbs such as chopped rosemary, dried oregano and/or spices such as smoked paprika, chili powder, cumin to the seeds before roasting. Check carefully to be sure the herbs and spices aren’t browning too quickly. If so, roast at a sightly lower heat.

Kombucha, Som, Pok Pok and a new Kitchen

Dear friends! As you can tell, I’ve been on a bit of a writing hiatus the past few… months! Works been busy, personal life has been busy, there’s been travel and apparently it’s important to sleep every now and then?! What a cramp on a busy gals schedule hey? But i’ve dearly miss and you and even though I haven’t been posting, I have still been cooking up a storm and gathering new recipes to share! We had the weekly staples- batches of kombucha,and almond butter.We traveled to visit our family and threw in a few beer soaked grilled bratwurst, paleo chocolate chip banana bread and Pecan Pies with fresh homemade crust (of course!). I can’t visit without baking a few pies! One of my favorite parts about visiting family is playing the role of both ‘imported resident chef’ and ‘kitchen instructor’. I have So much fun teaching the niece and nephews to cook! We had a ball in the kitchen and they do great!

photoBut, as I was saying. This entire summer has been booked SOLID with both work and play. And just when I thought things would calm down in the fall, our landlord decided to sell the condo after four years of renting so we had to find a new place. Luckily, we found a place that we just LOVE and we move this weekend. THIS WEEKEND! A matter of hours away! I’m so excited I can barely handle it! I can’t wait to unpack and organize the new kitchen! With the fast pace of the last 3 months, cooking as been more of a chore than it usually is. I’ve really leaned on simple recipes, the local pho restaurant, and cereal for dinner. But with a new kitchen comes new recipes and excitement to cook! Which brings me to my fall and winter sports.

I HATE to, and won’t, drive in snow and/or ice… so my fall/winter sports consist of cooking, baking, menu planning from the ridiculous amount of time I spend on Pinterest (A Byte of Life boards here), testing out my wine cellar, catching up on all the shows that everyones been raving about and listening to the rain falling outside. Oh, and pumpkins! I LOVE PUMPKIN!  I’ll eat slow roasted pumpkin right off the baking sheet! And Gingerbread. I LOVE gingerbread! But back to the point- my winter sports are gingerbread and/or pumpkin flavored, with a side of wine, and a good show in the background.

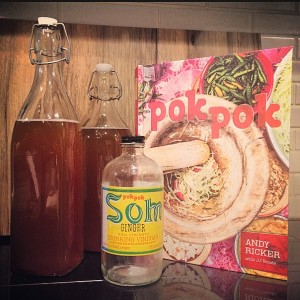
This year, I have a new hobby to add to the list. Pok Pok. If you’ve NEVER been to Pok Pok, you HAVE to go to either Portland or New York and experience their wings and one of their drinks with their drinking vinegar called som. Som is a drinking vinegar that has been an age old practice in many cultures around the world for it’s health benefits. Pok Pok has been serving their drinking vinegars since 2005, both as a cocktail mixer and diluted with soda as a soft drink. They use organic cane sugar for sweetener and let me tell you, while I’m not a soft drink person in the slightest, this stuff is downright addicting! You can purchase the Pok Pok Som online form both Pok Pok and ChefShop.com. A girlfriend and I just took an amazing cooking class at ChefShop.com so you can expect future blog post about them too!

Well, their chicken wings are known nation wide, and their cocktails are red-eye flight worthy. This, coming from a confirmed wine and anti-chicken wing girl. Let’s just keep this short and say that Pok Pok changed my life, as evidenced by the fact that after the first bite I waived down the waiter and asked if I could PLEASE purchase their cookbook but only if the amazing chicken wings were included. He handed me a copy to review. Each page coated in plastic which was an amazing idea because I was pouring over it as I was elbow deep in eating amazing chicken wings,The Pok Pok cookbook holds a special spot on my shelf , I personally confirmed that the chicken wing recipe is included, and it has been added to the list of fall and winter hobbies.

Tune in for more amazing thai inspired recipes from the Pok Pok cookbook, updates from this years International Food Bloggers conference (last years post) and to see how the Som Kombucha turns out! I had a bit of Som leftover and had a batch of kombucha ready tonight so I figured I’d do a little variation on my blueberry ginger kombucha and try some ginger som kombucha. I’ll let you know how it goes!

Fresh Heirloom Tomato Bruschetta

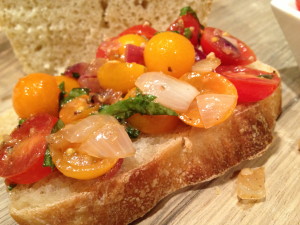
IMG_3815Somewhere in my DNA, there is an Italian heritage hanging out. Though I haven’t yet been to the country I seem to have an affinity for anything Italian. The culture, language, food, and history are all part of Italys draw on me.  Italy is a country that has always had a pull on my heartstrings. Chianti is my favorite wine AND Italy was my favorite part of Eat, Pray, Love. Honestly, I usually start the book with the intention to simply stop after Italy but I always get wrapped up in the purpose of the book and wind up reading India and Indonesia and mirroring her own journey in my life as I read it.

While pasta and pizza are the two dishes that will likely come to mind when you think of Italian cooking, there are SO many other amazing and unique recipes and preparation styles that grace us from that fantastic country. I don’t remember the first time that I had bruschetta, but I do remember the first time that I had my other half’s bruschetta. It was after one of our first road trips together, the sun was shining, we were in the honeymoon of early enamoration and the world was our oyster. Yep, I just made up a word variation for enamored! He “whipped” up his now famous bruschetta while I arranged some tapas on a plate then we grabbed a bottle of wine, our sunglasses, and headed up to the roof to eat alfresco. This is one of my favorite meals I’ve actually ever had because it combined so many of my all time favorite things: those I love, wine, tapas style eating, sunshine, eating outside and fresh foods.

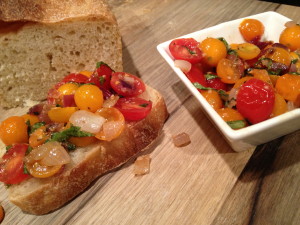
IMG_3818This bruschetta has been requested MANY times and while he’s never used a recipe, it always has that taste of spending a summer day eating outside on the roof with someone you love. You’ll notice there are not measurements. In the true Italian form, this is a dish that is best mastered over multiple and personalized to the chef and guests tastes so you can experiment with the ratios on each of the ingredients and put your own spin on the taste and texture.

One thing I will note about this dish, is how little oil you need. Olive Oil is both delicious and good for you when used in moderation, but this spread needs very little olive oil which increases the flavor and allows you to focus on the texture of the herbs and tomatoes versus any exceeding amount of oil. The shallots, onion and garlic have their own natural oils and juices, and finding a balance between those natural oils and a minimal amount of EVOO to sauté in will be the key!

Fresh Garden Bruschetta

heirloom cherry tomatoes, washed and halved
basil, washed and chiffonaded
fresh cracked black pepper and sea salt, to taste
aged balsamic
EVOO, used sparingly
minced garlic
red onion, chopped
shallots, chopped
grated parmesan or mozzarella cheese
artisan bread slices

  1. Wash and prepared each of the veggies as directed and slice up the artisan bread
  2. In a medium bowl, mix the tomatoes, basil, cheese and a drizzle of balsamic, adding fresh cracked pepper and sea salt to taste
  3. Heat a pan over medium-high heat, using the EVOO sparingly
  4. Add onions and shallots and cook until they start to turn translucent
  5. Add the garlic to the pan and reduce to medium low, cooking just a few minutes longer to mix flavors 
  6. Pour the hot mixture into the bowl, and gingerly toss all ingredients together
  7. You can either serve this immediately or make it ahead of time, cover and refrigerate up to 3 hours

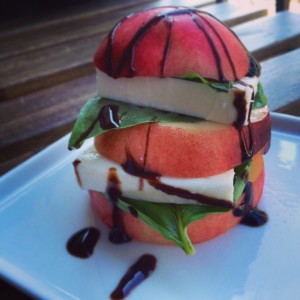
White Nectarine, Mozzarella, Basil “Stacks”
StacksWhite Nectarine, Mozzarella, Basil “Stacks”
Serves two

2 ripe, but slightly firm white nectarines
2 fresh mozzarella balls
1 bunch fresh basil, washed
Mandarano balsamic glaze

Wash the nectarines and basil, laying the basil out on a paper towel to pat dry. Slice the bottoms of the nectarines, then carefully slice so you have layers to stack.  Taking a sharp knife, slice the mozzarella balls. Stack up the ingredients, starting with a slice of the white nectarine and alternating the other ingredients until you have your “stack” created. Drizzle with the balsamic glaze and enjoy!

Healthy Spring Rolls with Garlic Ginger Dipping Sauce (Vegetarian Option)

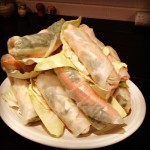
Spring has sprung friends! As the weather turns from the chilly winter to crisp spring I start to crave the lighter fare: chicken salads, grilled fish and veggies, Rose and bubbly wines, strawberries and all other fresh spring/summer fruit. A few weeks ago, my mother invited me along to a cooking class from Culinary Events Northwest. The class met at the Lynnwood Albert Lee Appliance store so off we went to learn our “Wraps Around the World”. There were a few different interesting offerings, such as crepes with buckwheat flour and strawberry balsamic drizzle. But my favorite from the class was the Vietnamese Style Spring Rolls.

We love ordering these when we eat out but I had NEVER before thought about trying to make them myself! To celebrate the first day of spring it was time to try my hand at some homemade spring rolls for dinner! The hardest part of this project is the prep! Once you get everything washed, chopped and arranged in an assembly line it’s easy peasy and I had 12 of these bad boys made before I knew it!

The report from mister Byte of life: Success! His only regret for the meal was that he didn’t have a larger stomach. Chef, happy! Even the next morning at breakfast he was talking about how good they were and how excited he was to be hungry later so he could eat more! These little guys are great as appetizers or served with grilled or steamed veggies for dinner. They make great next day lunches or afternoon snacks. I’ve included a few other ingredient ideas below. What are some of your favorite spring roll ingredients or ones you’d like to try! Also, please feel free to post other dipping sauce recipes!

Healthy Chicken Veggie Spring Rolls
These can be vegetarian by simply omitting the chicken!
Yield you’ll have to play around with the ratios of ingredients but this is a general guideline of ratios from my assembly line. 

12  8 or 9 inch rice-paper sheets
1 c fresh mint, chopped
1 c fresh cilantro, chopped
1 c fresh basil, chopped
1 – 1 1/2 c finely chopped green cabbage
extra full cabbage leaves to separate the spring rolls on your display plate (the rice-paper wrappings will stick to each other)
1 c matchstick-sized cucumber, peeled first
1 c matchstick-sized carrots, peeled first
2 cooked chicken breasts
1 pan, diameter wide enough to soak rice-paper sheets
1 dry dish towel and either a plate or cutting board to turn rice-paper onto

  1. Prep all herbs and veggies into separate bowls and create your assembly line. Carrots and cucumber first followed by the herbs, then your protein and cabbage at the end. Have a plate ready to place your completed spring rolls on, as well the cabbage to separate the spring rolls as the paper wrappers love to stick to each other.  (If you are making ahead and storing, you can also cover with a damp paper towel and plastic wrap, then place directly in fridge)*If you are making the sauce below, prep those veggies after chopping the spring roll ingredients then make the sauce before starting your spring roll assembly line.
  2. Fill your pan with 2-3 inches room temperature to slightly warm water and place at the beginning of your assembly line with the dry dish towel and cutting board or plate where you will be assembling your spring rolls.
  3. Soak the first rice-paper wrapper in the water until it looses it’s rigidity, about 30 seconds, but is still slightly firm. You’ll just have to try a few times and sacrifice a few rice-papers to get the hang of seeing and feeling when the rice paper is ready to be rolled. You don’t want it TOO soft or else it will easily tear. 
  4. Once the rice paper is ready to be rolled, move onto the paper towel and place another rice paper in the water. Gently dab off the water from the rice paper, it will still be damp and wet but it shouldn’t be soaked. Gently transfer to the cutting board and fill with your ingredients. Arrange a few carrots and cucumber centered in the top 1/3 of the rice paper closest to you, leaving about 3/4 – 1 inch border on each side for rolling. Place the herbs, protein and cabbage in the roll making sure to not fill TOO large to wrap. Fold the top of the rice paper closest to you over the heap of ingredients as tightly as you can without breaking the rice paper. Delicately fold in each side of the rice-paper burrito style and roll away from you to wrap up the spring roll, making sure to keep the rice-paper as taut/tight to the ingredients as you can. You might need to fold in the sides another time or two as you get to the end of the rolling process. The spring roll will seal itself against the rest of the rice-paper.* be sure to keep an eye on the sauce, stirring every few minutes to mix the ingredients together 
  5. Place on one of the large cabbage leaves on your display plate and repeat step 4 until you’re done making spring rolls.

Other roll ideas:
Marinated Baked Tofu with bean sprouts and sliced red peppers
Sashimi with pickled ginger & wasabi or wasabi dipping sauce
Asian Marinated flank steak with fresh ginger and garlic ginger dipping sauce

Garlic Ginger Dipping Sauce
Yield enough for about 6-8 spring rolls
3 cloves fresh garlic, minced (or 1 1/2 tsp jarred minced garlic)
1- 1 1/2 tbsp fresh ginger (or 1 1/2 tsp dried ginger)
1 tbsp toasted sesame oil
1/3 low sodium soy sauce
1/4  c.rice vinegar (or white wine vinegar works as well)
1/4 c. tsp crushed red pepper flakes ( unless you like it SPICY, stick to this ratio or it might overpower the rolls)
1 tbsp sugar

Combine all ingredients in small pot and cook over low heat until mixture bubbles. Can be stored in airtight container and refrigerated for up to three days after making.

Baked Beet Chips

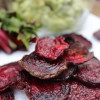
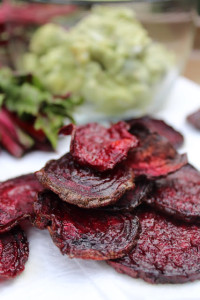
IMG_0640Roasted, canned, sliced, boiled, pureed, fried, baked into chips. Any way you serve them, sans raw on a plate, I’ll eat em! I LOVE beets! On one of my ritual weekend trips to shop at the best farmers market EVER I was strolling out of our amazing italian speciality market, De Laurenti, and stopped to watch them throw the fish when I hear a lady behind me say, “And this is a beet chip! Give that a try and tell me how amazing THAT tastes!” Immediately I turned around and found myself facing the dried fruit stand which I had never before given a second thought to.
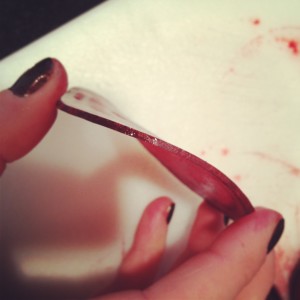
 

IMG_0639But, now the game was changed she said beet and chip in the SAME sentence! I tried one and was HOOKED! They were even part of my Christmas stocking last year. Seriously! I put chocolate in his stocking and he put beet chips in mine!  Of course, being little miss DIY I had to figure out how to make them at home! I knew she flash fried them, half of why there were so good but I wanted to see if I could recreate the goodness at home with less oil and keep the same crispy delicious flavor.
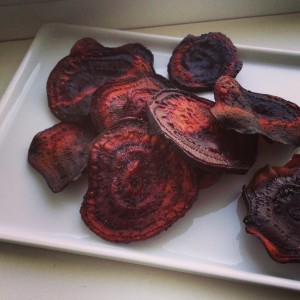
So, I searched the blogosphere, Pinterest-ed and Martha Stewart stalked to find and read as many recipes as I could to assimilate the ultimate recipe.

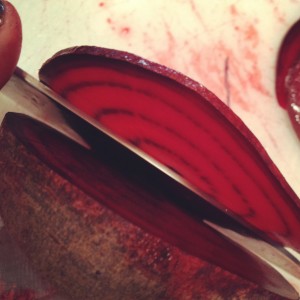
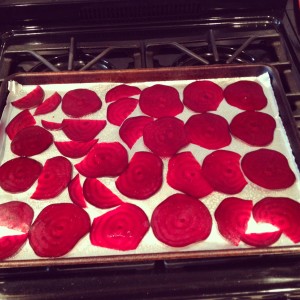
Many recipes called for using a mandoline to slice the beets which I don’t have! Thinking I’ll invest in one, which would not only be safer and swifter but it would also make much more uniform chips! They also said to cut the beets 1/16th of an inch, which I actually had no idea what that size was on a beet because I have ZERO depth perception so I just eyeballed what I felt was “thin” sliced then got curious so I pulled out the measuring tape and what do you know… it was 1/16 inch exactly! I also found the using my misto sprayer with EVOO in it worked better than brushing each chip for my goal of using less oil. It gave a nice even spray of olive oil to crisp it up and give it some flavor instead of bathing the beets in oil.

My take one...
My take one…


How they CAN look! Photo courtesy of Simply Whole Kitchen


Baked Beet Chips
1 large beet
Misto Sprayer + EVOO
Fresh cracked salt and pepper to taste

Preheat the oven to 350 and line a baking sheet with non-stick foil.

Wash your beet(s) and pat dry with a paper towel. Keep another paper towel handy to hold the beet when cutting. The skin will help to keep the purple of the beet from staining your hands, but if you’re half as clumsy as I am it’s smart to keep one handy!

Using a sharp knife (or mandolin), slice the beets into thin 1/16 inch slices.

Spray with the Misto Sprayer then crack fresh Salt & Pepper to taste.

Bake for 15-20 minutes until crisp then cool on a wire rack until completely cool. (I found that using less oil and the low heat of 350 took about 40 minutes to get them crisp. Next time I’ll try upping the heat and doing a double misto spray to see how that works!

IMG_0637