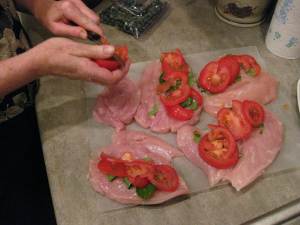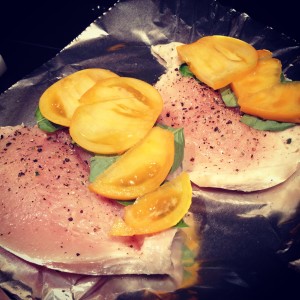
Baked Chicken with Tomatos and Basil

IMG_3795Everyone needs a few of those dishes that can be thrown together and are sure to please. For me, that’s baked chicken. It’s so easy to take a few chicken breasts, spastically cover them in dried herbs and spices, wrap them in aluminum foil and throw it in a pre-heated oven until they reach an internal temperature of 165 degrees. This recipe takes it one step further with a little trick, searing. When you sear the chicken, it locks in the flavor, keeps the chicken most, and  creates a delicious crispy and pretty coating!

Apologies to all of you for not having a better picture of the final product, I got hungry and broke my OWN rule of taking a picture first! I’ll update the post next time I make this dish and have a better “finished product” picture for you!

Baked Chicken with Tomatoes and Basil
Ingredients

  • One chicken breast per guest
  • Heirloom tomatoes (Or Roma tomatoes will work)
  • Optional-one slice of cheese per guest (Fontina or Mozzarella)
  • Fresh Basil
  • Minced Garlic
  • Cracked Pepper and salt
  • Parchment Paper and Baking sheet
  • Frying pan and oil to sear chicken

Directions

1. Wash and dry the basil. Wash the tomatoes and thinly slice them. Pre-heat the oven to 450 degrees. Cut individual sized pieces of parchment paper or aluminum foil to bake the chicken on. Since the chicken has natural juices, you’ll need to think about how you’re cooking the chicken. If you’re cooking it alone (no other veggies on the pan in the oven) a parchment paper is just fine. But, if you’re making other veggies at the same time as I often do, I find it easier to use aluminum foil so I can curl up the sides and contain the chicken juices so that it doesn’t touch the other veggies.

2. Wash the chicken breasts off, and pat them dry. Lay out chicken on a cutting board and “butterfly” it- which means slicing the chicken lengthwise, but don’t cut it enough to separate the two sides. Pre-heat a pan on the stove and cover with cooking spray or some EVOO (Extra Virgin Olive Oil).

3. Crack fresh pepper over the surface of the chicken. On one side of the chicken, that will be the bottom side, lay the washed basil down, followed by the tomato. (If you want to get really fancy, you can sauté some spinach and garlic and include it in this step). If you’re using cheese, lay it in between the basil and the tomato. Close the top side of the chicken over the bottom side, making sure that the tomato and basil don’t pop out. You can secure them with a tooth pick if needed.

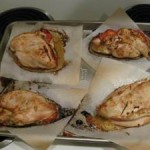
4. Carefully transfer the closed chicken breasts to the pre-heated pan and sear each side until golden brown. I use a wide spatula for this and you have to be careful when turning the chicken breast over so that none of the tomato or basil fall out. When they are seared on both sides, transfer the chicken to the individual pieces of parchment or aluminum foil and secure the openings with a toothpick if they’re still trying to let the tomatoes and basil fall out.

5. Place the chicken on the baking sheet and bake for  for 25-35 minutes or until meat thermometer reads 165 degrees for internal temperature. 

6. Remove the chicken from the oven and serve! I usually like to serve with some toasted quinoa, blasted broccoli, or yam fries.
 

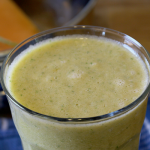
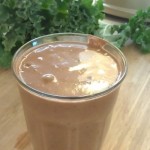
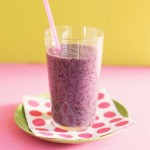
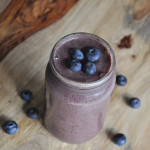
Kale Smoothies

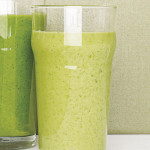
Photo from MyWholeFood Life.com
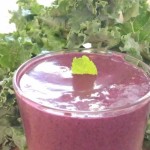
Kale and Mixed Berry Smoothie from MyWholeFoodLife.com {Photo from MyWholeFood Life.com}

Okay, let’s pause for just a moment because some of you are already wrinkling up your noses and saying, “KALE!? SMOOTHIES!? Alright that’s just GROSS!” I too though that would be a combo that I would only ever “choke down” because I mentally knew it was good for me but would never actually enjoy. I’ve never been more happy to report that I was wrong!

I’m not sure what started the kale kick, maybe I was just drawn to how fully and richly colored the kale has been at the farmers markets this year. Or, maybe it was a particularly delicious kale salad I had earlier this summer, or the fact that mentally I know it’s good for me. Perhaps it was the sudden realization that it’s SEPTEMBER and I better get started on those new years resolutions! Whatever the reason, two massive bunches of fresh kale decided to come home with me from the farmers market last weekend. The past few weeks I’ve tried to start mixing up what we make at home. I get into a comfort rut where I buy the same veggies and prepare them the exact same way and because I apparently need more of a mental challenge in life (careful what you ask for!) I decided to try using the same veggies we always buy but cooked or prepared in a different way.

Enter the kale smoothie! Now, I consider it a feat that not only do BOTH of us consume these smoothies but we actually ENJOY them! I think the mister has actually had more of them than I have! “I you PLEASE make me one of your amazing smoothies” is not a joke, he really says it! Today one of my girlfriends asked me for my kale recipe when she saw the gorgeous massive bunch of kale peering out proudly form the top of my market bag and I started to tell her about the kale smoothies. She asked for the recipe and I figured, maybe someone else would want to experiment with kale smoothies so I’m putting it out there in the bloggosphere and hoping that someone else will also be able to enjoy kale in liquid form! I’ve started reading up on kale, and there are many different opinions on whether it’s healthier to cook it or eat it raw and I think that a healthy balance of both is important.
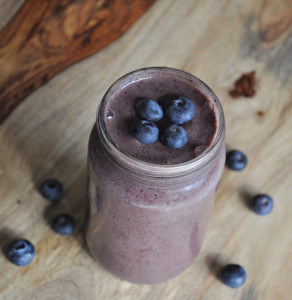
Warning, this smoothie will not LOOK pretty. It will however, taste delicious! Here are a few nutrition fun facts about this smoothie. The blueberries and kale do not make for a lovely look, but the nutrition is out of this world! Blueberries are a super food packed with antioxidants which can prevent heart disease can help with memory. In addition to fiber and vitamin c, they also have Manganese which helps with building healthy bones and metabolizing proteins, carbohydrates and fats. Kale contains both protein and fiber, which help you feel full, and also contain cholesterol-lowering traits. It also contains Vitamin K which is vital for blood clotting, Vitamin A which helps with vision and Vitamin C which helps with healing wounds. It also contains many minerals which are helpful for healthy body functions and health. Bananas are a good source of potassium, fiber, manganese and vitamins B6 and C. Oranges are high in Vitamin C and fiber. Apples not only help with sweetening the smoothie, but they contain phytonutrients that are excellent for helping regulate blood sugar and contain fiber which also helps to keep you full. (Nutrition info from WebMD)

Kale Smoothie

1/2 apple
1-2 cups chopped kale, ribs removed
1/2 c blueberries
1 Orange or Oj, to your liking for consistency  (water or almond milk also works)
1/2 banana (I like to freeze bananas to make the consistency a little thicker

Wash all ingredients and place in blender and mix until you reach the consistency that you desire. If it’s too thin, you can freeze the fruit or add ice cubes.

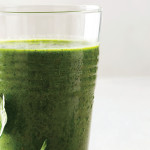
Here are a few more recipes for using Kale in smoothies that you can try! Post in the comments what your favorite kale smoothie recipes are, I’d LOVE to hear them!

And here is a great compilation of Kale smoothie recipes:

Healthy Water


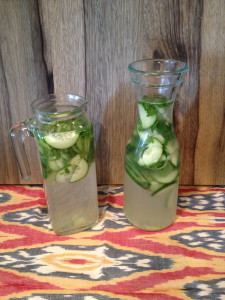
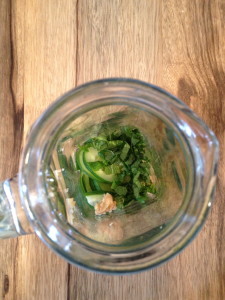
IMG_3244Let’s all agree on something, shall we? Water can be boring. Okay, now that we all agree, we can also agree that it cam be a challenge to achieve your daily recommended intake of water. Water just get’s so…bland! In the summer heat it’s important to stay hydrated but it can be such a chore when you just feel like your drowning in bland liquid and all you want is an iced tea, or a sangria or… SOMETHING other than straight water! I’ve tried both cucumber AND lemon water, and they just get “old”. One of my girlfriends passed along this recipe for “healthy water”. It’s simple to make, tastes refreshing, and helps combat the “boring” aspects of straight water. The mint and ginger also help with digestion! Double score!  


IMG_3243Healthy Water:

1 large pitcher
filtered water
1 medium cucumber peeled and sliced
1 lemon washed and sliced
1 tsp minced ginger
1 branch of mint leaves (in produce section)

Place all ingredients in the pitcher and muddle together a bit. You can drink right away or let it marinate overnight in refrigerator. The ginger and mint will calm your intestinal track, which reduces bloating and results in a flatter stomach!

Product Review & Recipe: Mandarano Balsamic Glaze with “Stacks” Recipe

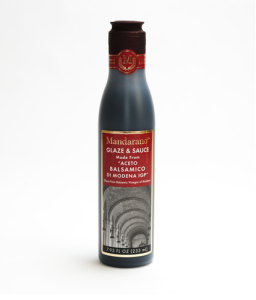
Screen Shot 2013-08-22 at 11.32.36 AMThe team over at Mandarano Balsamic Glaze & Sauce,  graciously asked if I be interested in doing a product review. Of course, I was excited to give it a try since I have become obsessed with aged balsamic in the past year. If you have never had an “aged” balsamic and think of only the vinegar style, you are in for a life changing treat. 

Balsamic vinegar has long been a staple in my pantry. I always have a large bottle up on the shelf. Sometimes it’s plain old vinegar, sometimes there are random herbs shoved into the bottle for an infusion, what can I say… we know how to party. Balsamic has many uses in our house,  as a dressing, a marinade for veggies or meat, drizzled on a top of a few slices fresh mozzarella for a caprice salad, the list goes on. Usually, I have the plain old vinegar style, which can be a tad acidic if drizzling straight onto a salad, hence the herbs shoved into the bottle! So, imagine my joy when I discovered “aged balsamic”.

I was SO excited to get my bottle of Mandarano last week and start trying it at…well ever meal actually. In case you were wondering, the answer is yes, it is delicious with scrambled eggs,  fresh basil and avocado toast. It’s much thicker and has a much richer flavor so a little goes a long way with an aged balsamic, or a balsamic glaze. When you first open the bottle, you can smell the vinegar qualities of the balsamic, but once you taste it you’ll find the slight sweetness that perfectly compliments the molasses like texture. Mandarano uses a proprietary blend of 25, 12, and 2 year aged balsamic vinegar and the entire process, grape growing, bottling and production, all happen in Modena, Italy. And if you thought it couldn’t get any better, it’s quite affordable! You can order it HERE from Amazon.com or directly from the Mandarano website HERE. They also have a few delicious recipes using the balsamic glaze posted HERE. I can’t wait to try the Caprese style portobellos with Mandarano balsamic.

As I said, I’ve been trying my balsamic glaze on just about every meal and while I don’t have lovely pictures to show you, because I was too busy scarfing down the amazing meal.  For dinner one night, I drizzled it over prosciutto wrapped chicken and asparagus and it was the perfect finishing touch, adding just the sweetness and flavor that the dish needed!

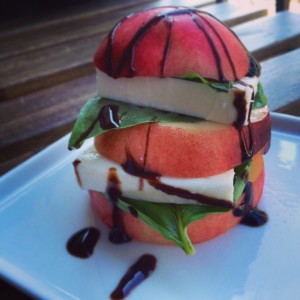
But my favorite recipe, by far, were the White Nectarine, Mozzarella, Basil and Balsamic “stacks” I made one afternoon for a quick patio happy hour treat. The bag of white nectarines were finally ripe, so I walked down to our Italian market, DeLaurenti, and picked up a few of their fresh house made mozzarella balls and some fresh basil and used my bottle of Mandarano balsamic glaze to make these delicious treat! Recipe was posted yesterday HERE, but I wanted to include it below so you could see how lovely it turned out, the the glaze drizzled over the top!

Stacks

White Nectarine, Mozzarella, Basil, Balsamic “Stacks”
Serves two

2 ripe, but slightly firm white nectarines
2 fresh mozzarella balls
1 bunch fresh basil, washed
Mandarano balsamic glaze

Wash the nectarines and basil, laying the basil out on a paper towel to pat dry. Slice the bottoms of the nectarines, then carefully slice so you have layers to stack.  Taking a sharp knife, slice the mozzarella balls. Stack up the ingredients, starting with a slice of the white nectarine and alternating the other ingredients until you have your “stack” created. Drizzle with the balsamic glaze and enjoy!

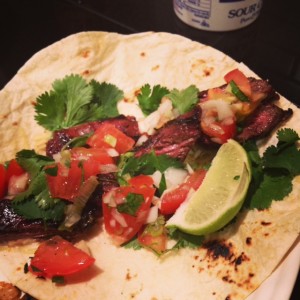
Carne Asada Steak Tacos

photo 3Taco Tuesday is a long-standing tradition in our house. As we start to get the pockets of good weather in Seattle I get more and more excited about one of my favorite things, roof top grilling. Now, we are not just your casual  everyday grill people. We’re Californian, which means we’re dedicated grillers;  we grill in all-weather! Neither rain, nor sleet nor wind or snow shall keep us from the grill! True story, my dad’s been known to put on his boots and grill in the SNOW! Luckily Taco Tuesday was somewhat sunny so the grilling experience was more leisurely than it is when you’re all out fighting wind or snow.

As you may have seen from this weeks Mango Salsa post, I had some Carne Asada tacos at our local Farmers Market and that started the obsession fever. They were amazing tacos and I had to try my hand at replicating that amazing experience. I’m happy to report, this little recipe made it in the top 5 BEST MEALS EVER list from the mister! Even I was speechless after my first bite…and realized that my biggest problem in life at the moment was that I didn’t have a bigger stomach!

Carne Asada Steak Tacos with Pico De Gallo, Grilled Cabbage Slaw
(Various parts of recipe adapted from Food Network)

Flank Steak: 

2 pounds flank or skirt steak, trimmed of excess fat
1 large baking dish, to prepare
1 large ziplock bag, to marinate
1 recipe Mojo, recipe follows
Olive oil, for coating the grill
Kosher salt and freshly ground black pepper

Mojo:
5 garlic cloves, minced*
1/2 jalapeno, minced
2 large handfuls fresh cilantro leaves, finely chopped
Kosher salt and freshly ground black pepper
2 limes, juiced
1 orange, juiced
2 tablespoons white vinegar
1/4 cup olive oil

For Serving:
Tortillas (We ” Home-Style” flour tortillas)
Cilantro
Lime wedges
Cheese
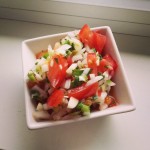
Pico de Gallo, recipe here
Grilled Cabbage Slaw, recipe here
Mango Salsa, recipe here

*Conversions for garlic if you don’t have the fresh stuff: 1 clove = 1 teaspoon chopped garlic = 1/2 teaspoon minced garlic = 1/8 teaspoon garlic powder = 1/2 teaspoon garlic flakes = 1/4 teaspoon granulated garlic = 1/2 teaspoon garlic juice

Directions
If you are using the Pico de Gallo, Cabbage Slaw, or Mango Salsa prepare all of the herbs and veggies at the same time before you prepare the meat. Getting all the chopping done at once makes the job easier and all of these dishes and side dishes are better when they’re left to marinate for a while!

To make the mojo, wash and chop all ingredients into a bowl and mix well. Lay steak out in a large baking dish and lightly coat with black pepper then pour the mojo over the steak making sure to spread out the clumps of cilantro and garlic. Fold the top of your plastic bag over itself twice, to keep any juices from interfering with the zip lock seal. Fold the meat over itself in quarters, with the mojo on the inside, and place in the plastic bag. Pour remaining mojo juices over the meat. Seal the bag and refrigerate for 1- 8 hours. I prefer a longer marinate time so the juices really soak into the meat, but don’t marinate longer than 8 hours as the citrus in the mojo will break down the delicate cut of meat and render it mushy.

Once you’re ready to cook the meat, pre-heat the grill and start a pan on the stove to cook the cabbage slaw. (You can also broil the meat, but we prefer to grill if that option is available). Brush the grill with olive oil to keep the meat from sticking. Grill (or broil) the steak for 7 to 10 minutes per side, turning once, until medium-rare. (At once you do the first turn, you can get out the toppings and have them ready.) Remove the steak to a cutting board and let it rest for 5 minutes to allow the juices to settle. Thinly slice meat, heat up tortillas over open flame on the stove and assemble a masterpiece!


Mango Salsa

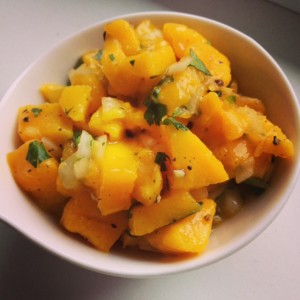
Fresh Mango Salsa
Fresh Mango Salsa

With the fresh feeling of spring, I trade my winter cravings of spaghetti squash and Ratatouille for the “fresh and light” fare. On Sunday I went over to our Ballard Farmers market and got the tastiest Carne Asada tacos I maybe have ever had! Seriously, I want to huddle in the corner and lick the plate they were THAT good!

Well, that of course challenged the cook in me that said, “Hey, can I make that!?” and off I was planning taco Monday/Tuesday/Wednesday and likely Quesadilla Thursday. Since the Carne Asada steak needed to marinate (that’s for dinner tonight so check back for the recipe) I decided that tonight would be fish tacos.

Menu: Grilled halibut, Grilled Cabbage Slaw & Mango Salsa
Full Menu Prep time: 15 -20 minutes || Full Menu Cook time 20 minutes

This meal is actually pretty quick to make, it’s really just the prep-time that takes little time investment. The Mango salsa and cabbage slaw can be prepared earlier in the day but only take about 15 minutes of cleaning and chopping. Cooking the fish takes about 12 minutes on a pre-heated grill and the cabbage slaw will cook up in a pan on the stove in about  18-20 minutes.  

Mango Salsa

3 Ripe Mangos, Peeled and cubed
1/2 Small White Onion
1/2 – 1 Jalapeño chile, minced (include ribs and seeds for a hotter taste if desired)
Fresh Cilantro, washed and chopped with stems removed
1 Fresh lime, juiced
Cracked Pepper to taste

Wash and prep ingredients then combine in large bowl. Cover and let sit in refrigerator for an hour or over night to let the flavors mix! If the salsa ends up being a little too hot or acidic for your taste, you can temper it by adding some diced avocado.


Healthy Spring Rolls with Garlic Ginger Dipping Sauce (Vegetarian Option)

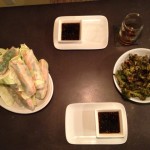
Spring has sprung friends! As the weather turns from the chilly winter to crisp spring I start to crave the lighter fare: chicken salads, grilled fish and veggies, Rose and bubbly wines, strawberries and all other fresh spring/summer fruit. A few weeks ago, my mother invited me along to a cooking class from Culinary Events Northwest. The class met at the Lynnwood Albert Lee Appliance store so off we went to learn our “Wraps Around the World”. There were a few different interesting offerings, such as crepes with buckwheat flour and strawberry balsamic drizzle. But my favorite from the class was the Vietnamese Style Spring Rolls.

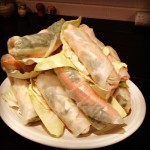
We love ordering these when we eat out but I had NEVER before thought about trying to make them myself! To celebrate the first day of spring it was time to try my hand at some homemade spring rolls for dinner! The hardest part of this project is the prep! Once you get everything washed, chopped and arranged in an assembly line it’s easy peasy and I had 12 of these bad boys made before I knew it!

The report from mister Byte of life: Success! His only regret for the meal was that he didn’t have a larger stomach. Chef, happy! Even the next morning at breakfast he was talking about how good they were and how excited he was to be hungry later so he could eat more! These little guys are great as appetizers or served with grilled or steamed veggies for dinner. They make great next day lunches or afternoon snacks. I’ve included a few other ingredient ideas below. What are some of your favorite spring roll ingredients or ones you’d like to try! Also, please feel free to post other dipping sauce recipes!

Healthy Chicken Veggie Spring Rolls
These can be vegetarian by simply omitting the chicken!
Yield you’ll have to play around with the ratios of ingredients but this is a general guideline of ratios from my assembly line. 

12  8 or 9 inch rice-paper sheets
1 c fresh mint, chopped
1 c fresh cilantro, chopped
1 c fresh basil, chopped
1 – 1 1/2 c finely chopped green cabbage
extra full cabbage leaves to separate the spring rolls on your display plate (the rice-paper wrappings will stick to each other)
1 c matchstick-sized cucumber, peeled first
1 c matchstick-sized carrots, peeled first
2 cooked chicken breasts
1 pan, diameter wide enough to soak rice-paper sheets
1 dry dish towel and either a plate or cutting board to turn rice-paper onto

  1. Prep all herbs and veggies into separate bowls and create your assembly line. Carrots and cucumber first followed by the herbs, then your protein and cabbage at the end. Have a plate ready to place your completed spring rolls on, as well the cabbage to separate the spring rolls as the paper wrappers love to stick to each other.  (If you are making ahead and storing, you can also cover with a damp paper towel and plastic wrap, then place directly in fridge)*If you are making the sauce below, prep those veggies after chopping the spring roll ingredients then make the sauce before starting your spring roll assembly line.
  2. Fill your pan with 2-3 inches room temperature to slightly warm water and place at the beginning of your assembly line with the dry dish towel and cutting board or plate where you will be assembling your spring rolls.
  3. Soak the first rice-paper wrapper in the water until it looses it’s rigidity, about 30 seconds, but is still slightly firm. You’ll just have to try a few times and sacrifice a few rice-papers to get the hang of seeing and feeling when the rice paper is ready to be rolled. You don’t want it TOO soft or else it will easily tear. 
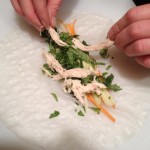
  4. Once the rice paper is ready to be rolled, move onto the paper towel and place another rice paper in the water. Gently dab off the water from the rice paper, it will still be damp and wet but it shouldn’t be soaked. Gently transfer to the cutting board and fill with your ingredients. Arrange a few carrots and cucumber centered in the top 1/3 of the rice paper closest to you, leaving about 3/4 – 1 inch border on each side for rolling. Place the herbs, protein and cabbage in the roll making sure to not fill TOO large to wrap. Fold the top of the rice paper closest to you over the heap of ingredients as tightly as you can without breaking the rice paper. Delicately fold in each side of the rice-paper burrito style and roll away from you to wrap up the spring roll, making sure to keep the rice-paper as taut/tight to the ingredients as you can. You might need to fold in the sides another time or two as you get to the end of the rolling process. The spring roll will seal itself against the rest of the rice-paper.* be sure to keep an eye on the sauce, stirring every few minutes to mix the ingredients together 
  5. Place on one of the large cabbage leaves on your display plate and repeat step 4 until you’re done making spring rolls.

Other roll ideas:
Marinated Baked Tofu with bean sprouts and sliced red peppers
Sashimi with pickled ginger & wasabi or wasabi dipping sauce
Asian Marinated flank steak with fresh ginger and garlic ginger dipping sauce

Garlic Ginger Dipping Sauce
Yield enough for about 6-8 spring rolls
3 cloves fresh garlic, minced (or 1 1/2 tsp jarred minced garlic)
1- 1 1/2 tbsp fresh ginger (or 1 1/2 tsp dried ginger)
1 tbsp toasted sesame oil
1/3 low sodium soy sauce
1/4  c.rice vinegar (or white wine vinegar works as well)
1/4 c. tsp crushed red pepper flakes ( unless you like it SPICY, stick to this ratio or it might overpower the rolls)
1 tbsp sugar

Combine all ingredients in small pot and cook over low heat until mixture bubbles. Can be stored in airtight container and refrigerated for up to three days after making.

Prosciutto Wrapped Chicken & Asparagus

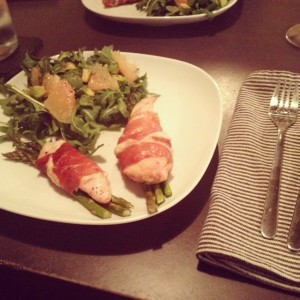
The plateJanuary is about fresh starts, renewal, clean slates and expansive opportunity ahead. I’m not big on “resolutions” necessarily but I do like the atmosphere of new beginnings that January holds.
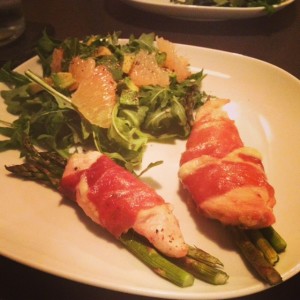
In an effort to combat the grey day and finding myself with a night at home to relax and unwind, I decided that it was time to cook a recipe from my many Pinterest “pins”. This meal finds its way to us from my “A Meal A Day” Pinterest Board, where I keep all my for a “Rainy Day” recipes to try, and today was as rainy as it will get!

up close The fresh light yet peppery flavor of the salad paired perfectly with the cured meat and cheesy flavors of the chicken!
Tips:
Measurements Everything on this meal should be “to taste”. I actually HATE having measurements on there since everyone likes their meals a different way but experiment with the flavors and ratios and have fun!

Prosciutto Choose a lean cut that  isn’t too salty and ask your butcher to slice it a bit thinner than lunch meat so it will not be an overpowering flavor but will still hold its integrity when you wrap it.

Prosciutto Wrapped Chicken & Asparagus
(Kale Grapefruit Salad with Avocado and EVOO Recipe Below)
Recipe Adapted from Inspired.ca

2 boneless and skinless chicken breasts
Fresh cracked pepper to taste
8 slices prosciutto
½  bunch young green asparagus, washed and trimmed
Shredded mozzarella, to taste (approx. ½ cup)

Pre-heat the oven to 375°F. Line a baking sheet with foil or parchment paper.

Wash the chicken and pat it dry. Then, slice each chicken breast in half horizontally to make four equal sized cutlets and set aside. Depending on the ratio of chicken to prosciutto you like, you may want to half each cutlet. Lay out the chicken on a plate so you can crack fresh pepper on the surface of each chicken breast.

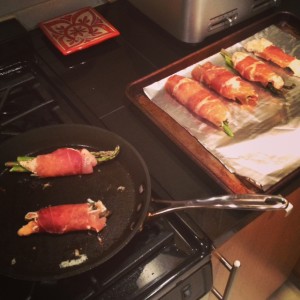
Pre heat a sauté pan on the stove. You’ll place the wrapped chicken in the hot pan to sear the prosciutto closed before placing on the baking sheet so make sure you have a spatula handy to transfer the wrapped chicken.

Lay two slices of prosciutto side by side, slightly overlapping. Sprinkle with mozzarella. Place one piece of chicken horizontally across the prosciutto so the prosciutto is vertical and the chicken completes a cross horizontally across the center.

PrepLay a few springs of asparagus on top of the chicken, also in a horizontal pattern. Carefully wrap the prosciutto around the chicken and asparagus tightly and place into the pre-heated sauté pan with the seam on the bottom. Sauté for a few seconds until the seam on the prosciutto is closed, then turn over for a few additional seconds to get a nice crisp to the prosciutto then transfer to the lined baking sheet with your spatula.
Repeat with the remaining prosciutto, chicken and asparagus.

Bake the chicken 15-18 minutes, until the internal temperate of the chicken reaches 165°F. When you transfer the chicken to the plate, there will be some juice from the chicken so let that drip into the lined baking sheet before placing on your plate. You can garnish with more mozzarella or cracked pepper if you desire, but we liked it just as it was!

up close


Kale Grapefruit Salad with Avocado and EVOO
Kale
Grapefruit, cubed and peeled from the flesh
Avocado, cubed into whatever size you desire
EVOO (Extra Virgin Olive Oil)

Wash the Kale and pat dry. Pull the leaves from the stock and chop. Wash the outside of the grapefruit and avocado, slice in half and cube. For the grapefruit, pull the each of the sections out of the fleshy membrane and use only the citrus “meat” portion.

Assemble all ingredients on the plate drizzle with EVOO . (Optional Addition: toasted Almonds)


Protein Pumpkin Bran Muffins with Walnuts & Raisins

Who doesn’t love muffins? Delicious, warming, hearty and the thing I love the most is the crunchy muffin top! On more than one occasion I’ve eaten the muffin top and left the rest, usually because there isn’t enough goodness throughout the rest of the muffin to keep my interest. I might have muffin ADD. That’s one of the reasons I LOVE making muffins at home, not only does the whole house smell amazing, but I love baking and it’s fun to make them exactly how I want and they are a wonderful easy breakfast option!


Wednesday night I roasted my own pumpkin (you can read the post here) in the effort to prepare the delicious pumpkin for baking. Pumpkin muffins have been on my mind for WEEKS! Well, last night was FINALLY the night! We had dinner plans with friends so it was the perfect time to make them and then LEAVE them to cool while we went out. This was my tricky methodology to keep myself from eating one… two …tasting my wonderful pumpkin creation!

I…LOVE…BAKING!! Fresh roasted pumpkin!? Check! Throw a few raisins and walnuts in there… let’s see what other spices can I throw in this bowl? Cloves are one of my favorite holiday spices because it always remind me of gingerbread, which is tied for first favorite holiday flavor right along with Pumpkin and Gingersnap.

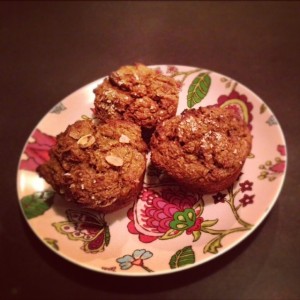
The first words as he walked in the door were: “It smells like CHRISTMAS in here!” Holiday baking is one of my favorite hobbies of the entire year, and that declaration my foodie friends  made my little baking heart well up with joy! Those muffins smelled as amazing when they were cooking as they did this morning for breakfast! Now, he’s NOT a pumpkin fan so I figured I’d be eating a dozen by myself (Oh darn), but dolled out some high compliments this morning as we both enjoyed them for breakfast. I reduced the sugar from the original recipe and they were still the perfect mix between spiced, pumpkin and sweet flavors and hearty enough to be satisfied with one muffin and some yogurt. It was the perfect fall breakfast!  The garbanzo flour and Greek yogurt gave an extra protein punch which I appreciate in a muffin.  I can’t WAIT to get home and eat another one two wonderful pumpkin creation! 🙂

Protein Pumpkin Bran Muffins with Walnuts & Raisins
Yield: 12 muffins

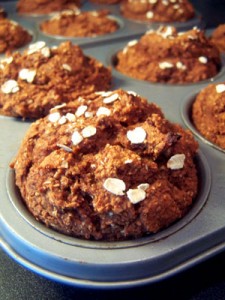
Photo from: Green Lite Bites

Adapted from Green Lite Bites Recipe

  • 1 ½ c. Flour ( I like garbanzo, Whole Wheat or Almond but any flour will do)
  • 1 tsp. baking soda
  • 1 tsp. baking powder
  • ¼ tsp. salt
  • ½ tsp. ground cinnamon
  • ½ tsp. ground ginger
  • ½ tsp. ground cloves
  • ½ tsp. fresh grated nutmeg (you can also use ground if you have/prefer)
  • 2 cups of fresh roasted pumpkin (or 1 15oz can of pumpkin)
  • 2 tbsp. molasses
  • 1 tbsp. honey (double if you like sweeter muffins)
  • 1 egg
  • 2 egg whites
  • ¼ c. unsweetened applesauce
  • ½ c. vanilla Greek yogurt
  • Raisins and crushed walnuts to taste
  • ¾ cup Wheat Bran

Pre-heat the oven to 400 degrees and grease your muffin tin or line with festive muffin cups

Mix the flour, baking soda, baking powder, salt, cinnamon, ginger, cloves and nutmeg in a medium bowl. The recipe called for double sifting, but since I don’t have a sifter and I’m way too lazy I just too my pastry blender (or you can use a whisk) and added a little fluffing to it!

In another large bowl, add the pumpkin, molasses, honey, egg, egg whites, applesauce and yogurt. Beat until all ingredients are mixed well.

Add the wheat bran to the flour mixture and mix.

Pour the flour/bran mixture into the pumpkin mixture and combine until just moistened. Don’t over mix. Add raisins and walnuts if you like them and pour into greased muffin tin. These muffins are pretty moist and I like the crunchier outside so I don’t use the paper cups since the muffins tend to stick. Don’t worry, they’ll be full and the pan will feel a bit heavy but they bake up with nice muffin tops! Optional: sprinkle the top with oats, wheat bran or pumpkin seeds.

Bake for 20 minutes in pre-heated oven. Muffins are cooked when a toothpick inserted into the middle of the muffin comes out clean. Cook on wire rack and enjoy!

Ratatouille

Antigüedades Bar (Sevilla, Spain)

The obsession with Ratatouille started on our recent trip to Seville, Spain. We decided to meander the alleys and streets for the 30 minute walk from our flat to the city center . Bar Antigüedades caught my eye as an adorable little café from the exterior (of course…look at the photos!) and reading the menu board when we passed I made the mental note to come back for lunch. We did, and loved the Ratatouille SOOO much that we returned for dinner and had the exact same meal! It was so warm, hearty, tasty, flavorful and just… well… cozy! We ordered a bowl and cleaned and had I not ordered an actual meal I would have ordered another Ratatouille! As it was I had to refrain from licking the bowl since 1. it’s rude to do in public 2. we were sitting outside and I couldn’t sneak it 3. I’d be pegged as a ridiculous American for SURE! Three sadly legitimate reasons why I had to refrain from one last taste of the very miniscule remains of wonderful veggies. I vowed to make it once we got home.

Sevilla...where it all began
Sevilla…where it all began

Of course, in order to make the dish I first had to find 15 recipes, make an entire Pintrest board devoted to my found ratatouille recipes (yes I’m that ridiculous organized..or maybe obsessive?). Of course I had to print out each recipe, lay them side by side, and pour over each minute difference and detail deciding which was the perfect recipe. Which was possibly closest to recreating the most incredibly wonderful cozy meal. My perfection was finally challenged by my need to make a grocery shopping trip and get ON with the actual MAKING of the dish so I picked one to use as a guideline because, and yes I’m a total girl, the picture looked the yummiest.  The recipe that I landed on was posted on the blog A Lady in France.

A brief history of Ratatoulie. It is usually served as a side dish but can also be a main, which is how we eat it with some crusty potato bread. For protein, I usually poach an egg or sprinkle some cheese on the top.

The hardest part of this meal is letting it cook those last 30 minutes without devouring it from the pan! The house starts to smell of wonderful cooked vegetables and herbs.

Ratatouille Prep
Ratatouille Prep

Tips:

  • The Pan: be sure to use a large deep pan so that the heat and evenly distribute and cook
  • Saute each round of veggies VERY well! Once you add the tomato it’s really just melding of the flavors and not really “cooking”
  • Don’t go light on the canned tomatoes! This is what makes or breaks the consistency of the Ratatouille. If it seems like the stew is a bit dry add another can of tomates or a 25 oz jar of basil marinera sauce. You’ll realize the consistency within 5-8 minutes and you really need to add within the 5-8 minutes so the consistency and the flavors are able to meld correctly.
  • Cook all the veggies without a lid until you add the tomatoes. The veggies really need to breathe and have the heat to saute up.
  • Liquid: keep stirring to move the liquid around and assure that it’s not too liquidy. If it feels like it’s becoming more soupy than thicker stewey, turn the heat up  and if it’s sticking to the pan turn the head down a bit.
Ratatouille
Ratatouille

Cucina de Kate Ratatouille

½ large onion
2 tsp (heaping) minced garlic
drizzle of olive oil (to cook the onions/garlic)
1 red pepper, chopped
1 good sized eggplant, cut up in to chunks
4 small zucchini, cut up into chunks
1 ½ tbsp. herbs de province
few fresh basil leaf’s
1 ½ c. diced canned tomatoes (I sometimes add a 25oz jar of 365 tomato basil marinera sauce)

Instructions

  1. Heat oil in your large pan while you chop the onions and garlic. Cook until translucent.
  2. Chop and add peppers. When they start to look a little cooked, chop and add the eggplant in medium chunks. I like them a bit larger so they retain some form as opposed to getting a bit more mushy when they’re smaller.
  3. Keep stirring the veggies in the pan until they eggplant starts to look a little cooked, then chop up and add the zucchini. Again, I liked keeping my chunks a bit larger to add to the stew-type texture and avoid a must consistency.
  4. Once the zucchini starts to look like it’s a little cooked, add the herbs and chopped basil and assure it’s all mixed together well. Then add the tomatoes. At this point you’ll have to keep an eye and stir frequently but you can multi-task and just remember to stir every few minutes.
  5. Keep stirring and cook for another 30 minutes (or so) until all the vegies are tender…and of course taste along the way!

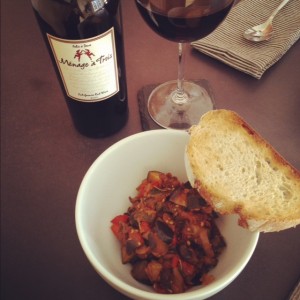
Serve with a protein (egg or meat) and some rustic bread (or omit if you’re gluten-free)


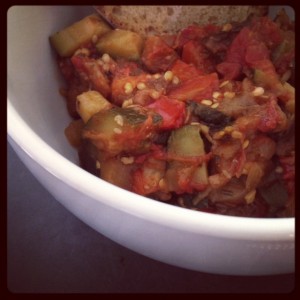
Ratatouille for Dinner
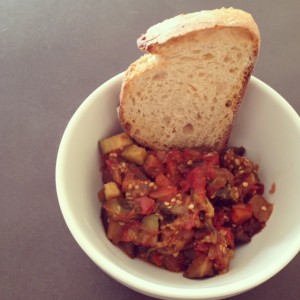
Ratatouille with Rustic Bread


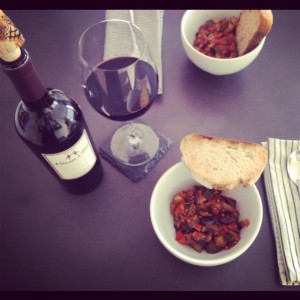
Dinner Table of Ratatouille with Rust Bread and Menage a Trios Red
Ratatouille with Rust Bread for Dinner
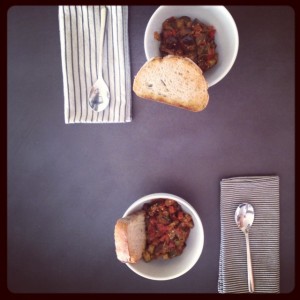
Ratatouille with Rust Bread for


Provençal ratatouille