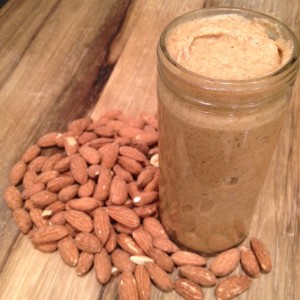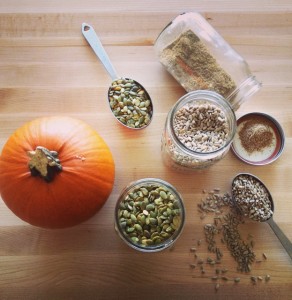
Pumpkin Seed Butter (Gluten-Free, Dairy Free)

FullSizeRenderLast summer I got hooked on pumpkin seed butter. Before that, I didn’t even know such a thing existed. I felt pretty nut-butter gourmet knowing that there was macadamia butter as well as cashew butter. I knew that you could grind your own; I’ve seen and even used the machines in my local Whole Foods to make fresh almond butter. But those machines were big, and scary, not to mention loud and quite menacing to look at. The though had NEVER dawned on me that it was something that could be made at home. Until a combination of a strong desire for a food processor, DIY itch and budgeting came together. Random components, but quite a story!

This recipe was adapted from the the kitchn’s Pumpkin Seed Butter recipe. I LOVE that they say it was inspired by a nut butter that they tasted at the Portland Farmers Market because I’m pretty sure it’s the same nut butter that hooked me on Pumpkin Seed Butter. Nut-Tritious Foods is a wonderful little company based out of  Vancouver, Washington.  They do a great job of educating customers why cold-pressed nut butters are better for you. I pulled the info below from their about page because it’s REALLY important to know!

“… we COLD-PROCESS and don’t use heat to get our nut butter into the tub. Heat will oxidize the healthy fats (poly- & mono-unsaturated) and make them more like a saturated fat! Most all jar nut butters have been heat processed – you can tell by the ‘nutcrete’ in the bottom of the glass jar.” An additional note, the heat processing method allows the nut butter to sit on the shelf in a jar until it’s purchased. Personally, I’d much rather have the fresh stuff that I know is perishable and know that I’m getting the most nutrition out of my consumption.

Check out my Almond butter recipe here.

Pumpkin Seed Butter

2 cup raw pumpkin seeds, without shells
1/2 cup ground sunflower seeds
1/4 cup flax meal*
1/4 cup  grapeseed oil
1 spoon of honey (to taste)
pinch grey salt

*Flax Meal: You can easily make flax meal in a coffee

Combine  pumpkin seeds, sunflower seeds , and flaxseed meal in your food processor. Blend until the ingredients are well chopped and blended. You’ll need to stop and scrape the sides down so all the ingredients get blended together.

Add the honey and blend until the nut butter starts to form. This can take up to ten full minutes so have patience! Once you see the play dough texture, where the seed butter starts to form a ball and move around the bowl you’re getting close! Add the oil and continue to blend 5-10 minutes more until the butter is consistently smooth. Your food processor might get warm but don’t worry too much, you can always let it cool a little bit and then blend away. I used the 1/4 cup of oil and it was just fine, but you may want to add more depending on how you like your nut butter.

Place in an airtight container (tupperware or glass jar) and store in refrigerator up to 2 weeks.

There are plenty of additions to this recipe, you can mix up the ratios. You can choose olive oil or coconut oil. You might want to add salt, or use salted pumpkin seeds. You can also pre-heat the oven to about 350 and roast the seeds on a parchment paper or foil wrapped cookie sheet for 10-15 minutes. If you oven roast them, stir the seeds once or twice during cooking and let them cool before adding to the food processor. There is also a delicious looking adaption for Maple Pumpkin Seed Butter and Chocolate Pumpkin butter.

Kombucha, Som, Pok Pok and a new Kitchen

Dear friends! As you can tell, I’ve been on a bit of a writing hiatus the past few… months! Works been busy, personal life has been busy, there’s been travel and apparently it’s important to sleep every now and then?! What a cramp on a busy gals schedule hey? But i’ve dearly miss and you and even though I haven’t been posting, I have still been cooking up a storm and gathering new recipes to share! We had the weekly staples- batches of kombucha,and almond butter.We traveled to visit our family and threw in a few beer soaked grilled bratwurst, paleo chocolate chip banana bread and Pecan Pies with fresh homemade crust (of course!). I can’t visit without baking a few pies! One of my favorite parts about visiting family is playing the role of both ‘imported resident chef’ and ‘kitchen instructor’. I have So much fun teaching the niece and nephews to cook! We had a ball in the kitchen and they do great!

photoBut, as I was saying. This entire summer has been booked SOLID with both work and play. And just when I thought things would calm down in the fall, our landlord decided to sell the condo after four years of renting so we had to find a new place. Luckily, we found a place that we just LOVE and we move this weekend. THIS WEEKEND! A matter of hours away! I’m so excited I can barely handle it! I can’t wait to unpack and organize the new kitchen! With the fast pace of the last 3 months, cooking as been more of a chore than it usually is. I’ve really leaned on simple recipes, the local pho restaurant, and cereal for dinner. But with a new kitchen comes new recipes and excitement to cook! Which brings me to my fall and winter sports.

I HATE to, and won’t, drive in snow and/or ice… so my fall/winter sports consist of cooking, baking, menu planning from the ridiculous amount of time I spend on Pinterest (A Byte of Life boards here), testing out my wine cellar, catching up on all the shows that everyones been raving about and listening to the rain falling outside. Oh, and pumpkins! I LOVE PUMPKIN!  I’ll eat slow roasted pumpkin right off the baking sheet! And Gingerbread. I LOVE gingerbread! But back to the point- my winter sports are gingerbread and/or pumpkin flavored, with a side of wine, and a good show in the background.

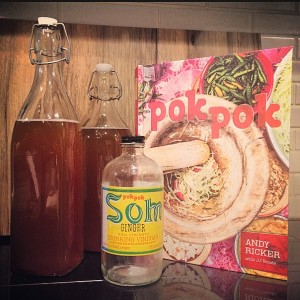
This year, I have a new hobby to add to the list. Pok Pok. If you’ve NEVER been to Pok Pok, you HAVE to go to either Portland or New York and experience their wings and one of their drinks with their drinking vinegar called som. Som is a drinking vinegar that has been an age old practice in many cultures around the world for it’s health benefits. Pok Pok has been serving their drinking vinegars since 2005, both as a cocktail mixer and diluted with soda as a soft drink. They use organic cane sugar for sweetener and let me tell you, while I’m not a soft drink person in the slightest, this stuff is downright addicting! You can purchase the Pok Pok Som online form both Pok Pok and ChefShop.com. A girlfriend and I just took an amazing cooking class at ChefShop.com so you can expect future blog post about them too!

Well, their chicken wings are known nation wide, and their cocktails are red-eye flight worthy. This, coming from a confirmed wine and anti-chicken wing girl. Let’s just keep this short and say that Pok Pok changed my life, as evidenced by the fact that after the first bite I waived down the waiter and asked if I could PLEASE purchase their cookbook but only if the amazing chicken wings were included. He handed me a copy to review. Each page coated in plastic which was an amazing idea because I was pouring over it as I was elbow deep in eating amazing chicken wings,The Pok Pok cookbook holds a special spot on my shelf , I personally confirmed that the chicken wing recipe is included, and it has been added to the list of fall and winter hobbies.

Tune in for more amazing thai inspired recipes from the Pok Pok cookbook, updates from this years International Food Bloggers conference (last years post) and to see how the Som Kombucha turns out! I had a bit of Som leftover and had a batch of kombucha ready tonight so I figured I’d do a little variation on my blueberry ginger kombucha and try some ginger som kombucha. I’ll let you know how it goes!

Banana Bread {Paleo, Gluten-Free, Dairy-Free, Sugar-Free}

photo 2


It feels like fall in the city. The weather had been grey and gloomy all week, which is quite a change from last weeks sunburn weather! Grey clouds always get me in a comfy cozy mood, and inspire me to drink tea and curl up with a good book and a blanket. But, what’s tea without a little tea treat, am  right?

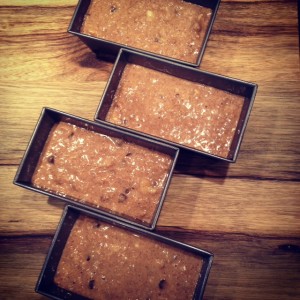
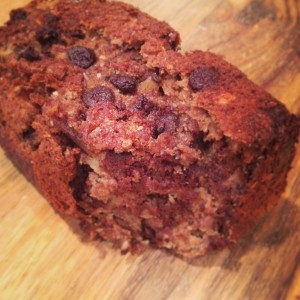
This amazing banana bread entered into my heart a few weeks ago when I had a day off and went to go visit my sister at work. She’s been on this “Paleo Kick” that I usually roll my eyes at, but I have to say this recipe immediate became a kitchen staple and has now replaced my  tried and true Banana Bread recipe that is YEARS old! It’s THAT good kids! 

Gluten-free cooking is nothing new to me. I LOVE baking with Bob’s Red Mill All-Purpose Gluten-Free Baking Flour and have made quite a few goodies with it. Most recently I made a Strawberry Basil BreadGingerbread cookiesChocolate Chip Cookies, amazing Vanilla Cupcakes, and even tried my hand at Vegan Gluten-Free Donuts! To be clear, I am NOT a big believer in following every food fad that comes along, and most definitely did NOT jump on the Paleo band wagon when it came in vogue, nor am I on that bandwagon now. This bread is quite simply one of the most delicious healthy baked goods I’ve ever had. It’s mainly bananas and eggs, a little homemade almond butter, gluten-free flour, and some apple sauce to hold it all together. That’s it! No added sugars. No two stick of butter and 5 cups of refined white flour. Just simple, regular ingredients you can pronounce and happily eat.

IMG_7780 

There are many variations you can try with this recipe and I list a few at the end of this recipe. Next time I might throw in some blueberries, or try coconut flour to make a bit more of a dessert style bread. What variations would you, or are you, going to try?

Paleo Banana Bread
Adapted from Civilized Caveman Cooking Creations Recipe 
Prep Time: 10 mins | Cook time: 30-45 minutes

Ingredients
2 1/2 cups  yellow bananas, mashed (approx. 4 bananas) 
4 eggs
1/2 cup homemade almond butter
4 tablespoons Apple sauce (original recipe called for melted grass-fed butter or coconut oil)
1/2 cup gluten-free flour
2 tsp cinnamon (original recipe called for 1 tbsp but that’s a little heavy for a summer bread)
1 teaspoon baking soda
1 teaspoon baking powder (gluten-free or homemade)
1 teaspoon vanilla
pinch of sea salt

Instructions
1. Pre-heat your oven to 350 degrees fahrenheit
2. Combine your bananas, eggs, and nut butter, and apple sauce and mix well
3. Add in in the flour, cinnamon, baking soda, baking powder, vanilla, and sea salt and mix well
4. Grease a 9×5 glass (see notes) loaf pan with a fat of your choice (I use Rice Bran oil)
5. Pour in your batter and spread it evenly throughout
6. Place in your preheated oven and bake for 55-60 minutes or until a toothpick inserted into the center comes out clean (If you use a metal pan it will probably bake in 35-40 minutes so start checking at 35 to ensure the middle stays moist)
7. Remove from oven and flip your bread out onto a cooling rack
8. Slice and serve

Variations
1. Alternate Nut Butter: You can use any almond butter you desire: coconut, sunflower seed, macadamia nut, etc
2. Alternate Flour: My sister uses coconut flour, but I bet that almond flour or macadamia nut meal could be delicious
3. Flavors: Cranberry Orange – Only use 3 tablespoons of butter. Add zest of one whole orange diced, juice of one whole orange, and 1 cup dried cranberries or fresh if you want
4. Flavors: Chocolate Blueberry – Add 1 cup of fresh blueberries and 1/2 cup of cocoa powder
5. Flavors: Pumpkin Pecan – Reduce the almond butter to 1/4 cup and add 1/2 cup of pumpkin puree and 1 cup of roughly chopped pecan pieces

If you want to make these into muffins, use the same recipe and for mini muffins bake approximately 25 mins and normal size muffins 30-35 minutes.


Homemade Almond Butter

photoLet me start this story by giving a little background on the hardware featured in this particular post. I’d been eying food processors like a kid looks at the passing candy store window, or cat looks at a fish bowl. I WANTED a food processor for reasons I can’t quite explain. The strong urge to rice cauliflower isn’t something that normal people think of, but I’ve also never claimed nor do I want to be “normal”…not if it means giving up dreams like rice-ing cauliflower. But, this particular post is about nut butter so I shall continue. The story is, I got hooked on the stuff then went into budget mode and got the DIY itch at the same time and scoured the internet for almond butter recipes.
We used to get a tub of fresh cold-pressed almond butter, and one of pumpkin seed butter each week. But, two tubs of $8/each nut butter per week got me thinking, “I HAVE to be able to same something close at home that could do the trick!” So, off to Costco I ventured to live out my food processor dreams. After extensive food processor research (yep, that’s a thing!) I decided to purchase the Cuisinart Prep 11 Plus™ 11-Cup Food Processor With Blade Storage (link takes you to Amazon.com- but I purchased at my local Costco for $140). I liked this one because not only was it cheaper than the ones I found on Amazon, but it came with the extra blades AND a nifty little blade holder, AND still had the Cuisinart warranty. Pretty good life choice if you ask me!

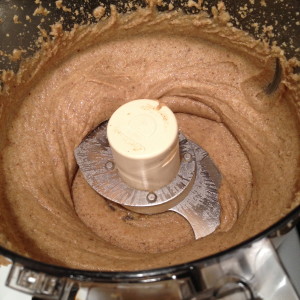
I won’t lie, there was a little intimidation when I started researching some nut and seed butter recipes. They warned that it would take up to 20 minutes to make nut butter. Who’s got the time! BUT, my amazing, lovely, wonderful food processor did the trick much quicker and is sturdy enough that I don’t have to stand and hold it. I could turn it on and do other chores in the kitchen in-between checking on the butter progress. I’d love to say that the first batch was an incredible success, that it was as if I had been making nut and seed butter all my life and that I was a natural…what, with my infinite patience and such. But alas, I was not an instant success. I did not make fantastic, amazing nut and seed butter the first time I tried. The first almond butter tasted weird because I used flax oil instead of flax meal. The flax oil had a very…”earthy” taste which tasted healthy but wasn’t amazingly tasty. But, with a very patient taste tester and a few batches, the recipe was pretty dialed in!

IMG_5705Homemade Raw Almond Butter
Yield: one pint
Time: 10-15 minutes 

Ingredients
4 cups almonds
1/2 cup  sunflower seeds
1/4 cup flax-seed meal
1/4 cup  grapeseed oil

Directions
Combine  almonds and flaxseed meal in your food processor. You’ll need to stop and scrape the sides down so all the ingredients get blended together. Keep blending until you see the nut butter starts to form into a play dough texture . This can take up to ten full minutes so have patience! Once you see the play dough texture, where the seed butter starts to form a ball and move around the bowl you’re getting close! Add the oil and sunflower seeds and continue to blend about 5 minutes more until the nut butter is consistently smooth. Your food processor might get warm but don’t worry too much, you can always let it cool a little bit and then blend away. I used the 1/4 cup and it was just fine, but you may want to add more depending on how you like your nut butter.

Place in an airtight container (Tupperware or glass jar) and store in refrigerator up to 2 weeks.

There are plenty of additions to this recipe, you can mix up the ratios. You can try using coconut oil. You might want to add salt, or use salted almonds. You can also pre-heat the oven to about 350 and roast the almonds on a parchment paper or foil wrapped cookie sheet for 10-15 minutes. If you oven roast them, stir the almonds once or twice during cooking and let them cool before adding to the food processor. You can also try adding honey if you like it a little sweeter, or even add cinnamon.

What is your favorite almond butter variation?