Best Pecan Pie…EVER

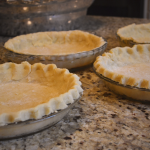
DSC_0762I’m not sure there’s much I need to say past the title. Once you make this pie, the taste speaks for itself! I started making this pie a few years back when I traveled with the mister and wanted to impress his family during Thanksgiving. Thankfully, this little wonder earned a spot in both their hearts and their stomachs and I was welcomed with open arms and second helpings into the family. If you need a “recipe to impress”, I suggest giving this little ditty a try but the clincher is to make your own homemade pie crust as well! You can find my homemade pie crust recipe HERE. If possible, give it a try at home before you’re under the pressure to cook and impress!

Pecan Pie

Makes filling for one pie
Prep:15 mins |Cooking: 60-70 mins

  • 1 cup Karo® Light
  • 3 eggs
  • 1 cup sugar
  • 2 tablespoons butter, melted
  • 1 teaspoon Vanilla Extract
  • 1-1/2 cups (6 ounces) pecans
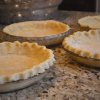
  • 1 (9-inch) pie crust (homemade recipe HERE)

Preheat oven to 350°F.
Mix corn syrup, eggs, sugar, butter and vanilla using a spoon. Stir in pecans. Pour filling into pie crust.
Bake on center rack of oven for 60 to 70 minutes (see tips for doneness, below). Cool for 2 hours on wire rack before serving.

RECIPE TIPS

Pie is done when center reaches 200°F. Tap center surface of pie lightly , if it’s done the center should spring back when pressed.

If pie crust is over browning, cover edges with foil.


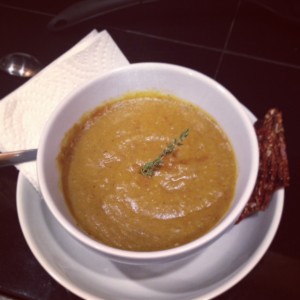
Potato, Carrot Leek Soup (Dairy Free, Soy Free, Gluten-Free, Vegan)

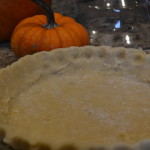
photo 1It has officially gotten cold in Seattle. Not “girl” cold where it’s 50 degrees and my tosies get a little chilly. I’m talking Midwest, you can see your breath, chill hits to your bones cold. We’ve had low 30’s for about a week now and even my poor parsley I forgot on the patio was frozen to the bone! With cold like this, a big bowl of warm homemade soup is just the ticket to help you thaw out! After being used to cooking an ENTIRE Thanksgiving feast, four pies seemed like a walk in the park! I opted for the my go-to holiday hits and baked four fresh crusts from scratch  for pumpkin pies and two pecan pies. Of course, I home-roasted the pumpkins using my recipe HERE.
we would up with all of the veggies that I had drug up my parents house with the best intentions of cooking up for my family. What do you do with bunches of leeks and a massive yellow onion?

Well, you buy potatoes and carrots and make soup of course! I wrote this recipe from looking at a few different ones, and deciding that I didn’t want dairy OR soy in my soup…and using this a little as a kitchen soup recipe to clean out the fridge. The recipe  is sweet because it’s relatively low maintenance and you can make it in your VitaMix or if you have a food processor. Super simple, SUPER delicious, and super healthy! No diary, no soy, gluten-free, and  can be made vegan if you substitute out the chicken bullion.


photo 3Potato, Carrot Leek Soup (Dairy Free, Soy Free, Gluten-Free, Vegan)
prep time: 10 min | cook time: 1 hr
5 leeks
2 ½ tsp minced garlic (or 5 fresh cloves)
5 stalks celery + the center lighter part with the leaves
dried Parsley (or fresh!)
5  medium russet potatoes
2-3 large carrots
½ large yellow onion
2 tbsp chicken bullion ( I swear by Better Than Bouillon Organic Chicken Base, Reduced Sodium)
8 cups water
1 tsp ground rosemary
1 tsp fresh thyme
2 bay leaves
fresh sea salt and pepper

Pre-heat oven to 400.

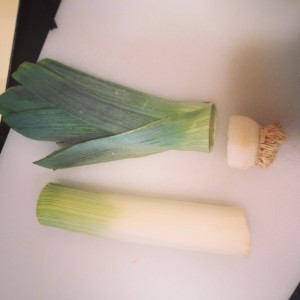
photo 2photo 1 copyWash, peel and chop all vegetables. To clean the leeks, cut just above the roots and just below where the dark green leaves start to branch off. Wash the body of the leek and peel the outside layer off. Cut into disks. For the dark leaves, cut the tips off and be sure you have washed them well. Then slice and set aside. For the potatoes, I usually cut the potato in half, then half again and cut into chunks.

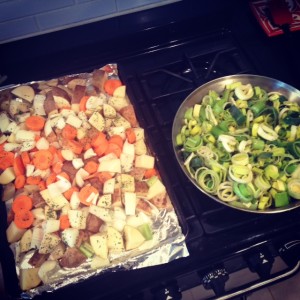
Misto spray a cookie sheet then place carrots, potatoes and onion on cookie sheet. Dust with fresh cracked pepper and dried parsley (unless you have the fresh stuff- in that case add when you puree the soup).  Cook 40 minutes or until potatoes are soft in the center. Turn veggies once or twice so that all surfaces get browned.

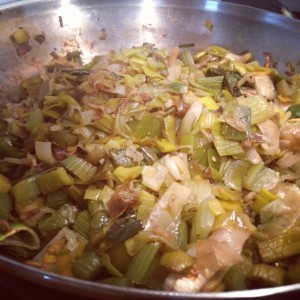
While those veggies are in the oven, get out a large pan and sauté the garlic. Add the leeks, separating the layers of the disks, and the celery. Then add a little fresh cracked pepper and some salt. Sauté until all the veggies are cooked. As I turn the leeks and celery in the pan, I’ll do a light olive oil Misto spray just so everything gets a little charred in the pan and I’ll also coat with pepper. Also, any of the leek that is still held together in the little disk, separate the different layers as you cook.  I never measure pepper and I like the flavor so I usually just cook by sight and will add until I feel like it’s seasoned.

To make the broth, bring the water in a 10-cup stockpot then stir in the chicken bullion. Add the rosemary, thyme and bay leaves. Bring to a boil and simmer for 10-15 minutes.

Once all veggies are cooked and the broth has simmered, remove the bay leaf and get your vita mix ready. Place 1/3 of each of the ingredients in the blender and blend on medium until thoroughly puréed.  Once puréed, place back in the stockpot and repeat until all of the ingredients are puréed. Simmer soup for 10-15 minutes and serve.

Can be frozen up to 4 months in a freezer Ziplocs bag or Tupperware. .

Gingerbread Cookies

photoLast year I posted my recipe for gluten-free gingerbread cookies. This year, we get the good old-fashioned gluten goodness version! Any of you that had a flash back to Will and Grace, and remembered Grace’s “Good Old Fashioned” parties… you just earned an extra gingerbread cookie for being amazing! I LOVE Christmas time. I love the cheer, bundling up with mittens and scarves, waterproofing my boots and pulling out the long jackets, that first red Starbucks Holiday cup, the smell of Christmas trees, and the ever-present smell of amazing baked goods. During the holidays, we can endure much stress. Between hosting, cleaning, shopping, decorating, hosting again, attending, participating, family, guests, New Year New You, drinking, and the ever-present baked treats…we seem to endure quite a bit of bodily and mental stress during the 8 weeks between pre-Thanksgiving to post New Years Resolutions. We need extra care, rest, and vitamins during this time.

Lucky for you, I know exactly the remedy for holiday stress. My dad was always so good about taking is vitamins. My mother would call from the living room, “And WHAT are YOU getting into!”.  To which my father , who, inevitably at that point would have one hand elbow deep in the cookie jar, would reply, “Oh, just taking my vitamins darling” then he’d wink at me and take a bite of the first of TWO successfully pilfered cookies. To this day, I can’t look at a cookie without first thinking of the word, “VITAMIN!”. So, during these potentially stressful times, we need to be sure to take our vitamins and my vitamin of choice are gingerbread cookies. Each year, I do a holiday party where I bake a ridiculous amount of gingerbread, fashion them into little men, women, dog bones, Christmas trees and a multitude of other shapes and invite 20 of my closest friends over to decorate them. Little, do they know… and some of them read this blog so my secret is out now… but I somehow always thankfully end up with about 4 plates of extra cookies! Some people might pull the “oh I wish it wasn’t in the house” card and, on other sweets I might say the same. But NOT for gingerbread cookies.

Cookies These are my vitamins! I literally eat a gingerbread cookie most days annually between December-February. THis is one way to beat the holiday stress, make sure to take your vitamins each day! If gingerbread is also your “vitamin” of choice, I’ll give you a life tip, they’re equally as good with coffee in the morning as they are with a glass of good red wine in the evening! Second (shameless plug ahead) is to read my article that was originally posted on LevoLeague.com and picked up by the Huffington Post; Holiday Stress 7 Ways to Ditch the Worry.  Now, my fine feathered friends, you are ready for the holiday season! Stock up on the red wine and bubbly, practice your 7 holiday stress tips and eat your “vitamins” daily!!


Gingerbread Cookies

Ingredients
2 1/2 cups  flour
1 1/2 tsp double-acting baking powder
1/2 tsp baking soda
1 tsp ginger
1 tsp ground cloves
1/2 tsp nutmeg
1/2 tsp salt

1/2 cup sugar
1/2 cup shortening
1/2 cup light molasses
1 egg

Ornamental Cookie Frosting (also listed in this post below)

In a small bowl, stir together the flour, baking powder, baking soda, ginger, cloves, nutmeg, and salt and set aside.
In a medium bowl, place the remaining ingredients, and stir to combine.
Add the dry ingredients to the wet ingredients and stir well to combine.
Cover the bowl, place it in the refrigerator, and chill the dough for 1 hour or more.
Lightly oil (or mist with olive oil in a Misto Sprayer) two non-stick cookie sheets and set aside.

Sprinkle a little flour over a work surface where you can roll out the cookies.
Divide the chilled dough into quarters, work with only one-quarter of the dough at a time, and keep the remaining dough covered and chilled until needed.
Working in batches, roll out the quarter of dough to 1/4-inch thickness, and cut into desired shapes with cookie cutters.

Carefully transfer the cut cookies to the prepared cookie sheet and bake at 350 degrees.

For softer cookies: bake 6 minutes (the cookies will feel slightly soft to the touch) and allow them to cool on the baking sheet 2-3 minutes before transferring them to the cooling rack.

For crispier cookies: bake 9-10 minutes and transfer to cooling rack right away. We prefer the crispy cookies!

Repeat the rolling and cutting-out procedure for the remaining cookie dough.

Store the cookies in an airtight container for up to a week.

Ornamental Cookie Frosting
from: Good Housekeeping Cookbook

1 1/4 c confectioners sugar (or powdered sugar)
1/8 tsp cream of tartar
1 egg white

Just before using, pull out your kitchen aid standing mixer or hand mixer and a bowl. Mix the sugar and cream of tartar together. Add the egg white and mix at high-speed until it’s so stiff that a knife drawn through leaves a clean path.

Divide into small bowls and add your food coloring. Use directly from the bowls or you can place into pastry bags or grab a freezer style ziplock bag and cut one side of the bag.

Classic Pie Crust

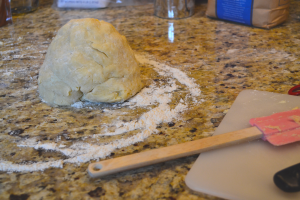
flare-iphoto-export-405809485The holidays are my favorite time of the year! Families come together, everyone is (mostly) joyful, houses and trees are decorated, ovens are pre-heated and baking can be considered a seasonal sport. Well, maybe not to some, but in our home baking is my winter sport. One of the most versatile and impressive things that you can learn to make is a pie crust. Whether it’s for a main dish or a desert, a homemade pie crust is SURE to impress. The original recipe calls for a food processor, but I don’t own a food processor so think that making this recipe by hand mixing counts as “adapting” the recipe. There is something so satisfying about hand making a pie crust and then watching it bake and hearing the chorus of “mmmmm’s” with that first bite of fresh-baked pie. Even if you only do it once and check it of your kitchen bucket list, I would recommend making this pie crust by hand at least once.

This recipe is good for two bottom crusts, or one pie that require a lattice or curst on top. It’s a very versatile crust as well since it’s not too sweet and holds up to liquid when baking. You can use this crust in my Home roasted Pumpkin or Pecan Pie recipes.  Or, you could easily use it in apple or other fruit pies and tarts. Check out the Real Simple 26 Holiday Pie and Tart Recipes for some inspiration. You can also use this as the base for a homemade chicken pot pie, simple Quiche to use Thanksgiving  leftovers or prepare a simple christmas brunch.

flare-iphoto-export-405809571


Basic Pie Dough
Adapted from Everyday Food, November 2006
Yield Makes two 9-inch crusts

Ingredients

  • 2 1/2 cups all-purpose flour, (spooned and leveled)
  • 1 teaspoon salt
  • 1 teaspoon sugar
  • 16 tablespoons cold (2 sticks) unsalted butter, cut into pieces
  • 1/4 to 1/2 cup ice water

Directions without food processor

  1. Combine flour, salt, and sugar in a medium-sized bowl and whisk to combine ingredients. Grab two knives or a pastry cutter and cut the butter until the mixture resembles a coarse meal with just a few small pieces of the butter left over.
  2. Sprinkle with 1/4 cup ice water. Mix until dough is crumbly but holds together when squeezed with fingers (if necessary, add up to 1/4 cup more water, 1 tablespoon at a time). To help ensure a flaky crust, do not over mix!
  3. Transfer half of dough (still crumbly) onto a piece of plastic wrap. Form dough into a disk 3/4 inch thick; wrap tightly in plastic. Refrigerate until firm, at least 1 hour (and up to 3 days). Repeat with remaining dough. (Disks can be frozen, tightly wrapped, up to 3 months. Thaw before using.) Makes 2 disks.

Directions with food processor

  1. Combine flour, salt, and sugar; pulse to combine. Add butter; pulse until mixture resembles a coarse meal with just a few small pieces of the butter left over.
  2. Sprinkle with 1/4 cup ice water. Pulse until dough is crumbly but holds together when squeezed with fingers (if necessary, add up to 1/4 cup more water, 1 tablespoon at a time). To help ensure a flaky crust, do not over process.
  3. Transfer half of dough (still crumbly) onto a piece of plastic wrap. Form dough into a disk 3/4 inch thick; wrap tightly in plastic. Refrigerate until firm, at least 1 hour (and up to 3 days). Repeat with remaining dough. (Disks can be frozen, tightly wrapped, up to 3 months. Thaw before using.) Makes 2 disks. 


Garlic Ginger Dipping Sauce

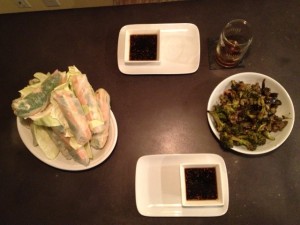
Dinner is served
Dinner is served

Garlic Ginger Dipping Sauce

Yield enough for about 6-8 spring rolls
3 cloves fresh garlic, minced (or 1 1/2 tsp jarred minced garlic)
1- 1 1/2 tbsp fresh ginger (or 1 1/2 tsp dried ginger)
1 tbsp toasted sesame oil
1/3 low sodium soy sauce
1/4  c.rice vinegar (or white wine vinegar works as well)
1/4 c. tsp crushed red pepper flakes ( unless you like it SPICY, stick to this ratio or it might overpower the rolls)
1 tbsp sugar

Combine all ingredients in small pot and cook over low heat until mixture bubbles. Can be stored in airtight container and refrigerated for up to three days after making.

Pairs well with Chicken Spring Rolls or you can marinate chicken in it and bake in the oven or grill!


Homemade Kombucha: A Step-by-Step Guide

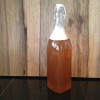
IMG_3770When I first thought about making my own Kombucha at home I was a little wary. What if I do it wrong it turns out horrible and make myself sick! For those of you that are like me, all you really know about Kombucha is that is some healthy drink that you see littering the aisles of health stores and somehow helps you be healthy and has something to do with mushrooms.

The Kombucha starter, often called a “mother” or a scoby, stands for symbiotic colony of bacteria & yeast. The reference to mushrooms comes with the disc like form that the scoby grows into, which can sometimes look like a Portobello mushroom or to be more specific, a very slimy slightly yeasty smelling version of a mushroom. So, there you have it, there are no mushrooms involved in the making of Kombucha! There are a bunch of SCOBYs out there, Amazon has a bunch of options and the only recommendation I’d make is to ensure that you get one that is hydrated – the dehydrated ones are a pain!

This drink is made from a process called fermentation, which simply means that bacteria or yeast is used to chemically break down a substance. While the sounds a little gross, I’ll admit, it’s quite good for you! It contains healthy bacteria called probiotics which support intestinal health and help with digestion and elimination as well as encouraging detoxification. For an extended list of possible health benefits, please visit Kombucha Kamp.

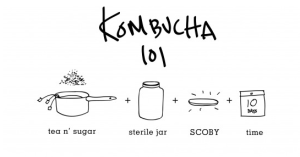
The process of making Kombucha is actually much easier that I thought it would be! I LOVE this picture below from a the Eat Life Whole post on Kombucha.

Screen Shot 2013-09-25 at 2.41.12 PM

See it’s simple! First, you’ll need to purchase a scoby from a reputable source. Unless you have a friend that has a baby scoby to share, you can purchase the same on that I did from Yemoos or Cultures for Health.  Next, you brew some tea with sugar, which feeds the bacteria, let it cool COMPLETELY to room temperature, then pour it into the jar with the scoby and let it hang out for 5-10 days and viola, you have Kombucha! I have to lead this post with a shout out to one of my dearest friends who’s pioneering into the world of Kombucha (and responsiveness to my contestant Kombucha support line texts of “DOES THIS LOOK NORMAL!?”) really helped me in making my first few batches. If you’re lucky enough to have someone that’s also making Kombucha you can trade stories and pictures of your ever growing SCOBYS (yes, you’ll want to take pictures as gross as that might seem) but if you DON’T have someone making it at the same time as you, please consider this your Kombucha support forum! Post pictures of your scoby, ask questions, let us know your favorite flavors that you’re brewing, and anything else Kombucha that comes to mind.

One of the most important things you have to remember when making Kombucha, and most other fermentations, is that metal utensils/containers and plastic containers are not a good idea. The metal and plastic can actually harm the fermentation so it’s best to brew using plastic utensils and a glass jar, which are easily sanitized.

If possible, try to prepare your first batch of Kombucha the day your scoby arrives. You can store the scoby in a cool cabinet until you’re ready to brew your first batch. I have to tell you, I put mine in the fridge because I thought it needed to be kept cold, and THEN decided to read the direction and freaked out thinking I had already killed my little scoby. It was in there over night and I contacted the team at Yemoos right away who quickly settled my worry and said that it would likely be just fine having spent the night in the fridge. Phew, guess I should read the directions FIRST next time hey? The nice thing about this process is that the scoby is pretty resilient so you don’t have to worry too much about “messing it up”.

As far as drinking this good stuff, most people are fine starting off with a full glass but for a few people it can be a little shock for the body since it’s packed with probiotics that encourage, well, elimination and promote intestinal balance. If you find that you DO have a little tummy rumbling response to the Kombucha, back off to a half glass and work up your consumption level daily.

So, are you ready to make some Kombucha!? I got my ball gallon glass jar and sling top bottle at Cost Plus. The quart glass jar came with the yemoos Sourdough kit I ordered at the same time as the Kombucha SCOBY starter, but you can get a great gallon jar HERE on Amazon.com them or find jars of various sizes at Cost Plus.

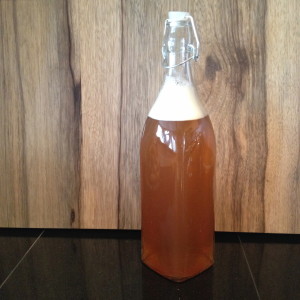
finished kombuchaHomemade Kombucha: A Step-by-Step Guide

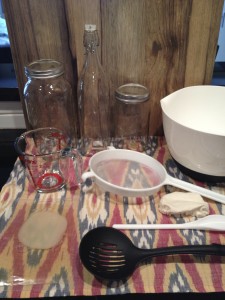
Tools:
1 gallon glass jar
Plastic spoon or spatula
Pyrex glass measuring cup (for measuring the water)
1 Plastic bowl for steeping and cooling the tea (one with a pour spout is easiest)
3 Sling top glass bottle to store finished Kombucha
Funnel that fits in the top your sling top bottle
(Optional) Strainer, used to strain out the little strands of Kombucha if  bother you
Cover for the Kombucha- cloth or paper towel secured with a rubber band works

Ingredients:
1 Scoby (called the “Mother) & Starter Tea liquid it arrived in
8 tea bags or 3 tbsp loose leaf tea  in a tea bag
14 cups filtered water
1 cup organic white sugar

  1. Get your large bowl and get your tea bags out, tying the strings together. Add in one cup of organic sugar.
  2. Boil your filtered water then add it to the bowl with the tea and sugar, stirring with your plastic spoon while you pour so the sugar dissolves.
  3. Let the tea steep and cool COMPLETELY to room temperature, if you pour it in with the scoby when it’s too hot it can harm the scoby cultures.
  4. While the tea is cooling, wash your hands and carefully open the scoby packet, which should also contain the starter tea. Gently pour the tea and the scoby into your sanitized jar that you will be brewing your kombucha in.
  5. Once the tea and sugar mixture is cooled, tilt your brewing jar to the side and carefully pour the cooled tea mixture into the jar trying to get the tea under the scoby. Cover the jar with a cloth or paper towel, something breathable, and secure with a rubber band. Place your Kombucha out of direct sunlight and let it brew for 7-10 days undisturbed.
  6. You can taste your Kombucha around day 5 if you’d like by dipping a straw into the Kombucha, covering the exposed end with your finger, then removing the straw so you don’t contaminate the rest of the batch. The sugar is what feeds the scoby, so if the tea still states sweet, it needs to brew longer. When you taste it, it should be a little acidic or tart first, then have a little touch of a sweet finish.
  7. When you have reached your desired taste, you’re ready to bottle! Get your sanitized swing top bottle, a strainer, and a funnel.  I didn’t actually use the strainer. This is an optional step where you can strain out the dead yeas cultures that you will see floating in the brewed tea- they’re just little pieces of dead yeast and are perfectly fine to consume. They don’t bother me but if you’d prefer to strain them out while you bottle it, you can. Place the funnel in the top of the swing top bottle and carefully pour the finished Kombucha into the bottle. Reserve about a cup of the liquid for the next batch of Kombucha and repeat the steps!
  8. Keep your finished tea in the fridge to slow down the fermenting that can slowly continued even after you’ve removed it from the scoby jar.

IMG_4118A Few Notes:

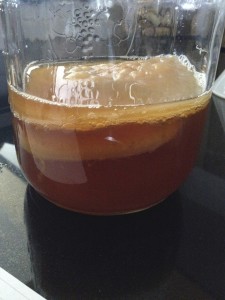
  • As the Kombucha brews, you’ll see another layer growing on top of the Kombucha. While it might resemble mold, it’s simply the start of a “baby scoby”. This is perfectly normal and actually what you will be using to keep brewing Kombucha at home. As long as the baby scoby isn’t thick, you can brew both the scobys together for your second batch. After the second brewing, you’ll want to carefully separate the bottom scoby, which is the mother, and continue to brew using only the baby scoby. You can either discard the mother scoby, or give it to someone else so they can home-brew Kombucha!
  • The scoby can sometimes sink a little, and it’s completely fine if it does. Just make sure it doesn’t completely sink to the bottom.
  • If you’re worried about the sugar, remember that this is what the scoby metabolizes, along with a good portion of the caffeine in the tea so there will be very little of either left in the final product. While it won’t completely remove the caffeine it will greatly reduce it.
  • You can use the same jar for your second batch, but make sure to separate the mother and baby scoby after the second brewing.
  • If you prefer your Kombucha fizzy, I suggest using a bottle with a sling back top so any pressure that accumulates can release itself. Simply pour the Kombucha almost to the top of the sling back bottle and set it on the counter for 2-5 days. You can also manually “burp” the Kombucha if you start to notice pressure on the lid.

You can also make flavored kombucha soda on a second ferment!

Blueberry Ginger Kombucha


IFBC: Day 2 Extravaganza & Day 3 Wrap Up

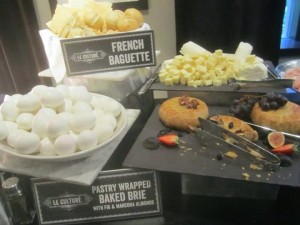
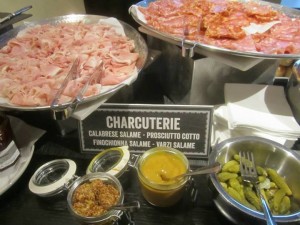
Saturday September 21, 2013 7:00 – 9:30 Breakfast hosted by Pastry Smart & WordPress Happiness bar Seven o’clock am doesn’t register in my vocabulary, no matter what food is served so I headed over to join the festivities around 9am and was greeted by one of the most lovely european style charcuterie breakfast spreads I’ve seen in- well maybe since I was actually IN Europe! Pastry Smart prepared the breakfast, with a special mention that the wonderful staff at the W Hotel allowed them to use the in-house kitchen! Between the build your own parfait bar to the fresh biscuits, hard boiled eggs, cheeses, and meats there was no chance anyone would be going hungry! On a side note, I vividly remember the prosciutto and paprika biscuit and will be attempting a replica VERY soon!

Breakfast (Pic from One Punk Army)


10:00 – 12:00 Live Cooking Demo& Food Photography

There was a fantastic live cooking demonstration from Chef John Mitzewich of Food Wishes and Blue C Sushi’s vice president of culinary, Jeffrey Lunak. Just to make things a bit more lively, not that it was needed, renowned The New York Times food photographer Andrew Scrivani (@AndrewScrivani) MC’d the live demonstration and participated in some very tongue in check banter. Immediately after the Cooking Demon was a “Food Photography: A-Zs of Digital Food Photography” course presented by Andrew.

12:00 – 2:00 Discovery Expo I wish I had better pictures and explanation from the Discover Expo- but I don’t! I tasted some delicious cheese and crackers from Rogue Creamery  and my already favorite  La Panzanella Artisan Crackers . There were FANTASTIC strawberries and dips from California Strawberry and a unique tasting plate from Veggie Grill! One thing I have to note, the french toast Marshmallow from mallow Artisan Marshmallows was VERY tasty!!!

Bordeaux Wine 101
Bordeaux Wine 101

2:15 – 3:45 Session 2 Wine & Writing: Live Blogging: An Exercise in Writing with @BordeauxWines Besides the fact that our table were the CHAMPIONS of the session, correctly answering ALL of the trivia questions and winning a delicious bottle of Bordeaux wine each, this session was a wonderful way to practice and learn about how to taste and review wines. Our fearless and experienced Wine Buff leaders, Ward Kadel and Sam Klingberg, reminded us that wines should be fun and NOT pretentious! Have fun and explore!

Chateau Ste Michelle Wine Paring


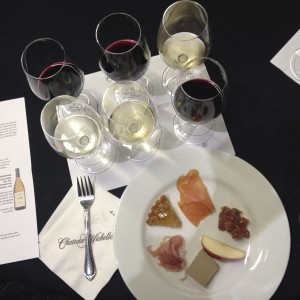
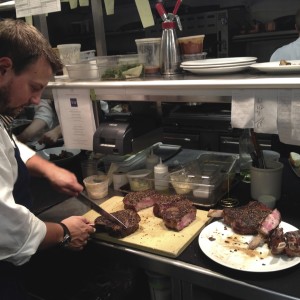
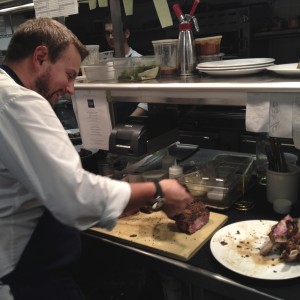
4:00 – 5:30 Session 1 Food & Wine Chateau Ste. Michelle Culinary Director John Sarich tasted us through some amazing wine and food parings. There were a few classic and quite a few  unexpected surprises in our tasting! 7:00 – 10:00 Urbanspoon Dine-Around Dinner   UrbanSpoon graciously, and bravely, set up hosted dinners across the city for all of the food bloggers and we were luckily enough to attend the RN74 dinner, which was just a few blocks from where the conference was hosted. We were served an IMPECCABLE 10 course dinner! I wish I had better photos to document the event but between the dark lighting, amazing food coma that was impending from the amazing food and the wine parings after an afternoon of wine tasting, all I have to report is that it was one of the most amazing tasting dinners I’ve experienced in a LONG white! mushroom tempura was INCREDIBLE, and 45-day dry-aged beef with duck fat fries were just to die for. I was whisked into the kitchen for some exclusive shots of the chef preparing our dinner and I’ve included them below!

RN74- Kitchen Exclusive 2
RN74- Kitchen Exclusive

Sunday September 22, 2013 There was an optional 6am “Wake up With Pike Place Market” tour provided, but as I said before, I don’t have 7am in my vocabulary. I REALLY don’t have it in my vocabulary after an afternoon of wine tasting classes, each with wine, followed buy a deliciously decadent dinner complete with it’s own wine paring. No, I opted to join a few other bloggers for coffee and breakfast at Storyville in Pike Place market.In attendance were some great bloggers,  @OnePunkArmy a California blogger who mixes punk rock and gourmet food, @mwangbickler another California blogger who focuses on food and wine writing, our local Bellingham Gluten-Free Doctor herself Jean Layton and the lovely  Erica Dermer who is the founder of  @CeliacBeast. Quite a wonderful found up of people! After we finished our coffee and walked through the market, we headed back to the conference for the last session and the conference closing.


9:45 – 11:15 Session 3 Tech: Google Plus, AuthorRank, and Where Search Is Going? I’ll try to post another update on this session- it was QUITE technical and I’m STILL working through my notes!

11:15 – 11:45 Conference Closing Chipotle lunch to book end a wonderful weekend Now excuse me while I drag myself to the gym to work off a few of these happily added pounds! Note: In order to received the discounted active blogger rate at IFBC, all participating bloggers were required to write three posts about their experience at the conference. I would also like to note that I was THRILLED to join the conference and would have written these posts regardless- but I prefer full disclosure! 🙂

IFBC: Day 1

Screen Shot 2013-09-17 at 10.12.50 AMWhen I wrote my first post about the International Food Bloggers Conference (IFBC), I wasn’t sure what to expect. This would be my first food blogger conference and had I know what was in store for the weekend, I’m not sure I could have been as patient for the Friday kickoff to arrive. One point I need to touch on and then I promise to get off the soapbox and get back to recapping the AMAZINGNESS that is IFBC- the new ios7 update on my iphone and I are not getting along.

I decided to leave the DLSR at home and just take my iphone as my camera for the weekend. While I usually snap a thousand pictures a second and then dread the daunting task of editing through 25 versions of the same shot, I didn’t have that problem this weekend because my phone decided to be blurry and quite honestly, I was so wrapped up in the moment most of the time that I completely forgot to whip out my camera and “get the shot”!! So, I’ll be featuring and linking to some of the wonderful photos from other food bloggers that were at the conference, which also means that you get some links to read OTHER accounts of IFBC! Win win for you!

Over the weekend there were times for “sessions” and for each these parts of the conference, there were three different”sessions” to choose from. As the weekend progressed it grew increasingly harder to choose which one to attend! In my recap I list only the session that I attended. The conference was only two full days, starting at noon on Friday with lunch from Chipotle and wrapping up around noon on Sunday, with a trip past the downtown Chipotle. A weekend started and ended with Chipotle is pretty tough to beat in my book! With all of the food, meeting and greeting, sessions, more food, and learning it felt MUCH longer than two days, but in that happy way that you wish it would end. Also in the way that you want a nap but refuse to take one because so much fun is happening that you don’t want to miss it! Let’s start with outlining what the weekend had in store.

Friday September 20, 2013 12:00 -1:30 Registration & Lunch provided by Chipotle Mexican Grill w/ Dessert scooped by Cupcake Royale 

As I walked into my first blogging conference I realized two things, first, there are a LOT of people who blog and second, it was time to put on the meet and greet hat! Luckily, happenstance placed Torie, of TorieandTristan.com, in front of me in line and after she turned around and introduced herself, we became the book ends of the conference! Event before my first bite of delicious Gluten Free Carnitas I’d already made a friend! She’s another local gal so you’ll see a few joint posts pop up in the coming months! This was the kick off to a wonderful weekend of food, friends and learning! The learning part started with lunch; I always thought I didn’t like pork, but those Carnitas started to change my mind! They were delicious! On our way into the “Conference Welcome” there was a Cupcake Royale station strategically placed which is where we immediately went after we secured our spots at a table. They were serving up the CUTEST little cones- in addition to real scoops as well. You can see the pictures below!

1:40-2:45 Conference Welcome & Keynote Speaker: Dorie Greenspan
There is SO much that could be said about the AMAING Dorie Greenspan, and I wish that at this moment I could remember all the amazing and wonderful one liners that she said but there were two things that I remember WEEKS after this IFBC session:
1- She followed her passion and was SO incredibly humble inspiring!!
2- Say YES and see what happens!!! Give “trying things” a try!!!

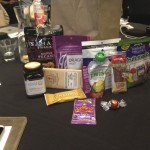
2:45 – 4:15 Live Food Blogging with Amazon.com Grocery There were 15 brands represented, and each of them had three minutes, yes that’s 180 seconds, to pitch their brand to a room full of food bloggers and answer any questions. When we sat down at the tables for the conference welcome, each of us found a bag filled with full size packages of the dry goods were going to taste. When the live food blogging started, conference volunteers brought out brown paper grocery bags FILLED with bottles of the juices, coconut waters and other liquid items we were going to sample. It was QUITE a spread!

4:30 – 5:45 (Sessions) Session 2 Writing:  Entrepreneurial Journalism: Building Your Food Blog Media Business [Mark Briggs, Director of Digital Media at KING] Broadcasting, in exploring how food bloggers can thrive and grow in the competitive digital writing space. Learn the business dynamics and skills required to turn your blog into a successful media business.

7:00 – 9:00 “The Guest Suite” and & A Taste of Seattle Gourmet Fair During the Amazon.com live blogging session, the vendors were mentioning that we could sample other flavors of their treats and such in the “guest suite” later that night. Now, I don’t know about you but the words “guest suite” just sound like one big gold lettered, hand written invitation to a world of glittery fun if you ask me! All afternoon I kept envisioning and wondering what the guest suite was, and let me tell you, it did NOT disappoint! With reusable bags provided by AllRecipes.com, we were welcomed into a large conference room with tables set up, and on those tables were STACKS and PILES of delicious treats and snacks! There were additional flavors of treats we had sampled earlier that day, wooden spoons and whisks, full size boxes of cereal, cans of Dry Soda (a household favorite so I was thrilled!)… my bag overflowith by the time I made it to the end of that tasty treat trail! We stashed our bags and headed into “A Taste of Seattle Gourmet Fair” where we sampled various bites prepared by some of Seattle’s best chefs and restaurants and sipped on some specially selected wines! I was pleasantly surprised by how good the sorghum salad with curry-roasted winter squash and crispy chickpeas was! Had Garrett, of the blog Vanilla Garlic, not beckoned to use from behind the Bob’s Red Mill booth I wouldn’t have picked up that tasty little bit and experienced sorghum for what I believe is the first time.  Thanks Garret, I owe you one!

My buddy One Punk Army posted some AWESOME pics of the Gourmet Fair HERE. Be sure to check em out!

I had two favorites  from the tasting fair. First was the amazing Chianti tasting table and Franciacorta bubbly from Balzac. They had a line up of Chiantis and secret bottles of bubbly, can we say love at first sight! The other hightlight was the italian antipasti spread from Ethan Stowell’s Rhone XIII. Ever since I heard rumors of a roving antipasti cart, I knew that there was a place for me there! The Rhone XIII spread was- delicious! Due to my ios7 update resulting in a blury camera AND quite a few happy sips from the Chianti table I didn’t get many pictures but one of the gals I met at the end of the conference, Colleen’s Kitchen, has some GREAT pictures from the gourmet fair on her blog <href=”http://www.colleens-kitchen.com/2013/09/ifbc-day-1.html” target=”_blank”>here.

Note: In order to received the discounted active blogger rate at IFBC, all participating bloggers were required to write three posts about their experience at the conference. I would also like to note that I was THRILLED to join the conference and would have written these posts regardless- but I prefer full disclosure! 🙂

Wine Marinated Crispy Chickpeas (Vegan, Vegetarian, Meat-Free, Dairy-Free)

Simple Tasty Winter Meals(Vegan, Vegetarian, Dairy-Free, Meat-free)
It’s “officially” fall in the Pacific Northwest. All of the normal indications are here: I need sunglasses, a jacket, a scarf, a tank top, gloves and an umbrella all in the course of about five minutes. The sun is setting earlier, waterproofing boots is on my to-do list, and my shorts get packed away.

Another indication that it’s fall is here is the lack of daylight. There is an impending sluggish feeling that starts to set in when we realize that we go to work when it’s dark and leave work it’s dark. Unless you’re one of the lucky few that has a window near your cubicle or in your office, it’s possible to only catch a glimpse of real “light” through ever distant windows on the run from the  much needed afternoon coffee break to back to back afternoon meetings.

When the rain starts, the fall flavor craving starts. These cravings battle the ever sluggish feelings and makes us torn when it comes to dinner. Either it’s the event that keeps me going during the day and I can’t wait to rush home and cook something that I’ve pinned, liked, saved or stashed. Or, the last thing I want to do is be in the kitchen as a continuation of my daily servitude but am conflicted when I mentally explore the ease of ordering pizza.

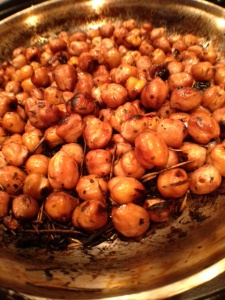
Marinated Chickpeas

1 can chickpeas, drained
White Wine
Minced garlic
Dried Parsley, garlic, rosemary pepper
EVOO or cooking spray

  1. Open the can of chickpeas, drain and rinse
  2. Marinate the chickpeas in spices, white wine and a few dashes of balsamic in a bowl or tupperware
  3. When you’re about 17 minutes away from the other dishes being ready, pre-heat a pan with some EVOO or cooking spray
  4. Remove the chickpeas from the marinade, I use a slotted spoon to do so, and toast on medium-high until the exterior starts to brown (usually about 10-15 minutes)
  5. Shake the pan every few minutes  to move the chickpeas around so they brown evenly
  6. Once they’re browned to your linking, remove from the heat and serve

I usually pair with baked butternut squash, sauteed garlic kale or kale chips and toasted quinoa.

Cooking Notes:

The Wine:  I NEVER cook with a wine I wouldn’t drink. So, choose whichever you’d like. Anything from a Chardonnay to Riesling works. I usually use a traditional table white wine or a dry Pinot Grigio

Marination Time : Since this is a go-to meal I usually only marinate them for about an hour, but if you can remember in the morning to prepare them it will taste MUCH more delicious

Vegan Blueberry Lemon Poppy Seed Bread

It’s 3:15 am… a time of… well not really day OR night… it’s a time no person should ever experience let alone when they’re SO worn out and sleepy all they want to do is go back to sleep. I’ve you’ve been following A Byte of Life, you’ll have read the post on Spain (also found here) which was a MOST incredible trip! We were seriously debating how long we could just fall off the grid and NOT come home! But alas, common sense or something to that nature won and we got on the multiple planes home. Oh hey jet lag, how are you? Are YOU the reason I’m up at 3:15am!?

Turning to my tried and true comfort, I started googling for recipes. If I can’t sleep I may as well bake right!? My love for lemon poppy-seed is almost as strong as my love for a good bottle of red wine, and thankfully, the mister LOVES a good lemon poppy-seed ANYTHING! The request was made and I had a mission ahead of me: your mission, should you choose to accept it, is to create a delicious lemon poppy-seed baked good that’s not super sweet and melts in your mouth Well, now that’s a fun challenge!

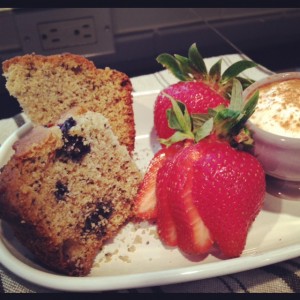
Lemon Blueberry Poppyseed Bread

Vegan Blueberry Lemon Poppy Seed Bread
—-
1/4C canola oil
1/4 C  honey
1/4C applesauce
1/4 C soy milk
zest & juice of 1 lemon
—-
2 C Bob’s Red Mill Gluten-Free flour
3/4 tsp baking soda
1/2 tsp salt
2 tbs poppy seeds
1 C fresh blueberries (put in freezer for about 30 minutes before using)
—-
Pre-heat oven to 375
Combine the oil, applesauce, soy milk, honey , lemon juice and zest in a bowl
Sift together the flour, baking soda and salt. Add the poppy seeds and mix to combine.
Add to the wet ingredients and incorporate
Fold in frozen blueberries. Note that the batter will be thick
Place into a greased loaf pan, sprinkle raw sugar on top
Bake at 375 for 35 minutes(turning once half way through cooking)

Tasting notes:
It’s not your typical fluffy, white flour, white sugar lemon loaf you’d get at Starbucks. This is a more rustic bread and it was quite good! The gluten-free flour lends to a bit more of a mealy texture. Next time I’d add a bit more lemon juice. It’s not a sweet bread at all, so you’d need a lemoncello glaze, or blueberry jam/lemon curd/clotted cream to make it more pastry-ish.

All in all, it’s a good solid rustic breakfast bread…and…I better go taste another slice before posting this review 🙂