Taco Tuesday: Black Bean & Lime

TTTTRRAADDDIITTTIIOOONNNN!!! TRADITION!

“Traditions, traditions. Without our traditions, our lives would be as shaky as… as… as a fiddler on the roof!”(Tevye, Fiddler on the Roof)

Oh, excuse me! I was just practicing my Fiddler on the Roof singing. In case you’re inspired to watch the intro video you can check it out here: Fiddler on the roof – Tradition.

But this outburst of song was inspired by the weekly taco Tuesday tradition that we have.This post was actually last weeks Taco Tuesday adventure but I got busy and figured I better get it up before tonight’s Taco Tuesday adventure (sneak peek: fish tacos are on the menu!). Our Tuesday tradition keeps menu planning simple and I love that I can pick up the ingredients on the weekend and just grab some fresh cilantro from the market on Monday/Tuesday (or heck even Sunday if I’m lazy!) and then everything’s pretty much ready to go when we get home. Because let’s be real, by the time you get home from work and get through chores/errands/working out/traffic/family/pets… the last thing you want to do is cook up some tedious elaborate meal! Well, maybe that’s just me so those of you that are with me… read on!
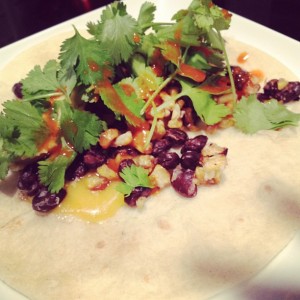
black bean and lime tacos

I am the more carnivorous eater in our house, but also dairy-free so we try to find meals that I can get excited about without featuring meat/dairy for the main protein focus. There are a few wonderful things about tacos. First, the word itself. Taco…ttaaccoooo…TACO! It’s just fun to say!  But another very wonderful feature of the taco is that it’s the everyone food. A taco can literally be made that will please anyone! From the meat and potatoes crowd to the vegan or gluten-free eaters, a taco will always have your back. They can be (deep breath) meat free, vegetarian, gluten-free, meat focused, lactose free, diary free, corn free, (air), wheat-free, egg free, nut free, tree-nut free, soy free, fish free, paleo…they can LITERALLY feed ANYONE!

Another amazing thing about tacos is that you can make them with whatever is in the fridge! They can be as simple or elaborate as you desire! Paging through our new cookbook I received as a birthday present from our recent trip to Sonoma, I was remembering the wonderful pureed black beans from Elote Cafe. They…were…delicious!!! Between that and a ridiculous excess of limes in our house (I’m not sure why… maybe it has something to do with a reverse sock monster effect? Someone PUT limes in the fridge?! We also have a glasses gnome that sneaks in an puts their sticky little paws all over our glasses! But back to the point! We had a randomly large amount of limes and decided to use them up in this tasty taco Tuesday recipe! For texture, I pureed some of the beans and left some of them whole. And… since I’m obsessed with grilled corm we also did a few ears of corn!

So sit back, relax, maybe make yourself a delicious sommer sherpa  and enjoy the tradition of taco Tuesday with us!! Stay tuned for tonight’s fish tacos recipe coming soon and let me know what your favorite taco recipes are! I’ll be featuring your suggestions in my Taco Tuesday Pintrest board!
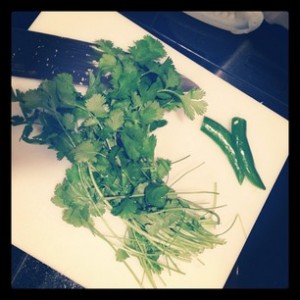
chopped cilantro and jalapeno

Black Bean & Lime Tacos w/Grilled Corn

1 can black beans
1 spoon full minced garlic and juice
Cracked Salt & Pepper to taste
Cayenne Pepper to taste
2 limes, juiced (plus any additional wedges you want for garnish)
2 Ears Corn
Flour Tortillas (or corn for a gluten-free option)

Optional garnish/additions: Cheese, sour cream, grilled southwest cabbage slaw, avocado, Cilantro, jalapeño, chopped/grilled onions, grilled mushrooms, hot sauce/salsa, Elote, red peppers, radishes, fruit salsa

  1. Soak the corn for 20 minutes then pre-heat the oven and wrap corn in foil and cook for 30 minutes. At that point I usually open up the foil and start to turn the corn every 5 minute to attain a good char. You can also use canned corn and heat on the stove if you’d like.
  2. The beans usually take 10 minutes to prepare so when you’re ready heat the beans over the stove or in the microwave with the garlic, salt/pepper, cayenne pepper and juice of two limes. Once it’s thoroughly heated transfer to a vita mix blender and blend until creamy. You can also use an emulsion blender, potato masher, or food processor.
  3. Slice the avocado and prepare the garnishes you desire
  4. Heat the tortillas over open flame on the stove (or heat in the micro between two damp paper towels or in the oven wrapped in foil).
  5. Spread out the black beans and garnish away!

Quick Healthy Breakfast

Breakfast is one of my favorite meals. I LOVE everything breakfast related…scones, muffins, breads, eggs, savory roasted veggies!  There’s something so relaxing about a good cup of coffee to get your day started that can only be enriched by a delicious breakfast to accompany it! You might find it odd, then, that breakfast is one of the most stressful times of day for me during the week.

Living in Seattle I’ve grown accustomed to seeing grey drizzle outside which makes it THAT much harder to crawl out of a warm bed. Once I do finally drag my lazy butt out of bed the last thing that I want to do is race the clock to get out the door and off to start my day. The typical morning looks something like: WakeupgetreadygetbreakfastCOFFEEneedfood! This leaves me a ball of stress when it comes to breakfast during the week. I’m guessing I’m not the only one who needs some good, healthy and QUICK breakfast options! Well rest assured I’ve got your back!!!

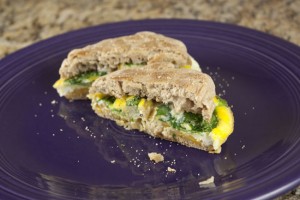
Quick Breakfast Sandwiches from Macheesmo (Photo from Macheesmo.com)

I used to love grabbing one of the English muffin breakfast sandwiches from Starbucks because they were quick and mostly healthy. Until I realized one morning as I unwrapped that wonderful warm bag and got the first whiff of my toasted breakfast sandwich as I sunk my hungry little face into the sandwich…I have EVERY ONE of these ingredients at home! Why did I just pay $3 for something that I could have literally made so easily before walking out of the house. Getting on the budgeting bandwagon I decided that with some planning ahead I could have a delicious breakfast at home while staying budget and health conscious! It just takes a little planning ahead!


Egg McMuffin Pan
Egg McMuffin Pan

Off to the recipe boards I went googling, blog scouring, pintrest-ing away and here is a little showcase of the handiwork. Above you’ll see the English muffin breakfast sandwich from Macheesmo and I LOVE that he illustrates how you can make them ahead and freeze them! Such a time saver!!  You can find the recipe here: Quick Breakfast Sandwiches from Macheesmo.

One of the best things I found to equip my kitchen for mornings was a little Egg plan! It was the PERFECT size for an English muffin breakfast sandwich! Simply heat the pan, scramble an egg and let it cook while toasting your muffin and continuing to get ready! SO EASY! One tip for the pan is that it can be a little larger than some English muffins so the egg will hang over the side of the bread a little which I actually don’t mind. Oh, and I’d only use one egg… two can get a little… souffle over the pan-ish! 🙂
My Pintrest Boards (if you need a little more inspiration):

Update: I JUST found 365 days of breakfast and I LOVE it!! LOVELY breakfast food photography that could make you hungry even after a Thanksgiving feast! I LOVE scrolling through their photos and getting some inspiration for breakfast meals!

And since we ALL love food pictures, here are a few other ideas for quick breakfasts:

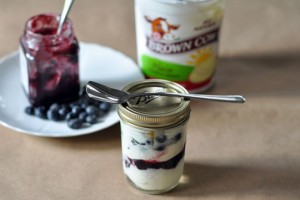
Make your own fruit on the bottom yogurt cups
Make your own fruit on the bottom yogurt cup
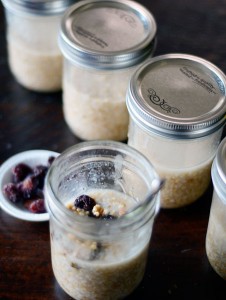
Make Ahead Oatmeal in Jars
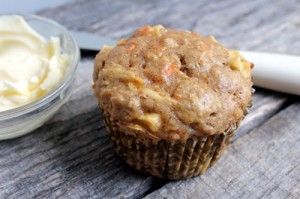
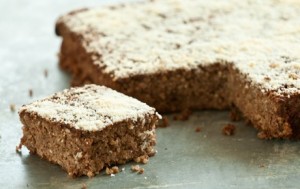
Apple Bran Muffins
Apple Bran Muffins
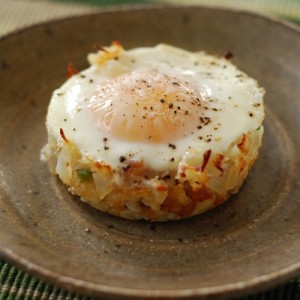
Baked Eggs Napoleon
Baked Eggs Napoleon
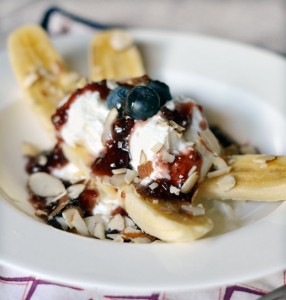
Breakfast Banana Split with Yogurt and Jam
Waffle Nut Butter Banana Sandwich
Quinoa Breakfast Bake

Gluten-Free 101

Gluten-Free
Gluten-Free

Pasta, Bread, Cookies, Pizza…

Why would you ever say goodbye to these wonderful LIFE staples!? Well, how about you find you’re allergic to gluten and they’re basically Krypontine to you?

When I first discovered as a teen that I was lactose-intolerant it was awful trying to navigate the lifestyle changes. Finding alternatives for my beloved milk, cheese and ice-cream were the least of my worries. Eating out became a nightmare, explaining that “it’s an allergy, not a preference” while fiercely praying that the kitchen might understand that I wasn’t TRYING To be high-maintenance and serve up my meal without any “special” presents from the kitchen. From helping a waitress to understand that yes that butter slathered on my toast might be delicious but it is still “diary” to learning how to navigate the hidden dairy in menus…food intolerance was frustrating and embarrassing to the extreme.

I state all of this only to lend validity to my statement, “gluten-intolerant friends… I UNDERSTAND your pain!” Whether it’s a choice to minimize gluten in your diet to an allergic necessity, the initial stages of gluten-free living will take work! I promise you though that like lactose intolerance you will learn what to look for and what to stay away from while embracing your choices as such and not as an ailment or your own personal “freak” button.

The may clinic has a GREAT article that lists gluten/gluten-free foods and what to generally avoid. Typically, you’ll need to avoid wheat, oats (unless specifically listed gluten-free), barley, rye, spelt and other flours. Gluten can reside in VERY obscure places so you will have to learn to navigate food labels. For example, beer and soy sauce contain gluten. As do many gravies, dressings and sauces. The Mayo Clinic Gluten-Free Article gives you a few great lists to read up on where you’ll find gluten and what to avoid.

Basic List of Gluten Free Foods

  • Beans, seeds, nuts
  • Eggs, Soy and most dairy products
  • Fresh meats, fish and poultry (not breaded, batter-coated or marinated)
  • Fruits, vegetables
  • Rice, Corn/Corn Meal, Flax, Quinoa
  • Gluten-free flours (rice, soy, corn, potato, bean), Hominy (corn), Amaranth, Arrowroot, Buckwheat, Tapioca, Millet, Teff, Sorghum

So, now that you have a basic list of what your new best friend foods are, let’s dig into the FUN part!! Thankfully the now mainstream nature of food allergies has done wonders for the food industry. No longer does gluten-free mean “taste and texture of cardboard”. I LOVE giving my family and friends treats that are gluten-free and/or vegan only to tell them afterward that the cookie they just ate was in fact gluten AND diary free! I have to give a little humor here and share a name with you that you may here now that you are on a gluten-free path: glutard. Pronounced glue-tard. Definition: one who can not process gluten. I have my version also: lactard. Pronounced lack-tard. Definition: one who can not process lactose. (if you can’t laugh at yourself what’s this world coming t0!)

Shout out

flying apron bakery & cafe


Here I have to pause and give a shout out to my wonderful local Flying Apron Cafe who has been helping glutards and lactards like ourselves enjoy cakes, cookies, muffins and savory dishes for years now! Their commitment to quality and TASTEFUL food paved the way for much of Seattle’s gluten-free progress and I’m forever grateful! If you’re not located in Seattle you can STILL enjoy their amazing food thanks to the new recipe book Flying Aprons Gluten-Free and Vegan Baking Book.


Our Tried and True Recipes
There have been quite a few requests for gluten-free recipes on the blog and we’ve been enjoying some wonderful gluten-free recipes that I’ve been posting on the Gluten-Free page as we try them! Also I wanted to highlight a few great sites for you. If you have any that you discover on your gluten-free journey that you’re loving PLEASE write and let me know so I can include them in this list! This is a journey for ALL of us to share and I’m happy to update this list as more resources that you find to be “tried and true” surface!
Update: I’ve also created a page dedicated to living gluten-free which you can view here: Gluten-Free Living

Recipe Inspiration

  • elana’s pantry includes many gluten-free as well as paelo recipes for everyday foods that you may have thought were “off-limits” due to dietary restrictions or lifestyle changes. She also includes substitution’s for making recipes gluten-free  which I found incredibly helpful! There truly is a science to baking and keeping the right ratios of ingredients to retain the right consistency and taste.
  • cannelle et vanille has a long list of some really wonderful looking gluten-free goodies from sweets to savories, breakfast to dinners and everything in between you’ll find some great inspiration for gourmet gluten-free cooking
  • one of my go-to sites for natural and healthy living is Whole Life Nutrition which contains a plethora of recipes for not only gluten-free living, but also cleanses and natural living recipes, tips tricks and plans (they also have a section of the elimination diet which might be helpful for you to read up on if you’re newly gluten-intolerant)
  • gluten-free goddess is an EXCELLENT blog about all things gluten-free and some lovely food photography as well!
  • gluten-free girl and the chef is a fun site with recipes and videos for a gluten-free lifestyle
  • another site i love, 101 cookbooks, has some great gluten-free recipes that you can take a look at and their photos are truly inspiriting!
  • Whole Foods is my go-to market for gluten-free baking and cooking. They also have awesome recipes and menu ideas posted online!
  • PCC Natural Markets also has online recipes, tips for gluten-free living as well as aisles stocked with products and friendly staff that can help you on your journey! Go wander for a few hours and you’ll find some treats!
  • Search Results for Pintrest Boards titled Gluten-Free Living (I have not clicked through and verified that all recipes listed are gluten-free. I’m merely providing a way for 4 more hours of you day to dispensary while you get lost in Pintrest!)

And there you have it wonderful friends! A VERY swift gluten-free 101 guide! PLEASE contact me if you have specific questions, need recipe help, have a recipe or resource to share!!!

Cheers to delicious living!!!

Roasted Red Peppers

Lovely Red Peppers ready to roast

Roasted Red Peppers are a love affair of mine. It feels like I’m getting caught in the act of hijacking cookies secretly from the cookie jar when I eat them…yes…straight from the container. It “feels” like I’m doing something wrong because how can such a delicious treat be SO good for you!?

When the peppers are roasted it brings out their sweetness and lends a wonderful charred flavor to them which also makes them a wonderful addition to any sandwich, salad, tapas or antipasto plate, pasta, humus, dip, need I go on?

I decided that it was best to read up a bit before jumping in and ruining 5 wonderful red peppers and I was SO surprised by how easy the process was! The roasting process is painless, the hardest part will be the options of what to DO with the peppers once you’ve roasted them.  You can use them right away, put them in a jar to eat through the week, freeze them or can preserve them. The thought of freezing them makes me a little skeptical, I feel like they’ll be mushy when they’re thawed out again. For this recipe I made enough for two weeks(ish) so I didn’t need to do any sort of preserving but this afternoon I’ll get another batch of peppers and a few mason jars (which I also have a crush on) and giving this Marinated Roasted Red Bell recipe from Simply Recipes a try.

Tips:

  • CHAR the peppers! Not only does this create the smoky flavor but it will also help you pinch off the pesky and indigestible skins.
  • Once out of the oven, place in a paper bag for  20-ish minutes (or longer if needed) to help steam the skins apart from the pepper. You can also use large bowl and cover with saran wrap or place in a large Tupperware. If you don’t let them  char OR steam long enough and it is a PAIN in the rear to pinch off all the skins! So, make sure you char and steam them long enough!

There are SO many recipes that I want to try with roasted peppers! I’ve listed a few of them below. Please feel free to post comments with your favorite red pepper recipes! I’m always looking for more!

Red Pepper Recipes to Try
Panini with eggplant, onions, roasted red pepper and basil

Roasted Red Pepper Humus
Marinated Red Peppers
Tapas Plates (Pimientos Rojos con Anchoas)
Roasted Red Pepper Sauce

Grilled Eggplant with Roasted Red Pepper Tapenade

Roasted Red Peppers

Ingredients
Red Peppers (Yellow or Green work also, I just prefer red)
Reynolds Wrap Non-Stick Aluminum Foil
Cookie Sheet
Large Tupperware container or bowl and saran wrap for steaming the skins off

Directions

  1. Preheat the oven to 450F then change to it to broil.
  2. Wash and dry the peppers.
  3. Core them from to remove the seeds. My method is the cut off the stem and cut around the top stem area like you would if you were coring a tomato. Pop out the core and chop them in half to remove all the seeds and white membrane inside.
  4. Place the red peppers on an aluminum lined baking sheet with the cut side facing down.
  5. Place the baking sheet on the top shelf in the oven and broil until the outer layer of the skin has blackened, about 20-25 minutes. Check them at the 15 min mark just to see how they’re charring…everyone’s oven is different.
  6. Place the peppers in a the Tupperware or in a glass bowl covered with saran wrap and let them steam and cool until you can handle them, about 20 minutes.
  7. Pinch off the skin from the peppers and place directly into jar or your preferred method of canning/preserving/freezing.

Grilled Bratwurst…Summer’s on it’s way

Amazing Brats for Dinner


“The big yellow one’s the sun!” (From stand-up comedian Brian Regan…if you haven’t heard him he’s HYSTERICAL! Check him out here)

That big blinding thing in the Seattle sky.. what IS it!? This past weekend in Seattle was gorgeous and dare I say it…it’s getting to be “that” time of year. You know which one I’m talking about…the birds chirping while the sun comes up at 5am, blinding white legs are peeking out from shorts, sunglasses sales shoot through the roof because no one knows where they placed any of the 5 pairs they used last time it was sunny in Seattle. Baseball is in season and it just seems downright American to drink beer and grill on the roof! After last years extended snowpocalypse, all of Seattle seems MORE than ready to get out and enjoy a little much awaited and MUCH deserved sunshine!

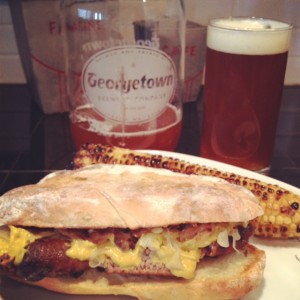
What better way to enjoy than to channel our German roots and grill up some Bratwurst! We’re spoiled to have the most delicious Uli’s Famous Sausages right down the street in Pike Place Market and Macrina Bakery two blocks away for amazing fresh Potato Rolls but I’m sure you can find your local version of each and make an equally tasty meal! Not to mention, with a few short minutes drive we can grab a fresh keg of Georgetown Manny’s Pale Ale.

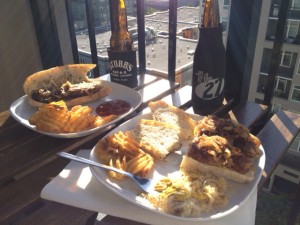
This is the perfect weekend meal! It’s so easy to prep and forget while you go about your weekend chores! Then when you’re hungry you can fire up the grill and have an amazing and rewarding meal! We LOVED this meal so much we made enough for four and had leftovers the next night! Added bonus: the whole house smelled of incredible German brats and beer all afternoon while we cleaned! Talk about motivation!

Grilled Bratwurst

2 40oz cans of Miller Light
1 large onion, chopped
4 Uli’s German Bratwurst
4 Potato rolls from Macrina Bakery
1 package Sauerkraut (I use the German imported style sold at Uli’s, it’s authentic and already prepared!)
4 ear of corn, husked
Ketchup/Mustard to taste
1 keg of Georgetown Manny’s Pale Ale (okay… I guess you can use whatever you’d like but if you’re Seattle local, this is the PERFECT beer with this meal!)

Meat and Onions
Meat and Onions

To marinate

  • Chop onion and place in large pot on the stove
  • Add both 40’s of Miller Light and add the delicious brat’s
  • Marinate on low for 4 hours
  • Husk the corn and set aside

1.5 – 2 hours before you want to eat

  • Soak the corn for a half hour then place each ear in foil. You can place whatever seasonings you like. I simply do salt and pepper but some like butter or oil and that actually helps it char up on the grill much more evenly and swifter. Bake individual corn foils in a pre-heated oven for 20-30 minutes then transfer and grill directly on the pre-heated grill. Corn takes a while so start this a good 15 minutes before you want to finish the dogs on the grill.
  • Remove the dogs from pot and place in foil to grill.
  • Set aside to onions to pan cook or you can also wrap them in foil and do this on the grill itself if you’d prefer to not use a stove.
  • Miller Light
    Miller Light

    Wrap the Sauerkraut in foil and grill (or you can pan fry them but this stinks up the house a bit so I usually just warm them in foil on the grill).

  • At this point you should have oven cooked corn still in the foil, foiled sauerkraut, foiled brats, and be ready to either pan fry the onions or foil those bad boys
  • Heat up your grill as hot as it will go and cook the corn for 10 minutes, turning frequently to get an even char. Also put the foiled sauerkraut and onions on the grill to cook up (for these pictures I pan fried it since everyone in our building seemed to be using the grills and I wanted to reserve space).
  •  Once the corn has a good char on all sides, place the brats on the grill and char those puppies up.
  • Toast your buns, set out your condiments and get ready to enjoy one of the most incredible meals you’ll ever set taste buds on!


Enjoy your delicious and easy meal!!!

The Full Meal Deal
The Full Meal Deal

Another amazing part of this meal… if you’re cooking for two.. this gives you leftovers to enjoy the next night like we did!!!

Leftovers
Leftovers


Elote Restaurant (Sedona, Az)

We discovered Elote on a recent trip to Arizona. Since our scheduled flight to thaw out occurred during this years snow-pocalypse our flight was canceled! How DEVASTATING when you’re at the airport, suitcase packed with shorts and bathers while your body is clad in thermal long underwear and a ski jacket. Snow can’t hold us down so we rescheduled a flight for mid April and thankfully the snow was nowhere to be  seen as we taxied off the runway, bound for warmer weather and no work e-mail! Time to THAW OUT!

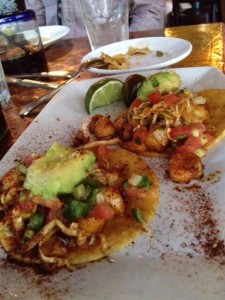
Seafood Scallop Tacos


Thanks to some last-minute planning on our wonderful hosts part, a trip to Sedona and the Grand Canyon was in order so last-minute overnight bags were packed and off we went! We stayed in Sedona and upon checking in, decided that Mexican food was the general “tasted up” status of our group so we asked the front desk concierge and immediately she said that we HAD to go to Elote. “You’ll want to get there right when they open at 5pm otherwise you’ll be in an hour plus line to get in. Regardless, I promise you it’s worth it! The food is worth waiting for!!”. She didn’t need to twist our arm any further, Elote it was! Thinking that we were going to beat a line, we tootled down and found parking and headed to the entrance that had.. gasp… a line of at LEAST 30-40 people in it! But… I… HOW!? It’s 15 to 5pm!!Thankfully they open the bar and efficiently shuffle you in to get drinks to enjoy while waiting. We started with a round of a few Margaritas and house Sangria’s (the house red Sangria was truly AMAZING!) and posted up in line. By the time we got to the front and got our name on the list, we were on the second round and headed to the side shaded patio that they have set aside for people waiting. Second round came and our table was ready!


Guacamole
Guacamole


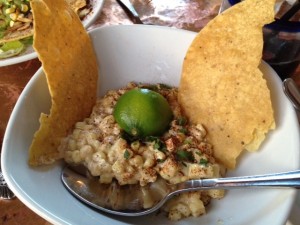
To start we ordered two table appetizers: the Guacamole and of course the namesake dish Elote, which is made of fire roasted corn and spicy mayo and garnished with lime and Cotija cheese. Both dishes were absolutely stunning!! I grew up in California with an avocado tree in my back yard so avocado and guacamole dishes are somewhat a specialty of my family, and this truly earned my seal of approval!! The Elote was SUCH a wondrfully charred and creamy dish… I regret that I have only one stomach and had actually ordered dinner. The entrée’s were equally as picturesque and tasted wonderful! The table ordered (therefore I was able to sample) the Carnitas, the Lamb Adobo AND enjoy my own absolutely delicious entrée of seafood scallop tacos. They served a black bean puree on the side and it completely changed how I will eat and cook black beans forever more!

Since it was a birthday trip, I was surprised by a trip to our table by the wonderful Chef, Jeff Smedstad, who signed my personal copy of the cookbook and took a picture at the table! This recipe for Elote, the namesake of the restaurant, was THANKFULLY included in the recipe book and we can’t WAIT to cook it up! Pictures to follow once we cook it up ourselves!


Elote

Serves 4-6

6 ears of corn, husks intact
1 c. mayonnaise
1 tbsp. Cholula hot sauce
2 tbsp. fresh lime juice
1 tsp kosher salt
1 tsp. fresh ground pepper
1 tsp sugar
1/4 c chicken stock
1/4 c cotija cheese, ground or crumbled for garnish
2 tbsp chopped cilantro for garnish
pure-ground red chile to taste for garnish
crispy tortillas for scooping

  • Over a medium-hot grill, roast the corn until the husks are well charred, about 5 minutes turning occasionally so as not to burn the side contacting the direct heat
  • Set the roasted ears aside until cool enough to handle, then shuck them and cut the kernels off the cobs
  • Mix the mayo, hot sauce, lime juice, salt and pepper, sugar and chicken stock in a saute pan over medium heat
  • Add the corn kernels and cook until corn is warmed
  • Pour into a bowl and garnish with cheese, cilantro, and ground chile
  • Enjoy immediately with crispy tortillas


Elote
Elote

Easter Brunch Cake: Spiced Carrot Cake w/ Walnut Coconut Glaze (Paleo)

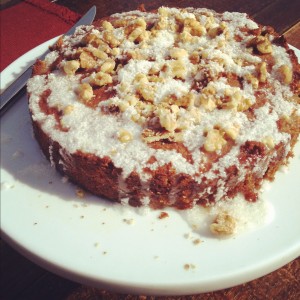
Spiced Carrot Cake w/ Walnut Coconut Glaze

Happy Easter everyone!! What better way to celebrate the Seattle sun than with a delicious cake for Easter brunch. A member of the family recently enrolled in cooking school so this was the year for me to take a back seat in the kitchen and a prime seat on the patio with a mimosa and let someone else do the work!

But, a chef can’t QUITE sit still that long so I whipped up a breakfast cake recipe, keeping in mind the diet of our Paleo host and hostess and I have to report that it turned out to be a delightful little post-brunch treat.

I was positive that our new chef would do just fine filling our stomachs with the main course so we needed a festive cake that was just a tad sweet, had a nice moist yet crunchy texture and a flavor that was both rich and light to satisfy the last few remaining bits of space in our brunch-ers stomachs. This cake did the trick! I wasn’t sure how it would turn out, since my recipes are comprised of a little of this and a handful of that but the measurements below are rough estimates.

Notes: If it feels a bit dry, add more applesauce or soy milk. A bit too wet  opt for more coconut or a dash more flour. With the glaze, keep the mindset that less water is better! It’s easier to add more water than have a half batch of glaze leftovers.

I did a bit too much and wound up with a half bowl of glaze! Above all else, pour another mimosa and have a wonderful day!!


Spiced Carrot Cake w/ Walnut Coconut Glaze (Paleo)

  • 1/2 c apple sauce
  • 1 c coconut flour
  • 1 tsp baking soda
  • 1/2 tsp cinnamon
  • 1/4 tsp salt
  • 2 large eggs
  • 3/4 c packed light-brown sugar
  • 1/3 c soy milk
  • 2 c shredded carrots
  • 1/3 c unsweetened coconut

Glaze & Topping:

  • 1/3 c unsweetened coconut
  • water (as much as needed)
  • chopped walnuts

Directions

  1. Preheat oven to 350 degrees. Spray an 8inch round cake pan with Pam or Misto with Canola oil.
  2. In a medium bowl, whisk flour, baking soda, cinnamon, and salt; set aside.
  3. In a small bowl, whisk eggs, sugar, applesauce and soy milk until smooth.
  4. Gently mix egg mixture into dry ingredients until moistened; mix in carrots. Transfer batter to prepared pan.
  5. Bake until a toothpick inserted in center comes out clean, 40 to 45 minutes (if browning too quickly, tent cake with aluminum foil). Cool in pan, 15 minutes. Turn out of pan, remove paper, and cool completely on a rack, right side up.
  6. Transfer to cake pedestal, and sprinkle with crumbled walnuts
  7. Make glaze and drizzle over the top of the cake and walnuts or dust with confectioners’ sugar.

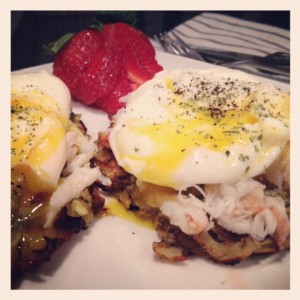
Seafood Breakfast for Dinner: Potato Parsnip Pancakes with Shaved Crab, Poached Eggs and Breakfast Cocktail Sauce

Living so close to Pike Place Market truly does spoil us. Brunch, being one of my favorite meals to cook and eat, has recently become a fun tradition to try new recipes and variations on the good old favorites. We decided to do a seafood brunch Sunday morning so down to the market I went only to returned with fresh AMAZING crab from the Pike Place Fish Market. Not only do they stock a wonderful inventory of fresh, quality fish but they are notorious for throwing the fish great distances, much to the amazement of the crowd. It was a quite a feat to even make it the few blocks home before digging into “sample” the crab meat which I KNEW would be amazing. Even with my high expectations I was blown away. The freshness and quality of the crab was evident in how rich, buttery and just wonderful it tasted.

Potato Parsnip Pancakes with Shaved Crab, Poached Eggs and Breakfast Cocktail Sauce

As I started preparing the brunch, grating the parsnip and potato and setting aside to drain, mentally setting the table and project managing the meal, starting the cocktail sauce… pause here. I opened a jar of our much loved Pike Place Fish Market cocktail sauce, mashed up a little avocado because I love them with both eggs and crab and started the grinder for some fresh coffee grounds to mix in. DON’T turn up your nose yet! It’s quite delicious and thanks to a trip to Seatown for Mother’s Day happy hour, Tom Douglas has me hooked on cocktail cause with coffee grounds.

I mixed and I blended, mashed and molded. Calling my trust taste tester over, I scooped up a bit for each of us and we had the same response when we tasted…it’s missing something. After much deliberation it was decided that a “kick” was missing. Imagine how dejected I was that I would need to make ANOTHER trip to the market and postpone making brunch until my taste tester made a most wonderful suggestion: let’s have the left over fajitas for lunch and have breakfast for dinner! What a brilliant idea! In our afternoon chores we picked up some fresh horseradish root and then it was game time! Breakfast for dinner, yes please!

Seafood Breakfast: Potato Parsnip Pancakes with Shaved Crab, Poached Eggs and Breakfast Cocktail Sauce
Serves 2

Ingredients:
1/2 lb crab meat, already cooked
eggs (one for the pancakes and one to top each pancake)

For the Breakfast Cocktail Sauce
1 Jar Pike Place Fish Market Cocktail Sauce
2 tbsp Fresh bold roast coffee, ground at a medium grind
Fresh Lemon, squeezed into the sauce to taste
Fresh horseradish root, exterior layer removed, soft white flesh grated and chopped

For the Potato Parsnip Pancakes
3 medium mini gold potatoes, grated
1 medium sized parsnip, grated
1 egg, lightly beaten
fresh cracked salt & pepper to taste

  1. Grate the potato and parsnip in a colander and sprinkle with a bit of salt. Let stand for about 20 minutes. I also take one more step and lay out the grated vegges on a paper towel and pat dry.
  2. In the mean time, make the breakfast cocktail by combining all ingredients to taste. Cover and let stand in the fridge.
  3. Place grated vegges in a bowl.
  4. Heat some oil in a skillet over medium/high heat
  5. At this time, heat a sauce pan with water to poach the eggs
  6. Lightly beat one egg and add it to the veggies, seasoning with fresh cracked pepper to taste.
  7. Add a scoop of the mixture to the hot skillet, forming into a patty once in the pan and cook until brown on one side (about 8 minutes) then  flip and cook the until brown on the other side.
  8. Place pancakes on paper towel to drain excess oil and serve.
  9. Poach eggs in boiling water for 90 seconds to 2 minutes depending on how you runny you like your yolk. Remove from water with a slotted spoon and place in a small ramekin to drain for a few seconds.
  10.  Plate  up the potato parsnip pancakes and top with the breakfast cocktail sauce. Top with shaved crab, squeeze a bit of fresh lemon and place your poached egg on the top. Garnish with a bit more cracked pepper and dried parsley.
  11. Enjoy!!!

Grilled Cabbage Slaw

In our house there are two forms of “to do lists”, there’s a “his” and a “hers”. “His” consist of various house chores and interior renovation tasks such as sanding, painting, scrubbing grout, fixing and rearranging various wires and boxes and electrical “this and that’s”.  Tasks on that list are actually being completed while I curl up in the corner, typing away on the dining room table which is against the living room wall with boxes to the right of me, boxes to the left of me, boxes in front of me… ten points and a big golds star to any of you that know that Little Rascals quote. We’re in the middle of redecorating the little perch and I’m actually quite thankful to report that I have a very dashing handyman that LOVES this type of work. Or, at least enjoys it more than I do! He’s been slaving away and I’ll post before and after pictures once we have the new carpet in.

    Grilled Southwest Cabbage "Slaw"Let me proceed to the “her” version of the to do list: banana bread, morning muffins (which I made this weekend and posted here), blueberry muffins with crumbles on top, stir fry, fajita’s… this is just a sample of the meals that are on my list. And I must say, to quote the great Ron Burgundy, “I’m not even mad.” Settling up my part of the redecoration manual labor with some good homemade meals is quite fine with me! After brand new paint in the bedroom and a gorgeous new living room painted the perfect shade of meringue yellow which at the moment is shining brightly in the rare spring Seattle sunshine, my handyman deserved a good hearty meal. I decided to follow the coupon clipping and headed to Metropolitan Market to get some steak for our fajita’s. Up to the counter I bounded, with WAY more than I went in for and happily presented my coupon with a sense of great accomplishment at a few dollars well saved, only to realize that I apparently can’t read dates and the coupon wasn’t good for another 3 days! We already had our hearts set on steak fajita’s so I put back the second of the “buy-one-get-one-free” coupon that was no more, and juggled my groceries to the car.

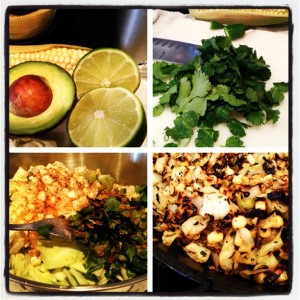
As all wonderful recipes transpire, parts of this meal are NOT what I originally intended and I have to say that they actually turned out much better! I meant to marinate the meat, and didn’t, yet it was more perfect that I could hope! About an hour before I was going to prep the meal I was still trying to think of a recipe enhancement. While taking a mental inventory of the fridge I stopped on the middle right shelf where 1 1/2 heads of green cabbage still lived as remnant from the post St. Patty’s Day sale at the market. SLAW! I’d never in my life made slaw and wasn’t even sure if it would go with steak fajita’s but it was going to be made and tested to world, watch out! I have to say, the slaw turned out INCREDIBLE! So incredible, in fact, that I make a brand new batch when we enjoyed our next day leftovers. The key to this slaw is fresh ingredients, an entire Anaheim pepper for kick, fresh lime juice and the Creme de la Creme finishing touch is that I pan grilled it! That deep charred taste completed the entire meal. I’ll never again eat another raw slaw… to the grill with that side!

Grilled Southwest Cabbage “Slaw”

3 c. cabbage, chopped
1 ear corn, uncooked
1 medium Anaheim pepper, sliced and diced very thin with seeds
1 good handful cilantro, rinsed and chopped
1/2 Lime, juiced
1 spoon full minced garlic and juice
Cracked Salt & Pepper to taste
Cayenne Pepper to taste

  1. In a large bowl, mixing all ingredients and set aside uncovered, to let the flavors mix (you can set this aside for however long you’d like which makes this a great prep ahead of time part of a meal, but let it set at least 20 minutes
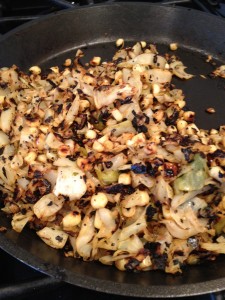
  2. Heat a non-stick pan over high heat and grill the cabbage until it’s charred, turning every few minutes (approx. 10 minutes)


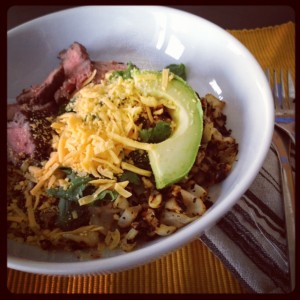
    Grilled Cabbage Slaw Salad with Seared Flank Steak and Galaxy Rice Cheese
Grilled Cabbage Slaw Salad with Seared Flank Steak and Galaxy Rice Cheese
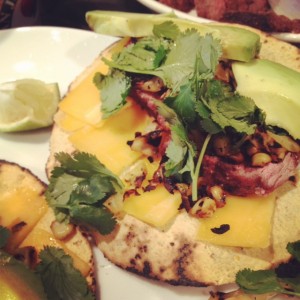
    Seared Steak Fajitas with Grilled Cabbage Slaw and Avocado
Seared Steak Fajitas with Grilled Cabbage Slaw and Avocado

Broiled Salmon & Cod with Asparagus and Rustic Baguette

Seattle is a gorgeous place in the sunshine! From the mountains which frame up the Seattle skyline to the greenery and the magnificent water that glistens and sparkles, I have to say it’s really the most gorgeous place on earth. With one stipulation, it’s only this way on a sunny day. The other 364 days per year it’s grey, cold, wet, and most recently added to the misery cocktail, windy. Okay, I’m exaggerating a LITTLE with the number of days but if you ask ANYONE around here they’ll admit that this past year has really been quite awful.

But, just as the leaves turn and signal fall, the cherry blossoms are pushing their way into spring regardless of how the weather feels about it. Spring truly is in the air! Birds are chirping, those cherry blossoms are blooming and dare I say it, the SUN WAS OUT! Not just peeking out and peacing out, but actually showing it’s glorious face for a Friday through Sunday appearance!

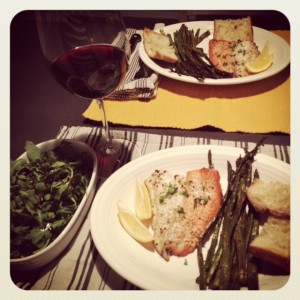
Broiled Salmon & Cod with Asparagus and Rustic Baguette

In addition to the sun, another WONDERFUL aspect of living in Seattle is the Pike Place Market. That is one Seattle legacy that will NEVER loose it’s appeal for me. Living a few short block away from the market is really just a plan from the cosmos to spoil us rotten. Our weekend walks to the market are nearly a religious experience. The shopping list varies between seasons but never fails to remind what a wonderful place we reside in. Whether it’s picking up a fresh Vegan muffin from one of my FAVORITE bakeries, Cinnamon Works, to grabbing a fresh crumpet and bowl of soup from our favorite little stop The Crumpet Shop or gathering a few $5 bouquets of flowers to brighten up the perch, there are a few staples of the weekend walk to the market.

First on the staples list is a stop into De Laurenti for some fresh salami or prosciutto, picking up a package of Rosemarry La Panzanella Mini Croccantini, or stocking up, if needed, on amazing olive oil and 25 year balsamic. Being in the shop is always a quite an experience and while I have not YET (yet is of course emphasized) been to Italy, I envision the experience of ordering meats and cheeses from a deli counter there to be one-in-the-same with the experience of ordering at De Laurenti. They meticulously hand wrap up all of the meats and cheeses in lovely folded white paper and encourage you to sample the various grilled an marinated veggies, cheese and charcuterie they have displayed behind their expansive glass case . It’s evident by their interactions that customer service is of utmost importance.

The second stop on the weekend market trip is at Corner Produce to pick up the fresh fruits and veggies for the week. They are always ready to help you shop, offer suggestions, and serve samples of their wonderful product while they banter with you about the weather, tourists or any other various topic you could suggest! I’ve been going to that stand for over two years and have gotten to know some of the guys, and they’re just wonderful. I never leave without a big smile on my face and a bag full of fresh handpicked produce.

The most recent addition to the weekend shopping experience is a stop at the world famous Pike Place Fish Market counter. Notorious for their theatrical display of throwing of the fish and yelling out each order, as well as  publicly announcing when they receive a tip, these guys stock and filet the most wonderful assortment of fresh seafood you could ever ask for. Name something in season and they have it fresh, fileted to your desire and wrapped up with a smile to boot!

I’ve have to say, living in or anywhere near downtown Seattle affords you the ability to eat like a King and Queen with fresh, local ingredients! We’re completely spoiled to be able to walk down to the market each weekend and stock up on all the fresh fish, product, fruit, charcuterie and spices we could desire. This afternoon we decided that fresh fish was on the dinner menu so down to the market we walked, returning home with fresh Salmon and Cod, a whole crab, asparagus, and a rustic baguette from Macrena Bakery.

Broiled Salmon & Cod with Asparagus and Rustic Baguette

Pre-Heat Oven to 375
Prepare the asparagus by washing and cutting of the bottom inch
Layout on a baking sheet on non-stick aluminum foil
Spray with olive oil from a misto sprayer and seasoned with fresh cracked pepper, sea salt, cayenne pepper, paprika and minced garlic
Cook for 30 minutes, flipping every 1o minutes
Once complete, remove from oven and turn oven to broil
Place Salmon in one cast iron, and Cod in another
Season with minced garlic, fresh parsley, cracked pepper and sea salt
Broil in pre-heated oven, salmon for 3 minutes and cod for 5

Serve with fresh rustic bread, arugula salad drizzled with 25  year balsamic and olive oil, and of course it was served with a glass of Ménage à Trois red! What meal is complete without it!