This recipe has been moved to my new blog, KateSommer.com | Life on Purpose.
You can find it HERE.
Eat simply, Eat well
This recipe has been moved to my new blog, KateSommer.com | Life on Purpose.
You can find it HERE.
January is the month of giveaways over here and it’s awesome! Score for YOU! Earlier this week I posted about my AstroTwins giveaway so if you haven’t had a chance to enter yet you still have a little bit of time before it’s over! This weeks giveaway is back to a food focus and we all have resolutions and goals that we set in January. If you resolution is to incorporate more Gluten-Free living into your diet are you in LUCK! I’ve partnered with Krusteaz to do a giveaway of the same prize pack that they sent me when I wrote my The Gluten-free Gobble Waffle recipe using the gluten-free buttermilk pancake mix! My entire family is still raving about those waffles and how amazingly delicious they were! Trust me, you’ll want to get in on this giveaway! You can click THIS link to learn more about the mixes, find recipes and a retailer near you.
You can win this Krusteaz Prize:
Enter Here:
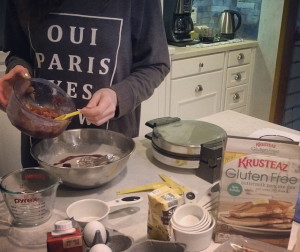 The folks over at Krusteaz asked me to be part of their “Krusteaz Blogger Bake-Off” to promote their new line of Gluten-free boxed mixes. They sent me two boxes each of their four new gluten-free mixes and all I had to do was create a brand new recipe that’s never before been created. My reward, the joy and satisfaction of writing a new recipe and a chance at winning their grand prize of a Crate and Barrel Gift Card. Kitchen time, a great topic for a blog post, recipe writing… I’m IN! Just to keep you reading, this is the ultimate Thanksgiving leftovers recipe! Read on!
I took a few days to look over each of the boxes, researched the recipes that have already been created and submitted and then did what I usually do when I want to talk about recipes; I called my trusty recipe consultant (aka mum) and talked through a few ideas. I received two boxes of each mix below and there were two that caught my eye: the cornbread and the pancake mix. I went through a few recipe ideas and this one just came to me the day after Thanksgiving when I took a box of the pancake mix home to make brunch. We had two gluten-free guests so I figured what better time to test a gluten-free mix than with a full house AND a few gluten-free eaters sprinkled in! We took a poll and everyone preferred waffles to pancakes so we were off. I made three batches of waffles so we could test flavors and have some fun with the mix-ins.
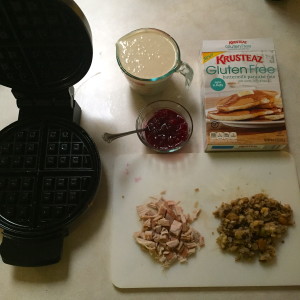 The first batch was just plain waffles with the mix. In the second batch I mixed in some fresh homemade apple sauce and the third was the crème de la crème: the gobble waffle. Now, before I get too far into the gobble waffle I wanted to talk about the plain and the apple sauce waffles for a minute. We made the plain waffles so we could test the taste and texture of the mix. I’m happy to report that all four men fully approved! If I hadn’t broadcast that they were gluten-free no one would have noticed! The plain one had a nice simple taste that was great with or without syrup. Delicious, tasty, crunchy on the outside and everything a waffle should be. The batch that had the homemade apple sauce added into the batter beat out the plain waffles by a landslide. The flavor of the cinnamon and pureed apples were a perfect addition to the tasty batter and were just amazing. It had the taste of white cake batter! But, this was all before the gobble!
What is the gobble waffle you might ask? Well, the gobble waffle is the ultimate Thanksgiving day left-overs brunch recipe. It combines a box of the tasty, simple, pantry-ready Krusteaz Gluten-Free Buttermilk Pancake Mix with some left over turkey, gluten-free stuffing and a bit of gravy and/or cranberry sauce in place of syrup. Just when you thought that left-overs couldn’t get any better, you discover something like the Gobble Waffle. It’s crunchy, tasty, thanksgiving goodness all in one brunchy bite. My mum has used the Krusteaz pancake mix for YEARS but I have to admit that I was a little skeptical about the gluten-free mix. They just have that association of being not quite “there” for taste and texture but both the cornbread and the pancake mix blew my socks off! My gluten-free waffles were specifically requested for Christmas leftover brunch so you know they’re good! Thanks for being my secret weapon Krusteaz!
You can click THIS link to learn more about the mixes, find recipes and a retailer near you. I’ll be stocking this amazing, tasty gluten-free mix in the pantry for SURE!
*Krusteaz Gluten-Free GIVEAWAY*
Krusteaz has agreed to partner on a giveaway! Stay tuned this week for details!!!
Gluten- Free Gobble Waffle
Prep time: 5 minutes | Total Bake/Cook time: 10 minutes
Servings: 6-8 people |Level of difficulty: easy
Ingredients
1 box of Krusteaz Gluten-Free Buttermilk Pancake Mix
2 cups cold water
2/3 cup almond milk
1 1/2 tbsp oil
4 egg whites
Leftover turkey
Leftover Gluten-free stuffing ( Recipe here using Krusteaz Gluten-Free Cornbread Mix)
Gluten-Free Gravy or cranberry sauce to use in place of syrup if desired
Directions
Get out your waffle iron and pre-heat it. Pour the dry mix into a bowl and mix in the cold water, almond milk, oil and egg whites. Break up the turkey into small pieces and add into the waffle mix. Add the left over gluten-free cornbread stuffing and mix. Pour onto pre-heated waffle iron and cook until golden brown.
Serve with heated gluten-free gravy or cranberry sauce!
It feels like fall in the city. The weather had been grey and gloomy all week, which is quite a change from last weeks sunburn weather! Grey clouds always get me in a comfy cozy mood, and inspire me to drink tea and curl up with a good book and a blanket. But, what’s tea without a little tea treat, am right?
This amazing banana bread entered into my heart a few weeks ago when I had a day off and went to go visit my sister at work. She’s been on this “Paleo Kick” that I usually roll my eyes at, but I have to say this recipe immediate became a kitchen staple and has now replaced my tried and true Banana Bread recipe that is YEARS old! It’s THAT good kids!
Gluten-free cooking is nothing new to me. I LOVE baking with Bob’s Red Mill All-Purpose Gluten-Free Baking Flour and have made quite a few goodies with it. Most recently I made a Strawberry Basil Bread, Gingerbread cookies, Chocolate Chip Cookies, amazing Vanilla Cupcakes, and even tried my hand at Vegan Gluten-Free Donuts! To be clear, I am NOT a big believer in following every food fad that comes along, and most definitely did NOT jump on the Paleo band wagon when it came in vogue, nor am I on that bandwagon now. This bread is quite simply one of the most delicious healthy baked goods I’ve ever had. It’s mainly bananas and eggs, a little homemade almond butter, gluten-free flour, and some apple sauce to hold it all together. That’s it! No added sugars. No two stick of butter and 5 cups of refined white flour. Just simple, regular ingredients you can pronounce and happily eat.
There are many variations you can try with this recipe and I list a few at the end of this recipe. Next time I might throw in some blueberries, or try coconut flour to make a bit more of a dessert style bread. What variations would you, or are you, going to try?
Paleo Banana Bread
Adapted from Civilized Caveman Cooking Creations Recipe
Prep Time: 10 mins | Cook time: 30-45 minutes
Ingredients
2 1/2 cups yellow bananas, mashed (approx. 4 bananas)
4 eggs
1/2 cup homemade almond butter
4 tablespoons Apple sauce (original recipe called for melted grass-fed butter or coconut oil)
1/2 cup gluten-free flour
2 tsp cinnamon (original recipe called for 1 tbsp but that’s a little heavy for a summer bread)
1 teaspoon baking soda
1 teaspoon baking powder (gluten-free or homemade)
1 teaspoon vanilla
pinch of sea salt
Instructions
1. Pre-heat your oven to 350 degrees fahrenheit
2. Combine your bananas, eggs, and nut butter, and apple sauce and mix well
3. Add in in the flour, cinnamon, baking soda, baking powder, vanilla, and sea salt and mix well
4. Grease a 9×5 glass (see notes) loaf pan with a fat of your choice (I use Rice Bran oil)
5. Pour in your batter and spread it evenly throughout
6. Place in your preheated oven and bake for 55-60 minutes or until a toothpick inserted into the center comes out clean (If you use a metal pan it will probably bake in 35-40 minutes so start checking at 35 to ensure the middle stays moist)
7. Remove from oven and flip your bread out onto a cooling rack
8. Slice and serve
Variations
1. Alternate Nut Butter: You can use any almond butter you desire: coconut, sunflower seed, macadamia nut, etc
2. Alternate Flour: My sister uses coconut flour, but I bet that almond flour or macadamia nut meal could be delicious
3. Flavors: Cranberry Orange – Only use 3 tablespoons of butter. Add zest of one whole orange diced, juice of one whole orange, and 1 cup dried cranberries or fresh if you want
4. Flavors: Chocolate Blueberry – Add 1 cup of fresh blueberries and 1/2 cup of cocoa powder
5. Flavors: Pumpkin Pecan – Reduce the almond butter to 1/4 cup and add 1/2 cup of pumpkin puree and 1 cup of roughly chopped pecan pieces
If you want to make these into muffins, use the same recipe and for mini muffins bake approximately 25 mins and normal size muffins 30-35 minutes.
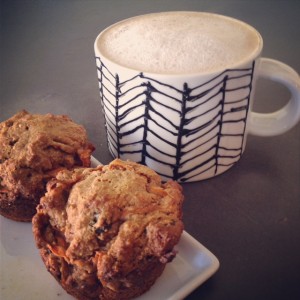 Some days you just wake up and want a muffin and a nice BIG cup of coffee. This was one of those mornings. Luckily, it’s also a weekend morning so I was able to enjoy all of the above, in the comfort of my PJ’s and completely homemade. Whenever I get a hankering for muffins, it’s usually for carrot raisin or bran muffins. Some people might protest and say that if it has vegetables in it, it’s not a “real muffin”. Well, most store bought muffins are really just cupcakes without frosting or generic blueberry. Neither of which are very appealing to me. I love to bake, and I do love a good muffin, but I need my PROTEIN in the morning to get going. Protein and a large cup of coffee. That’s where these little guys are a life saver for me. I use chickpea flour, which has higher protein that other flours, greek yogurt, AND walnuts! It’s got everything you need: protein, carbs, healthy fats, it’s filling, convenient and delicious. I don’t taste the chickpea flour but I love the extra protein that these little guys pack in!
Check out my muffin recipe here: Carrot Raisin Muffins
And if you love the mug, you can get a handmade one here: Hand Painted Mug on Etsy
It’s 3:15 am… a time of… well not really day OR night… it’s a time no person should ever experience let alone when they’re SO worn out and sleepy all they want to do is go back to sleep. I’ve you’ve been following A Byte of Life, you’ll have read the post on Spain (also found here) which was a MOST incredible trip! We were seriously debating how long we could just fall off the grid and NOT come home! But alas, common sense or something to that nature won and we got on the multiple planes home. Oh hey jet lag, how are you? Are YOU the reason I’m up at 3:15am!?
Turning to my tried and true comfort, I started googling for recipes. If I can’t sleep I may as well bake right!? My love for lemon poppy-seed is almost as strong as my love for a good bottle of red wine, and thankfully, the mister LOVES a good lemon poppy-seed ANYTHING! The request was made and I had a mission ahead of me: your mission, should you choose to accept it, is to create a delicious lemon poppy-seed baked good that’s not super sweet and melts in your mouth Well, now that’s a fun challenge!
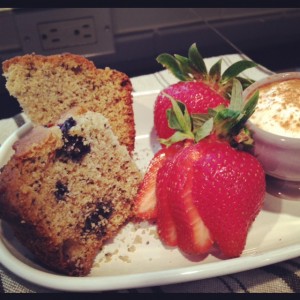
Vegan Blueberry Lemon Poppy Seed Bread
—-
1/4C canola oil
1/4 C honey
1/4C applesauce
1/4 C soy milk
zest & juice of 1 lemon
—-
2 C Bob’s Red Mill Gluten-Free flour
3/4 tsp baking soda
1/2 tsp salt
2 tbs poppy seeds
1 C fresh blueberries (put in freezer for about 30 minutes before using)
—-
Pre-heat oven to 375
Combine the oil, applesauce, soy milk, honey , lemon juice and zest in a bowl
Sift together the flour, baking soda and salt. Add the poppy seeds and mix to combine.
Add to the wet ingredients and incorporate
Fold in frozen blueberries. Note that the batter will be thick
Place into a greased loaf pan, sprinkle raw sugar on top
Bake at 375 for 35 minutes(turning once half way through cooking)
Tasting notes:
It’s not your typical fluffy, white flour, white sugar lemon loaf you’d get at Starbucks. This is a more rustic bread and it was quite good! The gluten-free flour lends to a bit more of a mealy texture. Next time I’d add a bit more lemon juice. It’s not a sweet bread at all, so you’d need a lemoncello glaze, or blueberry jam/lemon curd/clotted cream to make it more pastry-ish.
All in all, it’s a good solid rustic breakfast bread…and…I better go taste another slice before posting this review 🙂
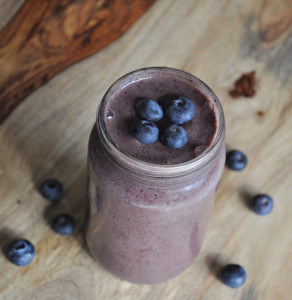
Okay, let’s pause for just a moment because some of you are already wrinkling up your noses and saying, “KALE!? SMOOTHIES!? Alright that’s just GROSS!” I too though that would be a combo that I would only ever “choke down” because I mentally knew it was good for me but would never actually enjoy. I’ve never been more happy to report that I was wrong!
I’m not sure what started the kale kick, maybe I was just drawn to how fully and richly colored the kale has been at the farmers markets this year. Or, maybe it was a particularly delicious kale salad I had earlier this summer, or the fact that mentally I know it’s good for me. Perhaps it was the sudden realization that it’s SEPTEMBER and I better get started on those new years resolutions! Whatever the reason, two massive bunches of fresh kale decided to come home with me from the farmers market last weekend. The past few weeks I’ve tried to start mixing up what we make at home. I get into a comfort rut where I buy the same veggies and prepare them the exact same way and because I apparently need more of a mental challenge in life (careful what you ask for!) I decided to try using the same veggies we always buy but cooked or prepared in a different way.
Enter the kale smoothie! Now, I consider it a feat that not only do BOTH of us consume these smoothies but we actually ENJOY them! I think the mister has actually had more of them than I have! “I you PLEASE make me one of your amazing smoothies” is not a joke, he really says it! Today one of my girlfriends asked me for my kale recipe when she saw the gorgeous massive bunch of kale peering out proudly form the top of my market bag and I started to tell her about the kale smoothies. She asked for the recipe and I figured, maybe someone else would want to experiment with kale smoothies so I’m putting it out there in the bloggosphere and hoping that someone else will also be able to enjoy kale in liquid form! I’ve started reading up on kale, and there are many different opinions on whether it’s healthier to cook it or eat it raw and I think that a healthy balance of both is important.
Warning, this smoothie will not LOOK pretty. It will however, taste delicious! Here are a few nutrition fun facts about this smoothie. The blueberries and kale do not make for a lovely look, but the nutrition is out of this world! Blueberries are a super food packed with antioxidants which can prevent heart disease can help with memory. In addition to fiber and vitamin c, they also have Manganese which helps with building healthy bones and metabolizing proteins, carbohydrates and fats. Kale contains both protein and fiber, which help you feel full, and also contain cholesterol-lowering traits. It also contains Vitamin K which is vital for blood clotting, Vitamin A which helps with vision and Vitamin C which helps with healing wounds. It also contains many minerals which are helpful for healthy body functions and health. Bananas are a good source of potassium, fiber, manganese and vitamins B6 and C. Oranges are high in Vitamin C and fiber. Apples not only help with sweetening the smoothie, but they contain phytonutrients that are excellent for helping regulate blood sugar and contain fiber which also helps to keep you full. (Nutrition info from WebMD)
Kale Smoothie
1/2 apple
1-2 cups chopped kale, ribs removed
1/2 c blueberries
1 Orange or Oj, to your liking for consistency (water or almond milk also works)
1/2 banana (I like to freeze bananas to make the consistency a little thicker
Wash all ingredients and place in blender and mix until you reach the consistency that you desire. If it’s too thin, you can freeze the fruit or add ice cubes.
Here are a few more recipes for using Kale in smoothies that you can try! Post in the comments what your favorite kale smoothie recipes are, I’d LOVE to hear them!
And here is a great compilation of Kale smoothie recipes:
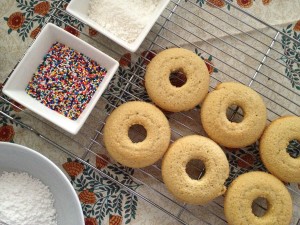 Everyone has a hankering for a donut from time to time. Yes, this includes the healthiest of people! Now, if you’re silently saying, “Why no, I can resist a fluffy, melt in your mouth, little bit of heaven pastry goodness” then 1- you’re either lying or crazy or 2- your just bitter because you’re gluten- intolerant. Well, harbor bitterness NO longer my friend! We have a family member that is gluten intolerant and on his last trip to see us I had the itch to bake.On my recipe hunt, I found QUITE a few recipes for donuts, and once I got my drooling problem under control, created a Pinterest board to keep all my lovely donut finds in one place. But, as I started clicking through the recipes I found that many of them were fried, used gluten-filled flours, and called for xanthan gum or other additives.
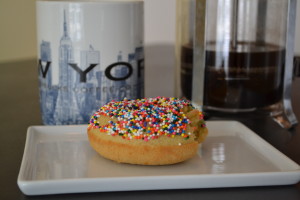 While I’m a FIRM believer that deserts should never be desecrated and demoted into the “light” or “non-fat” categories and should remain their butter or chocolate anchored selves, I do also believe it moderation. So, I set out to focus on the baked donut recipes and FINALLY found one that didn’t call for xanthan gum or some other additive that I can’t pronounce or state with confidence what exactly it is. The gal over at Vegan YumYum had a delicious recipe for mini-baked donuts which called for regular flour so I made a few alterations and gave it a shot! I also did my research on baked donuts, and decided to go with the affordable Norpro 6-Count Nonstick Donut Pan
 from Amazon and purchased a 4-pack of the Bob’s Red Mill All-Purpose Gluten-Free Baking Flour
as well. With a few toppings gathered and the ingredients for the glaze in hand, I was ready to BAKE my Vegan* gluten-free goodness! *In order to make these donuts vegan, use the egg replacer in the recipe instead of the egg.
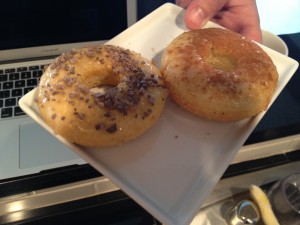 The donuts turned out to be a success, both men in the house had seconds and my gluten-loving one didn’t complain about the taste or texture. They are not going to be a complete replacement for the real deal full butter and flour style of donuts, and if you prefer a good fried old fashioned donuts beware that this will not replace that hankering and you better go get one..or two immediately! The texture was a bit different but the taste, especially buy the time the various toppings and glaze were applied it all tasted like a delicious donut! I followed the glaze recipe on the same website, and used sprinkles, shaved chocolate, coconut and cinnamon as toppings! You can take a glance at all our delicious toppings below
What’s your favorite donut topping?
Mini Baked Donuts
Recipe adapted from Vegan YumYum
Yield: Her recipe makes 20 mini-donuts but since I purchased the large donut pan, the recipe wound up yielding 10-12 donuts… I can’t remember because we were chowing on the first batch while the second batch when in!!!
Dry Ingredients:
1 Cup Bob’s Red Mill Gluten-Free Flour
1/2 Cup Organic Sugar
1 1/2 tsp Baking Powder
1/4 tsp Salt
1/4 tsp (scant) Nutmeg
1 tiny pinch or shake Cinnamon
Wet Ingredients:
1/2 Cup Soymilk
1/2 tsp Apple Cider Vinegar
1/2 tsp Pure Vanilla Extract
1 Egg (Or you can use Egg Replacer for 1 Egg)
4 Tbs Earth Balance
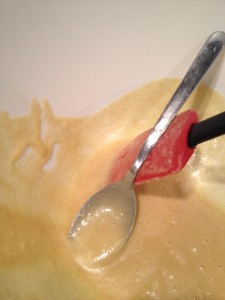
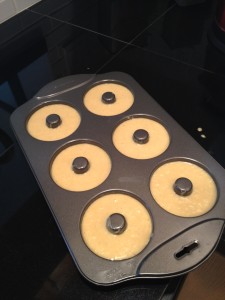 Preheat oven to 350º F. In a large bowl, combine dry ingredients with a whisk to mix thoroughly. Combine wet ingredients in a small sauce pan over medium low heat and mix until earth balance is melted. This mixture should NOT get too hot, you should be able to stick your finger in the mixture. It should feel slightly warm. Add wet to dry and mix until just combined. It should form a very soft dough. Using a tablespoon measure, scoop out dough into your un-greased nonstick donut pan. If you’d like “pretty” donuts, Smooth out the top of the dough with your fingers.
As you can see, the dough sits just below the rim. If you over fill, your donuts will come out looking like it has a little muffin top. Bake for 12 minutes. They should not be browned on top, but a tester will come out clean. Invert hot pan over a cutting board or cooling rack to release donuts. Allow to cool completely before decorating.
Glaze with Sprinkles
1/2 Cup Powdered Sugar (lump free!)
1 Tbs Soymilk
Bowl full of sprinkles (aprox. 1/3 cups
Whisk soy milk and powdered sugar together. Dip the “bottom” half of the donut (the side with the nicer shape) into the glaze, let some drip off, then dip glaze-side down into sprinkles. Transfer to a wire rack that has been set on top of some parchment paper. The excess glaze will drip through the rack onto the paper for easy cleaning later.
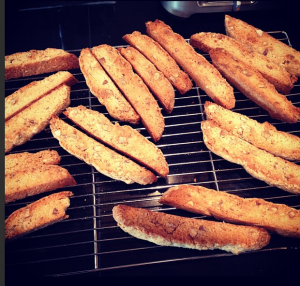 I love biscotti. It’s crunchy, flavorful with barely a hint of sweetness, and is convenient consume. Paired it with a foamy cappuccino it’s one of the most amazing afternoon treats on cold afternoon. It’s almost summer and this crazy gal is writing about cold days and biscotti? Well, up in Seattle the spring is a time a taunting. It will be gorgeous, no jacket and sun glasses weather for a few days then dissolve into a week of grey skies and soggy drizzle. The up-side is that it’s not freezing like it is during the winter.
When it’s grey or cold out, I get a baking itch. In high-school I developed a dairy allergy, which made baking a much harder task. This was before food allergies were really main stream. It proved quite a task to learn the alternatives for cooking and baking without dairy. I’ve long tweaked and updated different recipes, but this one has been a tried and true biscotti recipe for years.
So, while you may think that biscotti and baking are reserved only for the fall or winter time, but you can personalize this recipe for whatever season you crave biscotti. Give this recipe a spring twist and sub the nuts for poppy seeds and add a little lemon!
Ingredients
3 cups all-purpose flour
1 tablespoon baking powder
1/2 teaspoon salt
1 1/2 cups unbleached cane sugar
3/4 cup smooth unsweetened applesauce
1 -3 tablespoon vegetable oil
(I used one tbsp apple sauce)
1 ½ teaspoon vanilla extract
(can also use 1 tsp each vanilla and almond)
1 cups almonds, chopped & toasted
Directions
Variations
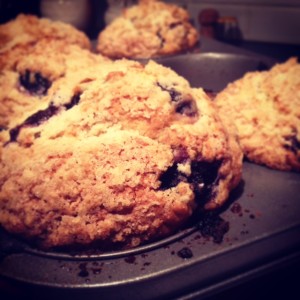
“I taste… baked goods, and a bit of cream. Crispy warm blueberry notes at the start and a soft lingering finish. A hit of cinnamon. Nice tannins. Pairs well with fruit” he said as he finished his bite and pops a half strawberry in his mouth with a smile.
This is the verdict from the master muffin taster (and wise guy!) himself on this mornings baking experiment. I couldn’t sleep last night so early this morning I decided to throw in the towel and let the day start. Apparently my body wanted to see what it was like to live a day in the life of a true baker: up at the crack of dawn in the kitchen among the aromas of creamed butter and cinnamon baking into fresh morning goodness for those lucky enough to sleep until a decent hour of the morning.
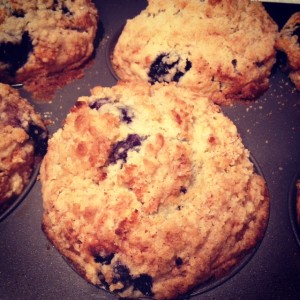
The mister has been asking me for months to make blueberry streusel muffins and this was the week. It was even on my calendar with a few recipes that I’d “Pinned” on my Pinterest Muffin Board. Yep, I’m that obsessive planner that I actually schedule making muffins in my calendar.
One thing that I think everyone can agree on is that the muffin top is THE BEST PART of the muffin. Right? Okay, if you answered “No, I think the bottom is actually tastier” you can just stop reading now because that’s ridiculous! I’ve been researching how to make the nice big crispy muffin tops and tried on this recipe. (More attempts in future blog posts!). I’m learning that it’s a mixture of batter consistency and HIGH heat. For this attempt I used some tips form the blog Meat Free for Three from her “Perfecting the Muffin Top” post. She uses a banana batter and I wanted blueberry muffins so I used a muffin and Streusel recipe from A Taste of Home and have a few personalized notes now that we’ve made the first batch.
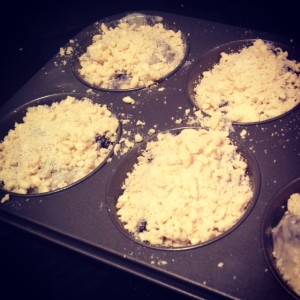 I made a few alterations to the recipe below after the final muffin tasting was complete and I had the tasting notes back from the judge. The muffin tops were crispy and billowy and I hoped they would be! The larger tray turned out just fine for baking the interior and not burning the top which I was a little worried about. The batter might be a little too thick for the muffin top to get super large on the larger 6 muffins so maybe I’ll see if the results are different when using a 12 muffin tray. The consistency of the muffin and it’s flavor were nice but a little too sweet for us so I’ll cut the white sugar and use brown sugar and honey next time. Also, we like oats in our muffins so I might try substituting 1 cup old fashioned oats for 1 cup of the flour.
Please leave comments below on your favorite muffin techniques or any tips you have for “the perfect muffin top”, streusel recipes or bran Morning Glory muffin recipes. Yes, I realize that the Bran Morning glory muffin request came a little out of left field but those are MY two favorite muffins and I’m still on the search for a great recipe that combines them both!
Bon Appetit!
Blueberry Streusel Muffins
Makes 12 regular or 6 large muffins
Ingredients
1/4 cup butter, softened
1/3 cup sugar honey
1 egg
1 teaspoon vanilla extract
2-1/3 cups all-purpose flour
4 teaspoons baking powder
1/2 teaspoon salt
1 cup milk
1 cup fresh or frozen blueberries
Note: If using frozen blueberries, use without thawing to avoid discoloring the batter.
Streusel:
1/2 cup sugar 1/4 cup brown sugar
2 tbsp 1/3 cup all-purpose flour
dash of ground cinnamon
2-3 tbsp cold butter, sliced
Directions