It feels like it’s been ages since the last blog post. Between our first trip to Italy, getting engaged, moving and loads of work travel I haven’t done much home cooking. Well, except the trip to Italy which was a cooking trip to one of the most amazing villas with my favorite chef in Seattle and there are MANY blog posts about that. But, for today all I have time to do is a quick cookbook review.
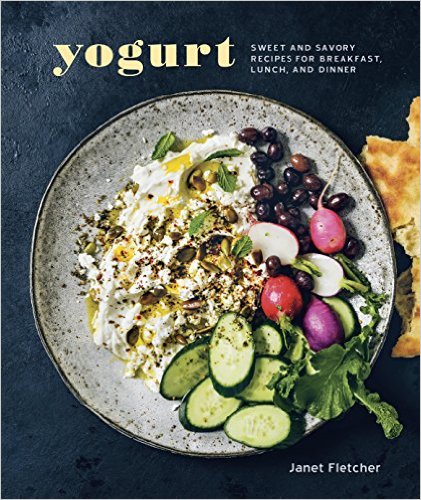
If you thought that yogurt is only for breakfast, you have a lot to learn! You’ll learn how to use yogurt in appetizers, salads, soups, sauces, marinades, beverages, and desserts. The biggest value of this book was the step by step instructions for how to make your yogurt at home! While I haven’t tried that recipe yet, mostly because I barely have a kitchen, I totally will once I have space to make it! The recipes feature both conventional recipes as well as ethnic and savory dishes and has a nice balance between the two. Books like this help you think more about the ingredients that make up a dish, and how you can completely change a recipe by changing one ingredient.
The pictures were beautiful and inspiring but I most of the recipes are more of the novelty “ made this one time” versus being part of the regular round-up. Stay tuned for a few recipe posts from the book in the coming months.
Please note, I was provided a free copy of this book by Blogging for Books in exchange for my honest opinion.
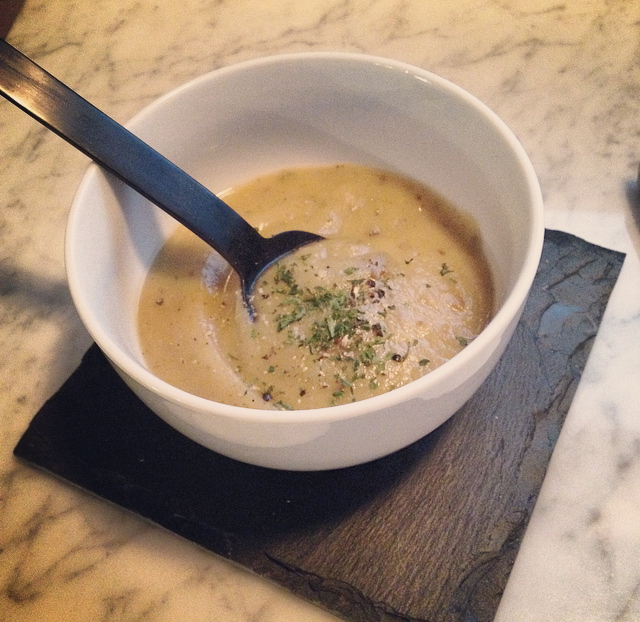
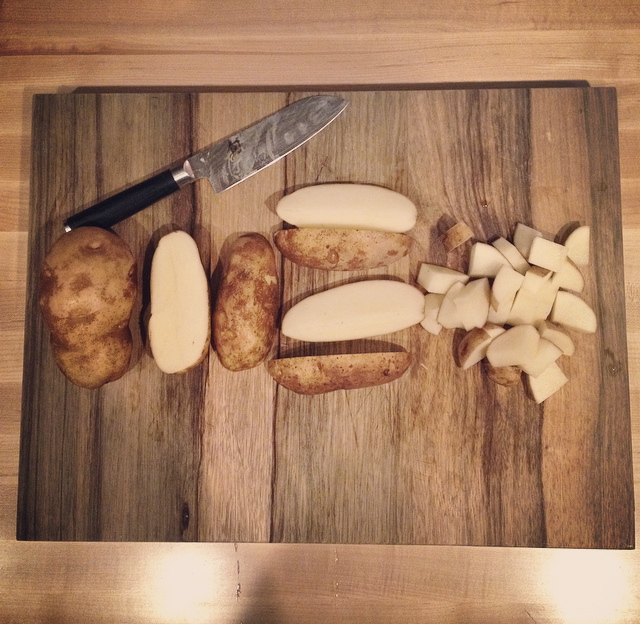
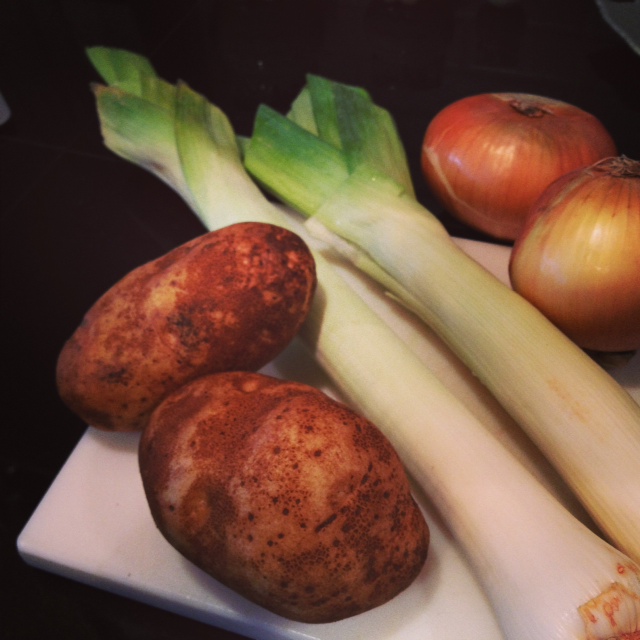
It’s officially soup weather. The sweaters, boots and umbrella have been pulled out and are here to stay. The rain is here and it’s cozy time. Browsing in the market on Saturday, I was drawn to the gorgeous leeks piled high in one of the bins at our local Whole Foods market. They were brilliantly colored, as big around as a hearty farm grown carrot and on sale. Check, check, check. There are two things I like to do with leeks; make a potato soup with them or sauté and eat them with olive oil and lemon for a snack. You can make soup with the stock sand sauté the leaves if you wish to have the best of both worlds. Sautéing leeks to eat as a snack would have NEVER crossed my mind, but I read it in a book I quite enjoy and have tried it a few times since. The book is something I picked up at a half-price book store a few years ago and find myself reading each year. It’s called “French Women Don’t Get Fat” by Mireille Guiliano. Now, let me pause here and say that I am not encouraging dieting behavior. The I love her healthy, holistic approach.
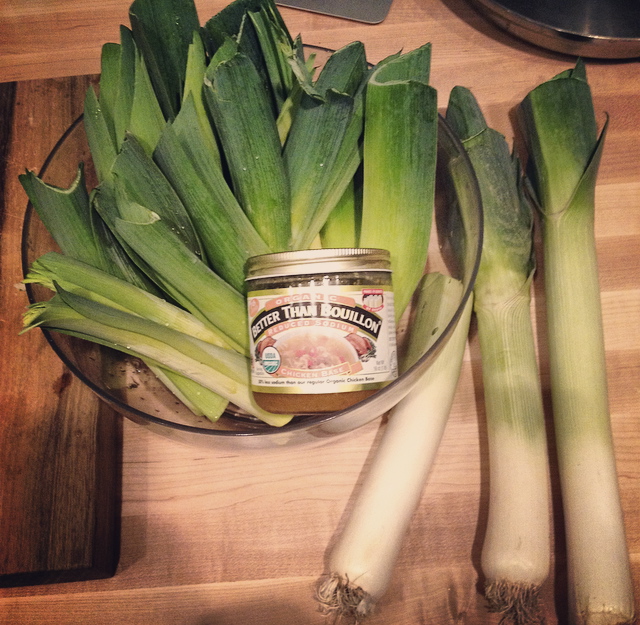
The focus of the book is teaching us how to eat for pleasure and nutrition versus eating, or not eating, as a diet choice. She discourages dieting and is a fabulous writer. I agree with her encouragement for people to view the relationships between food, weight and health within an over focus on a healthy happy lifestyle. Okay, back to sautéed leeks. I had the best intention of using two boxes of chicken stock that I received from an amazing food conference I just attended (IFBC!). We’re really aware of how much salt goes into our food and opt for low salt whatever we can (broth, soy-sauce, chips, mixed nuts, etc). I have to give the disclaimer that I’m a broth snob. I love broth and have been known to make up a pot of broth in the winters to supplement my massive tea intake. My mother makes amazing soups and has always set the bar high. I’ve never found a boxed or canned broth that I find remotely decent. I’ve always used the same stock my mum uses the brand Better Than Bouillon and I always make sure to get the reduced sodium base. You’ll always find the chicken and beef base in my fridge but they have ham, turkey, lobster, mushroom, the list goes on! One caveat, not all of their flavors come in reduced sodium but the chicken and beef ones do and Costco carries them so I’m a happy camper! So, I grabbed a few leeks, potatoes and onions and was off to make the first soup of the season.
As I mentioned before, we go low salt so at first when I tasted this soup it really felt like it was missing an ingredient. After calling my mother the soup master (Just missed her, she had already gone to bed!) and googling what flavor should hit the center of your tongue, which was right where the soup was missing some seasoning flavor, the mister and I decided that it was salt. Simple salt. I took out a few spoonfuls of the soup and cracked some fresh pink salt on top and low and behold…that soup was PERFECT!
The fun part about this soup is that you can completely change the flavor of the soup with a few very simple cooking variations! Throw in a few carrots, or add some turnips with the potatoes. Not big on thyme myself, but you could add a tablespoon or two of dried thyme or 1-2 Tbsp chopped fresh thyme and/or if you like dill, which I don’t, you can include ½ tsp dried dill, or 1 tsp chopped fresh dill. You can cook with truffle oil or use truffle salt, or any other amazingly flavored salt you have stumbled upon. You could cook bacon in the pan first and wipe half the oil out, and use the remaining half of bacon grease to cook up the veggies and potatoes.
How do you like your potato leek soup? Leave a comment!!
One Pot Potato Leek Soup {Gluten-Free, Dairy-Free}
1 Tbsp rice bran oil
1 medium yellow onion
3 large leeks, without the leaves, sliced into rounds
4 medium russet potatoes, washed and chopped and loosely diced
pinch grey or pink salt
fresh cracked black pepper, and more to taste
chopped fresh or dried parsley
2 bay leaves
2 tbsp Better than Bouillon Reduced Sodium Chicken base + 7 cups hot water
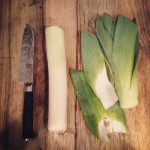
Pull out your stock pot. Heat the rice bran oil over medium heat. Chop your onions and add them to the pot, stirring occasionally. To prep your leeks, wash the stocks and cut off the leaves right where the light green turns dark green and the leaves start. Cut off the roots.
Cut the leaves from the stock
Cut off the very top of the leaf
Slice the bottom stock
Set the leaves aside (unless you want to wash them and include them which you totally can). Slice the stock in half, and cut 1/2 inch half moons until the stocks are all chopped. I do this so it’s easier to separate the leeks when I drop them into the pot.
Stir whatever you have in the pot a few times with each ingredient addition. Add the leeks to the pot and cover.
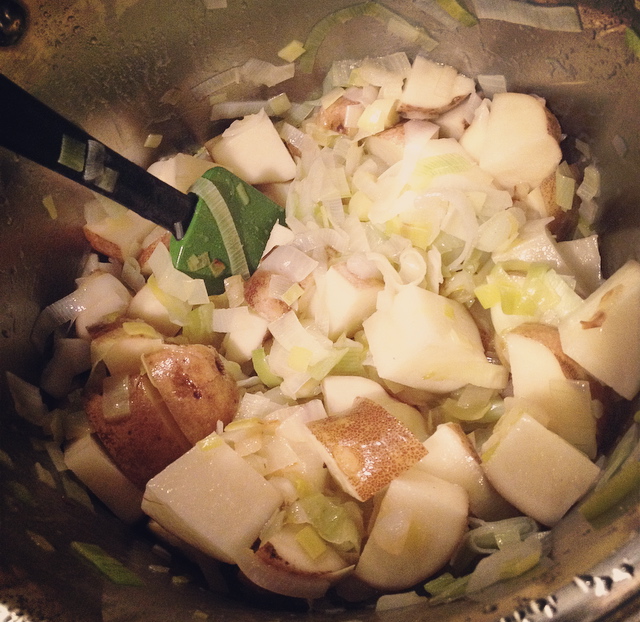
Cut your potatoes and add them to the pot to sauté for about 5-7 minutes. I cut my potatoes like I would for a breakfast hash: cut the potato in half, then half again and loosely dice.
Once you’ve sautéed the leeks, onions and potatoes for a bit, add a pinch of salt, pepper, chopped fresh or dried parsley and 2 bay leaves. I always add bay leaves to my soup and broths because my mother does and she makes the most amazing soups! Just remember to pull both of them out before blending or serving!
While this is sautéing heat up your tea pot to mix the bouillon base. I always mix the broth in a glass pyrex because just when you think it’s all dissolved into the water and pour it into your soup pot, you’ll see the huge chunk of bouillon that was hiding at the bottom plop into the pot! Not amazing. Mix the bouillon in your pyrex, assuring it’s dissolved, then add it to the pot and bring to a boil.
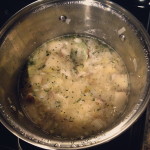
All the goodies in the pot
Soup pot
Let the soup boil for a few minutes then reduce to low heat, cover and simmer for about 45 minutes. Check the soup to assure that the potatoes are cooked through and turn off the heat. Go fishing for your two bay leaves and pull those guys out. If you have a stainless steel immersion blender, which I don’t, puree of the soup in the pot until you reach the desired level of smoothness. If, like me you don’t own a fantastic immersion blender, pardon me while I add that to my amazon which list which is 90% cooking tools and cook books! I use my trusty vita mix and blend it in batches.
Taste the soup as you blend it because this is your chance to add more herbs and spices since you’re blending the heck out of it and the flavors will be sure to mix well.
Garnish with whatever your heart desires:
cracked pepper
fresh chopped parsley
pumpkin seeds (roasted pumpkin seeds recipe) and sub paprika for the salt
shaved marinated carrots
chopped green onions
sour cream
chopped bacon
fried onions
a drizzle of some truffle oil
… your options are endless!
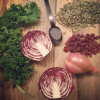
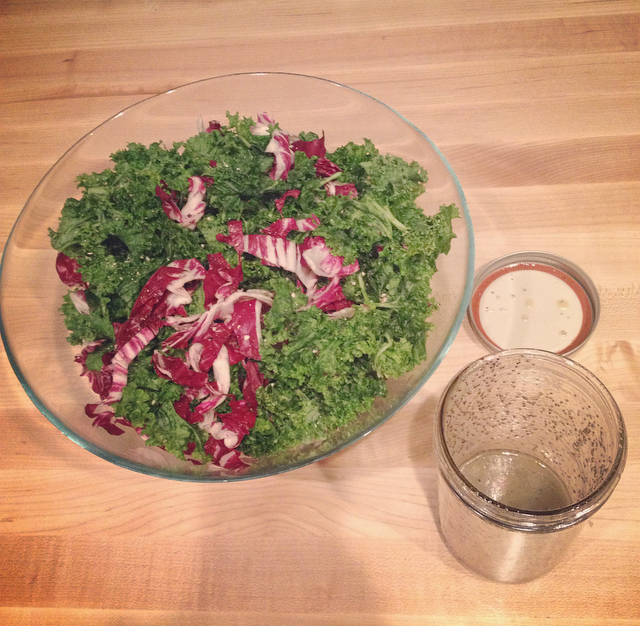
I met this delicious seasonal dish at a baby shower a few weeks ago. Let’s set the stage here; I’m not usually super amazing thrilled baby showers attendee. But, one of my very good girlfriends recently had her first shower and there was a sacred promise that there would be no games, which is a huge plus for encouraging attendance. Little did I know that I would be greeted upon entry with a glass of La Marca Processco (which is my favorite) and ushered into a room of absolutely fantastic gals. With a glass of bubbly in my hand and a smile on my face I was shown to the food table. This, my fine friends, was both a visual and tasty delight! There were numerous quiche options, fresh shrimp with cocktail sauce, three types of homemade mini cupcakes and an absolutely amazing kale radicchio salad which I shamelessly had thirds of.
The bubbly was also flowing, but, that has no correlation to the ‘yum’ factor of this salad. Not only was it visually delightful, but it was so delicious that I had to remind myself I was in public and shoving salad into my mouth as quickly as I could was not socially appropriate. It was tangy, creamy, crunchy, herbaceous, earthy and downright amazing. Three bites in I was begging for the recipe. It was a simple and side dish that is easily transported for events and was SUPER tasty. Had I hit the side-dish mecca? Quite possibly my friends, quite possibly.
For halloween our office did a “Crocktober” and one look at the food sign up sheet had my insides yelling for something even remotely healthy! Someone’s got to make a non-crockpot dish to balance this whole situation out right!? So, when asked to sign up for a dish to share I decided that there needed to be a little balance to the baked goods, 3 types of mac n cheese (including one that boasted being ‘texas style’ which apparently meant extra cheese and cream), pork, meatballs, cookies, brownies and otherwise carbacious cheese covered feast that was about to ensue. This festive gathering needing kale, lots of kale. Good, wholesome tasty kale. There was no other thought in my mind than to debut the kale radicchio salad recipe. If we’re being completely honest, I made this salad for a few reasons; one of preservation so I knew there would be something I would eat there, and I also really needed some motivation to blog this recipe (that a few people have specifically asked for in the past week) and try my hand at homemade poppyseed dressing. Unless I had a deadline of hungry mouths tomorrow and feeling the moral obligation to balance out the cholesterol and sugar levels of the office party, this recipe could have been put off for months.
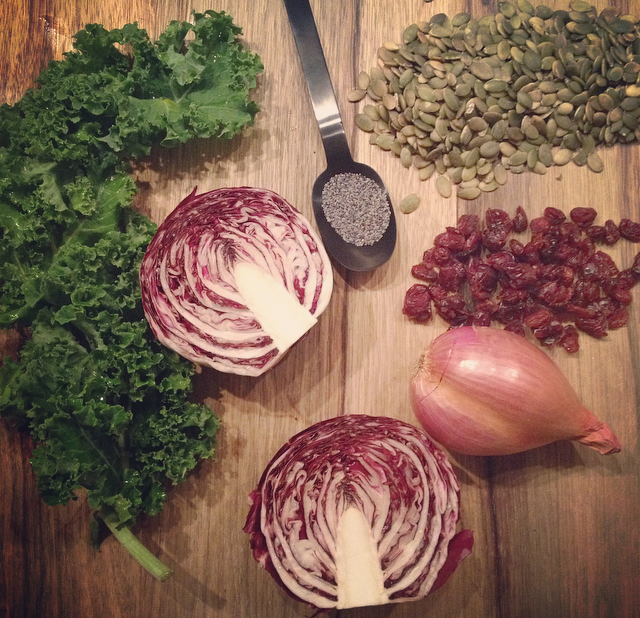
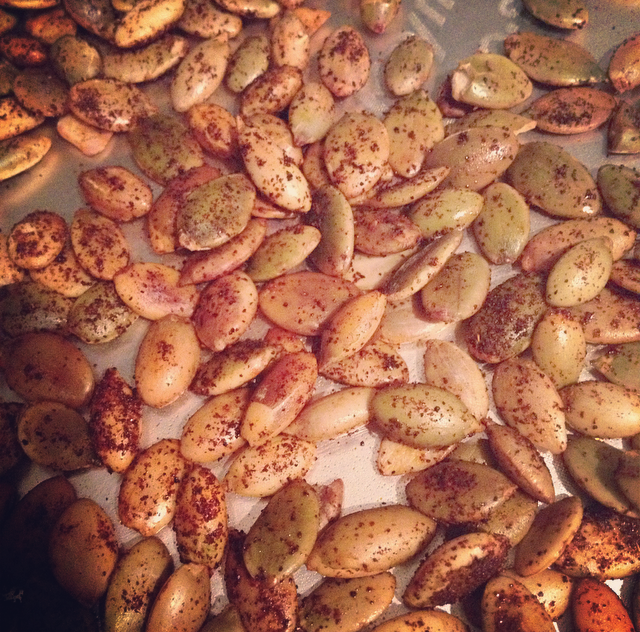
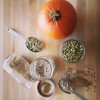
This recipe is so easy and tasty it’s almost ridiculous. It really highlights the fall and winter seasonal flavors that might not be combined in salad form but are absolutely ridiculously good when combined. This recipe calls for one of my favorite seasonal ingredients, pumpkin seeds. Now, if we want to be fancy we’d call them pepitas instead of pumpkin seeds which has a literal translation of “little seed of a squash”. It’s basically the spanish culinary term for a pumpkin seed. I gave the salad a little upgrade by roasting them with paprika before adding them to the recipe. You can find my recipe for roasted pumpkin seeds here and just sub out the salt for paprika. This is one salad where you can really personalize! Next time I might also roast some delicata squash and add it in, or even pumpkin or butternut squash!
This salad is really going to be a seasonal staple for us and will be ever evolved. It makes a great simple, quick meal or healthy and tasty potluck dish! It’s super simple to make the night before and combine when you’re ready to serve. It’s gluten-free, dairy free, nut-free, healthy and easy. Yes PLEASE!
Seasonal Kale Radicchio Salad w/ Poppyseed Dressing
For the Salad
1 head kale, washed, stemmed, massaged and torn into pieces
1 head radicchio, washed and cut and cut in chiffonade
pepitas/ pumpkin seeds
olive oil
paprika
dried cranberries
1 small thinly sliced shallot
Pre-heat the oven to 350 degrees. Lay the pepitas out on non-stick foil and spray with olive oil or other high-heat oil. Dust with smoked paprika and toast for 10 minutes, keeping an eye and adjusting time according to how your oven heats. Once they’re done remove from the oven and let cool.
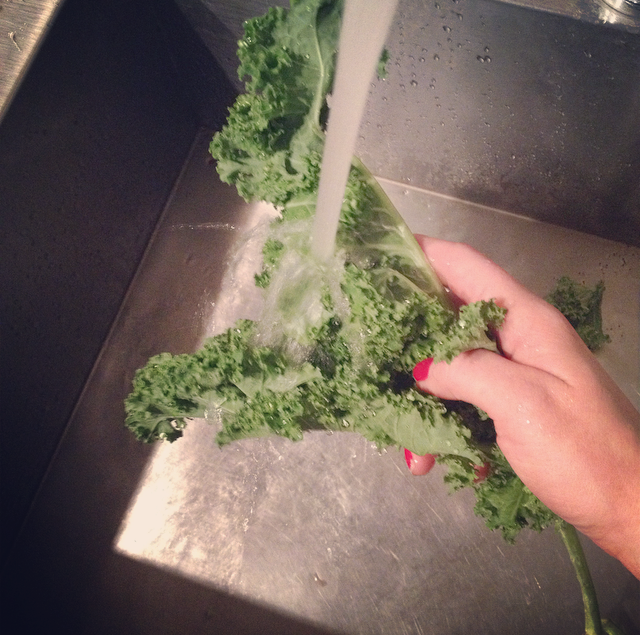
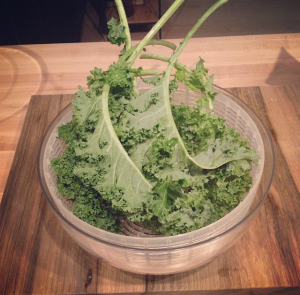
Meanwhile, thoroughly wash and de-stem the kale.
I wash the kale well, and use a large OXO SoftWorks Salad Spinner to dry kale and I absolutely love it! Add a tiny bit of grey salt and massage the kale in the bowl until it reduces in size and turns a darker color.
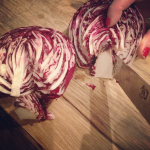
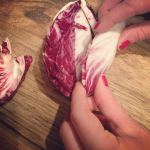
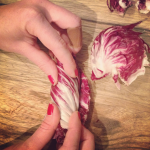
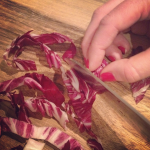
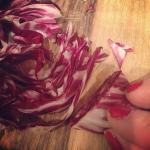
Grab the radicchio, peel the outer layer, slice in half and core the halves. Pull apart a few layers at a time, fold and chiffonade. The chiffonade technique is basically rolling the leaves and thinly slicing.
Half and core the radicchio
Rolling up the radicchio
Roll the radicchio leaves
Radicchio roll
Slice the radicchio in thin layers
Successful chiffonade
Place kale and radicchio in a bowl. Add the toasted pepitas and cranberries to taste.
Place all dressing ingredients in a mason jar and shake to combine.
When you’re ready to serve, add the dressing to the bowl and toss.
Variations Substitute pepitas for walnuts and add goat cheese and parsley with plain oil dressing
Spiced pecans and dried cranberries with a warm bacon vinaigrette
Mandarine oranges with slivered almonds and a sesame vinaigrette
Roast up some delicata squash, butternut squash or pumpkin and throw it in
Last summer I got hooked on pumpkin seed butter. Before that, I didn’t even know such a thing existed. I felt pretty nut-butter gourmet knowing that there was macadamia butter as well as cashew butter. I knew that you could grind your own; I’ve seen and even used the machines in my local Whole Foods to make fresh almond butter. But those machines were big, and scary, not to mention loud and quite menacing to look at. The though had NEVER dawned on me that it was something that could be made at home. Until a combination of a strong desire for a food processor, DIY itch and budgeting came together. Random components, but quite a story!
This recipe was adapted from the the kitchn’s Pumpkin Seed Butter recipe. I LOVE that they say it was inspired by a nut butter that they tasted at the Portland Farmers Market because I’m pretty sure it’s the same nut butter that hooked me on Pumpkin Seed Butter. Nut-Tritious Foods is a wonderful little company based out of Vancouver, Washington. They do a great job of educating customers why cold-pressed nut butters are better for you. I pulled the info below from their about page because it’s REALLY important to know!
“… we COLD-PROCESS and don’t use heat to get our nut butter into the tub. Heat will oxidize the healthy fats (poly- & mono-unsaturated) and make them more like a saturated fat! Most all jar nut butters have been heat processed – you can tell by the ‘nutcrete’ in the bottom of the glass jar.” An additional note, the heat processing method allows the nut butter to sit on the shelf in a jar until it’s purchased. Personally, I’d much rather have the fresh stuff that I know is perishable and know that I’m getting the most nutrition out of my consumption.
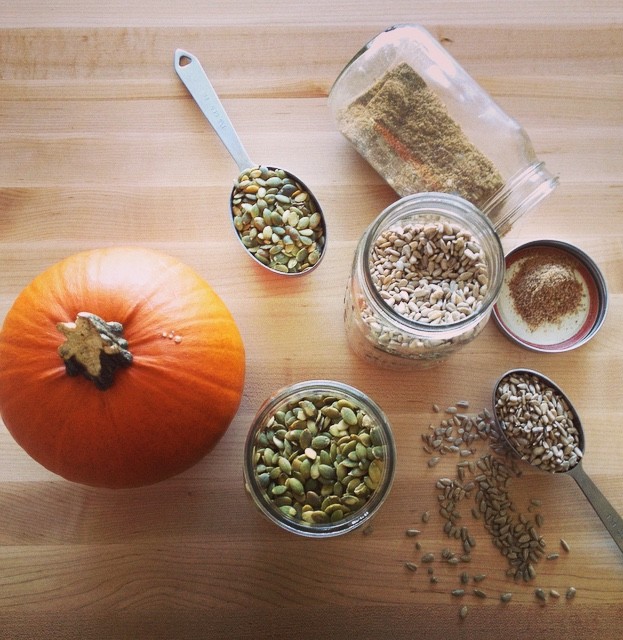
2 cup raw pumpkin seeds, without shells
1/2 cup ground sunflower seeds
1/4 cup flax meal*
1/4 cup grapeseed oil
1 spoon of honey (to taste)
pinch grey salt
*Flax Meal: You can easily make flax meal in a coffee
Combine pumpkin seeds, sunflower seeds , and flaxseed meal in your food processor. Blend until the ingredients are well chopped and blended. You’ll need to stop and scrape the sides down so all the ingredients get blended together.
Add the honey and blend until the nut butter starts to form. This can take up to ten full minutes so have patience! Once you see the play dough texture, where the seed butter starts to form a ball and move around the bowl you’re getting close! Add the oil and continue to blend 5-10 minutes more until the butter is consistently smooth. Your food processor might get warm but don’t worry too much, you can always let it cool a little bit and then blend away. I used the 1/4 cup of oil and it was just fine, but you may want to add more depending on how you like your nut butter.
Place in an airtight container (tupperware or glass jar) and store in refrigerator up to 2 weeks.
There are plenty of additions to this recipe, you can mix up the ratios. You can choose olive oil or coconut oil. You might want to add salt, or use salted pumpkin seeds. You can also pre-heat the oven to about 350 and roast the seeds on a parchment paper or foil wrapped cookie sheet for 10-15 minutes. If you oven roast them, stir the seeds once or twice during cooking and let them cool before adding to the food processor. There is also a delicious looking adaption for Maple Pumpkin Seed Butter and Chocolate Pumpkin butter.
It feels like fall in the city. The weather had been grey and gloomy all week, which is quite a change from last weeks sunburn weather! Grey clouds always get me in a comfy cozy mood, and inspire me to drink tea and curl up with a good book and a blanket. But, what’s tea without a little tea treat, am right?
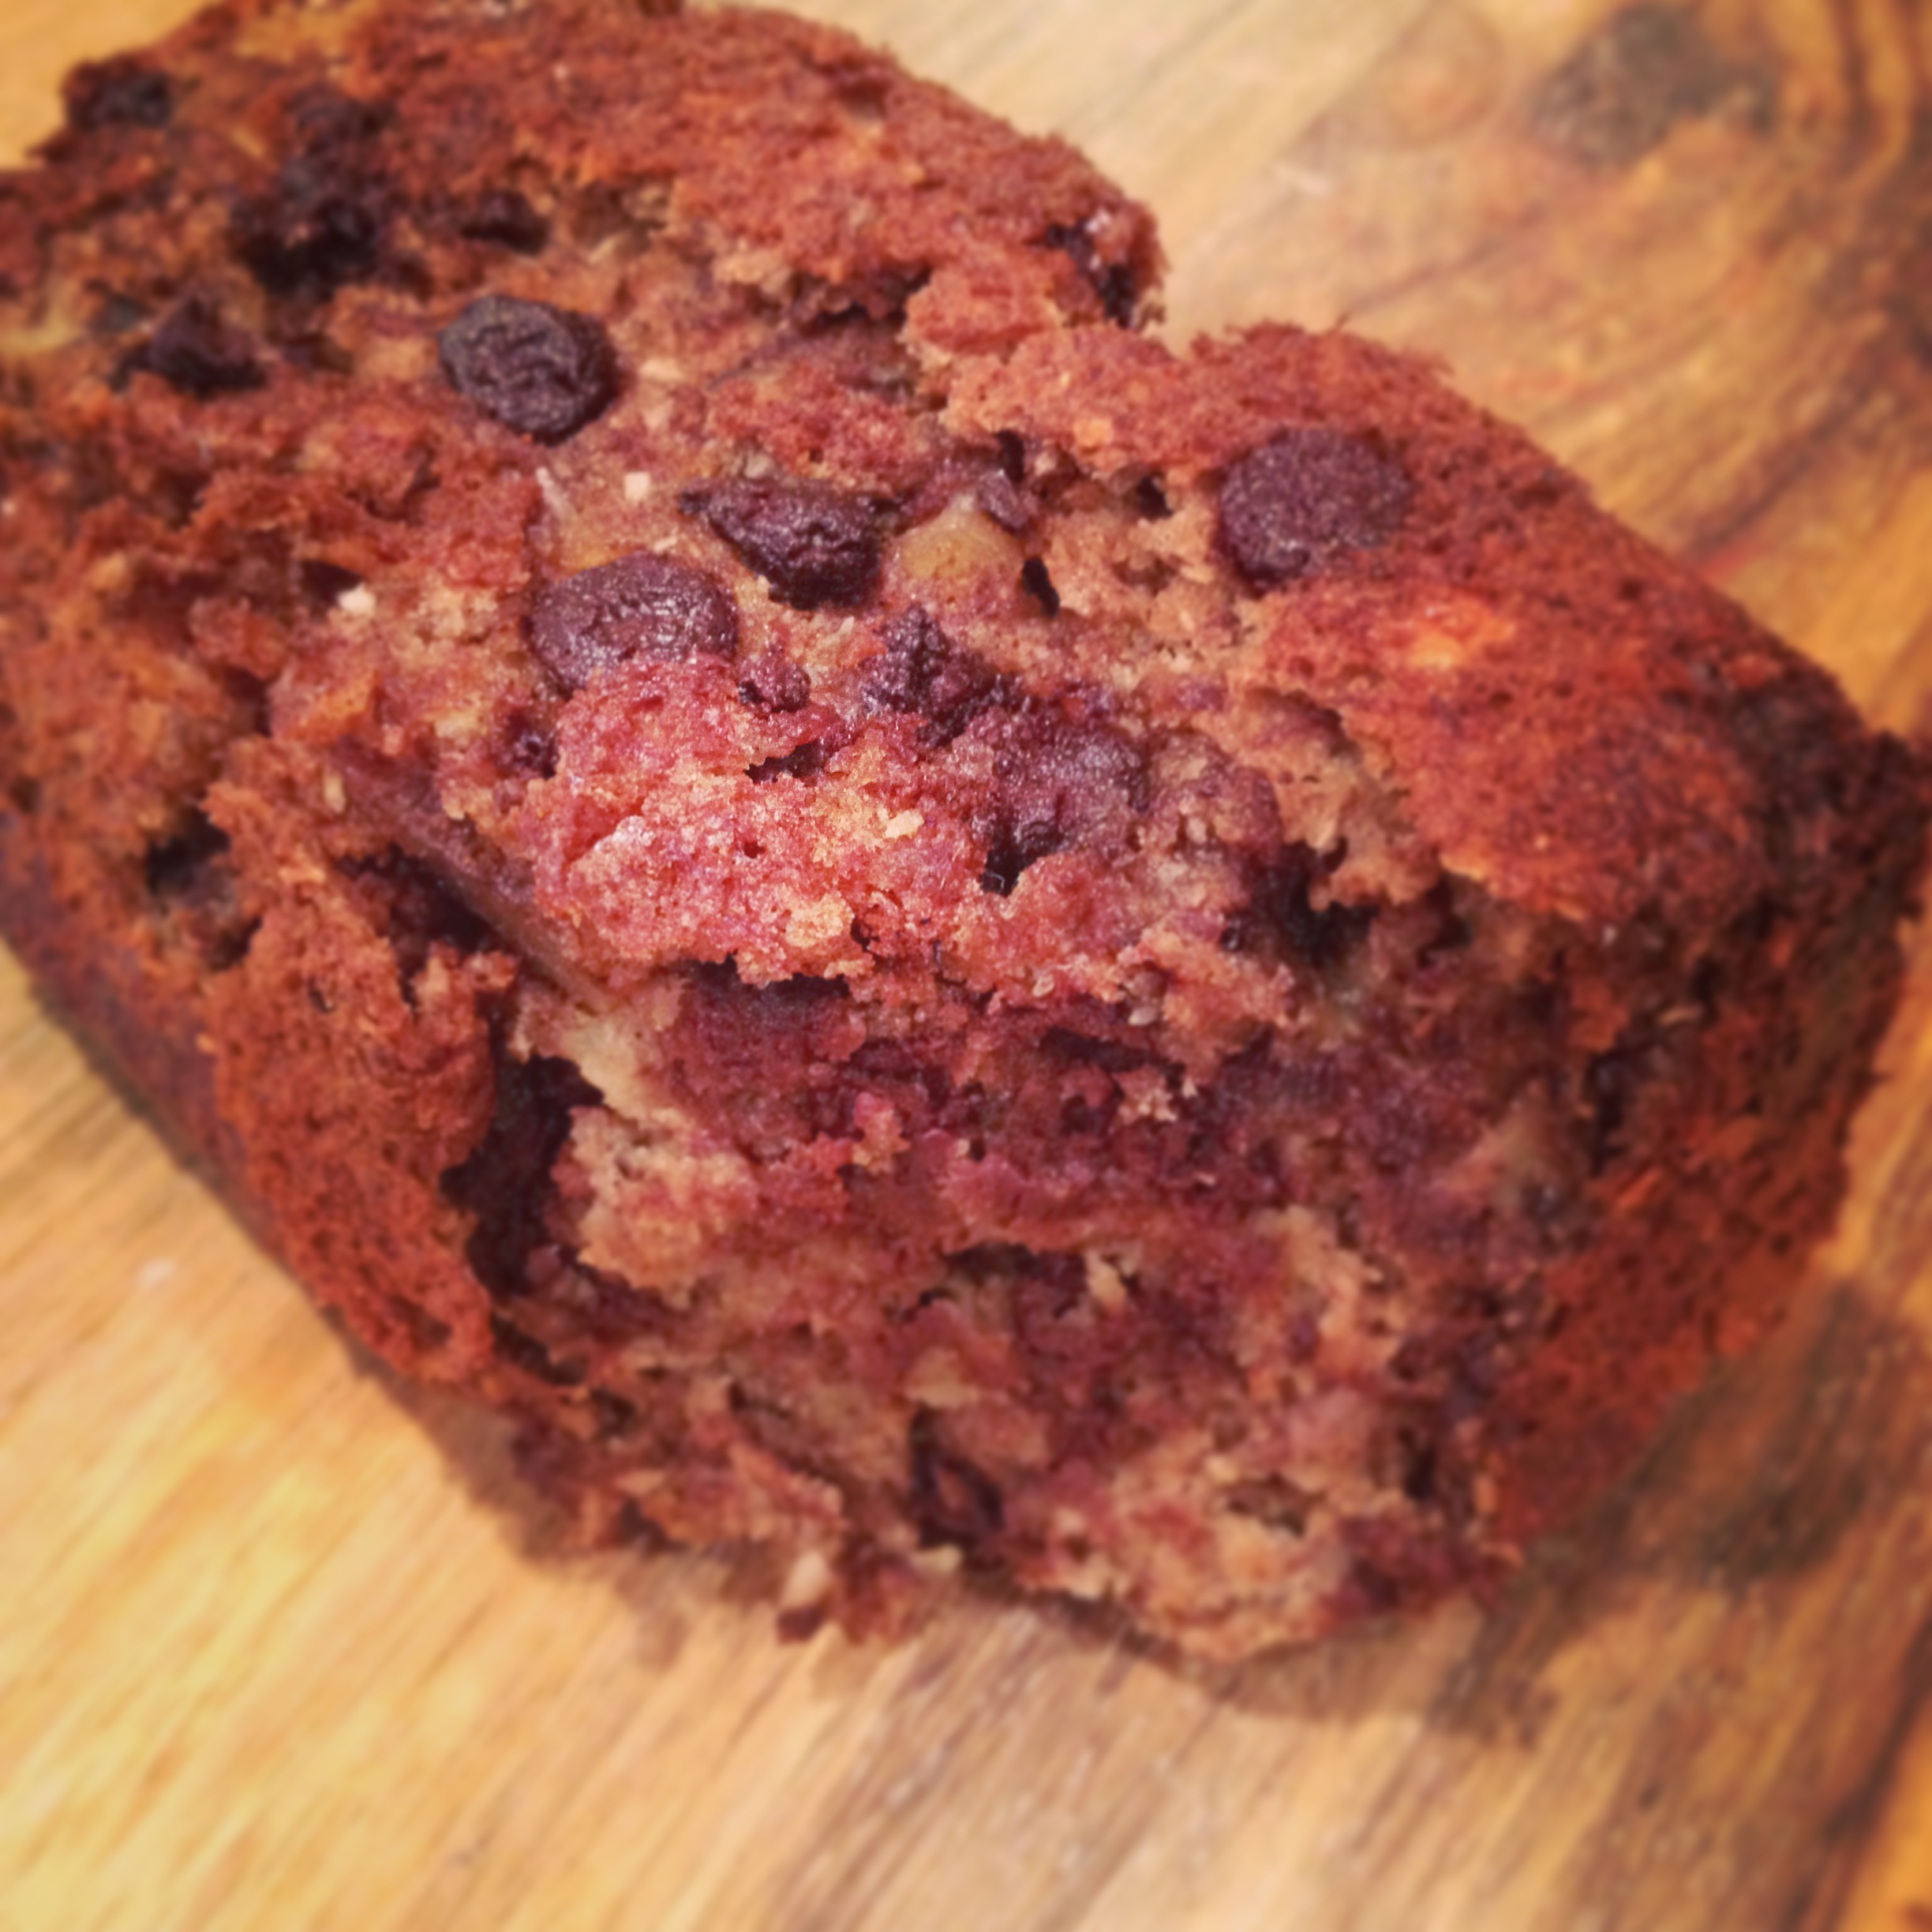
This amazing banana bread entered into my heart a few weeks ago when I had a day off and went to go visit my sister at work. She’s been on this “Paleo Kick” that I usually roll my eyes at, but I have to say this recipe immediate became a kitchen staple and has now replaced my tried and true Banana Bread recipe that is YEARS old! It’s THAT good kids!
Gluten-free cooking is nothing new to me. I LOVE baking with Bob’s Red Mill All-Purpose Gluten-Free Baking Flour and have made quite a few goodies with it. Most recently I made a Strawberry Basil Bread, Gingerbread cookies, Chocolate Chip Cookies, amazing Vanilla Cupcakes, and even tried my hand at Vegan Gluten-Free Donuts! To be clear, I am NOT a big believer in following every food fad that comes along, and most definitely did NOT jump on the Paleo band wagon when it came in vogue, nor am I on that bandwagon now. This bread is quite simply one of the most delicious healthy baked goods I’ve ever had. It’s mainly bananas and eggs, a little homemade almond butter, gluten-free flour, and some apple sauce to hold it all together. That’s it! No added sugars. No two stick of butter and 5 cups of refined white flour. Just simple, regular ingredients you can pronounce and happily eat.
There are many variations you can try with this recipe and I list a few at the end of this recipe. Next time I might throw in some blueberries, or try coconut flour to make a bit more of a dessert style bread. What variations would you, or are you, going to try?
Paleo Banana Bread Adapted from Civilized Caveman Cooking Creations Recipe Prep Time: 10 mins | Cook time: 30-45 minutes
Ingredients 2 1/2 cups yellow bananas, mashed (approx. 4 bananas)
4 eggs
1/2 cup homemade almond butter
4 tablespoons Apple sauce (original recipe called for melted grass-fed butter or coconut oil)
1/2 cup gluten-free flour
2 tsp cinnamon (original recipe called for 1 tbsp but that’s a little heavy for a summer bread)
1 teaspoon baking soda
1 teaspoon baking powder (gluten-free or homemade)
1 teaspoon vanilla
pinch of sea salt
Instructions 1. Pre-heat your oven to 350 degrees fahrenheit
2. Combine your bananas, eggs, and nut butter, and apple sauce and mix well
3. Add in in the flour, cinnamon, baking soda, baking powder, vanilla, and sea salt and mix well
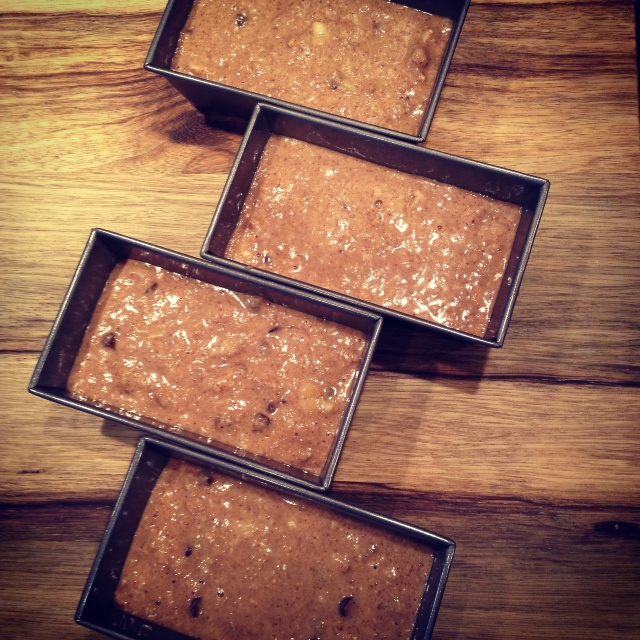
4. Grease a 9×5 glass (see notes) loaf pan with a fat of your choice (I use Rice Bran oil)
5. Pour in your batter and spread it evenly throughout
6. Place in your preheated oven and bake for 55-60 minutes or until a toothpick inserted into the center comes out clean (If you use a metal pan it will probably bake in 35-40 minutes so start checking at 35 to ensure the middle stays moist)
7. Remove from oven and flip your bread out onto a cooling rack
8. Slice and serve
Variations
1. Alternate Nut Butter: You can use any almond butter you desire: coconut, sunflower seed, macadamia nut, etc
2. Alternate Flour: My sister uses coconut flour, but I bet that almond flour or macadamia nut meal could be delicious
3. Flavors: Cranberry Orange – Only use 3 tablespoons of butter. Add zest of one whole orange diced, juice of one whole orange, and 1 cup dried cranberries or fresh if you want
4. Flavors: Chocolate Blueberry – Add 1 cup of fresh blueberries and 1/2 cup of cocoa powder
5. Flavors: Pumpkin Pecan – Reduce the almond butter to 1/4 cup and add 1/2 cup of pumpkin puree and 1 cup of roughly chopped pecan pieces
If you want to make these into muffins, use the same recipe and for mini muffins bake approximately 25 mins and normal size muffins 30-35 minutes.
The way that I describe this dish, is a middle eastern version of fried rice. It’s a great meal the throw together and one that you can experiment with spices that you don’t likely use in your daily cooking. The original recipe calls for a steaming method of cooking, which is the traditional method. I neglected to read the directions before I started the recipe and didn’t think we even owned a steamer! Well, after I completely revamped the entire cooking method, I realized that we DO have a steamer so I guess I’ll try that next time!
Couscous is very low in fat, and has about the same in protein, fiber and carbs as quinoa. Quinoa beats couscous in the mineral content, but couscous packs an amazing 87% of your daily suggested intake. About 55mcg is suggested daily and couscous has 43mcg per once cup serving. Selenium has antioxidant properties, can help the body regulate the thyroid hormones, support a healthy immune system, and aid in metabolism. One of selenium’s most important roles is as an antioxidant helping to prevent cell damage due to free radicals. (Sources: WebMD and Eating Well)
One VERY important thing that I did not note, until I’d already washed and set aside four cups of couscous, is the water to couscous ratio in this recipe. Much like rice or quinoa, there is a two to one ratio for water to couscous. Now, this recipe called for 4 cups of dry couscous. Four cups of dry couscous is quite a large portion, borderline obscene actually. I only realized this fact at the very moment where I was pouring the 8 cups of water and 4 cups of couscous into my stove top pan and it was nearly brimming over. And, I hadn’t event started it boiling yet! My denial for the amount of couscous I was in the middle of making could no longer be indulged and I pulled out the large stock pot and transferred my absurd amount of couscous into the larger pot. While there was much more couscous than I would normally cook, about 9 servings worth, the ratio of the other ingredients worked perfectly. The only thing I would change is to maybe try cutting the couscous by half.
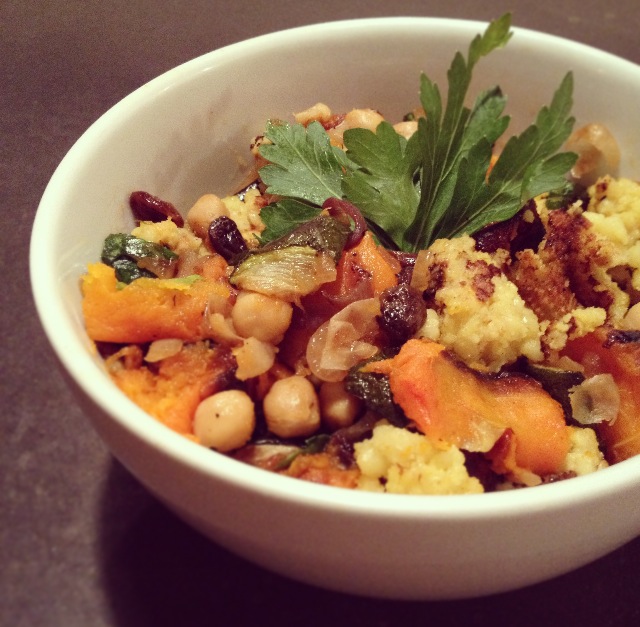
To serve, mix the roasted zucchini and butternut squash, chickpeas, raisins and sautéed onion together in a bowl and add a little more chopped parsley. (Typically, chickpeas from a can are already cooked but double-check.) Add in the couscous and stir well. The couscous will be a little gummy which is possibly due to my cooking method and not steaming it as directed. Garnish with more fresh parsley if you wish. You can also add grilled chicken or tofu to this if you want more protein like I usually do.
Squash Couscous Yield: 9 cups of couscous + a good amount of veggies for 4 people Recipe and method adapted from the recipe on Canadian Living *Note: Due to preference and feeding two people versus 6, I suggest cutting the couscous, chicken stock and water in half. If you LOVE couscous or have a lot of people to feed, keep the recipe as is!
Ingredients
1 1/2 lb (one medium large) butternut squash, peeled and chopped in 2 inch cubed
2 large zucchini, sliced into 2 inch cubes
1 medium yellow onion, diced
1/2 cup raisins
2 cups ( 1 15 oz can) chickpeas, drained and rinsed
1/4 c chicken bullion paste for chicken stock 8 cups water 2 tbsp chopped fresh parsley 1 tsp ground ginger 1/2 tsp pepper 1/4 tsp salt
1/2 tsp turmeric 4 cups Israeli couscous ( I only had 3 cups, so I added one cup of the golden small couscous additional parsley to garnish
Directions Wash and chop the zucchini and butternut squash. Don’t forget to de-seed the squash. Lay out on aluminum foil on a baking sheet and roast at 450 for 30-45 minutes. Turning every 10 -15 min. Wash the couscous and set aside.
Chop the onion and fry it on the stove with some olive oil in a large stock pot. Set aside in a large bowl which you’ll use to mix up the rest of the ingredients. Drain and rinse the chickpeas and add to the bowl, along with the raisins and some more parsley (to taste). Add the zucchini and butternut squash to this bowl once they’re browned on all sides.
Bring 8 cups of water to a boil in the large stock pot you used for the onions. Stir in the 1/4 cup of bullion, parsley, ginger, pepper, salt, and turmeric. Let boil together for a few minutes. Add the couscous and let it come back to a boil. Be sure to stir it all up every few minutes. Cook until the couscous soaks up the broth and get’s to a consistency you like.
Add the couscous to your large bowl with the onions, raisins and chickpeas, zucchini and butternut squash and stir. Garnish with additional parsley if you wish.
Tonight we’re eating this with some delicious bone in pork chops that are currently brining, but you can serve with grilled chicken, boiled eggs, firm tofu, or grilled steak. The options are endless!
Some days you just wake up and want a muffin and a nice BIG cup of coffee. This was one of those mornings. Luckily, it’s also a weekend morning so I was able to enjoy all of the above, in the comfort of my PJ’s and completely homemade. Whenever I get a hankering for muffins, it’s usually for carrot raisin or bran muffins. Some people might protest and say that if it has vegetables in it, it’s not a “real muffin”. Well, most store bought muffins are really just cupcakes without frosting or generic blueberry. Neither of which are very appealing to me. I love to bake, and I do love a good muffin, but I need my PROTEIN in the morning to get going. Protein and a large cup of coffee. That’s where these little guys are a life saver for me. I use chickpea flour, which has higher protein that other flours, greek yogurt, AND walnuts! It’s got everything you need: protein, carbs, healthy fats, it’s filling, convenient and delicious. I don’t taste the chickpea flour but I love the extra protein that these little guys pack in!
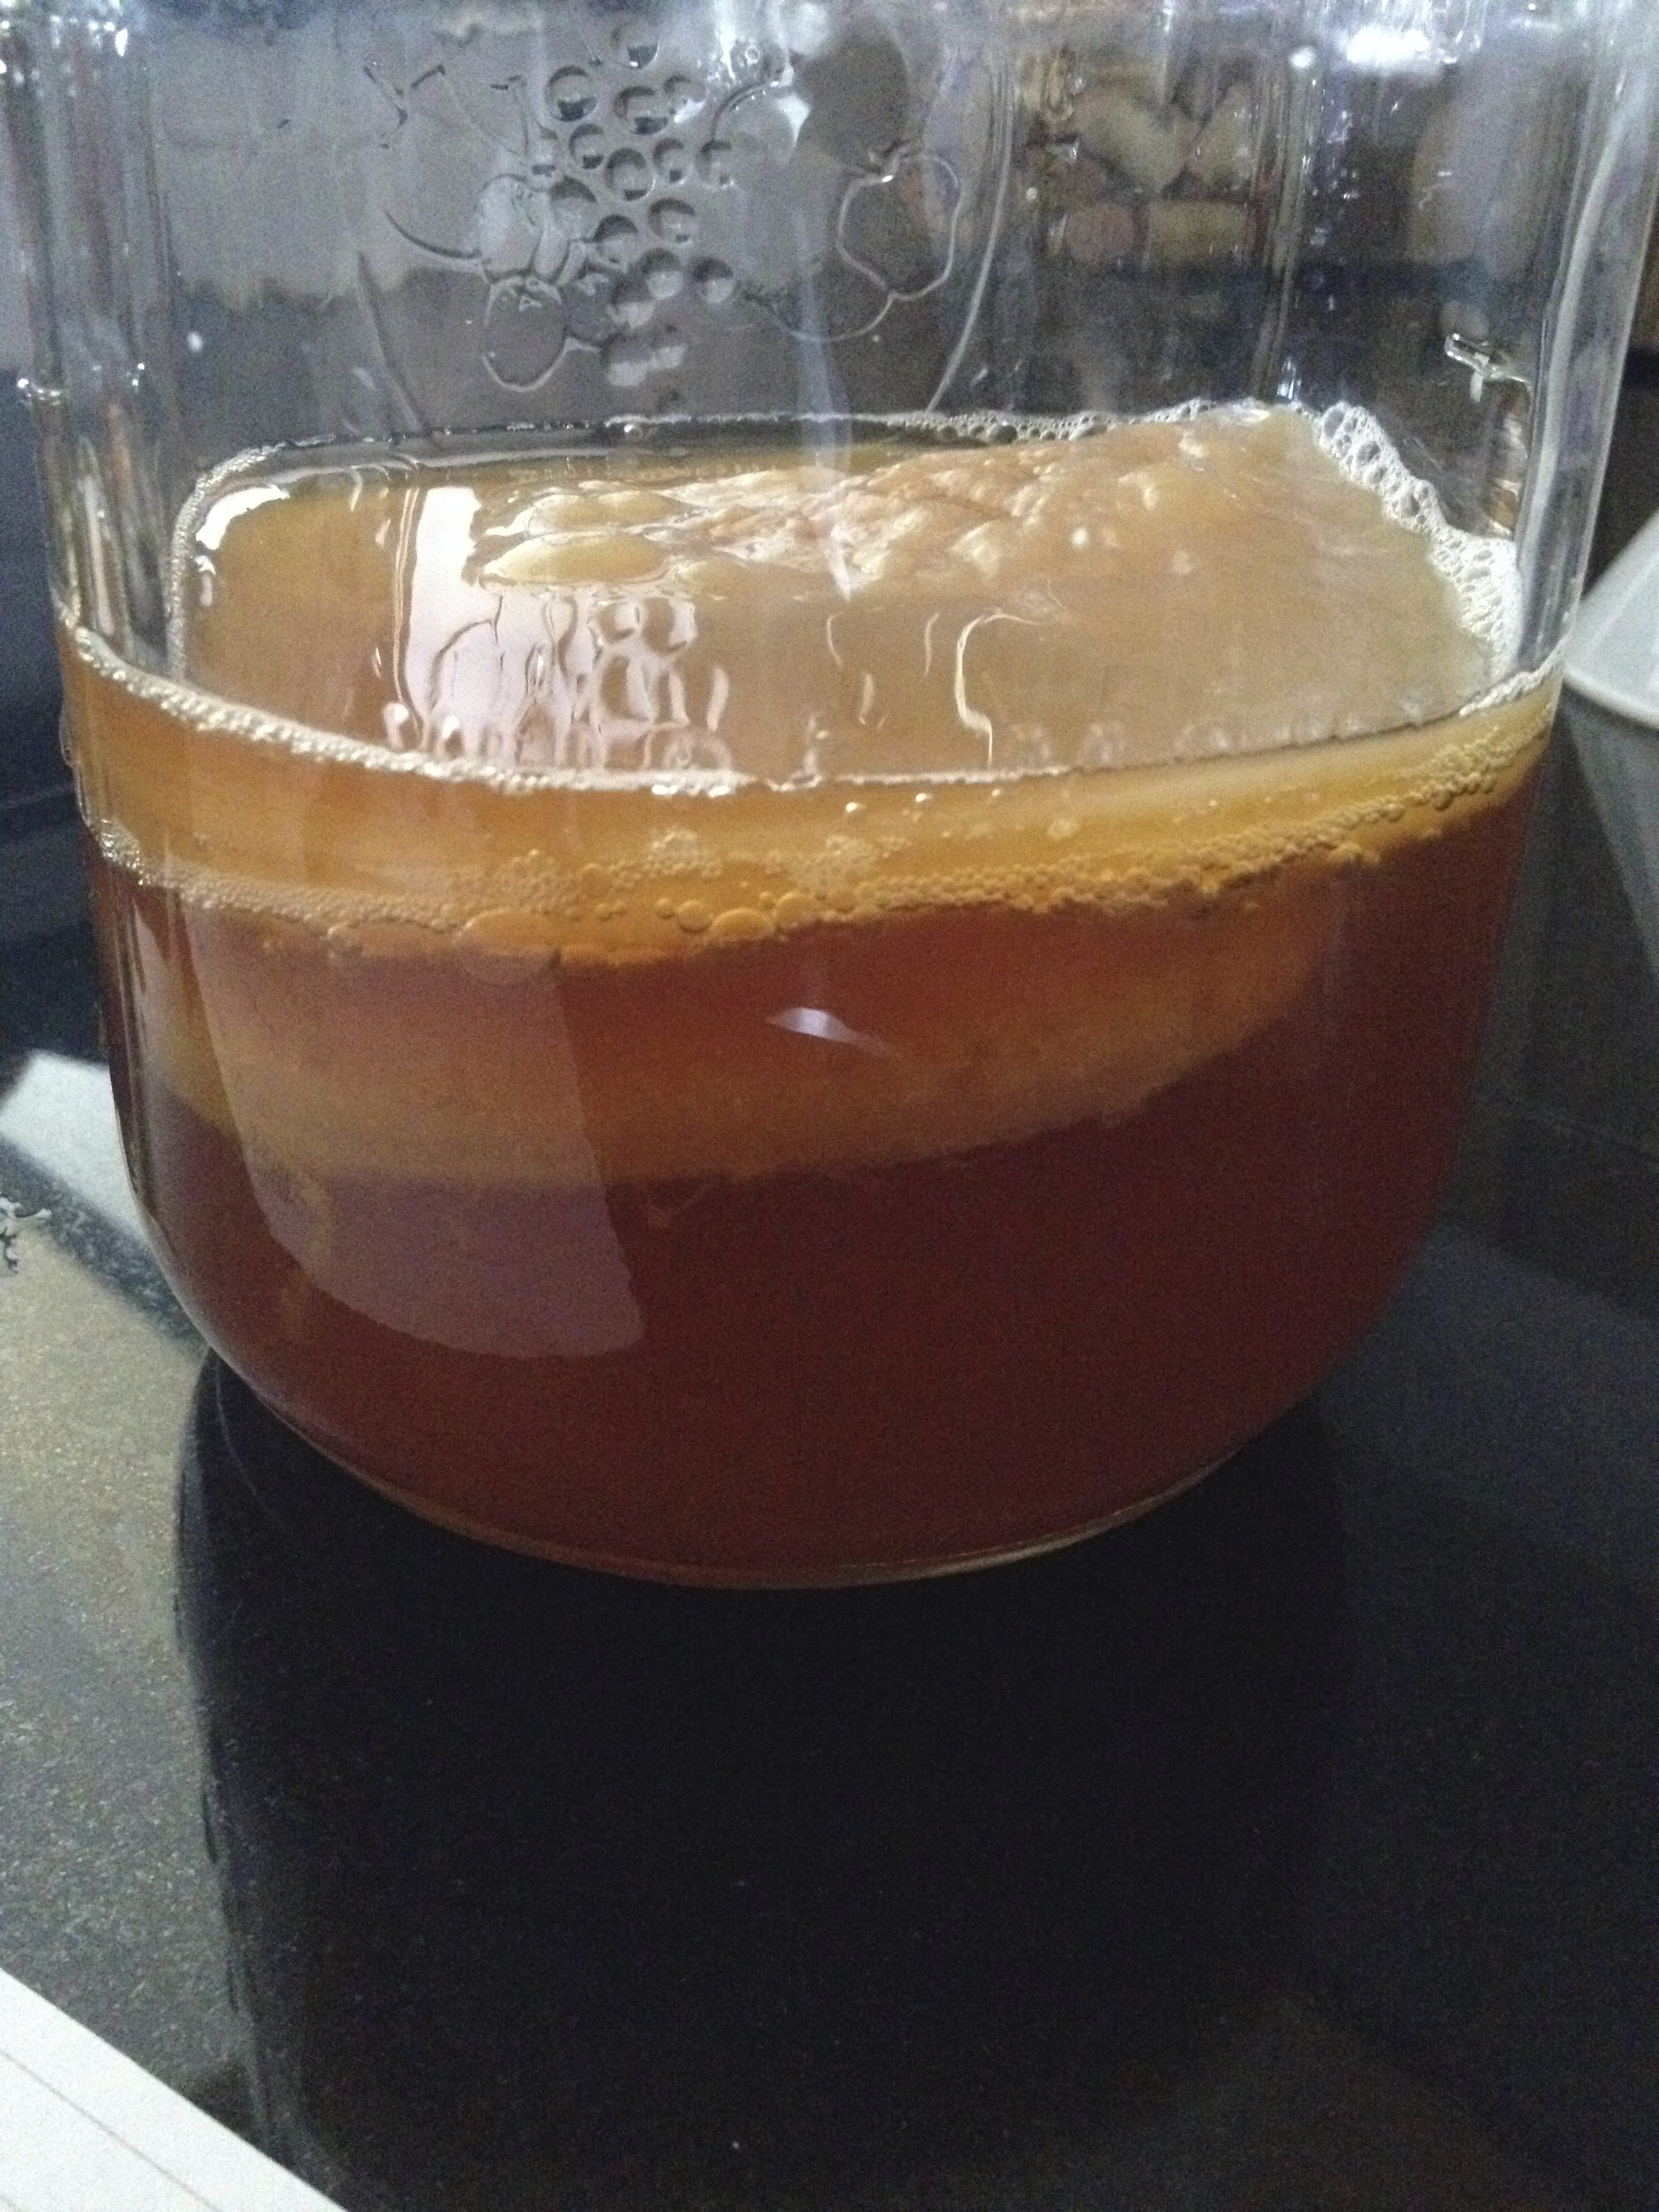
When I first thought about making my own Kombucha at home I was a little wary. What if I do it wrong it turns out horrible and make myself sick! For those of you that are like me, all you really know about Kombucha is that is some healthy drink that you see littering the aisles of health stores and somehow helps you be healthy and has something to do with mushrooms.
The Kombucha starter, often called a “mother” or a scoby, stands for symbiotic colony of bacteria & yeast. The reference to mushrooms comes with the disc like form that the scoby grows into, which can sometimes look like a Portobello mushroom or to be more specific, a very slimy slightly yeasty smelling version of a mushroom. So, there you have it, there are no mushrooms involved in the making of Kombucha! There are a bunch of SCOBYs out there, Amazon has a bunch of options and the only recommendation I’d make is to ensure that you get one that is hydrated – the dehydrated ones are a pain!
This drink is made from a process called fermentation, which simply means that bacteria or yeast is used to chemically break down a substance. While the sounds a little gross, I’ll admit, it’s quite good for you! It contains healthy bacteria called probiotics which support intestinal health and help with digestion and elimination as well as encouraging detoxification. For an extended list of possible health benefits, please visit Kombucha Kamp.
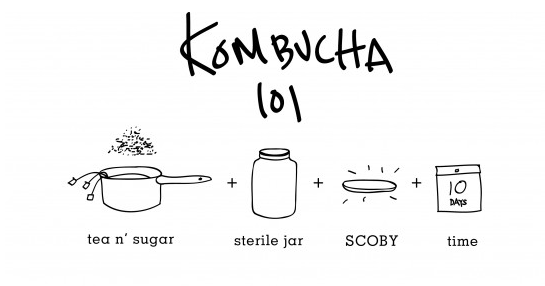
The process of making Kombucha is actually much easier that I thought it would be! I LOVE this picture below from a the Eat Life Whole post on Kombucha.
See it’s simple! First, you’ll need to purchase a scoby from a reputable source. Unless you have a friend that has a baby scoby to share, you can purchase the same on that I did from Yemoos or Cultures for Health. Next, you brew some tea with sugar, which feeds the bacteria, let it cool COMPLETELY to room temperature, then pour it into the jar with the scoby and let it hang out for 5-10 days and viola, you have Kombucha! I have to lead this post with a shout out to one of my dearest friends who’s pioneering into the world of Kombucha (and responsiveness to my contestant Kombucha support line texts of “DOES THIS LOOK NORMAL!?”) really helped me in making my first few batches. If you’re lucky enough to have someone that’s also making Kombucha you can trade stories and pictures of your ever growing SCOBYS (yes, you’ll want to take pictures as gross as that might seem) but if you DON’T have someone making it at the same time as you, please consider this your Kombucha support forum! Post pictures of your scoby, ask questions, let us know your favorite flavors that you’re brewing, and anything else Kombucha that comes to mind.
One of the most important things you have to remember when making Kombucha, and most other fermentations, is that metal utensils/containers and plastic containers are not a good idea. The metal and plastic can actually harm the fermentation so it’s best to brew using plastic utensils and a glass jar, which are easily sanitized.
If possible, try to prepare your first batch of Kombucha the day your scoby arrives. You can store the scoby in a cool cabinet until you’re ready to brew your first batch. I have to tell you, I put mine in the fridge because I thought it needed to be kept cold, and THEN decided to read the direction and freaked out thinking I had already killed my little scoby. It was in there over night and I contacted the team at Yemoos right away who quickly settled my worry and said that it would likely be just fine having spent the night in the fridge. Phew, guess I should read the directions FIRST next time hey? The nice thing about this process is that the scoby is pretty resilient so you don’t have to worry too much about “messing it up”.
As far as drinking this good stuff, most people are fine starting off with a full glass but for a few people it can be a little shock for the body since it’s packed with probiotics that encourage, well, elimination and promote intestinal balance. If you find that you DO have a little tummy rumbling response to the Kombucha, back off to a half glass and work up your consumption level daily.
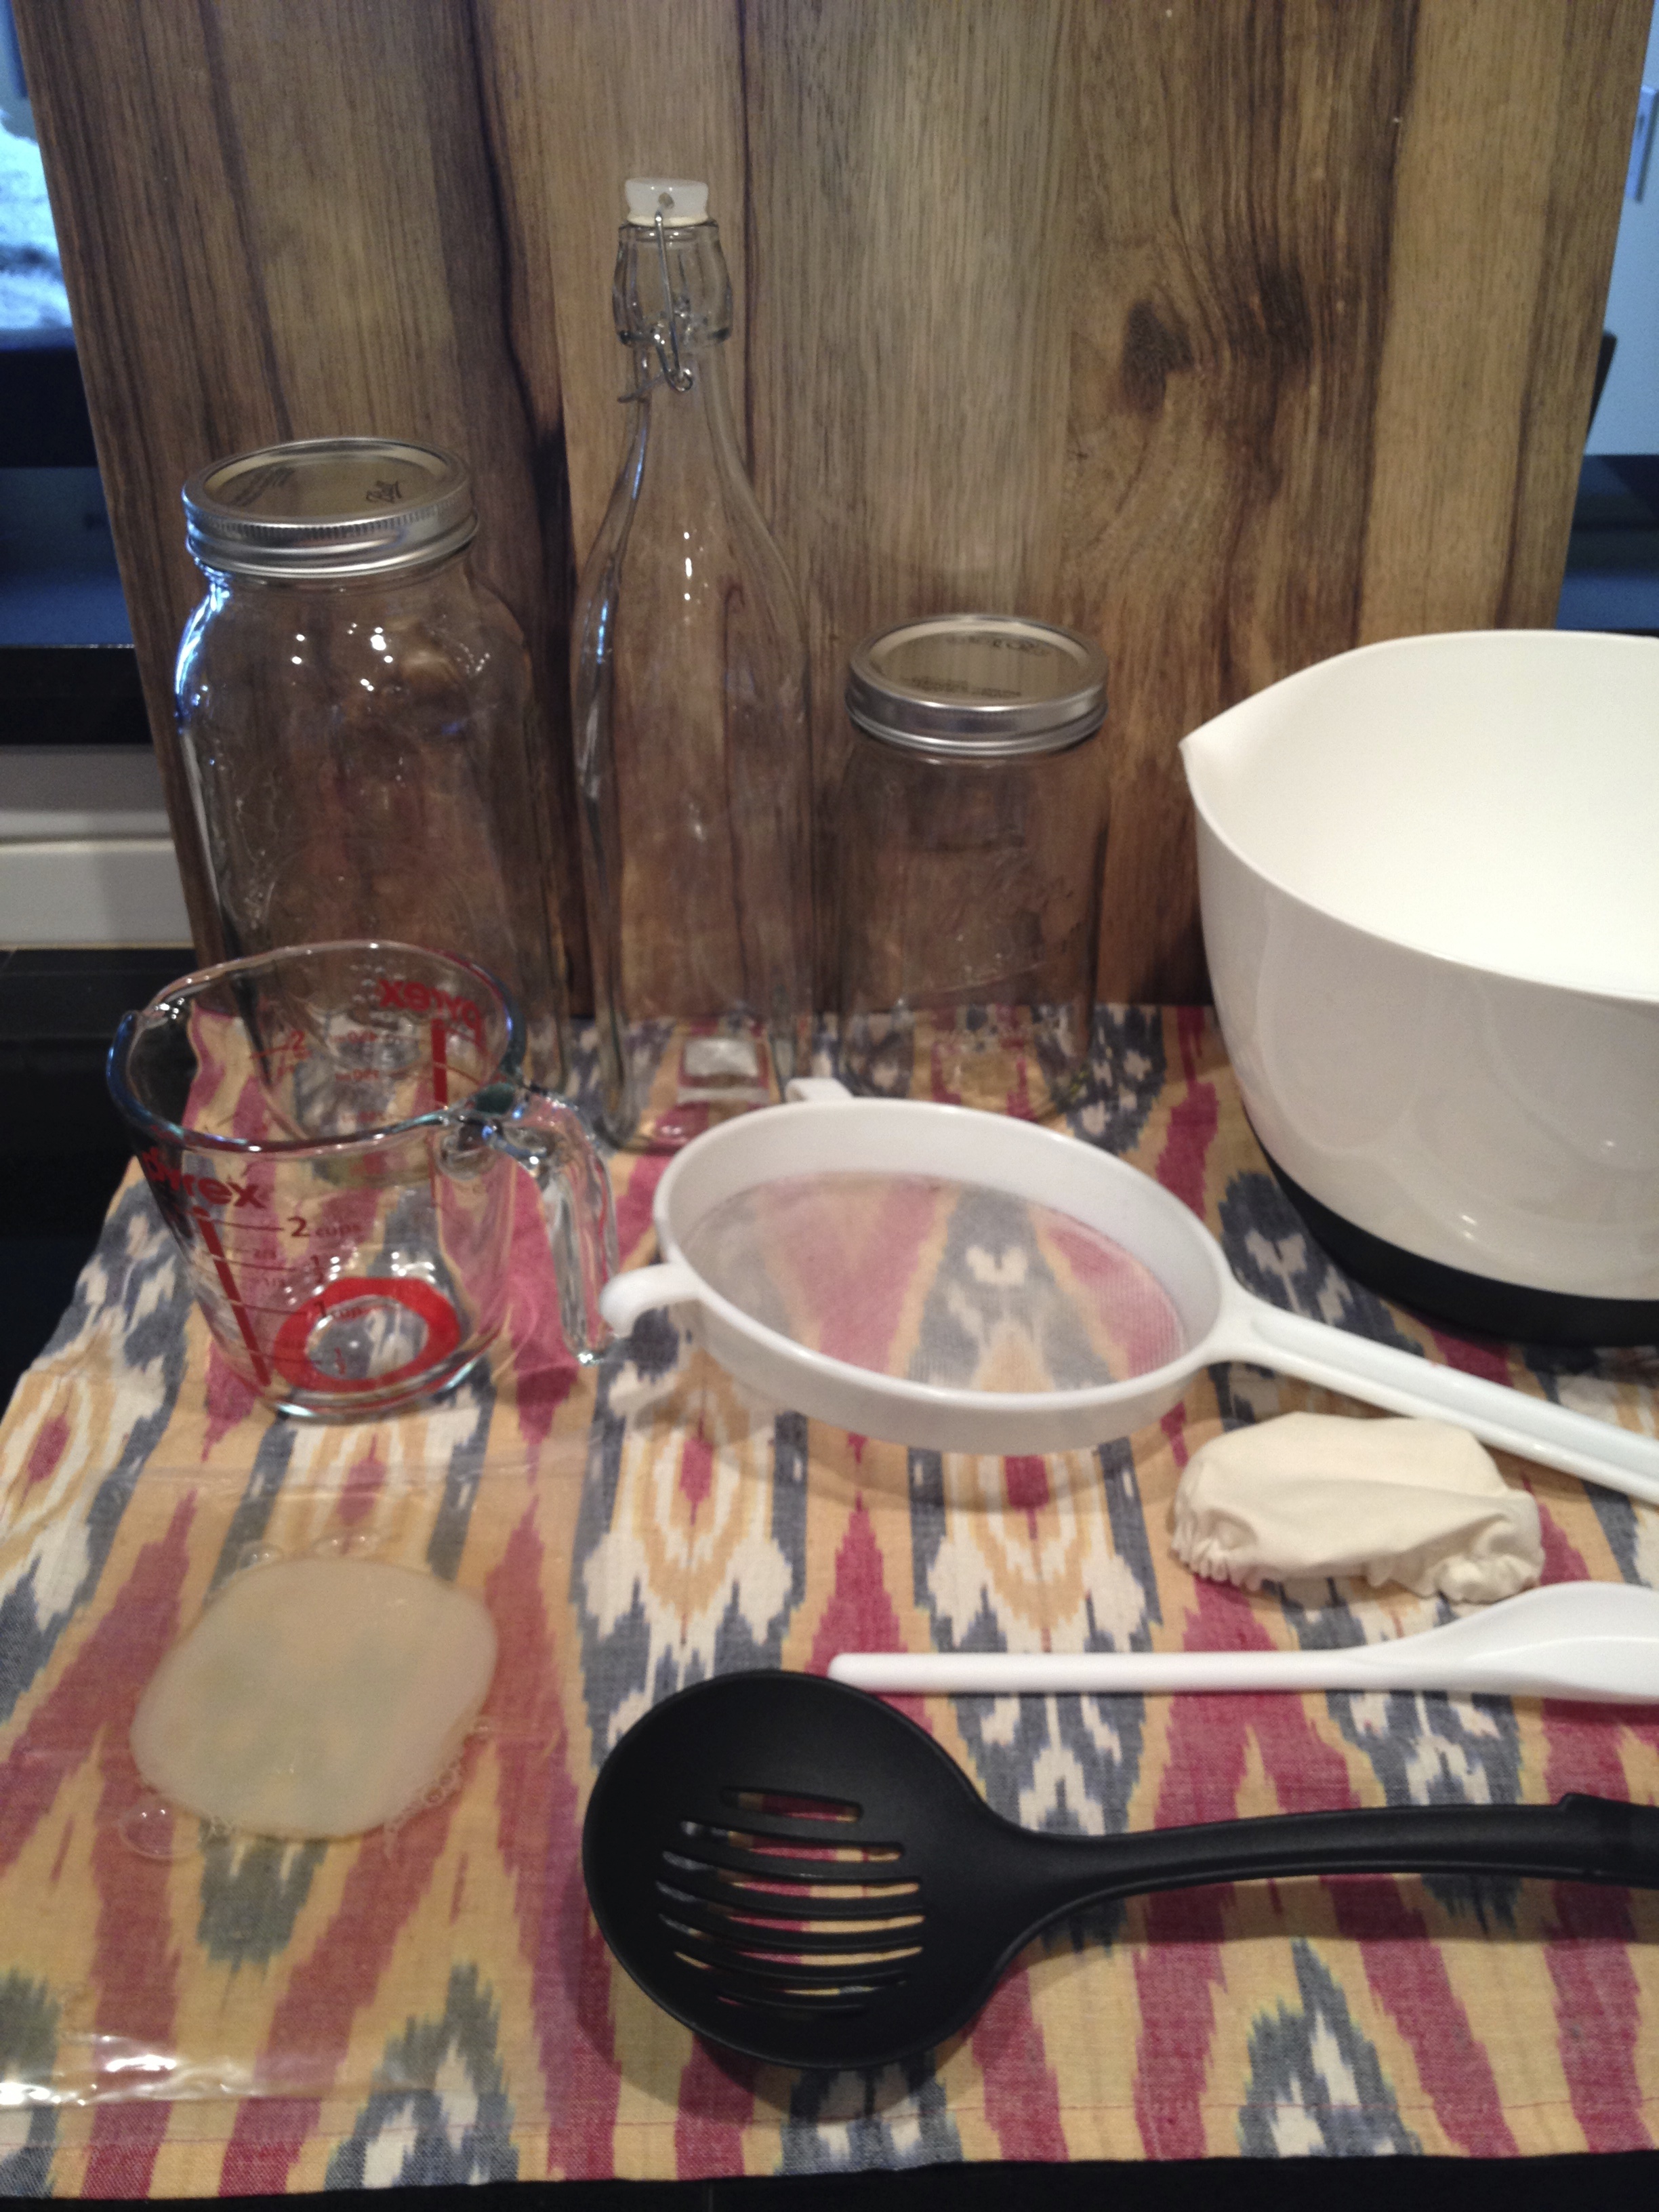
So, are you ready to make some Kombucha!? I got my ball gallon glass jar and sling top bottle at Cost Plus. The quart glass jar came with the yemoos Sourdough kit I ordered at the same time as the Kombucha SCOBY starter, but you can get a great gallon jar HERE on Amazon.com them or find jars of various sizes at Cost Plus.
Homemade Kombucha: A Step-by-Step Guide
Tools:
1 gallon glass jar
Plastic spoon or spatula
Pyrex glass measuring cup (for measuring the water)
1 Plastic bowl for steeping and cooling the tea (one with a pour spout is easiest)
3 Sling top glass bottle to store finished Kombucha
Funnel that fits in the top your sling top bottle
(Optional) Strainer, used to strain out the little strands of Kombucha if bother you
Cover for the Kombucha- cloth or paper towel secured with a rubber band works
Ingredients:
1 Scoby (called the “Mother) & Starter Tea liquid it arrived in
8 tea bags or 3 tbsp loose leaf tea in a tea bag
14 cups filtered water
1 cup organic white sugar
Get your large bowl and get your tea bags out, tying the strings together. Add in one cup of organic sugar.
Boil your filtered water then add it to the bowl with the tea and sugar, stirring with your plastic spoon while you pour so the sugar dissolves.
Let the tea steep and cool COMPLETELY to room temperature, if you pour it in with the scoby when it’s too hot it can harm the scoby cultures.
While the tea is cooling, wash your hands and carefully open the scoby packet, which should also contain the starter tea. Gently pour the tea and the scoby into your sanitized jar that you will be brewing your kombucha in.
Once the tea and sugar mixture is cooled, tilt your brewing jar to the side and carefully pour the cooled tea mixture into the jar trying to get the tea under the scoby. Cover the jar with a cloth or paper towel, something breathable, and secure with a rubber band. Place your Kombucha out of direct sunlight and let it brew for 7-10 days undisturbed.
You can taste your Kombucha around day 5 if you’d like by dipping a straw into the Kombucha, covering the exposed end with your finger, then removing the straw so you don’t contaminate the rest of the batch. The sugar is what feeds the scoby, so if the tea still states sweet, it needs to brew longer. When you taste it, it should be a little acidic or tart first, then have a little touch of a sweet finish.
When you have reached your desired taste, you’re ready to bottle! Get your sanitized swing top bottle, a strainer, and a funnel. I didn’t actually use the strainer. This is an optional step where you can strain out the dead yeas cultures that you will see floating in the brewed tea- they’re just little pieces of dead yeast and are perfectly fine to consume. They don’t bother me but if you’d prefer to strain them out while you bottle it, you can. Place the funnel in the top of the swing top bottle and carefully pour the finished Kombucha into the bottle. Reserve about a cup of the liquid for the next batch of Kombucha and repeat the steps!
Keep your finished tea in the fridge to slow down the fermenting that can slowly continued even after you’ve removed it from the scoby jar.
A Few Notes:
As the Kombucha brews, you’ll see another layer growing on top of the Kombucha. While it might resemble mold, it’s simply the start of a “baby scoby”. This is perfectly normal and actually what you will be using to keep brewing Kombucha at home. As long as the baby scoby isn’t thick, you can brew both the scobys together for your second batch. After the second brewing, you’ll want to carefully separate the bottom scoby, which is the mother, and continue to brew using only the baby scoby. You can either discard the mother scoby, or give it to someone else so they can home-brew Kombucha!
The scoby can sometimes sink a little, and it’s completely fine if it does. Just make sure it doesn’t completely sink to the bottom.
If you’re worried about the sugar, remember that this is what the scoby metabolizes, along with a good portion of the caffeine in the tea so there will be very little of either left in the final product. While it won’t completely remove the caffeine it will greatly reduce it.
You can use the same jar for your second batch, but make sure to separate the mother and baby scoby after the second brewing.
If you prefer your Kombucha fizzy, I suggest using a bottle with a sling back top so any pressure that accumulates can release itself. Simply pour the Kombucha almost to the top of the sling back bottle and set it on the counter for 2-5 days. You can also manually “burp” the Kombucha if you start to notice pressure on the lid.
You can also make flavored kombucha soda on a second ferment!
(Vegan, Vegetarian, Dairy-Free, Meat-free)
It’s “officially” fall in the Pacific Northwest. All of the normal indications are here: I need sunglasses, a jacket, a scarf, a tank top, gloves and an umbrella all in the course of about five minutes. The sun is setting earlier, waterproofing boots is on my to-do list, and my shorts get packed away.
Another indication that it’s fall is here is the lack of daylight. There is an impending sluggish feeling that starts to set in when we realize that we go to work when it’s dark and leave work it’s dark. Unless you’re one of the lucky few that has a window near your cubicle or in your office, it’s possible to only catch a glimpse of real “light” through ever distant windows on the run from the much needed afternoon coffee break to back to back afternoon meetings.
When the rain starts, the fall flavor craving starts. These cravings battle the ever sluggish feelings and makes us torn when it comes to dinner. Either it’s the event that keeps me going during the day and I can’t wait to rush home and cook something that I’ve pinned, liked, saved or stashed. Or, the last thing I want to do is be in the kitchen as a continuation of my daily servitude but am conflicted when I mentally explore the ease of ordering pizza.
Marinated Chickpeas
1 can chickpeas, drained
White Wine
Minced garlic
Dried Parsley, garlic, rosemary pepper
EVOO or cooking spray
Open the can of chickpeas, drain and rinse
Marinate the chickpeas in spices, white wine and a few dashes of balsamic in a bowl or tupperware
When you’re about 17 minutes away from the other dishes being ready, pre-heat a pan with some EVOO or cooking spray
Remove the chickpeas from the marinade, I use a slotted spoon to do so, and toast on medium-high until the exterior starts to brown (usually about 10-15 minutes)
Shake the pan every few minutes to move the chickpeas around so they brown evenly
Once they’re browned to your linking, remove from the heat and serve
I usually pair with baked butternut squash, sauteed garlic kale or kale chips and toasted quinoa.
Cooking Notes:
–The Wine: I NEVER cook with a wine I wouldn’t drink. So, choose whichever you’d like. Anything from a Chardonnay to Riesling works. I usually use a traditional table white wine or a dry Pinot Grigio
–Marination Time : Since this is a go-to meal I usually only marinate them for about an hour, but if you can remember in the morning to prepare them it will taste MUCH more delicious
When the weather turns soggy, I start to practice my winter sport of “being in the kitchen”. From caramelizing and chopping to baking to broiling, when the weather turns to mush I turn to the kitchen. …and a glass of wine, but that’s a year round sport!
This year I’ve really tried to focus on cooking “in season” and challenging myself to prepare my “typical” foods in a different way. While leek’s are not something that we traditionally have on hand in our house, they made the headliner in today recipes. To be honest, the lack of consistent main stage placement in our cabinet is purely due to the fact that I only know two ways to cook them; sautéed or made into leek soup. While they are can be found year round, they are in season November to February and are more readily available.
The more I looked into the nutrition characteristics of leeks, the more I realized that I wasn’t the only one who usually passed up these shallot and garlic relatives in the grocery aisles; many people shy away from these cardio enriching veggies because they don’t know how to cook or prepare them. Leeks are high in folate, which is a key B complex vitamin for supporting and balancing our cardiovascular system (source) as well as being very high in potassium and very low in sodium, giving it naturally diuretic properties (source). Sharing the same family as garlic and onions, they boast immune, antioxidant, and heart-healthy benefits.
Enjoyed in in salads with vinaigrette, in soups, sautés, risottos, sauces, pastas, frittatas, creamed, carmelized, Bruschettaed… there are SO many ways to prepare leeks it will blow your mind! Check out this Leek Pinterest Board for more inspiration!
When shopping for leeks, look for ones that are firm and straight, with dark leaves and white bodies. Quality leeks should not be yellowing, wilting or cracking. To store, keep them unwashed and untrimmed,wrapped in a paper towel inside a plastic bag in the fridge up to a week. Cooked leaks should be kept for no more than two days, but you can freeze them up to three months once they’re blanched for three minutes and stored in an airtight bag.
I have to warn you, you’ll need a spoon readily accessible once this soup is cooked, is so good you’ll be eating it out of the pot!
Vegan Potato Leek Soup Adapted from recipe posted on Care2.com Serves 4 – 6
Ingredients:
1 tbsp EVOO (extra virgin olive oil)
3 large leeks, whites and greens, washed and sliced
2 medium yellow onions, chopped
½ tsp fresh cracked sea salt
3 cloves garlic, or 1 ½ tsp minced garlic
2 large white potatoes, washed and cubed
5 cups chicken stock (use vegetable stock if you’re making entirely vegan)
½ tsp crushed rosemary
Wash all veggies
Heat EVOO in stock pan with the chopped leeks, onion, garlic and sea salt, sauté stirring often until the onions begins to turn translucent
Add the potatoes and vegetable stock and bring to a boil. Cover, reduce heat and simmer 20 minutes
Meanwhile, get your blender out and prepared to blend up the soup
Once cooked, remove the soup from the heat and ladle into your blender, 1 cup at a time (if you have an immersion/stick blender you can blend the soup right in the pot)
Blend the soup until smooth and free of chunks
Pour smooth soup into a heat-proof bowl and continue until all of the soup has been blended
Transfer the blended soup back to the original soup pot and warm over low heat until heated through

 Hello friends…