Roasted Red Peppers

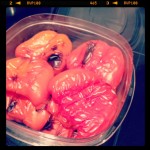
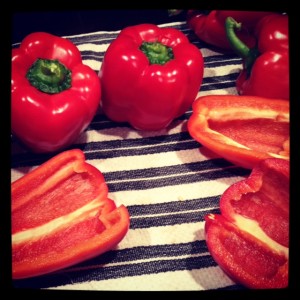
Lovely Red Peppers ready to roast

Roasted Red Peppers are a love affair of mine. It feels like I’m getting caught in the act of hijacking cookies secretly from the cookie jar when I eat them…yes…straight from the container. It “feels” like I’m doing something wrong because how can such a delicious treat be SO good for you!?

When the peppers are roasted it brings out their sweetness and lends a wonderful charred flavor to them which also makes them a wonderful addition to any sandwich, salad, tapas or antipasto plate, pasta, humus, dip, need I go on?

I decided that it was best to read up a bit before jumping in and ruining 5 wonderful red peppers and I was SO surprised by how easy the process was! The roasting process is painless, the hardest part will be the options of what to DO with the peppers once you’ve roasted them.  You can use them right away, put them in a jar to eat through the week, freeze them or can preserve them. The thought of freezing them makes me a little skeptical, I feel like they’ll be mushy when they’re thawed out again. For this recipe I made enough for two weeks(ish) so I didn’t need to do any sort of preserving but this afternoon I’ll get another batch of peppers and a few mason jars (which I also have a crush on) and giving this Marinated Roasted Red Bell recipe from Simply Recipes a try.

Tips:

  • CHAR the peppers! Not only does this create the smoky flavor but it will also help you pinch off the pesky and indigestible skins.
  • Once out of the oven, place in a paper bag for  20-ish minutes (or longer if needed) to help steam the skins apart from the pepper. You can also use large bowl and cover with saran wrap or place in a large Tupperware. If you don’t let them  char OR steam long enough and it is a PAIN in the rear to pinch off all the skins! So, make sure you char and steam them long enough!

There are SO many recipes that I want to try with roasted peppers! I’ve listed a few of them below. Please feel free to post comments with your favorite red pepper recipes! I’m always looking for more!

Red Pepper Recipes to Try
Panini with eggplant, onions, roasted red pepper and basil

Roasted Red Pepper Humus
Marinated Red Peppers
Tapas Plates (Pimientos Rojos con Anchoas)
Roasted Red Pepper Sauce

Grilled Eggplant with Roasted Red Pepper Tapenade

Roasted Red Peppers

Ingredients
Red Peppers (Yellow or Green work also, I just prefer red)
Reynolds Wrap Non-Stick Aluminum Foil
Cookie Sheet
Large Tupperware container or bowl and saran wrap for steaming the skins off

Directions

  1. Preheat the oven to 450F then change to it to broil.
  2. Wash and dry the peppers.
  3. Core them from to remove the seeds. My method is the cut off the stem and cut around the top stem area like you would if you were coring a tomato. Pop out the core and chop them in half to remove all the seeds and white membrane inside.
  4. Place the red peppers on an aluminum lined baking sheet with the cut side facing down.
  5. Place the baking sheet on the top shelf in the oven and broil until the outer layer of the skin has blackened, about 20-25 minutes. Check them at the 15 min mark just to see how they’re charring…everyone’s oven is different.
  6. Place the peppers in a the Tupperware or in a glass bowl covered with saran wrap and let them steam and cool until you can handle them, about 20 minutes.
  7. Pinch off the skin from the peppers and place directly into jar or your preferred method of canning/preserving/freezing.

Grilled Cabbage Slaw

In our house there are two forms of “to do lists”, there’s a “his” and a “hers”. “His” consist of various house chores and interior renovation tasks such as sanding, painting, scrubbing grout, fixing and rearranging various wires and boxes and electrical “this and that’s”.  Tasks on that list are actually being completed while I curl up in the corner, typing away on the dining room table which is against the living room wall with boxes to the right of me, boxes to the left of me, boxes in front of me… ten points and a big golds star to any of you that know that Little Rascals quote. We’re in the middle of redecorating the little perch and I’m actually quite thankful to report that I have a very dashing handyman that LOVES this type of work. Or, at least enjoys it more than I do! He’s been slaving away and I’ll post before and after pictures once we have the new carpet in.

    Grilled Southwest Cabbage "Slaw"Let me proceed to the “her” version of the to do list: banana bread, morning muffins (which I made this weekend and posted here), blueberry muffins with crumbles on top, stir fry, fajita’s… this is just a sample of the meals that are on my list. And I must say, to quote the great Ron Burgundy, “I’m not even mad.” Settling up my part of the redecoration manual labor with some good homemade meals is quite fine with me! After brand new paint in the bedroom and a gorgeous new living room painted the perfect shade of meringue yellow which at the moment is shining brightly in the rare spring Seattle sunshine, my handyman deserved a good hearty meal. I decided to follow the coupon clipping and headed to Metropolitan Market to get some steak for our fajita’s. Up to the counter I bounded, with WAY more than I went in for and happily presented my coupon with a sense of great accomplishment at a few dollars well saved, only to realize that I apparently can’t read dates and the coupon wasn’t good for another 3 days! We already had our hearts set on steak fajita’s so I put back the second of the “buy-one-get-one-free” coupon that was no more, and juggled my groceries to the car.

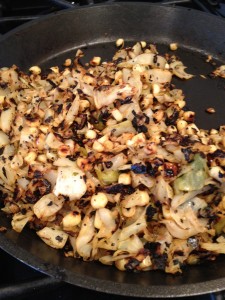
As all wonderful recipes transpire, parts of this meal are NOT what I originally intended and I have to say that they actually turned out much better! I meant to marinate the meat, and didn’t, yet it was more perfect that I could hope! About an hour before I was going to prep the meal I was still trying to think of a recipe enhancement. While taking a mental inventory of the fridge I stopped on the middle right shelf where 1 1/2 heads of green cabbage still lived as remnant from the post St. Patty’s Day sale at the market. SLAW! I’d never in my life made slaw and wasn’t even sure if it would go with steak fajita’s but it was going to be made and tested to world, watch out! I have to say, the slaw turned out INCREDIBLE! So incredible, in fact, that I make a brand new batch when we enjoyed our next day leftovers. The key to this slaw is fresh ingredients, an entire Anaheim pepper for kick, fresh lime juice and the Creme de la Creme finishing touch is that I pan grilled it! That deep charred taste completed the entire meal. I’ll never again eat another raw slaw… to the grill with that side!

Grilled Southwest Cabbage “Slaw”

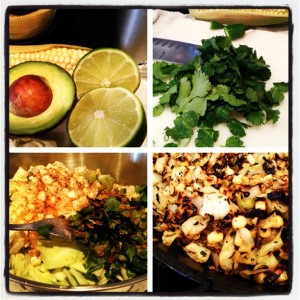
3 c. cabbage, chopped
1 ear corn, uncooked
1 medium Anaheim pepper, sliced and diced very thin with seeds
1 good handful cilantro, rinsed and chopped
1/2 Lime, juiced
1 spoon full minced garlic and juice
Cracked Salt & Pepper to taste
Cayenne Pepper to taste

  1. In a large bowl, mixing all ingredients and set aside uncovered, to let the flavors mix (you can set this aside for however long you’d like which makes this a great prep ahead of time part of a meal, but let it set at least 20 minutes
  2. Heat a non-stick pan over high heat and grill the cabbage until it’s charred, turning every few minutes (approx. 10 minutes)


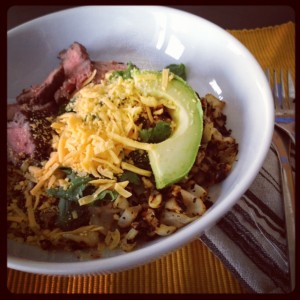
    Grilled Cabbage Slaw Salad with Seared Flank Steak and Galaxy Rice Cheese
Grilled Cabbage Slaw Salad with Seared Flank Steak and Galaxy Rice Cheese
    Seared Steak Fajitas with Grilled Cabbage Slaw and Avocado
Seared Steak Fajitas with Grilled Cabbage Slaw and Avocado