One Pot Potato Leek Soup {Gluten-Free, Dairy-Free}

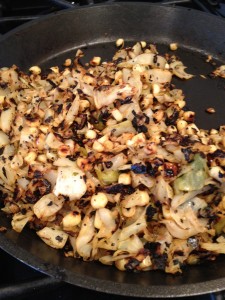
IMG_0204It’s officially soup weather. The sweaters, boots and umbrella have been pulled out and are here to stay. The rain is here and it’s cozy time. Browsing in the market on Saturday, I was drawn to the gorgeous  leeks piled high in one of the bins at our local Whole Foods market. They were brilliantly colored, as big around as a hearty farm grown carrot and on sale. Check, check, check. There are two things I like to do with leeks; make a potato soup with them or sauté and eat them with olive oil and lemon for a snack. You can make soup with the stock sand sauté the leaves if you wish to have the best of both worlds. Sautéing leeks to eat as a snack would have NEVER crossed my mind, but I read it in a book I quite enjoy and have tried it a few times since. The book is something I picked up at a half-price book store a few years ago and find myself reading each year. It’s called “French Women Don’t Get Fat” by Mireille Guiliano. Now, let me pause here and say that I am not encouraging dieting behavior. The I love her healthy, holistic approach.
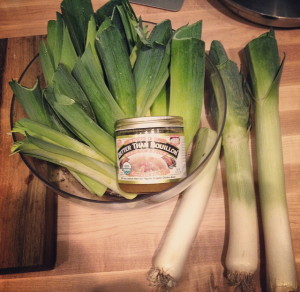
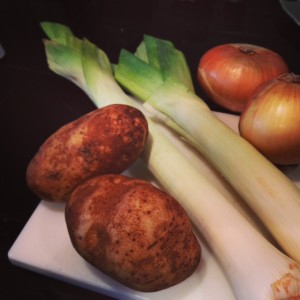
IMG_0205The focus of the book is teaching us how to eat for pleasure and nutrition versus eating, or not eating, as a diet choice.  She discourages dieting and is a fabulous writer. I agree with her encouragement for people  to view the relationships between food, weight and health within an over focus on a healthy happy lifestyle.  Okay, back to sautéed leeks. I had the best intention of using two boxes of chicken stock that I received from an amazing food conference I just attended (IFBC!). We’re really aware of how much salt goes into our food and opt for low salt whatever we can (broth, soy-sauce, chips, mixed nuts, etc). I have to give the disclaimer that I’m a broth snob. I love broth and have been known to make up a pot of broth in the winters to supplement my massive tea intake. My mother makes amazing soups and has always set the bar high. I’ve never found a boxed or canned broth that I find remotely decent. I’ve always used the same stock my mum uses the brand Better Than Bouillon and I always make sure to get the reduced sodium base. You’ll always find the chicken and beef base in my fridge but they have ham, turkey, lobster, mushroom, the list goes on! One caveat, not all of their flavors come in reduced sodium but the chicken and beef ones do and Costco carries them so I’m a happy camper! So, I grabbed a few leeks, potatoes and onions and was off to make the first soup of the season.
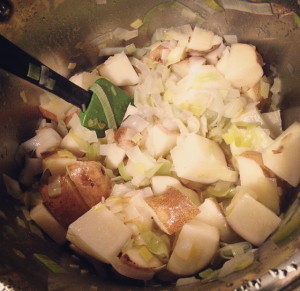
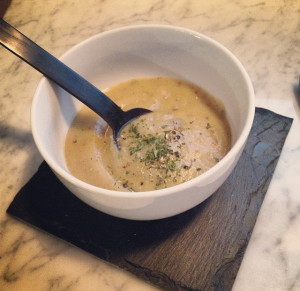
IMG_0201As I mentioned before, we go low salt so at first when I tasted this soup it really felt like it was missing an ingredient. After calling my mother the soup master (Just missed her, she had already gone to bed!) and googling what flavor should hit the center of your tongue, which was right where the soup was missing some seasoning flavor, the mister and I decided that it was salt. Simple salt. I took out a few spoonfuls of the soup and cracked some fresh pink salt on top and low and behold…that soup was PERFECT!

The fun part about this soup is that you can completely change the flavor of the soup with a few very simple cooking variations! Throw in a few carrots, or add some turnips with the potatoes. Not big on thyme myself, but you could add a tablespoon or two of dried thyme or 1-2 Tbsp chopped fresh thyme and/or if you like dill, which I don’t, you can include ½ tsp dried dill, or 1 tsp chopped fresh dill. You can cook with truffle oil or use truffle salt, or any other amazingly flavored salt you have stumbled upon. You could cook bacon in the pan first and wipe half the oil out, and use the remaining half of bacon grease to cook up the veggies and potatoes.

How do you like your potato leek soup? Leave a comment!!

One Pot Potato Leek Soup {Gluten-Free, Dairy-Free} 

1 Tbsp rice bran oil
1 medium yellow onion
3 large leeks, without the leaves, sliced into rounds
4 medium russet potatoes, washed and chopped and loosely diced
pinch grey or pink salt
fresh cracked black pepper, and more to taste
chopped fresh or dried parsley
2 bay leaves
2 tbsp Better than Bouillon Reduced Sodium Chicken base + 7 cups hot water

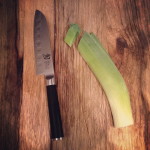
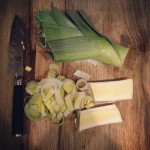
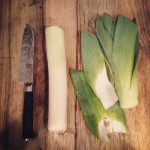
Pull out your stock pot. Heat the rice bran oil over medium heat. Chop your onions and add them to the pot, stirring occasionally. To prep your leeks, wash the stocks and cut off the leaves right where the light green turns dark green and the leaves start. Cut off the roots.

Set the leaves aside (unless you want to wash them and include them which you totally can). Slice the stock in half, and cut 1/2 inch half moons until the stocks are all chopped. I do this so it’s easier to separate the leeks when I drop them into the pot.

Stir whatever you have in the pot a few times with each ingredient addition. Add the leeks to the pot and cover.

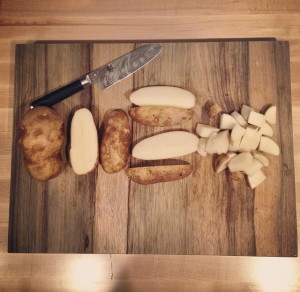
Cut your potatoes and add them to the pot to sauté for about 5-7 minutes. I cut my potatoes like I would for a breakfast hash: cut the potato in half, then half again and loosely dice.

IMG_0202

Once you’ve sautéed the leeks, onions and potatoes for a bit, add a pinch of salt, pepper, chopped fresh or dried parsley and 2 bay leaves. I always add bay leaves to my soup and broths because my mother does and she makes the most amazing soups! Just remember to pull both of them out before blending or serving!

While this is sautéing heat up your tea pot to mix the bouillon base.  I always mix the broth in a glass pyrex because just when you think it’s all dissolved into the water and pour it into your soup pot,  you’ll see the huge chunk of bouillon that was hiding at the bottom plop into the pot! Not amazing. Mix the bouillon in your pyrex, assuring it’s dissolved, then add it to the pot and bring to a boil.

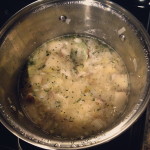
Let the soup boil for a few minutes then reduce to low heat, cover and simmer for about 45 minutes. Check the soup to assure that the potatoes are cooked through and turn off the heat. Go fishing for your two bay leaves and pull those guys out. If you have a stainless steel immersion blender, which I don’t, puree of the soup in the pot until you reach the desired level of smoothness. If, like me you don’t own a fantastic immersion blender, pardon me while I add that to my amazon which list which is 90% cooking tools and cook books! I use my trusty vita mix and blend it in batches.

Taste the soup as you blend it because this is your chance to add more herbs and spices since you’re blending the heck out of it and the flavors will be sure to mix well.

Garnish with whatever your heart desires:
cracked pepper
fresh chopped parsley
pumpkin seeds (roasted pumpkin seeds recipe) and sub paprika for the salt
shaved marinated carrots
chopped green onions
sour cream
chopped bacon
fried onions
a drizzle of some truffle oil
… your options are endless!

Potato Leek Soup (Vegan)

photo 2When the weather turns soggy, I start to practice my winter sport of “being in the kitchen”. From caramelizing and chopping to baking to broiling, when the weather turns to mush I turn to the kitchen. …and a glass of wine, but that’s a year round sport!

This year I’ve really tried to focus on cooking “in season” and challenging myself to prepare my “typical” foods in a different way. While leek’s are not something that we traditionally have on hand in our house, they made the headliner in today recipes. To be honest, the lack of consistent main stage placement in our cabinet is purely due to the fact that I only know two ways to cook them; sautéed or made into leek soup. While they are can be found year round, they are in season November to February and are more readily available.

The more I looked into the nutrition characteristics of leeks, the more I realized that I wasn’t the only one who usually passed up these shallot and garlic relatives in the grocery aisles; many people shy away from these cardio enriching veggies because they don’t know how to cook or prepare them. Leeks are high in folate, which is a key B complex vitamin for supporting and balancing our cardiovascular system (source) as well as being very high in potassium and very low in sodium, giving it naturally diuretic properties (source). Sharing the same family as garlic and onions, they boast immune, antioxidant, and heart-healthy benefits. 

Enjoyed in in salads with vinaigrette, in soups, sautés, risottos, sauces, pastas, frittatas, creamed, carmelized, Bruschettaed… there are SO many ways to prepare leeks it will blow your mind! Check out this Leek Pinterest Board for more inspiration!

When shopping for leeks, look for ones that are  firm and straight, with dark leaves and white bodies. Quality leeks should not be yellowing, wilting or cracking. To store, keep them unwashed and untrimmed,wrapped in a paper towel inside a plastic bag in the fridge up to a week. Cooked leaks should be kept for no more than two days, but you can freeze them up to three months once they’re blanched for three minutes and stored in an airtight bag.

I have to warn you, you’ll need a spoon readily accessible once this soup is cooked, is so good you’ll be eating it out of the pot!

photo 1Vegan Potato Leek Soup
Adapted from recipe posted on Care2.com Serves 4 – 6
Ingredients:

1 tbsp EVOO (extra virgin olive oil)
3 large leeks, whites and greens, washed and sliced
2 medium yellow onions, chopped
½ tsp fresh cracked sea salt
3 cloves garlic, or 1 ½ tsp minced garlic
2 large white potatoes, washed and cubed
5 cups chicken stock (use vegetable stock if you’re making entirely vegan)
½ tsp crushed rosemary

  1. Wash all veggies
  2. Heat EVOO in stock pan with the chopped leeks, onion, garlic and sea salt, sauté  stirring often until the onions begins to turn translucent
  3. Add the potatoes and vegetable stock and bring to a boil. Cover, reduce heat and simmer 20 minutes
  4. Meanwhile, get your blender out and prepared to blend up the soup
  5. Once cooked, remove the soup from the heat and ladle  into your blender, 1 cup at a time (if you have an immersion/stick blender you can blend the soup right in the pot)
  6. Blend the soup  until smooth and free of chunks
  7. Pour smooth soup into a heat-proof bowl and continue until all of the soup has been blended
  8. Transfer the blended soup back to the original soup pot and warm over low heat until heated through
  9. Serve hot

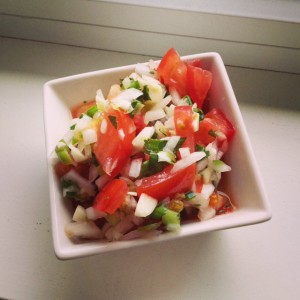
Pico De Gallo

Pico De Gallo
Pico De Gallo

Pico De Gallo
(Recipe adapted from Food Network)
Yield: 2 cups

4 vine-ripe tomatoes, chopped
1/2 medium white or red onion, chopped
2 green onions, white and green parts, sliced
1 Serrano or Jalapeño chile, minced
fresh cilantro leaves, chopped
3 garlic cloves, minced
1 lime, juiced
Salt, to taste (a little goes a long way)

Wash & prep ingredients. Place in large bowl, toss ingredients together. Cover, place in fridge and let the flavors marinate for at 15 minutes before serving.

Mango Salsa

Fresh Mango Salsa
Fresh Mango Salsa

With the fresh feeling of spring, I trade my winter cravings of spaghetti squash and Ratatouille for the “fresh and light” fare. On Sunday I went over to our Ballard Farmers market and got the tastiest Carne Asada tacos I maybe have ever had! Seriously, I want to huddle in the corner and lick the plate they were THAT good!

Well, that of course challenged the cook in me that said, “Hey, can I make that!?” and off I was planning taco Monday/Tuesday/Wednesday and likely Quesadilla Thursday. Since the Carne Asada steak needed to marinate (that’s for dinner tonight so check back for the recipe) I decided that tonight would be fish tacos.

Menu: Grilled halibut, Grilled Cabbage Slaw & Mango Salsa
Full Menu Prep time: 15 -20 minutes || Full Menu Cook time 20 minutes

This meal is actually pretty quick to make, it’s really just the prep-time that takes little time investment. The Mango salsa and cabbage slaw can be prepared earlier in the day but only take about 15 minutes of cleaning and chopping. Cooking the fish takes about 12 minutes on a pre-heated grill and the cabbage slaw will cook up in a pan on the stove in about  18-20 minutes.  

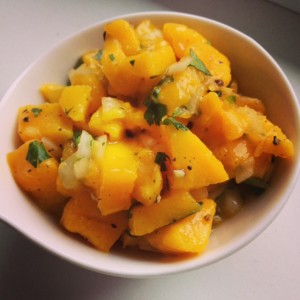
Mango Salsa

3 Ripe Mangos, Peeled and cubed
1/2 Small White Onion
1/2 – 1 Jalapeño chile, minced (include ribs and seeds for a hotter taste if desired)
Fresh Cilantro, washed and chopped with stems removed
1 Fresh lime, juiced
Cracked Pepper to taste

Wash and prep ingredients then combine in large bowl. Cover and let sit in refrigerator for an hour or over night to let the flavors mix! If the salsa ends up being a little too hot or acidic for your taste, you can temper it by adding some diced avocado.


Homemade Pizza

IMG_3399Pizza…is…DELICIOUS! With a plethora of options, toppings, styles, crusts and meals that it can be served for Pizza is pretty much an ultimate food. Eat it cold the next morning or  poach an egg on it and Viola, Breakfast! It’s the perfect brown bag lunch or picnic lunch option. It can be served flatbread style is an appetizer or tapas course, or loaded with amazing toppings and served as a dinner delight! Now, there is some debate between Pizza and flatbread so let’s review the three-step by step criteria for granted a place in the hierarchy of acceptable pies.

IMG_3383CRUST: This can be a chat of endearment or an all out fight in certain areas of the world. There are crust aficionados that take this topic very seriously. Whether you’re in thin crust camp or a lover of the thick bready crust, this is the foundation of the dish. With Pizza it seems that there can be variation in the crust whereas a flatbread will typically be a little thicker on the crust but there could be blurred lines here so let’s proceed.
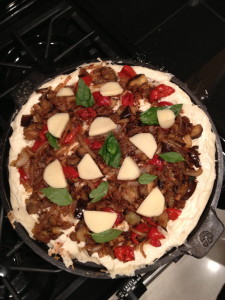
BASE LAYER: Then you have the cheese vs. sauce or olive oil assessment. I call this the base layer since it seems to set the tone for how the rest of the topping architecture. With the increase in food allergies and culinary progression pizzas without cheese is no longer a cardinal sin. It is now more common to find pizzas and flatbread without cheese, topped with a traditional tomato sauce or simply brushed with olive oil. This too can be a blur in the pizza or flatbread debate, so it seems that we must proceed to the last criteria.

IMG_3603TOPPINGS: Now we have the “finitura” (finishing touch in Italian), the toppings.  If you saw broccoli on a pizza you might do a double take and wonder if your mother was in the kitchen sneaking in your daily dose of veggies. But on a flatbread, you wouldn’t think twice (I would think?) It seems that a flatbread is a trendy version of a pizza? Maybe we just needed to change the name and feel better about eating pizza with our wine, a ritual that is not only perfectly acceptable but the highlight of my week when it occurs!
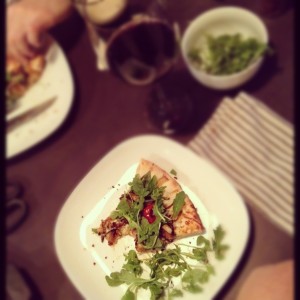
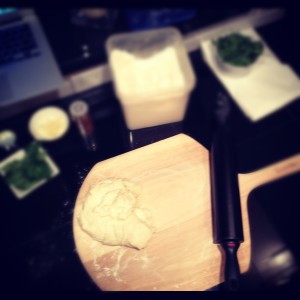
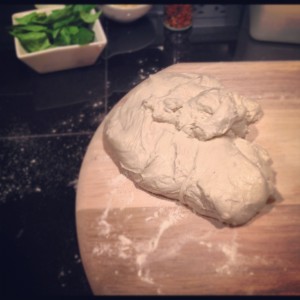
So my verdict: Flat bread is to pizza what sliders are to burgers…an open interpretation depending on the chef’s whim and creativity.

With that, I give you my current recipe for the crust, now the flatbread or pizza question is up to you to decide! BON APPETIT!!

IMG_3398

Homemade Pizza

Prepare the dough according to the directions below

IMG_3604


Cast Iron Pizza Stone
Clean Kitchen shears for cutting
Pizza Paddle (super hand for transfering to the already HOT cast iron!)

Toppings
Onion, sliced
Garlic, thinly sliced or minced
Eggplant, cut in strips or wedges
Peppadew, cut in half out of the jar (I like the flavor of this brand)
Cracked pepper
Fresh or dried parsley
Fresh Basil
Shredded Mozzarella
Scamorza Mozzarella, sliced into medallions
For Serving: Balsamic, olive oil, red pepper flakes, and arugula

Sprayed the cast iron before and pre-heat in the oven on “broil” for 15+ minutes then turn down to 475
In the meantime, chop and saute the onion, garlic, sliced eggplant and peppadew with parsley and cracked pepper on the stove.
When the cast iron is ready dusted it with flour and assemble the pizza right on the pizza stone. It will be HOT and a little hard to spread out the dough so be careful!

One light layer of shredded mozzarella, then add the sautéed onion, garlic, eggplant and seared peppadew.
Add fresh basil then the medallions of Scamorza cheese and another light layer of Mozzarella.
Cook at 475 for 8-12 minutes, until edges started to bubble up and show signs of crisping.
Remove and cut in the traditional style, with clean kitchen scissors.
Serve with balsamic, olive oil, red pepper flakes,  arugula and plates/cooking.

Notes-
We loved that the cast iron kept the pizza warm even 20+minutes after we took it out of the oven!
I used too much of the dough so the crust was too thick so less dough next time and spread the topping to the outer edges.
It was perfectly seared on the bottom and the dough didn’t stick to the cast iron pan as we expected it would, it actually slid right off.

IMG_3607Olive Oil Dough
Makes 4-1 lb loaves
Originally found on http://www.mybakingaddiction.com/no-knead-pizza-dough-recipe/

Ingredients:
2-3/4 cups lukewarm water
1-1/2 tablespoon granulated yeast (2 packets)
1-1/2 tablespoons Kosher salt
1 tablespoon sugar
1/4 cup extra virgin olive oil
6-1/2 cups unbleached all-purpose flour

Directions:

In a 5 quart bowl mix the yeast, salt, sugar, and olive oil with the water without kneading. Think of the motion of a dough hook working the dough and mix that way. You might need to wet your hands a little and mix by hand but I found a spatula to do just fine. (Notes: Original recipe called for using a standing mixer fitted with the dough hook attachment but I don’t have that so I went with the old fashion handmade tactics).

Transfer dough into another large bowl. The dough will be a little sticky but will stick together pretty well. Cover (not airtight), and allow to rest at room temperature until dough rises and collapses (or flattens on top), approximately 2 hours.

The dough can be used immediately after the initial rise, though it is easier to handle when cold. Refrigerate in a lidded (not airtight) container and use over the next 12 days.

If you like more of the deep dish style, and care to explore out of the pizza stone category, here is a cool recipe I found on Flourishing Foodie for Cast Iron Pizzas!


.


Ratatouille

Antigüedades Bar (Sevilla, Spain)

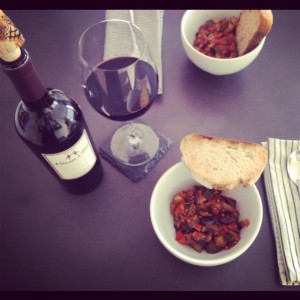
The obsession with Ratatouille started on our recent trip to Seville, Spain. We decided to meander the alleys and streets for the 30 minute walk from our flat to the city center . Bar Antigüedades caught my eye as an adorable little café from the exterior (of course…look at the photos!) and reading the menu board when we passed I made the mental note to come back for lunch. We did, and loved the Ratatouille SOOO much that we returned for dinner and had the exact same meal! It was so warm, hearty, tasty, flavorful and just… well… cozy! We ordered a bowl and cleaned and had I not ordered an actual meal I would have ordered another Ratatouille! As it was I had to refrain from licking the bowl since 1. it’s rude to do in public 2. we were sitting outside and I couldn’t sneak it 3. I’d be pegged as a ridiculous American for SURE! Three sadly legitimate reasons why I had to refrain from one last taste of the very miniscule remains of wonderful veggies. I vowed to make it once we got home.

Sevilla...where it all began
Sevilla…where it all began

Of course, in order to make the dish I first had to find 15 recipes, make an entire Pintrest board devoted to my found ratatouille recipes (yes I’m that ridiculous organized..or maybe obsessive?). Of course I had to print out each recipe, lay them side by side, and pour over each minute difference and detail deciding which was the perfect recipe. Which was possibly closest to recreating the most incredibly wonderful cozy meal. My perfection was finally challenged by my need to make a grocery shopping trip and get ON with the actual MAKING of the dish so I picked one to use as a guideline because, and yes I’m a total girl, the picture looked the yummiest.  The recipe that I landed on was posted on the blog A Lady in France.

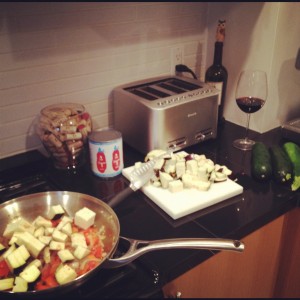
A brief history of Ratatoulie. It is usually served as a side dish but can also be a main, which is how we eat it with some crusty potato bread. For protein, I usually poach an egg or sprinkle some cheese on the top.

The hardest part of this meal is letting it cook those last 30 minutes without devouring it from the pan! The house starts to smell of wonderful cooked vegetables and herbs.

Ratatouille Prep
Ratatouille Prep

Tips:

  • The Pan: be sure to use a large deep pan so that the heat and evenly distribute and cook
  • Saute each round of veggies VERY well! Once you add the tomato it’s really just melding of the flavors and not really “cooking”
  • Don’t go light on the canned tomatoes! This is what makes or breaks the consistency of the Ratatouille. If it seems like the stew is a bit dry add another can of tomates or a 25 oz jar of basil marinera sauce. You’ll realize the consistency within 5-8 minutes and you really need to add within the 5-8 minutes so the consistency and the flavors are able to meld correctly.
  • Cook all the veggies without a lid until you add the tomatoes. The veggies really need to breathe and have the heat to saute up.
  • Liquid: keep stirring to move the liquid around and assure that it’s not too liquidy. If it feels like it’s becoming more soupy than thicker stewey, turn the heat up  and if it’s sticking to the pan turn the head down a bit.
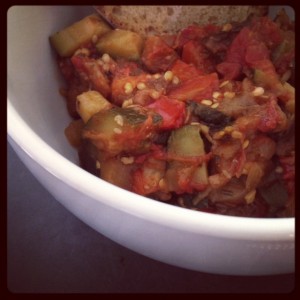
Ratatouille
Ratatouille

Cucina de Kate Ratatouille

½ large onion
2 tsp (heaping) minced garlic
drizzle of olive oil (to cook the onions/garlic)
1 red pepper, chopped
1 good sized eggplant, cut up in to chunks
4 small zucchini, cut up into chunks
1 ½ tbsp. herbs de province
few fresh basil leaf’s
1 ½ c. diced canned tomatoes (I sometimes add a 25oz jar of 365 tomato basil marinera sauce)

Instructions

  1. Heat oil in your large pan while you chop the onions and garlic. Cook until translucent.
  2. Chop and add peppers. When they start to look a little cooked, chop and add the eggplant in medium chunks. I like them a bit larger so they retain some form as opposed to getting a bit more mushy when they’re smaller.
  3. Keep stirring the veggies in the pan until they eggplant starts to look a little cooked, then chop up and add the zucchini. Again, I liked keeping my chunks a bit larger to add to the stew-type texture and avoid a must consistency.
  4. Once the zucchini starts to look like it’s a little cooked, add the herbs and chopped basil and assure it’s all mixed together well. Then add the tomatoes. At this point you’ll have to keep an eye and stir frequently but you can multi-task and just remember to stir every few minutes.
  5. Keep stirring and cook for another 30 minutes (or so) until all the vegies are tender…and of course taste along the way!

Serve with a protein (egg or meat) and some rustic bread (or omit if you’re gluten-free)


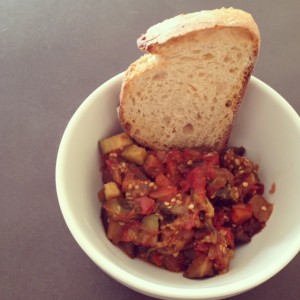
Ratatouille for Dinner
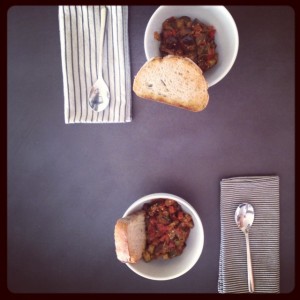
Ratatouille with Rustic Bread


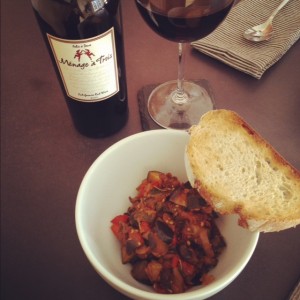
Dinner Table of Ratatouille with Rust Bread and Menage a Trios Red
Ratatouille with Rust Bread for Dinner
Ratatouille with Rust Bread for


Provençal ratatouille

Grilled Cabbage Slaw

In our house there are two forms of “to do lists”, there’s a “his” and a “hers”. “His” consist of various house chores and interior renovation tasks such as sanding, painting, scrubbing grout, fixing and rearranging various wires and boxes and electrical “this and that’s”.  Tasks on that list are actually being completed while I curl up in the corner, typing away on the dining room table which is against the living room wall with boxes to the right of me, boxes to the left of me, boxes in front of me… ten points and a big golds star to any of you that know that Little Rascals quote. We’re in the middle of redecorating the little perch and I’m actually quite thankful to report that I have a very dashing handyman that LOVES this type of work. Or, at least enjoys it more than I do! He’s been slaving away and I’ll post before and after pictures once we have the new carpet in.

    Grilled Southwest Cabbage "Slaw"Let me proceed to the “her” version of the to do list: banana bread, morning muffins (which I made this weekend and posted here), blueberry muffins with crumbles on top, stir fry, fajita’s… this is just a sample of the meals that are on my list. And I must say, to quote the great Ron Burgundy, “I’m not even mad.” Settling up my part of the redecoration manual labor with some good homemade meals is quite fine with me! After brand new paint in the bedroom and a gorgeous new living room painted the perfect shade of meringue yellow which at the moment is shining brightly in the rare spring Seattle sunshine, my handyman deserved a good hearty meal. I decided to follow the coupon clipping and headed to Metropolitan Market to get some steak for our fajita’s. Up to the counter I bounded, with WAY more than I went in for and happily presented my coupon with a sense of great accomplishment at a few dollars well saved, only to realize that I apparently can’t read dates and the coupon wasn’t good for another 3 days! We already had our hearts set on steak fajita’s so I put back the second of the “buy-one-get-one-free” coupon that was no more, and juggled my groceries to the car.

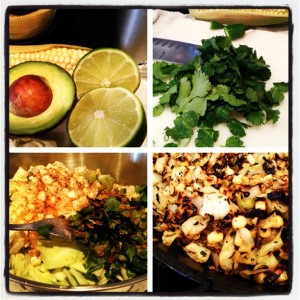
As all wonderful recipes transpire, parts of this meal are NOT what I originally intended and I have to say that they actually turned out much better! I meant to marinate the meat, and didn’t, yet it was more perfect that I could hope! About an hour before I was going to prep the meal I was still trying to think of a recipe enhancement. While taking a mental inventory of the fridge I stopped on the middle right shelf where 1 1/2 heads of green cabbage still lived as remnant from the post St. Patty’s Day sale at the market. SLAW! I’d never in my life made slaw and wasn’t even sure if it would go with steak fajita’s but it was going to be made and tested to world, watch out! I have to say, the slaw turned out INCREDIBLE! So incredible, in fact, that I make a brand new batch when we enjoyed our next day leftovers. The key to this slaw is fresh ingredients, an entire Anaheim pepper for kick, fresh lime juice and the Creme de la Creme finishing touch is that I pan grilled it! That deep charred taste completed the entire meal. I’ll never again eat another raw slaw… to the grill with that side!

Grilled Southwest Cabbage “Slaw”

3 c. cabbage, chopped
1 ear corn, uncooked
1 medium Anaheim pepper, sliced and diced very thin with seeds
1 good handful cilantro, rinsed and chopped
1/2 Lime, juiced
1 spoon full minced garlic and juice
Cracked Salt & Pepper to taste
Cayenne Pepper to taste

  1. In a large bowl, mixing all ingredients and set aside uncovered, to let the flavors mix (you can set this aside for however long you’d like which makes this a great prep ahead of time part of a meal, but let it set at least 20 minutes
  2. Heat a non-stick pan over high heat and grill the cabbage until it’s charred, turning every few minutes (approx. 10 minutes)


    Grilled Cabbage Slaw Salad with Seared Flank Steak and Galaxy Rice Cheese
Grilled Cabbage Slaw Salad with Seared Flank Steak and Galaxy Rice Cheese
    Seared Steak Fajitas with Grilled Cabbage Slaw and Avocado
Seared Steak Fajitas with Grilled Cabbage Slaw and Avocado

Curry Coconut Turkey Veggie Soup

Curry Coconut Turkey Veggie Soup
Can’t WAIT to make this one! Got this recipe from the BFF and she’s an incredible cook! Once I make it I’ll upload a pic!

ingredients

  • Onion
  • Carrots
  • Celery
  • EVOO
  • 1lb Ground Turkey
  • Salt
  • Curry/cumin (to taste)
  • 2 qts Chix broth
  • 5tbsp Thai yellow curry sauce from TJ
  • Zucchini/mushrooms
  • 1/2 can coconut milk
  • Little more salt and some cayenne
  • 1/2-3/4 c fresh chopped cilantro

directions

  • Sauté onions, carrots and celery in EVOO until the carrots barely become soft
  • Add the turkey and brown in the same pot seasoning with salt, curry and cumin to taste
  • Add chicken broth the ingredients already in the pot
  • Add 5tbsp Yellow curry sauce from Trader Joes , chopped zucchini and mushrooms and 1/2 can of coconut milk with salt and cayenne to taste and simmer until veggies are cooked
  • Just before serving, mix in 1/2-3/4 c fresh chopped cilantro and let simmer for a few minutes