Butternut Squash Couscous (Vegetarian, Vegan, Meat Free, Dairy Free)

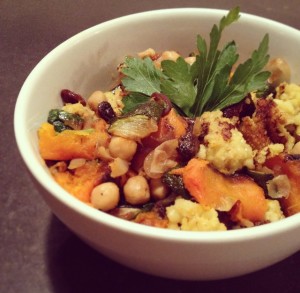
photoThe way that I describe this dish, is a middle eastern version of fried rice. It’s a great meal the throw together and one that you can experiment with spices that you don’t likely use in your daily cooking. The original recipe calls for a steaming method of cooking, which is the traditional method. I neglected to read the directions before I started the recipe and didn’t think we even owned a steamer! Well, after I completely revamped the entire cooking method, I realized that we DO have a steamer so I guess I’ll try that next time!

Couscous is very low in fat, and has about the same in protein, fiber and carbs as quinoa. Quinoa beats couscous in the mineral content, but couscous packs an amazing 87% of your daily suggested intake. About 55mcg is suggested daily and couscous has 43mcg per once cup serving. Selenium has antioxidant properties, can help the body regulate the thyroid hormones, support a healthy immune system, and aid in metabolism. One of selenium’s most important roles is as an antioxidant helping to prevent cell damage due to free radicals. (Sources: WebMD and Eating Well)

One VERY important thing that I did not note, until I’d already washed and set aside four cups of couscous, is the water to couscous ratio in this recipe. Much like rice or quinoa, there is a two to one ratio for water to couscous. Now, this recipe called for 4 cups of dry couscous. Four cups of dry couscous is quite a large portion, borderline obscene actually. I only realized this fact at the very moment where I was pouring the 8 cups of water and 4 cups of couscous  into my stove top pan and it was nearly brimming over. And, I hadn’t event started it boiling yet! My denial for the amount of couscous I was in the middle of making could no longer be indulged and I pulled out the large stock pot and transferred my absurd amount of couscous into the larger pot. While there was much more couscous than I would normally cook, about 9 servings worth, the ratio of the other ingredients worked perfectly. The only thing I would change is to maybe try cutting the couscous by half. 

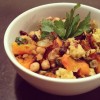
To serve, mix the roasted zucchini and butternut squash, chickpeas, raisins and sautéed onion together in a bowl and add a little more chopped parsley. (Typically, chickpeas from a can are already cooked but double-check.) Add in the couscous and stir well. The couscous will be a little gummy which is possibly due to my cooking method and not steaming it as directed. Garnish with more fresh  parsley if you wish. You can also add grilled chicken or tofu to this if you want more protein like I usually do.

Squash Couscous
Yield: 9 cups of couscous + a good amount of veggies for 4 people 
Recipe and method adapted from the recipe on Canadian Living
*Note: Due to preference and feeding two people versus 6, I suggest cutting the couscous, chicken stock and water in half. If you LOVE couscous or have a lot of people to feed, keep the recipe as is!

Ingredients
1 1/2 lb (one medium large)  butternut squash, peeled and chopped in 2 inch cubed
2 large zucchini, sliced into 2 inch cubes
1 medium yellow onion, diced
1/2 cup raisins
2 cups  ( 1  15 oz can)  chickpeas, drained and rinsed
1/4 c chicken bullion paste for chicken stock
8 cups water
2 tbsp chopped fresh parsley
1 tsp ground ginger
1/2 tsp pepper
1/4 tsp salt
1/2 tsp turmeric
4 cups Israeli couscous ( I only had 3 cups, so I added one cup of the golden small couscous
additional parsley to garnish

Directions
Wash and chop the zucchini and butternut squash. Don’t forget to de-seed the squash. Lay out on aluminum foil on a baking sheet and roast at 450 for 30-45 minutes. Turning every 10 -15 min. Wash the couscous and set aside.

Chop the onion and fry it on the stove with some olive oil in a large stock pot. Set aside in a large bowl which you’ll use to mix up the rest of the ingredients. Drain and rinse the chickpeas and add to the bowl, along with the raisins and some more parsley (to taste). Add the zucchini and butternut squash to this bowl once they’re browned on all sides.

Bring 8 cups of water to a boil in the large stock pot you used for the onions. Stir in the 1/4 cup of bullion, parsley, ginger, pepper, salt, and turmeric. Let boil together for a few minutes. Add the couscous and let it come back to a boil. Be sure to stir it all up every few minutes. Cook until the couscous soaks up the broth and get’s to a consistency you like.

Add the couscous to your large bowl with the onions, raisins and chickpeas, zucchini and butternut squash and stir. Garnish with additional parsley if you wish.

Tonight we’re eating this with some delicious bone in pork chops that are currently brining, but you can serve with grilled chicken, boiled eggs, firm tofu, or grilled steak. The options are endless!

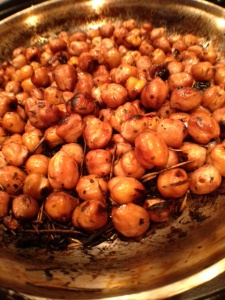
Wine Marinated Crispy Chickpeas (Vegan, Vegetarian, Meat-Free, Dairy-Free)

Simple Tasty Winter Meals(Vegan, Vegetarian, Dairy-Free, Meat-free)
It’s “officially” fall in the Pacific Northwest. All of the normal indications are here: I need sunglasses, a jacket, a scarf, a tank top, gloves and an umbrella all in the course of about five minutes. The sun is setting earlier, waterproofing boots is on my to-do list, and my shorts get packed away.

Another indication that it’s fall is here is the lack of daylight. There is an impending sluggish feeling that starts to set in when we realize that we go to work when it’s dark and leave work it’s dark. Unless you’re one of the lucky few that has a window near your cubicle or in your office, it’s possible to only catch a glimpse of real “light” through ever distant windows on the run from the  much needed afternoon coffee break to back to back afternoon meetings.

When the rain starts, the fall flavor craving starts. These cravings battle the ever sluggish feelings and makes us torn when it comes to dinner. Either it’s the event that keeps me going during the day and I can’t wait to rush home and cook something that I’ve pinned, liked, saved or stashed. Or, the last thing I want to do is be in the kitchen as a continuation of my daily servitude but am conflicted when I mentally explore the ease of ordering pizza.

Marinated Chickpeas

1 can chickpeas, drained
White Wine
Minced garlic
Dried Parsley, garlic, rosemary pepper
EVOO or cooking spray

  1. Open the can of chickpeas, drain and rinse
  2. Marinate the chickpeas in spices, white wine and a few dashes of balsamic in a bowl or tupperware
  3. When you’re about 17 minutes away from the other dishes being ready, pre-heat a pan with some EVOO or cooking spray
  4. Remove the chickpeas from the marinade, I use a slotted spoon to do so, and toast on medium-high until the exterior starts to brown (usually about 10-15 minutes)
  5. Shake the pan every few minutes  to move the chickpeas around so they brown evenly
  6. Once they’re browned to your linking, remove from the heat and serve

I usually pair with baked butternut squash, sauteed garlic kale or kale chips and toasted quinoa.

Cooking Notes:

The Wine:  I NEVER cook with a wine I wouldn’t drink. So, choose whichever you’d like. Anything from a Chardonnay to Riesling works. I usually use a traditional table white wine or a dry Pinot Grigio

Marination Time : Since this is a go-to meal I usually only marinate them for about an hour, but if you can remember in the morning to prepare them it will taste MUCH more delicious

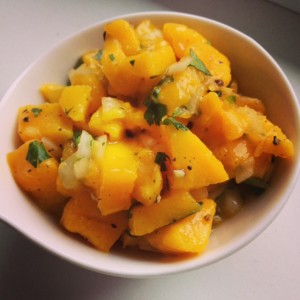
Mango Salsa

Fresh Mango Salsa
Fresh Mango Salsa

With the fresh feeling of spring, I trade my winter cravings of spaghetti squash and Ratatouille for the “fresh and light” fare. On Sunday I went over to our Ballard Farmers market and got the tastiest Carne Asada tacos I maybe have ever had! Seriously, I want to huddle in the corner and lick the plate they were THAT good!

Well, that of course challenged the cook in me that said, “Hey, can I make that!?” and off I was planning taco Monday/Tuesday/Wednesday and likely Quesadilla Thursday. Since the Carne Asada steak needed to marinate (that’s for dinner tonight so check back for the recipe) I decided that tonight would be fish tacos.

Menu: Grilled halibut, Grilled Cabbage Slaw & Mango Salsa
Full Menu Prep time: 15 -20 minutes || Full Menu Cook time 20 minutes

This meal is actually pretty quick to make, it’s really just the prep-time that takes little time investment. The Mango salsa and cabbage slaw can be prepared earlier in the day but only take about 15 minutes of cleaning and chopping. Cooking the fish takes about 12 minutes on a pre-heated grill and the cabbage slaw will cook up in a pan on the stove in about  18-20 minutes.  

Mango Salsa

3 Ripe Mangos, Peeled and cubed
1/2 Small White Onion
1/2 – 1 Jalapeño chile, minced (include ribs and seeds for a hotter taste if desired)
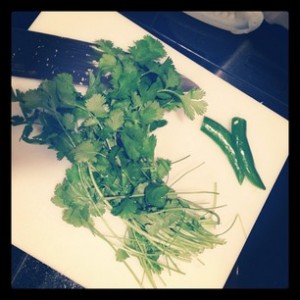
Fresh Cilantro, washed and chopped with stems removed
1 Fresh lime, juiced
Cracked Pepper to taste

Wash and prep ingredients then combine in large bowl. Cover and let sit in refrigerator for an hour or over night to let the flavors mix! If the salsa ends up being a little too hot or acidic for your taste, you can temper it by adding some diced avocado.


Simple Winter Soup- Butternut Squash, Yam, Carrot & Garlic

Photo from: “inspiring the everyday” post on butternut squash soup

Somehow the winter season always ages my hobbies by about ten years; knitting, roasting whole pumpkins, baking, canning and the strong desire to bake and make breads and pastas, winter meals, soups, stews… wanting to make everything really. I will admit I recently pins a recipe for homemade Wheat thins! (Stay tuned to see how THAT one goes!)

While chatting last night with my impossibly adorable new hairstylist who is also a foodie, she shared with me a new recipe! Cue ridiculous joy and excitement! We proceed to chat the entire time about her recently discovered hobby of making homemade pasta from scratch (a checkbox on my cooking bucket list), reviewing all of our favorite local restaurants and expounding on 15 uses for sage (It truly is an under appreciated herb)!


Cooking doesn’t have to be hard, we both agreed, you just have to have the ingredients in your pantry and a couple of minutes to make it.

So, along with the recently added item “weather proof boots” on my winter weekend to do list, “roast” to appease the pumpkin on my counter, and “meal plan” to attempt an attack plan to actually COOK all of my recently pinned winter dishes, I shall also be making this soup!

I’ll post my own pictures once I cook it up but for now, enjoy a lovely picture from inspiring the everyday’s post on butternut squash soup.
So, stock up on winter goodness, snuggle into your favorite sweater, pour a glass of wine and and let the winter begin!!

What are your warming winter foods or your go to winter dishes?
Winter Warming Squash Soup

1 butternut squash
carrots, yams and fresh garlic (ratio to your preference)
1 large onion to caramelize
chicken stock/broth


Directions- 

  • Pre-heat the oven to 400 or 450 (depends on how quickly you want the veggies and how your oven  heats) and proceed with prepping the butternut squash as you prefer. Note: There are two methods for butternut squash you can either peel it and bake it or slice in half rub with olive oil and bake.
  • Slice the carrots and yams, and chop off the top of your garlic. (I just posted a recipe here on home-roasting your own garlic. You can roast and keep fresh for up to a week, frozen for a few months. It’s GREAT to have on hand for winter meals!)
  • Roast all veggies and garlic in pre-heated oven until golden brown.
  • In the meantime, sauté your onions.
  • Once the squash, veggies and garlic are roasted to your preferred “done-ness”, remove from the oven and blend/ puree in a food processer with some warmed chicken broth and serve warm.


Taco Tuesday: Black Bean & Lime

TTTTRRAADDDIITTTIIOOONNNN!!! TRADITION!

“Traditions, traditions. Without our traditions, our lives would be as shaky as… as… as a fiddler on the roof!”(Tevye, Fiddler on the Roof)

Oh, excuse me! I was just practicing my Fiddler on the Roof singing. In case you’re inspired to watch the intro video you can check it out here: Fiddler on the roof – Tradition.

But this outburst of song was inspired by the weekly taco Tuesday tradition that we have.This post was actually last weeks Taco Tuesday adventure but I got busy and figured I better get it up before tonight’s Taco Tuesday adventure (sneak peek: fish tacos are on the menu!). Our Tuesday tradition keeps menu planning simple and I love that I can pick up the ingredients on the weekend and just grab some fresh cilantro from the market on Monday/Tuesday (or heck even Sunday if I’m lazy!) and then everything’s pretty much ready to go when we get home. Because let’s be real, by the time you get home from work and get through chores/errands/working out/traffic/family/pets… the last thing you want to do is cook up some tedious elaborate meal! Well, maybe that’s just me so those of you that are with me… read on!

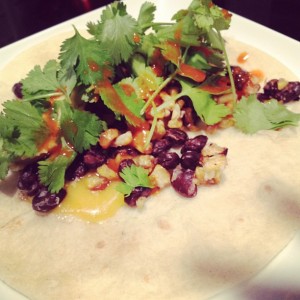
black bean and lime tacos

I am the more carnivorous eater in our house, but also dairy-free so we try to find meals that I can get excited about without featuring meat/dairy for the main protein focus. There are a few wonderful things about tacos. First, the word itself. Taco…ttaaccoooo…TACO! It’s just fun to say!  But another very wonderful feature of the taco is that it’s the everyone food. A taco can literally be made that will please anyone! From the meat and potatoes crowd to the vegan or gluten-free eaters, a taco will always have your back. They can be (deep breath) meat free, vegetarian, gluten-free, meat focused, lactose free, diary free, corn free, (air), wheat-free, egg free, nut free, tree-nut free, soy free, fish free, paleo…they can LITERALLY feed ANYONE!

Another amazing thing about tacos is that you can make them with whatever is in the fridge! They can be as simple or elaborate as you desire! Paging through our new cookbook I received as a birthday present from our recent trip to Sonoma, I was remembering the wonderful pureed black beans from Elote Cafe. They…were…delicious!!! Between that and a ridiculous excess of limes in our house (I’m not sure why… maybe it has something to do with a reverse sock monster effect? Someone PUT limes in the fridge?! We also have a glasses gnome that sneaks in an puts their sticky little paws all over our glasses! But back to the point! We had a randomly large amount of limes and decided to use them up in this tasty taco Tuesday recipe! For texture, I pureed some of the beans and left some of them whole. And… since I’m obsessed with grilled corm we also did a few ears of corn!

So sit back, relax, maybe make yourself a delicious sommer sherpa  and enjoy the tradition of taco Tuesday with us!! Stay tuned for tonight’s fish tacos recipe coming soon and let me know what your favorite taco recipes are! I’ll be featuring your suggestions in my Taco Tuesday Pintrest board!

chopped cilantro and jalapeno

Black Bean & Lime Tacos w/Grilled Corn

1 can black beans
1 spoon full minced garlic and juice
Cracked Salt & Pepper to taste
Cayenne Pepper to taste
2 limes, juiced (plus any additional wedges you want for garnish)
2 Ears Corn
Flour Tortillas (or corn for a gluten-free option)

Optional garnish/additions: Cheese, sour cream, grilled southwest cabbage slaw, avocado, Cilantro, jalapeño, chopped/grilled onions, grilled mushrooms, hot sauce/salsa, Elote, red peppers, radishes, fruit salsa

  1. Soak the corn for 20 minutes then pre-heat the oven and wrap corn in foil and cook for 30 minutes. At that point I usually open up the foil and start to turn the corn every 5 minute to attain a good char. You can also use canned corn and heat on the stove if you’d like.
  2. The beans usually take 10 minutes to prepare so when you’re ready heat the beans over the stove or in the microwave with the garlic, salt/pepper, cayenne pepper and juice of two limes. Once it’s thoroughly heated transfer to a vita mix blender and blend until creamy. You can also use an emulsion blender, potato masher, or food processor.
  3. Slice the avocado and prepare the garnishes you desire
  4. Heat the tortillas over open flame on the stove (or heat in the micro between two damp paper towels or in the oven wrapped in foil).
  5. Spread out the black beans and garnish away!

Roasted Fennel Pasta with Tomato Dressing

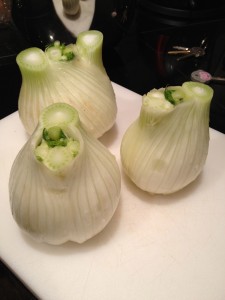
I don’t make New Year’s resolutions, because if I did then my number one AND two would have been broken for the past few YEARS: cook through my recipes and cook with more diverse foods! Thanks to Presidents Day, a little holiday afforded me the time and the inspiration to try TWO new recipes! Something possessed me to pick up fennel at the market this week and while I can’t remember actually consciously eating fennel up to now something in me decided that we needed to cook it!

Keeping with the homemade and new recipes theme, I found a delicious tomato dressing/compote recipe  Martha Stewart.com (link below) and what was it drizzled over? That’s right…fennel. It was a sign from the cooking gods! Below I’ve worked in both recipes into the overall preparation of the meal but will have links to the specific recipes below.  The recipe below served 3 people healthy portions but there was only leftover pasta. If you want leftovers to enjoy I suggest doubling the fennel and sauce portion of the meal.

This meal is Meat-free, dairy-free (if you omit the Parmesan like I do) AND Vegan; if you use gluten-free bread & pasta it’s also a gluten-free option as well! Look at the endless possibilities!


Ingredients

Pasta

  • 1/2 package pasta of your choice ( I used Angel Hair)

Garlic Bread

  • Whatever rustic loaf you like
  • Optional- Parmesan or Dairy Free Cheese for the garlic bread.We love the grated blend  Parmesan from DeLaurenti that we pick up fresh from Pike Place

Roasted Fennel

  • 3 fennel bulbs (choose with thick base), stalks cut off, bulbs sliced
  • EVOO (extra virgin olive oil)

Tomato Dressing:

  • EVOO (extra virgin olive oil)
  • 10 ounces (1-pint container) grape or cherry tomatoes
  • minced garlic (to taste in all recipes, I don’t measure much!)
  • 2/3 cup dry red wine
  • 1/4 cup balsamic vinegar
  • 1 tablespoon sugar
  • 1/4 teaspoon salt
  • 1 teaspoon red-wine vinegar

  1. Pre-heat oven to 400°F.
  2. Chop top of fennel stock off, wash bulb and cut as shown below. (Note, the lovely photography is from the Simply Recipes site, I didn’t remember to take a photo of this step). You can wash your tomatoes at this time also if you’d like.
  3. Lay out baking sheet with aluminum foil over it. Toss the fennel in olive oil. This time I used a bowl to coat, which resulted in a bit too much olive oil on the fennel, next time I suggest laying out on a baking sheet and brushing with an OXO Basting Brush.
  4. Crack fresh pepper over fennel and drizzle with balsamic vinegar.
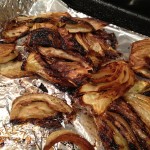
  5. Roast for 30-40 minutes, until fennel is caramelized.
  6. Prep the garlic bread on aluminum foil so it’s ready to put in the oven! I use my handy dandy Misto Sprayer and spray some EVOO over the bread, drizzle with minced garlic, fresh cracked pepper, and dried parsley. If you’re doing cheese (Being lactose intolerant I don’t use the cheese but it’s still quite delicious!)  add the cheese on the top.
  7. When fennel has about 25 minutes left start the water to  boil the water for the spaghetti. Add the spaghetti when the water boils and cook to your desired tenderness.
  8. In a medium pan, drizzle olive oil for the tomato dressing over medium heat. Add the tomatoes when the pan is hot. Make sure you keep swirling the pan around so that all the skins have a chance to cook.
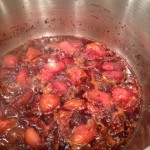
  9. Add the garlic, red wine, and balsamic vinegar to the dressing pan, mixing well. Simmer until the liquid reduces and tomatoes start to get soft (about 5 minutes). At this step I cut the tomatoes in half with my spatula to allow the juices to mix.
  10. Stir in sugar, salt, and red-wine vinegar, and cook for 1 minute.
  11. When there is 10 minutes left on the fennel timer, stick the bread in the oven to toast and the cheese has melted.
  12. Serve and enjoy a culinary masterpiece!!

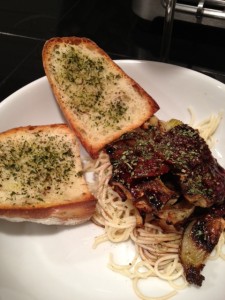
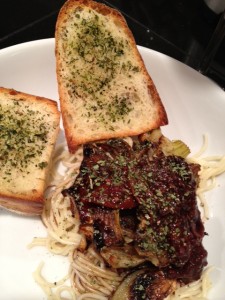
My overall review:  I think this is one of the best meals I’ve ever made!! The savory grilled and caramelized flavor complimented the liquorice taste of the fennel blended, which perfectly with the tomato balsamic sauce and the texture of the pasta. Add some grilled potato garlic bread and it was simple divine!!!

Recipes this meal was inspired from:
Roasted Fennel Recipe

Warm Tomato Dressing