Flying Apron Chocolate Chip Cookies (Gluten-Free, Dairy-Free)

I fell in love with Flying Apron  bakery a bout 6 years ago when I was diagnosed with a dairy allergy. No dairy…means… no… BAKED GOODS!? What about my cookies, muffins, and scones!?  While lactose was the allergy, being a digestive tract allergy meant that gluten would quite possibly be an “irritant” for me even thought I wasn’t necessarily allergic to it. “Oh Joy” … my first thoughts… and many of the subsequent thoughts afterward. This diagnoses came before food allergies were really becoming main stream and I must confess it was a very rough life adjustment for me, being miss baked goods lover, to find things that were both dairy-free and yet still tasteful. Flying Apron specializes in gluten-free, vegan baked goods, and breads as well as savory lunch items including savory veggie hand-pies, macaroni dishes, pizzas, soups, and salads to name a few. They rotate their menu to feature dishes that incorporate seasonal and local ingredients.

It was at their Fremont Cafe that I first had the realization that gluten-free and/or dairy-free baked goods didn’t have sacrifice taste and make me feel like I was chewing on a soggy 10 day old strip of cardboard! Previously, adhering to food allergies meant an immediate departure from any sort of taste, texture or delightful food experience.  But when I first bit into a Flying Apron muffin, my food allergic life changed for the better. Their baked goods, breads, and savory items are really delicious and intensely palatable. Mind you, this review is coming from both the dairy-free AND the “MORE BUTTER PLEASE” review voice of this household. I’ve got him hooked on both the  Flying Apron  Chocolate Chip Cookies (which are both Gluten-free & Dairy-Free) as well as the Mighty O Vegan Sprinkle Doughnuts. Muwahaha!!)

Well, I’m quite obsessed with their chocolate chip cookies which is saying a LOT for someone who isn’t particularly fond of chocolate. My all to often nightly ritual consists of mixing a Flying Apron cookie and a few small scoops of LivingHemp Ice Cream which can actually become an expensive habit and deprives me of both my baking fix and smelling the house up with cookie scent!


Flying Apron’s Gluten-Free Chocolate Chip Cookies
15 cookies 

2 3/4 cups brown rice flour
1 1/2 cups plus 1 tablespoon garbanzo bean flour
1 teaspoon baking powder
1/2 teaspoon baking soda
3/4 teaspoon sea salt
1 cup canola oil
1 cup organic whole cane sugar
1 teaspoon vanilla extract
1 cup soy milk
1 cup (8 ounces) dairy-free dark chocolate chips

1. Preheat the oven to 350 degrees F.
2. Combine the brown rice flour, garbanzo bean flour, baking powder, baking soda, and salt in a large bowl. In the bowl of a standing mixer fitted with the paddle attachment, combine the canola oil, organic whole cane sugar, and vanilla until well mixed. With the mixer on low speed, add the flour mixture and rice milk alternately, a little at a time, until smooth, about 3 minutes. Stir in the chocolate chips.
3. Scoop the dough onto greased or parchment-lined baking sheets with an ice cream scoop. Bake until golden and slightly firm to the touch, about 17 minutes. For a fancy look, dust the cookies with cocoa powder while they are still hot.


Banana Walnut Bread (gluten-free, dairy-free)

There is something about the smell of fresh baked banana bread that warms the heart and soul. “Summer”, and I use the term loosely, has started to creep around Seattle. Today is a balmy and overcast 70 degrees but whenever it’s grey I always get the cozy urge to bake. This weekend, we’re adventuring up to see my family and while I’m baking the bread for both my roomie and his mum who’s visiting us, I’m also baking this to surprise my dad.

Since I was a little girl, whenever there were bananas that were even one day past perfect my father would take my hand and guide me to the fruit bowl and say “Kate, you know what THAT means right!? … BANANA BREAD”!!! I always loved baking this for him, and filling the house with the warm smells of bread and seeing his joy as I would pull that loaf out of the oven, hovering as all good taste tester seems to do, barely waiting for it to cool before cutting thick slices and serving it up to one very happy man!

Like clockwork, whenever the weather in Seattle is grey, ahem most of the year, my ache to bake exponentially increases. Even if I don’t particularly WANT a baked good at that moment, sacrilege I know, I just can’t calm the urge until I’m mixing up the dough and filling the house with the smells of a bakery then fending off the taste tester as I try to pull it out of the oven.

Truth be told, I simply LOVE baking! For myself and more so for others to enjoy . While I can’t have you all in my kitchen this moment eagerly awaiting the “ding” of the kitchen timer indicating that fresh baked goodness is ready to being it’s futile attempt to cool before being devoured, I CAN share with you by posting this tried and true recipe!

This recipe yields one large loaf or three small individual loaves. Personally, I prefer to use smaller individual size loaf pans and because they’re easier to gift and look cuter on a plate (true story!). I’m not allowed to freeze bread in our house but these loaves freeze quite well for future rainy day enjoyment or to give as a hostess gift for a last minute dinner party! They also make great muffins!!

My loaves are in the oven now so here’s a sneak peek of THIS batch. (Photos below are previous completed batches)

Banana Walnut Bread
Banana Walnut Bread


Banana Walnut Bread
From:The Good Housekeeping Cookbook

Ingredients

  • 1 3/4 c. flour (can use Whole-Wheat or Gluten-Free)
  • 2/3 c. white sugar
  • 1 tsp. double-acting baking powder
  • 1/2 tsp. salt
  • 1/4 tsp baking soda
  • 1/2 c. shortening
  • 1 cup mashed bananas ( 2 ripe bananas)
  • 1 small banana, cut into chunks
  • 2 eggs
  • 1/2 cup walnuts (my own addition)
  • 1 fresh orange, squeezed (my addition)
Banana Walnut Muffins and Bread

Directions

  1. Pre-heat oven to 350 degrees F
  2. Grease and flour ( or non-stick spray) your baking pan(s)
  3. In a large bowl, mix the first 5 ingredients
  4. Cut in the shortening using a pastry blender (or two knives scissor-fashion) until the mixture resembles coarse crumbs
  5. Stir in the remaining ingredients until just blended
  6. Bake in pre-heated oven as directed below:
    Large loaf pan: 55-60 minutes
    4 Individual Loaf pans: 30-40 minutes
  7. Cool in pan on wire rack
  8. ENJOY!!!

Ratatouille

Antigüedades Bar (Sevilla, Spain)

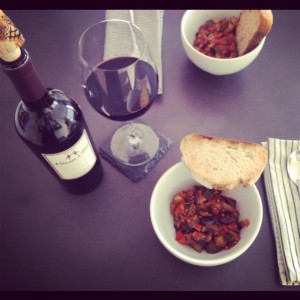
The obsession with Ratatouille started on our recent trip to Seville, Spain. We decided to meander the alleys and streets for the 30 minute walk from our flat to the city center . Bar Antigüedades caught my eye as an adorable little café from the exterior (of course…look at the photos!) and reading the menu board when we passed I made the mental note to come back for lunch. We did, and loved the Ratatouille SOOO much that we returned for dinner and had the exact same meal! It was so warm, hearty, tasty, flavorful and just… well… cozy! We ordered a bowl and cleaned and had I not ordered an actual meal I would have ordered another Ratatouille! As it was I had to refrain from licking the bowl since 1. it’s rude to do in public 2. we were sitting outside and I couldn’t sneak it 3. I’d be pegged as a ridiculous American for SURE! Three sadly legitimate reasons why I had to refrain from one last taste of the very miniscule remains of wonderful veggies. I vowed to make it once we got home.

Sevilla...where it all began
Sevilla…where it all began

Of course, in order to make the dish I first had to find 15 recipes, make an entire Pintrest board devoted to my found ratatouille recipes (yes I’m that ridiculous organized..or maybe obsessive?). Of course I had to print out each recipe, lay them side by side, and pour over each minute difference and detail deciding which was the perfect recipe. Which was possibly closest to recreating the most incredibly wonderful cozy meal. My perfection was finally challenged by my need to make a grocery shopping trip and get ON with the actual MAKING of the dish so I picked one to use as a guideline because, and yes I’m a total girl, the picture looked the yummiest.  The recipe that I landed on was posted on the blog A Lady in France.

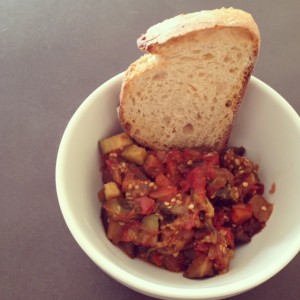
A brief history of Ratatoulie. It is usually served as a side dish but can also be a main, which is how we eat it with some crusty potato bread. For protein, I usually poach an egg or sprinkle some cheese on the top.

The hardest part of this meal is letting it cook those last 30 minutes without devouring it from the pan! The house starts to smell of wonderful cooked vegetables and herbs.

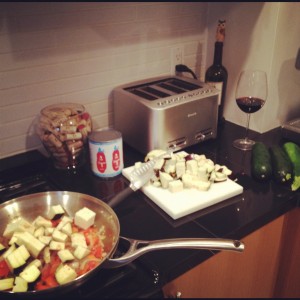
Ratatouille Prep
Ratatouille Prep

Tips:

  • The Pan: be sure to use a large deep pan so that the heat and evenly distribute and cook
  • Saute each round of veggies VERY well! Once you add the tomato it’s really just melding of the flavors and not really “cooking”
  • Don’t go light on the canned tomatoes! This is what makes or breaks the consistency of the Ratatouille. If it seems like the stew is a bit dry add another can of tomates or a 25 oz jar of basil marinera sauce. You’ll realize the consistency within 5-8 minutes and you really need to add within the 5-8 minutes so the consistency and the flavors are able to meld correctly.
  • Cook all the veggies without a lid until you add the tomatoes. The veggies really need to breathe and have the heat to saute up.
  • Liquid: keep stirring to move the liquid around and assure that it’s not too liquidy. If it feels like it’s becoming more soupy than thicker stewey, turn the heat up  and if it’s sticking to the pan turn the head down a bit.
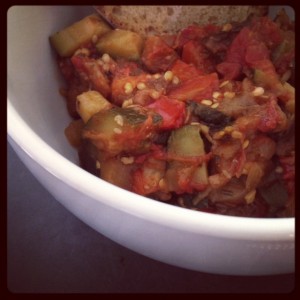
Ratatouille
Ratatouille

Cucina de Kate Ratatouille

½ large onion
2 tsp (heaping) minced garlic
drizzle of olive oil (to cook the onions/garlic)
1 red pepper, chopped
1 good sized eggplant, cut up in to chunks
4 small zucchini, cut up into chunks
1 ½ tbsp. herbs de province
few fresh basil leaf’s
1 ½ c. diced canned tomatoes (I sometimes add a 25oz jar of 365 tomato basil marinera sauce)

Instructions

  1. Heat oil in your large pan while you chop the onions and garlic. Cook until translucent.
  2. Chop and add peppers. When they start to look a little cooked, chop and add the eggplant in medium chunks. I like them a bit larger so they retain some form as opposed to getting a bit more mushy when they’re smaller.
  3. Keep stirring the veggies in the pan until they eggplant starts to look a little cooked, then chop up and add the zucchini. Again, I liked keeping my chunks a bit larger to add to the stew-type texture and avoid a must consistency.
  4. Once the zucchini starts to look like it’s a little cooked, add the herbs and chopped basil and assure it’s all mixed together well. Then add the tomatoes. At this point you’ll have to keep an eye and stir frequently but you can multi-task and just remember to stir every few minutes.
  5. Keep stirring and cook for another 30 minutes (or so) until all the vegies are tender…and of course taste along the way!

Serve with a protein (egg or meat) and some rustic bread (or omit if you’re gluten-free)


Ratatouille for Dinner
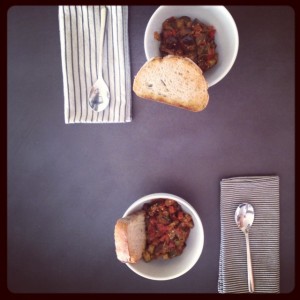
Ratatouille with Rustic Bread


Dinner Table of Ratatouille with Rust Bread and Menage a Trios Red
Ratatouille with Rust Bread for Dinner
Ratatouille with Rust Bread for


Provençal ratatouille

Taco Tuesday: Black Bean & Lime

TTTTRRAADDDIITTTIIOOONNNN!!! TRADITION!

“Traditions, traditions. Without our traditions, our lives would be as shaky as… as… as a fiddler on the roof!”(Tevye, Fiddler on the Roof)

Oh, excuse me! I was just practicing my Fiddler on the Roof singing. In case you’re inspired to watch the intro video you can check it out here: Fiddler on the roof – Tradition.

But this outburst of song was inspired by the weekly taco Tuesday tradition that we have.This post was actually last weeks Taco Tuesday adventure but I got busy and figured I better get it up before tonight’s Taco Tuesday adventure (sneak peek: fish tacos are on the menu!). Our Tuesday tradition keeps menu planning simple and I love that I can pick up the ingredients on the weekend and just grab some fresh cilantro from the market on Monday/Tuesday (or heck even Sunday if I’m lazy!) and then everything’s pretty much ready to go when we get home. Because let’s be real, by the time you get home from work and get through chores/errands/working out/traffic/family/pets… the last thing you want to do is cook up some tedious elaborate meal! Well, maybe that’s just me so those of you that are with me… read on!

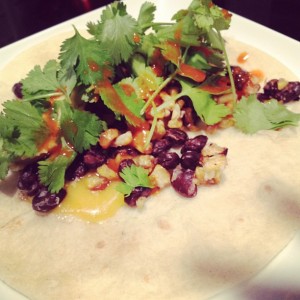
black bean and lime tacos

I am the more carnivorous eater in our house, but also dairy-free so we try to find meals that I can get excited about without featuring meat/dairy for the main protein focus. There are a few wonderful things about tacos. First, the word itself. Taco…ttaaccoooo…TACO! It’s just fun to say!  But another very wonderful feature of the taco is that it’s the everyone food. A taco can literally be made that will please anyone! From the meat and potatoes crowd to the vegan or gluten-free eaters, a taco will always have your back. They can be (deep breath) meat free, vegetarian, gluten-free, meat focused, lactose free, diary free, corn free, (air), wheat-free, egg free, nut free, tree-nut free, soy free, fish free, paleo…they can LITERALLY feed ANYONE!

Another amazing thing about tacos is that you can make them with whatever is in the fridge! They can be as simple or elaborate as you desire! Paging through our new cookbook I received as a birthday present from our recent trip to Sonoma, I was remembering the wonderful pureed black beans from Elote Cafe. They…were…delicious!!! Between that and a ridiculous excess of limes in our house (I’m not sure why… maybe it has something to do with a reverse sock monster effect? Someone PUT limes in the fridge?! We also have a glasses gnome that sneaks in an puts their sticky little paws all over our glasses! But back to the point! We had a randomly large amount of limes and decided to use them up in this tasty taco Tuesday recipe! For texture, I pureed some of the beans and left some of them whole. And… since I’m obsessed with grilled corm we also did a few ears of corn!

So sit back, relax, maybe make yourself a delicious sommer sherpa  and enjoy the tradition of taco Tuesday with us!! Stay tuned for tonight’s fish tacos recipe coming soon and let me know what your favorite taco recipes are! I’ll be featuring your suggestions in my Taco Tuesday Pintrest board!

chopped cilantro and jalapeno

Black Bean & Lime Tacos w/Grilled Corn

1 can black beans
1 spoon full minced garlic and juice
Cracked Salt & Pepper to taste
Cayenne Pepper to taste
2 limes, juiced (plus any additional wedges you want for garnish)
2 Ears Corn
Flour Tortillas (or corn for a gluten-free option)

Optional garnish/additions: Cheese, sour cream, grilled southwest cabbage slaw, avocado, Cilantro, jalapeño, chopped/grilled onions, grilled mushrooms, hot sauce/salsa, Elote, red peppers, radishes, fruit salsa

  1. Soak the corn for 20 minutes then pre-heat the oven and wrap corn in foil and cook for 30 minutes. At that point I usually open up the foil and start to turn the corn every 5 minute to attain a good char. You can also use canned corn and heat on the stove if you’d like.
  2. The beans usually take 10 minutes to prepare so when you’re ready heat the beans over the stove or in the microwave with the garlic, salt/pepper, cayenne pepper and juice of two limes. Once it’s thoroughly heated transfer to a vita mix blender and blend until creamy. You can also use an emulsion blender, potato masher, or food processor.
  3. Slice the avocado and prepare the garnishes you desire
  4. Heat the tortillas over open flame on the stove (or heat in the micro between two damp paper towels or in the oven wrapped in foil).
  5. Spread out the black beans and garnish away!

Easter Brunch Cake: Spiced Carrot Cake w/ Walnut Coconut Glaze (Paleo)

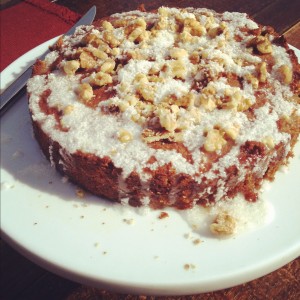
Spiced Carrot Cake w/ Walnut Coconut Glaze

Happy Easter everyone!! What better way to celebrate the Seattle sun than with a delicious cake for Easter brunch. A member of the family recently enrolled in cooking school so this was the year for me to take a back seat in the kitchen and a prime seat on the patio with a mimosa and let someone else do the work!

But, a chef can’t QUITE sit still that long so I whipped up a breakfast cake recipe, keeping in mind the diet of our Paleo host and hostess and I have to report that it turned out to be a delightful little post-brunch treat.

I was positive that our new chef would do just fine filling our stomachs with the main course so we needed a festive cake that was just a tad sweet, had a nice moist yet crunchy texture and a flavor that was both rich and light to satisfy the last few remaining bits of space in our brunch-ers stomachs. This cake did the trick! I wasn’t sure how it would turn out, since my recipes are comprised of a little of this and a handful of that but the measurements below are rough estimates.

Notes: If it feels a bit dry, add more applesauce or soy milk. A bit too wet  opt for more coconut or a dash more flour. With the glaze, keep the mindset that less water is better! It’s easier to add more water than have a half batch of glaze leftovers.

I did a bit too much and wound up with a half bowl of glaze! Above all else, pour another mimosa and have a wonderful day!!


Spiced Carrot Cake w/ Walnut Coconut Glaze (Paleo)

  • 1/2 c apple sauce
  • 1 c coconut flour
  • 1 tsp baking soda
  • 1/2 tsp cinnamon
  • 1/4 tsp salt
  • 2 large eggs
  • 3/4 c packed light-brown sugar
  • 1/3 c soy milk
  • 2 c shredded carrots
  • 1/3 c unsweetened coconut

Glaze & Topping:

  • 1/3 c unsweetened coconut
  • water (as much as needed)
  • chopped walnuts

Directions

  1. Preheat oven to 350 degrees. Spray an 8inch round cake pan with Pam or Misto with Canola oil.
  2. In a medium bowl, whisk flour, baking soda, cinnamon, and salt; set aside.
  3. In a small bowl, whisk eggs, sugar, applesauce and soy milk until smooth.
  4. Gently mix egg mixture into dry ingredients until moistened; mix in carrots. Transfer batter to prepared pan.
  5. Bake until a toothpick inserted in center comes out clean, 40 to 45 minutes (if browning too quickly, tent cake with aluminum foil). Cool in pan, 15 minutes. Turn out of pan, remove paper, and cool completely on a rack, right side up.
  6. Transfer to cake pedestal, and sprinkle with crumbled walnuts
  7. Make glaze and drizzle over the top of the cake and walnuts or dust with confectioners’ sugar.

Vegan Poppy Seed Cake: Which Cake Will Win?

I’m home sick today and completely miserable. Tea, tissues and my fluffy duvet are my best friends. Always the busy body, it’s really hard for me to sit and be calm for any amount of time. Now, as my friends and family read this they’ll be saying something along the lines of one of two thought steams:
1. DUH!!!
2. The first step to recovery is admitting you have a problem!

Hehe.. yeah yeah… love you guys too!

With quite a few family birthday’s coming up I consider that an excellent excuse, er, opportunity to bake a few cakes! While perusing my instagram feed earlier today, I came across a LOVELY picture from one of my favorite food photography blogs; “Le Chou Sauvage” . It was for vegan lemon poppy seed cake and it was just too delicious looking!

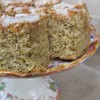
Lemon Poppy Seed Cake: Captured by Le Chou Sauvage on instagram

SEE WHAT I MEAN! Are you drooling now or what!? But thanks to the picture above all I’ve been thinking about all afternoon, between cups of tea and blowing my little nose (too much info?!), and I had to go out to the blogosphere and find at least 15 recipes for a vegan lemon poppy seed cake that I can personalize and try!

Vegan/ dairy-free baking has long been a hobby of mine. When I realized I was allergic to dairy it nearly ended me… no…no more scones and muffins!? There is little more in life than a truly delicious muffin or scone homemade fresh out of the oven with a side of fresh fruit and a good cup of coffee. I digress… and wish I was enjoying that right this moment!

Well, jumping into vegan cooking can be a rough transition because the eggs and butter, which are both excluded from the vegan diet,  in recipes act as a binding agent to hold all the ingredients together as well as providing texture and flavor.  With vegan cooking and baking those qualities still need to exist in a baked good and there are many alternatives. Keeping with my tenants of mindful eating, try to stay away from processed foods as much as is feasible and since I’m really only dairy-free and not vegan I do include eggs in my diet. If you’d like to understand a bit more of the science behind how ingredients work in a recipe, as well as outlining a few alternatives depending on your dietary preferences and restrictions check out the blog, Real Sustenance: 101 in Baking.

Finding recipes that are vegan or dairy-free without using xanthan gum or some other processed replace thrill me! They truly make me so excited!

After a few cups of tea and some perusing I came upon the two recipes below and will (oh “darn”) have to try out both to see which wins! Please weigh in on which has your vote and I’ll update this with a review of each cake and updated pictures of our taste testing!

——————————————————————————————————————————————————————————-

Vegan Poppy Seed Cake
Recipe from blog: Feed Me I’m Cranky 

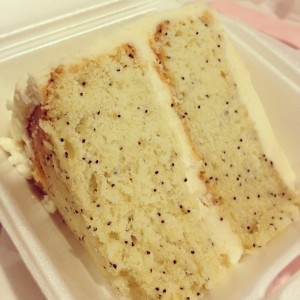
Picture from Feed Me I'm Cranky
Picture from Feed Me I’m Cranky

Ingredients

  • 3 cups all-purpose flour
  • 2 cups vegan sugar
  • 2 teaspoons baking soda
  • 1 teaspoon salt
  • 2 cups water
  • 3/4 cup canola oil
  • 2 tablespoons vinegar
  • 2 teaspoons almond extract
  • 1/3 cup fresh lemon juice
  • 1/4 cup poppy seeds

Directions

  • Preheat oven to 350 degrees and spray a 9×13 baking pan with non-stick spray.
  • Mix together first four dry ingredients, then add in wet ingredients.
  • Make sure you mix thoroughly, then fold in poppy seeds
  • Pour mixture into pan and bake for 40 minutes. Check the center with a toothpick to make sure it comes out dry (that means done and voila!)
  • YUM!

Frosting: She used a favorite butter cream frosting recipe from The Vegan Chef, here, but substituted one tablespoon lemon extract for the two teaspoons vanilla.

——————————————————————————————————————————————————————————-

Lemon Poppy Seed Cake
recipes from blog: v:gourmet

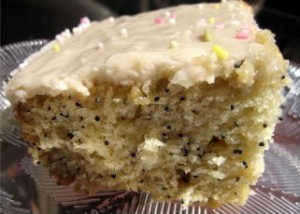
picture of vegan lemon poppy seed cake from v:gourmet

ingredients
2  cups pastry flour
2 cups all-purpose flour
1 tbsp plus 1 tsp baking powder
2 tsps baking soda
1/3 cup poppy seeds
1 tsp sea salt
1/2 cup lemon juice (juice from approx 2 lemons)
1/3 cup water
1 cup apple cider or apple juice
1 2/3 cups maple syrup
2/3 cup olive oil or sunflower oil
2 tsps vanilla extract
4 tbsps lemon zest (zest from approx 2 lemons)
1 cup super fine sugar
Juice from 1 lemon

  • Preheat the oven to 350 degrees. Lightly brush 8 x 12 baking pan with oil. Add several tablespoons of flour and shake to coat evenly. Invert pans and knock against the counter to rid them of excess flour.
  • Whisk the flour, baking power, baking soda, salt, and poppy seeds together in a medium-size mixing bowl.
  • In a separate bowl, whisk together the lemon and apple juices, maple syrup, oil, vanilla, and zest. Using a wooden spoon, stir the wet mixture into the dry to form a batter. Do not overmix.
  • Transfer batter to the baking pan and bake on the middle rack of the oven for 25 minutes or until a toothpick comes out clean. Cool for 30 minutes before removing.
  • Meanwhile, mix together the super fine sugar and lemon juice. Once cake is removed from the pan, place on a serving dish and drizzle with the lemon sugar icing.

——————————————————————————————————————————————————————————-


Cheese is Back in my Life, Thank you Galaxy

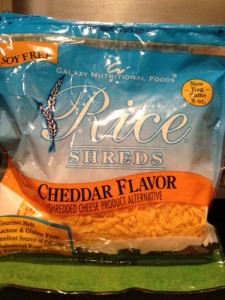
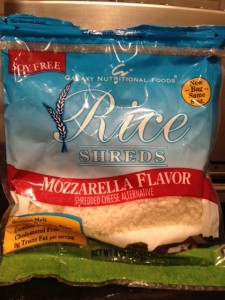
Galaxy Rice Shreds: Cheddar

Now, cheese may seem like a small matter to those of you who can eat it or have completely cut it out of your life. But to someone who made peace with saying goodbye YEARS ago, thinking that I would never again taste the  sweet taste of a cheesy panini, nachos, grilled cheese, cheese pizza, sliced cheese with wine… okay I think you get the picture by now…it’s a gaping hole in my culinary consumption.

Well, that was pre “Galaxy”! I can’t tell you how excited I was to be able to eat some form of “cheese” again! We happened upon the Galaxy Food’s rice based shreds on a recent trip to Whole Foods a few weeks back when it was on sale. I love trying new things almost as much as I love a good sale, but still have the tarnished taste of some “alternative food” taste tests gone wrong so I was a bit apprehensive about venturing into the world of “cheese alternatives”.

But, looking at the nutrition info I was quite surprised! Take a look :

Galaxy Shreds: Mozzarella Flavor

Serving Size 1/3 c.
70 calories (35 from fat)
4g Fat (1 gram saturated, 0g Trans)
6g Protein
0 mg Cholesterol
370mg Sodium
3g Carbs

Look at that protein content in ONE serving! That’s the thing that I miss about cheese, it’s a quick and easy non-meat protein. I feel like an entirely new playground of culinary fun has opened up to me again! It also delivers 30% of your daily calcium, which is important for building strong bones and something that those of us that are dairy-free or vegan to keep an eye on since it’s usually found in dairy-based products.

The day after we bought it to try I literally woke up and the first words out of my mouth were… CHEESE!! There was a bee-line to the kitchen and I was eating it right out of the package! Now this is coming from the girl who doesn’t like eating first thing in the morning! (Which has inspired a “Breakfast” series I’m working on… stay tuned!)  I looked like the little kid who got caught with one hand half in the cookie jar and the other already delivering a handful of cookies to my mouth!

The taste is actually quite good, the melting leaves a BIT to be desired on the cheddar, it didn’t melt very well on nachos but when I tried the mozzarella shreds on top of my spaghetti squash for lunch last week it melted PERFECTLY! It also melted wonderfully on the stuffed tomatoes from dinner last night! I’ll have to try melting the Cheddar a few more ways to see how it does.  “oh darn”… more cheesy cooking!!

I have only tried the shreds so far, but they have a whole line of vegan, rice and soy cheese as well as cream cheese alternatives, Parmesan crumbles, and “cheese” slices. You can see the line up of their products here: Galaxy Foods.

Curry Coconut Turkey Veggie Soup

Curry Coconut Turkey Veggie Soup
Can’t WAIT to make this one! Got this recipe from the BFF and she’s an incredible cook! Once I make it I’ll upload a pic!

ingredients

  • Onion
  • Carrots
  • Celery
  • EVOO
  • 1lb Ground Turkey
  • Salt
  • Curry/cumin (to taste)
  • 2 qts Chix broth
  • 5tbsp Thai yellow curry sauce from TJ
  • Zucchini/mushrooms
  • 1/2 can coconut milk
  • Little more salt and some cayenne
  • 1/2-3/4 c fresh chopped cilantro

directions

  • Sauté onions, carrots and celery in EVOO until the carrots barely become soft
  • Add the turkey and brown in the same pot seasoning with salt, curry and cumin to taste
  • Add chicken broth the ingredients already in the pot
  • Add 5tbsp Yellow curry sauce from Trader Joes , chopped zucchini and mushrooms and 1/2 can of coconut milk with salt and cayenne to taste and simmer until veggies are cooked
  • Just before serving, mix in 1/2-3/4 c fresh chopped cilantro and let simmer for a few minutes

Weekend Breakfast: Potato Pancakes, Poached Eggs & Avocado Sauce

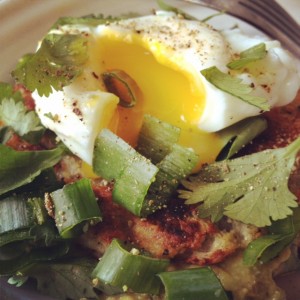
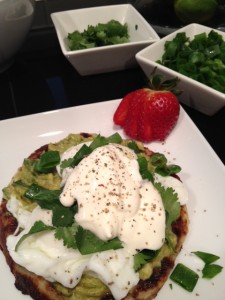
Potato Pancakes, Poached Egg, Avocado Sauce

Recipes for me serve as general guidelines for inspiration, so this meal is the result of a recipe for avocado sauce and a fridge of leftover ingredients from cilantro lime marinated chicken skewers and homemade potato skins.

It was super easy to make and, as I’ve mentioned in other posts, I LOVE cooking weekend breakfast and brunch! Today’s religious experience was so simple and flavorful! It even got the complement comment  “this is SO good! I feel like I’m on vacation! “… Now that makes a chef happy!

The crispy texture of the pancake mixed with the creamy avocado sauce and the runny egg is just to die for! The lime in the avocado sauce and the spices made for a very refreshing meal. I couldn’t believe how the flavors  and textures mixed. Don’t get me wrong, I knew it would be good but I was actually surprised at how incredibly delicious it was! I regret that I have only one stomach! You can play around with different spices and ingredients, and you might get extra points if you find a way to mix in some tequila! 🙂 Breakfast drink anyone!?

Potato Pancakes, Poached Eggs & Avocado Sauce
a rough step by step guide

Potato Pancake & Poached Eggs Ingredients
Potato
Milk (you can use regular or an alternative)
Cheddar Cheese, grated (regular and/or alternative)
Eggs
Fresh Salt & Cracked Pepper
Cilantro (to garnish, if desired)
Green Onions (to garnish, if desired)
Sour Cream (to garnish, if desired)

Avocado Sauce Ingredients
Avocado
1 lime
Fresh Salt & Cracked Pepper
Cayenne Pepper
Cumin
Garlic, minced
Cilantro

  1. Heat pan for potato pancakes. I swear by my Calphalon Crepe Pan! It heats evenly and the non-stick makes for quick and easy clean up!
  2. Mash together the potato, milk, salt & pepper to taste. Make sure to get it as smooth as you can without any potato lumps. While the potato pan is still heating, chop the green onion, cilantro and grate the cheese.
  3. To make the avocado sauce, mix together all listed ingredients to taste until smooth. Be mindful on the cumin, it’s a strong flavor and can easily overpower the flavors if you’re not careful!
  4. The potato pan should be hot by now, scoop in the potato and carefully flatten and shape into a circle. Cook until crispy on one side and flip. Add the cheese and allow it to melt. Once the cheese is fully melted, move to plate and smear avocado sauce on the top.
  5. Once you flip the pancakes, start the water for the eggs boiling and poach the eggs for 3 minutes. Have a small ramekin handy to drain the water from the eggs. I LOVE the CorningWare Ramekins, they’re so stylish and the perfect size for poached eggs. After 3 minutes, don’t let the eggs overcook, remove the egg with a slotted spoon and rest the spoon over the ramekin to allow the last drops of water to fall. If you don’t do this, the water will soak into the pancake and make it soggy.
  6. Place the poached egg on top of the avocado adorned pancake, and garnish with cilantro, green onion, sour cream, and spices as desired. You can add a little salsa if you wish, I wanted to bring out the flavor of the avocado sauce so we didn’t use it for this breakfast.


Weekend Breakfast: Eggplant and Scrambled Eggs

I love weekends! What’s better than waking up and realizing that the first of two day’s you’ve been looking forward to all week are finally here!

One of the best parts of the weekend, in our house, is weekend breakfast! During the week, breakfast is a chore and provides quite a bit of entertainment while I bang around opening cabinets and drawers in the attempt to find a suitable meal that can be made quickly or eaten on the go.

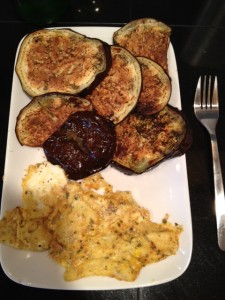
But Weekends…walking into the kitchen, opening the fridge and creating some delicious weekend masterpiece is nearly a religious experience for me! Today, however, there was little inspiration flowing so I gave creative powers the day off and opted for my simple “go-to” stand by’s of eggplant and and scrambled eggs.

Not only is this meal gluten-free, dairy-free, paleo, low fat but it’s also incredibly simple and quite delicious!

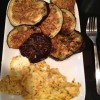
Eggplant & Scrambled Eggs

  • Pre-heat oven to 450
  • Slice eggplant and lay on baking sheet covered with a sheet of Reynolds Wrap Non-stick aluminum foil 
  • Misto Spray olive oil  on the top of the eggplant and season with fresh cracked pepper
  • Cook for 15-17 minutes, or until eggplant is as cooked/crispy as you like
  • When there is about 5 minutes left on the oven timer, scramble one egg with garlic, cayenne pepper, fresh cracked pepper, dried parsley and cook.
  • Enjoy!!

Today I also tried something that we picked up last week and I haven’t yet tried, Reynolds Wrap Non-stick aluminum foil (also available through My Amazon.com Store). We make broiled veggies 3-5 times a week and no matter how much olive oil I lather on the veggies or Misto spray on foil the eggplant ALWAYS sticks! It drives me nuts and has caused a few choice words to escape on various occasions! So, last week we picked up a roll of the alleged “non-stick” foil and today was the day! I was skeptical as I pulled it out of the drawer mentally recounting the countless fights with the baking sheet and foil as it they tried to hold onto my precious eggplant with their sticky powers.

I am quite happy to report that I’m a believer! Foil CAN be non-stick! Ring the bells, sound the horns! That foil worked wonders and I actually liked that it wasn’t quite flawless, as you can see in the photo the end cut of the eggplant stuck to the sheet a bit. Full dramatically narrated product review posted here. This is now a STAPLE of my modest little kitchen! With the tiny space that we have, every utensil, pot, pan and gadget must earn it’s spot!


And on a completely non-related side note… have you ever tried to spell  “utensil” and gotten it right the first time!? I’ll shamelessly admit that it took me a few tries… what a strange word!


Broiled Eggplant