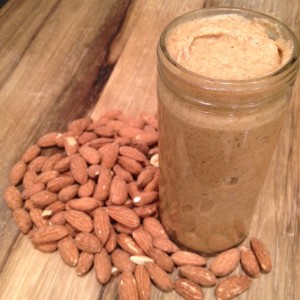
 Let me start this story by giving a little background on the hardware featured in this particular post. I’d been eying food processors like a kid looks at the passing candy store window, or cat looks at a fish bowl. I WANTED a food processor for reasons I can’t quite explain. The strong urge to rice cauliflower isn’t something that normal people think of, but I’ve also never claimed nor do I want to be “normal”…not if it means giving up dreams like rice-ing cauliflower. But, this particular post is about nut butter so I shall continue. The story is, I got hooked on the stuff then went into budget mode and got the DIY itch at the same time and scoured the internet for almond butter recipes.
We used to get a tub of fresh cold-pressed almond butter, and one of pumpkin seed butter each week. But, two tubs of $8/each nut butter per week got me thinking, “I HAVE to be able to same something close at home that could do the trick!” So, off to Costco I ventured to live out my food processor dreams. After extensive food processor research (yep, that’s a thing!) I decided to purchase the Cuisinart Prep 11 Plus™ 11-Cup Food Processor With Blade Storage (link takes you to Amazon.com- but I purchased at my local Costco for $140). I liked this one because not only was it cheaper than the ones I found on Amazon, but it came with the extra blades AND a nifty little blade holder, AND still had the Cuisinart warranty. Pretty good life choice if you ask me!
I won’t lie, there was a little intimidation when I started researching some nut and seed butter recipes. They warned that it would take up to 20 minutes to make nut butter. Who’s got the time! BUT, my amazing, lovely, wonderful food processor did the trick much quicker and is sturdy enough that I don’t have to stand and hold it. I could turn it on and do other chores in the kitchen in-between checking on the butter progress. I’d love to say that the first batch was an incredible success, that it was as if I had been making nut and seed butter all my life and that I was a natural…what, with my infinite patience and such. But alas, I was not an instant success. I did not make fantastic, amazing nut and seed butter the first time I tried. The first almond butter tasted weird because I used flax oil instead of flax meal. The flax oil had a very…”earthy” taste which tasted healthy but wasn’t amazingly tasty. But, with a very patient taste tester and a few batches, the recipe was pretty dialed in!
 Homemade Raw Almond Butter
Yield: one pint
Time: 10-15 minutes
Ingredients
4 cups almonds
1/2 cup sunflower seeds
1/4 cup flax-seed meal
1/4 cup grapeseed oil
Directions
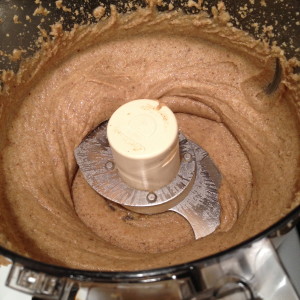
Combine almonds and flaxseed meal in your food processor. You’ll need to stop and scrape the sides down so all the ingredients get blended together. Keep blending until you see the nut butter starts to form into a play dough texture . This can take up to ten full minutes so have patience! Once you see the play dough texture, where the seed butter starts to form a ball and move around the bowl you’re getting close! Add the oil and sunflower seeds and continue to blend about 5 minutes more until the nut butter is consistently smooth. Your food processor might get warm but don’t worry too much, you can always let it cool a little bit and then blend away. I used the 1/4 cup and it was just fine, but you may want to add more depending on how you like your nut butter.
Place in an airtight container (Tupperware or glass jar) and store in refrigerator up to 2 weeks.
There are plenty of additions to this recipe, you can mix up the ratios. You can try using coconut oil. You might want to add salt, or use salted almonds. You can also pre-heat the oven to about 350 and roast the almonds on a parchment paper or foil wrapped cookie sheet for 10-15 minutes. If you oven roast them, stir the almonds once or twice during cooking and let them cool before adding to the food processor. You can also try adding honey if you like it a little sweeter, or even add cinnamon.
What is your favorite almond butter variation?
