DIY Holiday Decorations (Christmas & Chanukah)

DIY Christmas Tree
DIY Christmas Tree

Do-It-Yourself Holiday Decorations

It’s that time of year: the lights are sparkling, holiday music is playing everywhere you turn, and gingerbread lattes are readily available! I get so excited to decorate for the holidays, but I do dread the credit card bill at the end of the month. This year, I decided that there has to be some holiday decorating ideas that are chic, classy and personalized without busting my budget.

After sleuthing around on Pinterest and exploring the blogosphere, I was amazed at a multitude of great and incredibly inexpensive holiday decorating ideas. Decking the halls shouldn’t put you in the poor house, so let’s get started!

Set the Mood

You don’t have to purchase holiday music to feel that holiday cheer or set the tone for your gift wrapping, decorating or dinner party. Try making a Pandora station or Spotify playlist and include a few of your favorite artists. You might even find a few new festive songs to enjoy.

When decorating, candles are my go-to, as candlelight always creates such a lovely ambiance. Use various heights of candles in different colors and arrange them in glass mason jars with cranberries around the base of the candle. You can even make a menorah using craft boxes and candles from the dollar store. One fun project is to use old tin cans and make a holiday luminary to decorate the inside and outside of your home, which can be reused year after year.

Snow Men!
Snow Men!

Use What You’ve Got

When it comes to decoration, natural elements give a very classy touch. It’s amazing how many uses there are for tree branches and pine cones. Pick up a few extra boughs when you select your Christmas tree and take them home to decorate with metallic or colored spray paint. Make your own wreath or place them on the table with a candle in a glass jar for a festive centerpiece. You can also do the same spray-paint treatment to fruit to use as centerpieces, accent colors in glass bowls or jars, or as place settings for dinner party guests. I just love these little decorative pieces using Christmas tree sprigs and wine corks.

Want to be even more frugal? Use pine cones from your own backyard to decorate your home. You can also spray-paint them like this with metallic or sparkled paint for an extra pinch of pizzaz! The options are endless.

Meanwhile, make holiday cards multitask by hanging a ribbon and getting wooden clothespins to hang the cards as they come. Check out this roundup of festive ways to display your holiday cards.

Homemade Cinnamon Ornaments

Scour the Kitchen

There are quite a few things that are probably already in your house and kitchen that can be used to make amazing holiday decorations. For example, you could make a popcorn and cranberry garland for your tree or banister. For snacking and decoration, try these marshmallow dreidels. You can also float cranberries in water for an unconventional decoration piece like this. Use up festive paper and make paper Christmas trees or felt trees in various sizes. The paper trees also make great table top décor or name cards for dinner parties.

Some of my favorite holiday memories are around baking for the holidays and decorating the house. Mom brought both of them together and had us make our own ornaments one year. It was so much fun and my little angel still hangs on her tree each Christmas! Make your own cinnamon or salt dough ornaments and bring some personalized holiday cheer to your tree. They also make great gifts or even gift tags. You can also use model magic and create some lovely ornaments like these snowflake ornaments.

I love the smells of Christmas as much as the sights and sounds. One of the most common decorations that’s most readily available for any budget is to decorate oranges with cloves, called pomanders, like this. Use a large needle to poke holes and insert the cloves. You can even spell out festive words. Hang them around your house or on your tree or mantle and enjoy the fresh smell of citrus and spice!

Wine Bottle Advent Calendar

D.I.Y.

The anticipation that comes with counting down to the holidays might be one of my favorite parts to incorporate into holiday décor. Try making your own advent calendar using paper bags and string. You could also paint a piece of wood and adhere number painted clothespins and dangle little presents like this advent calendar. If you are feeling festive as a wino, check out my favorite advent calendar of all time.

To make you own tree adornment, get clear glass ball ornaments at a craft store and paint them with festive and metallic paint like this or this. For Chanukah, these felt dreidel pouches can easily be stitched together to stash some goodies.

That should be enough to get your house somewhere near as festive as the Macy’s window in New York! For more décor, baking and holiday entertaining ideas visit my Christmas and Chanukah Pinterest boards.

(Original Publication, feature on Levo League here)

What are some of your tips and tricks for decorating on a budget? Share them in the comments section!

Holidays Stress: 7 Ways To Ditch The Worry (Posted on Huffington Post Women)

One holiday down, one to go. How is Christmas only three weeks away?! Somehow I got a bit of a head start on the gifting list but between getting the house decorated, Christmas cards finished and mailed, Holiday parties and obligations, traveling, cooking, baking, cleaning, working out and, oh yeah, a full-time job, life can get pretty stressful!

Luckily, there’s an article for that! Just so happens that it was picked up today by the Huffington Post Women and posted on the FRONT PAGE!

Yes.. I DID have to include a picture! It’s exciting!


Here is the full article, which was first published on the LEVO League here, and then was picked up by Huffington Post Women today! I wrote this article right before the holiday season started, as a reminder to myself as well as an attempt at helping all of you with tips for managing holiday stress…but mostly as a reminder for me! Trust me, preaching to the choir of one over here! Hope you find it helpful and I would love to hear in the comments section what your tips and tricks are for managing holiday stress!

Holiday Stress: 7 Ways To Ditch The Worry
By Kate Neschke, LocalLEVO Seattle Leader
Posted on LevoLeague Nov 20, 2012Posted on Huffington Post Women Dec 5, 2012

It’s that time of year again. Between the endless parties and obligations, visiting with friends and family (and sometimes avoiding certain friends and family), not to mention navigating decadent table spreads and endless office baked goods, it’s no wonder we sometimes dread the holiday season. Rest assured, there is a way you can manage the inevitable holiday stress and glide to a new year with balance, poise and at least most of your sanity in tact!

The key thing for managing holiday stress is to realize that we often can’t change the situations around us, but that we can change how we interact and respond in these situations. Which means, proper stress management starts with you…

Take Care… of You

Know your limits! Make sure to get enough sleep, drink water, balance your eating (which of course includes a cookie or two!) and most important, keep your sense of humor handy. This is supposed to be a joyful season, full of good times and many laughs. Sometimes that means laughing at yourself.

Say No

“Thank you so much for the invitation, but we have another engagement.”

Now isn’t that a nice way of saying no? It’s likely that you won’t be able to — or want to — attend every party or engagement to which you are invited, so here is a chance to prioritize which ones you’d like to attend and politely decline (with appropriate notice) the rest.

Keep Calm, Carry On… and Let Go!

You’ve likely seen these “Keep Calm, Carry On” posters popping up everywhere. As simple as it might seem, this is such a good reminder! One of the best tactics for holiday stress management is to learn what you can control and let go of the rest. Don’t let the hustle and bustle of the holidays overwhelm you. Keep calm in the moment by taking a deep breath, thinking before you speak and remembering that whatever is stressing you right this moment is not likely going to matter in one hour, or even one year. Keep your focus on the joy of the season and have fun!

Have a Little Grace

This one is important! Often, we women really focus on the little details and put so much focus on one aspect that we lose track of the overall picture. I can bet you a nicely frosted gingerbread cookie that no one is going to be focusing on those little details half as much as you are! Let go of control and have grace with yourself. Everyone forgets to serve a dish, or perfectly wrap some gift. Repeat mantra from above: “Keep calm, carry on then let it go!”

Accept Help

Just like you don’t have to control everything, you don’t have to do it on your own. Allow someone to bring a dish to the dinner party, when offered do your best to accept the help. ‘Tis the season for giving. Reward the giving mood in others and allow help!

Get Rid of Useless Worry

There is a difference between worry and planning. Trust that you will handle situations that might come up and focus on what it is truly in your control. Perhaps you could mentally walk through a situation that could be stressful and practice your response. Plan ahead what you can to minimize stress.

The last step for stress management ends with you…

Choose

Everyone finds themselves in situations that are not preferable — cue the awkward family dinner or significant other’s office Christmas party. In those uncomfortable moments, you choose your memories. How much fun you have is entirely up to you. You can focus on all the reasons why you’d rather be at home with some spiked eggnog in pajamas, or you can be present in the moment and make the choice to put forth an effort and find the good in your current situation.

So when you start to feel overwhelmed by too much family pressure or obligation, all the little details or overwhelming stress of presents and parties, remember that this is the season of joy. Trust that you can and will navigate holiday stress by taking care of yourself, setting and knowing your boundaries and choosing how you respond.

How do you deal with stress during the holidays? Tell us in the comments section!

That’s a Wrap…Simple Quick and Tasty Breakfast Wraps

Nut Butter, Fruit, Jelly, Granola Breakfast Wrap
Nut Butter, Fruit, Granola    Breakfast Wrap

Getting up when it’s still dark out is a lot less appealing than hitting the snooze button and curling back into that warm spot under the covers.  Once I finally roll out of bed and throw some make up on, I barely have enough time to do breakfast and opt for the go to meal: protein (Greek Yogurt or Cottage Cheese) + Carb (usually honey toast or English muffin) +whatever fruit is in the fridge. But I also get bored eating the same thing every morning so it was time to mix it up, but still get my precious snooze time!

Enter the breakfast wrap! I build my wraps with the same breakfast criteria: protein +Carb + fruit. I love doing wraps to clean out the fridge because you can you can build all kinds of different tasty breakfasts out of leftovers in the fridge, wrap them up in a convenient easy to manage wrap and you’re ready to go!

One of the fun parts about doing wraps for breakfast is that you get a chance to start the day off with some veggies as well! This is one of my favorite in the “quick and easy breakfast” category and an excellent way to use up tortillas after Taco Tuesday. It is also a great way to clean out the fridge before going out-of-town for the Holidays.


Building Your Wrap
1. Choose your Protein: eggs, cheese, bacon/turkey bacon, sausage, cheese, beans (black/navy/garbanzo), cottage cheese, Greek yogurt, humus, nut butter
2. Add a Carb: tortilla, flat-out wrap, pita pocket, pita bread, lavash wrap
3. Add Fruit, or in the case of a wrap Veggies and other delicious ingredients!

A few ideas:

  • Mediterranean: Kalamata olives, Roma Tomatoes, Spinach, Avocado, Feta cheese, Pesto, Humus, Basil or Rosemary, Roasted Peppers
  • Thanksgiving Leftovers: Cranberry sauce, Stuffing, Mashed Potatoes, Sweet Potato, Grilled Veggies
  • Mexi: Black Beans, Hot Sauce, Salsa, Avocado, Cheese, Cilantro, Peppers, Spinach
  • Cottage Cheese, Banana, Granola, Pineapple, Whole Wheat Wrap
  • Greek Yogurt, Berries, Wheat Germ
  • Peanut/Almond Butter + Honey or Fruit (Banana, Pear, Blueberry, Strawberry, Apple)- and a few chocolate chips doesn’t hurt!

Check out other quick and easy breakfast ideas on my Pinterest Board Breakfast on the GO 

Caprese Breakfast Wrap
Caprese Breakfast Wrap from The Nesting Project with Heirloom Tomatoes, Mozzarella, Pesto and Scrambled Egg
Mediterranean Feta Egg Scramble Breakfast Wrap
Mediterranean Feta Egg Scramble Breakfast Wrap from OurBestBites.com garlic, basil, oregano, feta cheese, roasted red peppers, green onion


Protein Pumpkin Bran Muffins with Walnuts & Raisins

Who doesn’t love muffins? Delicious, warming, hearty and the thing I love the most is the crunchy muffin top! On more than one occasion I’ve eaten the muffin top and left the rest, usually because there isn’t enough goodness throughout the rest of the muffin to keep my interest. I might have muffin ADD. That’s one of the reasons I LOVE making muffins at home, not only does the whole house smell amazing, but I love baking and it’s fun to make them exactly how I want and they are a wonderful easy breakfast option!
 

Wednesday night I roasted my own pumpkin (you can read the post here) in the effort to prepare the delicious pumpkin for baking. Pumpkin muffins have been on my mind for WEEKS! Well, last night was FINALLY the night! We had dinner plans with friends so it was the perfect time to make them and then LEAVE them to cool while we went out. This was my tricky methodology to keep myself from eating one… two …tasting my wonderful pumpkin creation!
I…LOVE…BAKING!! Fresh roasted pumpkin!? Check! Throw a few raisins and walnuts in there… let’s see what other spices can I throw in this bowl? Cloves are one of my favorite holiday spices because it always remind me of gingerbread, which is tied for first favorite holiday flavor right along with Pumpkin and Gingersnap.

The first words as he walked in the door were: “It smells like CHRISTMAS in here!” Holiday baking is one of my favorite hobbies of the entire year, and that declaration my foodie friends  made my little baking heart well up with joy! Those muffins smelled as amazing when they were cooking as they did this morning for breakfast! Now, he’s NOT a pumpkin fan so I figured I’d be eating a dozen by myself (Oh darn), but dolled out some high compliments this morning as we both enjoyed them for breakfast. I reduced the sugar from the original recipe and they were still the perfect mix between spiced, pumpkin and sweet flavors and hearty enough to be satisfied with one muffin and some yogurt. It was the perfect fall breakfast!  The garbanzo flour and Greek yogurt gave an extra protein punch which I appreciate in a muffin.  I can’t WAIT to get home and eat another one two wonderful pumpkin creation! 🙂
Protein Pumpkin Bran Muffins with Walnuts & Raisins
Yield: 12 muffins

Photo from: Green Lite Bites

Adapted from Green Lite Bites Recipe

  • 1 ½ c. Flour ( I like garbanzo, Whole Wheat or Almond but any flour will do)
  • 1 tsp. baking soda
  • 1 tsp. baking powder
  • ¼ tsp. salt
  • ½ tsp. ground cinnamon
  • ½ tsp. ground ginger
  • ½ tsp. ground cloves
  • ½ tsp. fresh grated nutmeg (you can also use ground if you have/prefer)
  • 2 cups of fresh roasted pumpkin (or 1 15oz can of pumpkin)
  • 2 tbsp. molasses
  • 1 tbsp. honey (double if you like sweeter muffins)
  • 1 egg
  • 2 egg whites
  • ¼ c. unsweetened applesauce
  • ½ c. vanilla Greek yogurt
  • Raisins and crushed walnuts to taste
  • ¾ cup Wheat Bran

Pre-heat the oven to 400 degrees and grease your muffin tin or line with festive muffin cups

Mix the flour, baking soda, baking powder, salt, cinnamon, ginger, cloves and nutmeg in a medium bowl. The recipe called for double sifting, but since I don’t have a sifter and I’m way too lazy I just too my pastry blender (or you can use a whisk) and added a little fluffing to it!

In another large bowl, add the pumpkin, molasses, honey, egg, egg whites, applesauce and yogurt. Beat until all ingredients are mixed well.

Add the wheat bran to the flour mixture and mix.

Pour the flour/bran mixture into the pumpkin mixture and combine until just moistened. Don’t over mix. Add raisins and walnuts if you like them and pour into greased muffin tin. These muffins are pretty moist and I like the crunchier outside so I don’t use the paper cups since the muffins tend to stick. Don’t worry, they’ll be full and the pan will feel a bit heavy but they bake up with nice muffin tops! Optional: sprinkle the top with oats, wheat bran or pumpkin seeds.

Bake for 20 minutes in pre-heated oven. Muffins are cooked when a toothpick inserted into the middle of the muffin comes out clean. Cook on wire rack and enjoy!

Home Roasted Pumpkins

As the weather starts to turn, I start to crave warm comforting foods. My mind becomes preoccupied with slow-cooker Soups, fresh out of the oven baked goods, fresh gingerbread and roasted pumpkin. A few years ago, I roasted my first pumpkin and have been hooked on home roasting ever since. There might be a common misconception that roast pumpkins is tedious, messy, hard, impossible or time consuming. Well, all of the above are wrong! It’s ridiculously easy, cleaner than the carving process and once you hack it, rub it with olive oil and place it in the oven you free for the next 45 minutes!

With the first pumpkin spotting for the season, I have had it on my mind to start my pumpkin roasting. I’ve been pinning recipes on my Pumpkin & Winter Squash Pinterest board, drooling over recipes and even quite nearly gave in and ordered a Starbucks Pumpkin Loaf with my Americano last week. Breathe a sigh of relief, I have held out! I wanted my home roasted pumpkin to make some muffins and I wasn’t going to settle for anything less!

My lovely pumpkin and I had a 3/4 mile walk home in the Seattle drizzle three weeks ago. On that walk I learned a few things, first,  it’s truly the simple joys in life that matter most and for me that simply joy was fixating on a pumpkin and finally picking one up, grinning ear to ear as we walked home! Second, a 7 pound pumpkin gets heavy after a few blocks and seems to double in weight every block there after! And third, taking a pumpkin for a walk sure get’s you noticed… “hey nice pumpkin”, “my my, that’s a nnniiicceee looking pumpkin you have there”, and my favorite, “your pumpkin is nice, want to talk to me?”


Lovely photo from David Lebovitz- Roasted Pumpkin Wedges


Now, I have to admit that the poor thing sat on the counter and stared me down for the past 3 weeks and finally…FINALLY last night I figured that Halloween was the perfect night to roast a pumpkin! We don’t get trick or treaters, nor are we too into dressing up and going out to celebrate so pumpkin roasting it was! The nice thing about pumpkin, is that it’s not a sweet squash like butternut can be, it’s not stringy like spaghetti squash, and it’s not nutty flavored like acorn… it’s just the perfect mix of them all and quite delicious! I call it the tofu of squash, you can literally use it in ANY type of meal!!!I challenge you, find a meal that it wouldn’t go good in because it’s delicious in pasta, baked goods, ice cream, sauces, oatmeal, smoothies, sandwiches, spreads, soups, desserts, by it self… see!? It’s amazing!!
Home Roasted Pumpkin
Pumpkin
Rimmed Baking sheet
Foil
Cutting board and knife
Spoon to scrape seeds and bowl to hold seeds

How To:
First, wash and dry the outside of your pumpkin. The outside flesh is tough and the pumpkin is round…and I’m pretty clumsy… annddd my wielding a knife is a good idea HOW!? Just to be safe,  I opted for the horizontal half method. Using a sharp knife cut out the stem of the pumpkin as if you would to create a Jack o Lantern then cut the pumpkin in half from top to bottom.

Pre-heat the oven to 450 (*Tip- I increased the heat from the suggested 400 to 450 because I’m impatient and wanted dinner and it actually turned out just fine. The temp and amount of roasting time depends on your preferred texture and firmness for the pumpkin.) De-gut the pumpkin and separate out the seeds in the bowl to roast later. Be sure to remove all the stringy parts since they don’t taste as good.

De-gut the pumpkin

Prep the Pumpkin- now at this part you have an option. I wanted half my pumpkin to puree for baked goods and half to cut into chunks and add to salads and pasta for the next few days. So, for my recipe I roasted half the pumpkin whole, and the cut the other half into wedges, rubbed the outside with olive oil and laid out on the aluminum foil lined baking sheet. Be sure to use a baking sheet with edges because the pumpkin holds water that actually releases during cooking so you’ll need those rimmed sides of the baking sheet to keep it contained.

Bake at 450 for 30 minutes, flip and cook for 15-20 minutes more or until pumpkin is cooked your desire. To tell if it’s done, carefully press the outside of the pumpkin skin making sure not to burn yourself (yes, that’s more a note to myself!) and it should yield to a gentle press.

Remove from the oven and let the pumpkin cool on a wire rack. Once it’s cool, use a spoon to scoop out your roasted pumpkin or a fork to peel away the skin from the wedges. The flesh of the pumpkin should fall away from the outer shell. I place the pumpkin in a strainer for about 10 minutes to let the additional water drain so it doesn’t get mushy.

At this point, the fun just continues and you can prepare the pumpkin for whatever you have in mind! Blend it up to make a puree, slice up the wedges, mash it with herbs, bake it into delicious goodies, blend up a smoothie or make a pumpkin spice latte, mix with your oatmeal…the options are endless!

Storing: The pumpkin will last in an air-tight container in the fridge for about a week. You can also freeze it for future use, and I wouldn’t let it go more than a few months in the freezer.

Roasting the seeds
Wash the seeds and separate from the stringy pumpkin parts. Pat them dry with a paper towel then lay them out on a greased cookie sheet. Dust with sea salt, or whatever your preferred spice or seasoning is and toast in 325 degree oven for about 20-25 minutes, stirring the seeds around on the tray half way through the cooking.

Check out a few ideas on my Pumpkin & Winter Squash Pinterest board for inspiration!

What do you plan to do with your roasted pumpkin! Post pictures and recipes below!

Simple Winter Soup- Butternut Squash, Yam, Carrot & Garlic

Photo from: “inspiring the everyday” post on butternut squash soup

Somehow the winter season always ages my hobbies by about ten years; knitting, roasting whole pumpkins, baking, canning and the strong desire to bake and make breads and pastas, winter meals, soups, stews… wanting to make everything really. I will admit I recently pins a recipe for homemade Wheat thins! (Stay tuned to see how THAT one goes!)

While chatting last night with my impossibly adorable new hairstylist who is also a foodie, she shared with me a new recipe! Cue ridiculous joy and excitement! We proceed to chat the entire time about her recently discovered hobby of making homemade pasta from scratch (a checkbox on my cooking bucket list), reviewing all of our favorite local restaurants and expounding on 15 uses for sage (It truly is an under appreciated herb)!


Cooking doesn’t have to be hard, we both agreed, you just have to have the ingredients in your pantry and a couple of minutes to make it.

So, along with the recently added item “weather proof boots” on my winter weekend to do list, “roast” to appease the pumpkin on my counter, and “meal plan” to attempt an attack plan to actually COOK all of my recently pinned winter dishes, I shall also be making this soup!

I’ll post my own pictures once I cook it up but for now, enjoy a lovely picture from inspiring the everyday’s post on butternut squash soup.
So, stock up on winter goodness, snuggle into your favorite sweater, pour a glass of wine and and let the winter begin!!

What are your warming winter foods or your go to winter dishes?
Winter Warming Squash Soup

1 butternut squash
carrots, yams and fresh garlic (ratio to your preference)
1 large onion to caramelize
chicken stock/broth


Directions- 

  • Pre-heat the oven to 400 or 450 (depends on how quickly you want the veggies and how your oven  heats) and proceed with prepping the butternut squash as you prefer. Note: There are two methods for butternut squash you can either peel it and bake it or slice in half rub with olive oil and bake.
  • Slice the carrots and yams, and chop off the top of your garlic. (I just posted a recipe here on home-roasting your own garlic. You can roast and keep fresh for up to a week, frozen for a few months. It’s GREAT to have on hand for winter meals!)
  • Roast all veggies and garlic in pre-heated oven until golden brown.
  • In the meantime, sauté your onions.
  • Once the squash, veggies and garlic are roasted to your preferred “done-ness”, remove from the oven and blend/ puree in a food processer with some warmed chicken broth and serve warm.


Carrot Raisin Walnut Muffins (Dairy Free)

Carrot Walnut Raisin Protein Muffins

Well she’s at it again… the one who can’t rest when she’s sick! What can I say!? I was tasted up for a carrot raisin muffin and there were carrots in the fridge! Now, on a note to my future self, baby carrots are NOT the optimum for baking and I’m actually amazed that I didn’t grate my fingers in the process! But, as I previously stated, in my defense that’s all that was in the fridge and I was in no condition to be baking… let alone traipsing out to the store in the Seattle rain! So, I worked with what was in the pantry!

I cut the original recipe in half since my other half doesn’t enjoy vegetables in his baked goods and I can’t..er… shouldn’t eat a dozen by myself in a week. Although after tasting one fresh out of the oven just now, I’m pretty sure I could happily live off of these and soy foam americanos for at LEAST the next week. These are THE best muffins I think I’ve ever made! And let me tell you, I’ve made a LOT of muffins in my lifetime! They were perfectly moist yet dense and hearty enough that I wasn’t reaching for a second just to feel full. The balance between the  walnut, carrot and raisin to “bread” ratio was superb!

When it comes to breakfast, I start with my “protein” and build around that. Garbanzo bean flour has twice the protein that other flours have and mixed with the other goodies in the muffin, it’s just a perfect delight to grab in the morning and doesn’t leaving me reaching for a loaf of bread by 10am or feeling bad about eating a muffin for breakfast! One of these guys with some yogurt or cottage cheese and a coffee and you’ve got a happy morning!

I was short on eggs and long on garbanzo bean flour so I figured I’d noodle around with the recipe a bit. After all, I strongly believe that recipes are simply “ratio guidelines” for us to play with! And I like raisins so I threw a few handfuls in there! When it comes to “wet” ingredients in baking recipes I cook a lot “to taste” making sure to keep the same ratio of wet to dry ingredients while making sure to keep an eye on the leavening agents. I learned that last one the hard way, you don’t want to omit those or you’ll have dense flat baked goods!

Carrot Raisin Walnut Muffins (Dairy Free)
Yield: 6 muffins 
Recipe adapted from PCC’s Market recipe: Carrot-Walnut Muffins 

Ingredients
1 1/2 c Garbanzo Bean Flour
1/2 c wheat bran
1/2 c brown sugar
1 tsp baking soda
1 tbsp baking powder
1 tsp ground cinnamon
1/4 tsp ground nutmeg
1/4 c  + 2 tbsp apple sauce
2/3 cup vanilla soy yogurt
2 1/2 cups grated carrots
chopped walnuts & raisins to taste

Preparation
Preheat oven to 350° F. Combine the dry ingredients in a bowl. Add the remaining ingredients, one at a time, and stir to blend. Spoon into oiled muffin tins or paper muffin cups. Bake for 20 to 25 minutes.

Nutritional Value

Calories Fat(g) Sat Fat(g) Cholesterol(g) Sodium(mg) Potassium (mg) Total Carbs (g) Dietary Fiber (g) Sugar(g) Protein (g)
1 Dozen 175 2 0.75 3.75 346 226 31.5 6.6 16.8 8.6
Half Dozen 351 4.5 1.5 7.5 692 451 63 13 34 17

Variations:

  • Any flour can be used, but keep an eye on the baking time if you’re using whole wheat as it tends to burn quicker
  • 1/4 c apple sauce replaced one egg
  • 2 tbsp apple sauce replaced 2 tbsp oil
  • I added raisins to my recipe since I like them, but you can omit or add whatever other ingredients you wish (coconut, chocolate chips, other nuts, etc)

Roasted Garlic

I’m sick. Anyone that know’s me know that’s I’m TERRIBLE at being sick. I mean… TERRIBLE!! I’m grumpy, irritable, independent and needy all at once and just a downright mess. The moment I feel even the slightest hint of energy, I’m off running a marathon. Well, I did it again. Somehow the bug got me something fierce! It just laid me FLAT and thanks to my prince charming with patience as fortified as Knox itself, I was well cared for and starting to feel the slightest bit better today. Which of course meant that I needed to jump into the kitchen and cook up 15 pots of something-or-rather and bake this-and-that.

Made myself soup...someday I'll learn to rest when I'm sick...
Made myself soup…someday I’ll learn to rest when I’m sick…

Oh, how very wrong I was! “Simply” whipping up some home roasted garlic turned into chopping two massive leeks, a head of celery, handful of mushrooms, a large onion, a few handfuls of frozen peas and adding a can of white beans to a home prepared chicken stock base with pepper, bay leaves, cayenne and dried parsley (darn not picking up a fresh head at the store!)… see what I mean! I can’t REST! Now, I have to say…the soup smells lovely simmering in the pot but I completely over exerted myself into a grumpy bear and now  I need to go sit in the corner and put myself into what I’m now referring to as an “adult timeout” and think about what I’ve done! New mantra… MUST rest… or at least try harder 🙂

ROASTED GARLIC
Prep: 5 minutes | Cook 30 min
Original recipe from: Simply Recipes – Roasted Garlic
Home Roasted Garlic
Home Roasted Garlic

1. Preheat the oven to 400°F.

2. Peel away the outer layers of the garlic bulb skin, leaving the skins of the individual cloves intact. Using a knife, cut off 1/4 to a 1/2 inch of the top of cloves, exposing the individual cloves of garlic.

3.
 Place the garlic heads in a baking pan (you can use either muffin or small loaf pans as they both work equally well.) Use Misto spray (or you can free hand pour) olive oil on the open garlic tops.


4. Cover with aluminum foil and bake for 30-35 minutes, or until the cloves feel soft when pressed.

5. Allow the garlic to cool 5-10 minutes so you can handle with bare hands. The garlic should simply slip out of the skins. If it doesn’t, simply use your fingers and peel back the skins and slide the garlic out .

Now you have some delicious home roasted garlic! Roasted garlic should last about a week in the fridge in an airtight container, but can also be frozen and used later in soups, pastas, spreads (especially with heirloom tomatoes basil and fresh potato or sourdough bread!) or any other cooking dish that might call for garlic. The only problem you might encounter, as with many other “make yourself” projects… you’ll be spoiled for the homemade and won’t want to use store bought! That’s what happened when I made Home roasted red peppers!

Garlic ready to be roasted!


I LOVE collecting recipes and seeing how others use ingredients! How do you plan to use your home roasted garlic?

Spaghetti Squash- A simple fall meal

Photo from Roost
Spaghetti Squash (Photo from Roost)

Fall is on its way… leaves are turning colors, the air is crisp and the pumpkin spice latte signs abound. Today it feels like a cozy grey blanket was spread across the city, and it’s tucked up under my chin making me feel like I’ve found the warm part of the bed and don’t want to rustle the covers. You know what I’m talking about? It’s the same feeling as the morning when you wake up and the mattress is perfectly indented with your body and you can feel the cold air in the room on your nose but under the covers it’s all warm! Well, that’s how today feels.

I LOVE fall! Boot season, reaching for scarves, leaves turning, impending holidays in the planning… I love ALL that fall brings with it but mostly I LOVE Fall cooking! I can’t walk past a pumpkin without sizing it up for how much pumpkin it would yield for after roasting, mentally creating a cutting plan in my head of how I would slice it to fit on a roasting sheet!

One of my fall favorites is spaghetti squash. It is such a simple and warming dish to make for those nights you don’t want to spend your night in the kitchen making dinner! I love to make extra and pour cinnamon and soy milk over it the next morning for breakfast or pack some for lunch sprinkled with cheese! I was going to write my own recipe and include pictures BUT as luck would have it one of my favorite food blogs to read, Roost, posted this very day (yep you guessed it!) Spaghetti Squash!

Caitlin is the author and creator of Roost, and her photography is out of this world! I want to curl up and live in every picture she takes while I devour ALL of the lovely food! She created Roost when her husband was diagnosed with Crohn’s and focused on all things gluten-free. In this recipe, She makes her spaghetti squash with meatballs and sauce, but I love to make my Roasted Fennel and Tomato Dressing and Homemade Turkey Meatballs!

So,  head on over to Roost for the Spaghetti Squash Pasta with Meatballs recipe and gawk at her lovely photos and let me know how you dress up your spaghetti squash! Feel free to post your own recipes in the comments!

Happy Fall Everyone!


Homemade Cold Brew Coffee

If you have…

Then you too can make and enjoy some Cold Brew Coffee in the comfort of your own fabulous home!
This past weekend I attended a Creative Leadership Summit in California and like all wonderful gatherings of creative minds, I went without expectations and was blown away by the talent that I saw! There were different areas of concentration as well as one-off classes sprinkled into our weekend schedules where we could explore different industries and skills that we might not otherwise be exposed to. One of the classes on that list was “Cold Brew Coffee”. I’m from Seattle, OBSESSED with good coffee, and for those few days a year that Seattle puts on her make up and turns the heat up, I’d love to be sipping on a glass of good chilled coffee!
I’m always amazed at the different flavor of cold brew coffee. With regular coffee brewing, the hot water and the oils from the bean swiftly pressed together are what combine to provide that deep, rich, roasted flavor and the slight bitterness you might taste in hot coffee comes from the acidity in the beans. Icing coffee that is hot-brewed simply puts that same flavor on ice…surprise surprise!

BUT, the cold brew method actually brings out a different part of the beans flavor and the lengthened steeping process combined with the coarse texture of the grinds reduces the acidity which makes for a  sweeter and more syrup type flavor which is actually quite delightful even for someone who doesn’t like any sweetness in her coffee!

Apart from challenging all my urges for instant gratification, cold brew coffee is so simple to make at home and completely worth the forethought to make ahead of time.While there is a bit of science to cold brew coffee is very forgiving so you can mix up the temp, how much you layer, length of time you steep, ratio of coffee to water, etc! The method below was developed by hipster teacher/coffee guru, Mason,and  follows the Toddy method (Link directs you to the Toddy Website which lists cold brew instructions for both coffee and tea.)

So, grab a mason jar and wow your friends with you home cold brew coffee skills! These are also great frozen into a popsicle or tray for coffee ice cubes!!

Cold Brew Coffee Prep


Cold brew coffee

-yield depends on the ratios you use
-coffee lasts up to two weeks in  a sealed container the fridge

You’ll Need…
16 oz mason jar
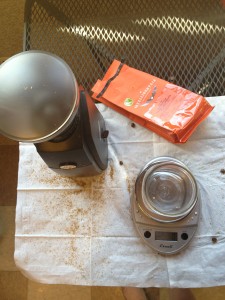
coffee grinder (I suggest the affordable Krups, Stylish Bodum Bistro or the classic Kyocera)
Single Cup Coffee Filter like the Melitta Ready Set Joe and with filters,  ,
kitchen scale to measure the water and coffee
Small Bowl
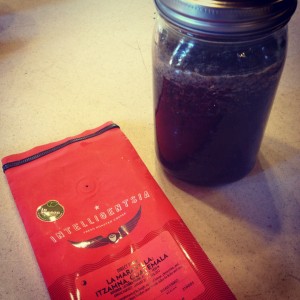
Coffee of choice (We used the amazing Intelligenstia La Marvailla blend)
Water

Tips…
The ratio is 1 part coffee to 4 parts water, so you can mess around with the different ratios to create a different flavor if you so desire. The key in this process is that you want to be as mindful as possible and don’t agitate the coffee. Use a coarse grind, even a step more coarse than you would for a french press so that the water can have a larger surface of the coffee bean to steep with.

Making the coffee…

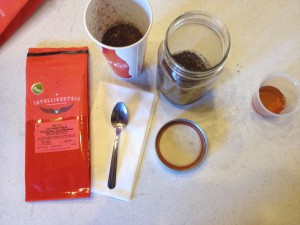
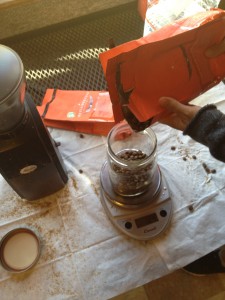
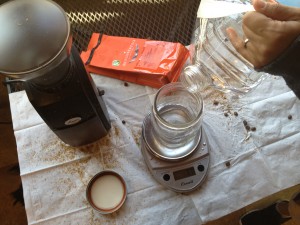
  • Set jar on scale and zero out the weight. Measure 125g coffee into jar and grind in a coarse texture then pour into bowl and set aside
  • Measure 80g room temp water into jar and add half the grinds from the bowl
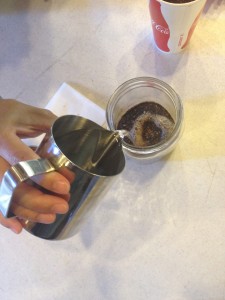
  • Measure 240g water and pour into your jar in a slow circular motion then gently spread other half of coffee grinds on top and let set for 5 min
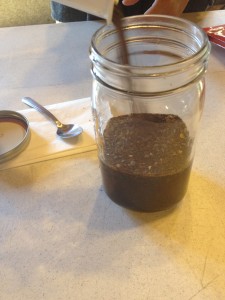
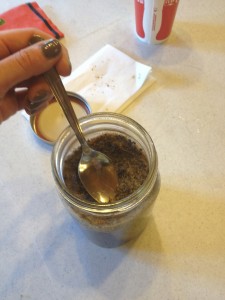
  • Measure out another 240g water and pour in slow circular motion over the layer of grinds and with minimal agitation, gently press sides of the grinds down with spoon to fully saturate then cover with lid and set aside at room temperature for 8-12 hours
  • Filter coffee through the single cup coffee filter (don’t forget to insert an actual filter into the strainer) by gently pouring from the side of the jar then inverting the entire jar so gravity can do its job pulling the water through the grinds in the jar
  • You can then rinse your jar and pour your cold brew right back into your mason jar or put into little bottles to share or store (just remember to refrigerate after you filter!)
  • Pour over ice or dilute with water/milk to tast


How did your cold brew turn out! Did you mix up the layers, ratio, steeping time or other variable? Would LOVE to her any tips and tricks that you discover in your homemade cold brew coffee process!!

Cheers!