Butternut Squash Couscous (Vegetarian, Vegan, Meat Free, Dairy Free)

photoThe way that I describe this dish, is a middle eastern version of fried rice. It’s a great meal the throw together and one that you can experiment with spices that you don’t likely use in your daily cooking. The original recipe calls for a steaming method of cooking, which is the traditional method. I neglected to read the directions before I started the recipe and didn’t think we even owned a steamer! Well, after I completely revamped the entire cooking method, I realized that we DO have a steamer so I guess I’ll try that next time!

Couscous is very low in fat, and has about the same in protein, fiber and carbs as quinoa. Quinoa beats couscous in the mineral content, but couscous packs an amazing 87% of your daily suggested intake. About 55mcg is suggested daily and couscous has 43mcg per once cup serving. Selenium has antioxidant properties, can help the body regulate the thyroid hormones, support a healthy immune system, and aid in metabolism. One of selenium’s most important roles is as an antioxidant helping to prevent cell damage due to free radicals. (Sources: WebMD and Eating Well)

One VERY important thing that I did not note, until I’d already washed and set aside four cups of couscous, is the water to couscous ratio in this recipe. Much like rice or quinoa, there is a two to one ratio for water to couscous. Now, this recipe called for 4 cups of dry couscous. Four cups of dry couscous is quite a large portion, borderline obscene actually. I only realized this fact at the very moment where I was pouring the 8 cups of water and 4 cups of couscous  into my stove top pan and it was nearly brimming over. And, I hadn’t event started it boiling yet! My denial for the amount of couscous I was in the middle of making could no longer be indulged and I pulled out the large stock pot and transferred my absurd amount of couscous into the larger pot. While there was much more couscous than I would normally cook, about 9 servings worth, the ratio of the other ingredients worked perfectly. The only thing I would change is to maybe try cutting the couscous by half. 

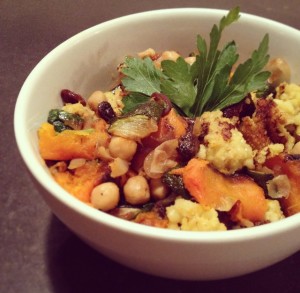
To serve, mix the roasted zucchini and butternut squash, chickpeas, raisins and sautéed onion together in a bowl and add a little more chopped parsley. (Typically, chickpeas from a can are already cooked but double-check.) Add in the couscous and stir well. The couscous will be a little gummy which is possibly due to my cooking method and not steaming it as directed. Garnish with more fresh  parsley if you wish. You can also add grilled chicken or tofu to this if you want more protein like I usually do.

Squash Couscous
Yield: 9 cups of couscous + a good amount of veggies for 4 people 
Recipe and method adapted from the recipe on Canadian Living
*Note: Due to preference and feeding two people versus 6, I suggest cutting the couscous, chicken stock and water in half. If you LOVE couscous or have a lot of people to feed, keep the recipe as is!

Ingredients
1 1/2 lb (one medium large)  butternut squash, peeled and chopped in 2 inch cubed
2 large zucchini, sliced into 2 inch cubes
1 medium yellow onion, diced
1/2 cup raisins
2 cups  ( 1  15 oz can)  chickpeas, drained and rinsed
1/4 c chicken bullion paste for chicken stock
8 cups water
2 tbsp chopped fresh parsley
1 tsp ground ginger
1/2 tsp pepper
1/4 tsp salt
1/2 tsp turmeric
4 cups Israeli couscous ( I only had 3 cups, so I added one cup of the golden small couscous
additional parsley to garnish

Directions
Wash and chop the zucchini and butternut squash. Don’t forget to de-seed the squash. Lay out on aluminum foil on a baking sheet and roast at 450 for 30-45 minutes. Turning every 10 -15 min. Wash the couscous and set aside.

Chop the onion and fry it on the stove with some olive oil in a large stock pot. Set aside in a large bowl which you’ll use to mix up the rest of the ingredients. Drain and rinse the chickpeas and add to the bowl, along with the raisins and some more parsley (to taste). Add the zucchini and butternut squash to this bowl once they’re browned on all sides.

Bring 8 cups of water to a boil in the large stock pot you used for the onions. Stir in the 1/4 cup of bullion, parsley, ginger, pepper, salt, and turmeric. Let boil together for a few minutes. Add the couscous and let it come back to a boil. Be sure to stir it all up every few minutes. Cook until the couscous soaks up the broth and get’s to a consistency you like.

Add the couscous to your large bowl with the onions, raisins and chickpeas, zucchini and butternut squash and stir. Garnish with additional parsley if you wish.

Tonight we’re eating this with some delicious bone in pork chops that are currently brining, but you can serve with grilled chicken, boiled eggs, firm tofu, or grilled steak. The options are endless!

Potato, Carrot Leek Soup (Dairy Free, Soy Free, Gluten-Free, Vegan)

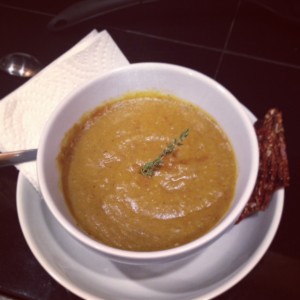
photo 1It has officially gotten cold in Seattle. Not “girl” cold where it’s 50 degrees and my tosies get a little chilly. I’m talking Midwest, you can see your breath, chill hits to your bones cold. We’ve had low 30’s for about a week now and even my poor parsley I forgot on the patio was frozen to the bone! With cold like this, a big bowl of warm homemade soup is just the ticket to help you thaw out! After being used to cooking an ENTIRE Thanksgiving feast, four pies seemed like a walk in the park! I opted for the my go-to holiday hits and baked four fresh crusts from scratch  for pumpkin pies and two pecan pies. Of course, I home-roasted the pumpkins using my recipe HERE.
we would up with all of the veggies that I had drug up my parents house with the best intentions of cooking up for my family. What do you do with bunches of leeks and a massive yellow onion?

Well, you buy potatoes and carrots and make soup of course! I wrote this recipe from looking at a few different ones, and deciding that I didn’t want dairy OR soy in my soup…and using this a little as a kitchen soup recipe to clean out the fridge. The recipe  is sweet because it’s relatively low maintenance and you can make it in your VitaMix or if you have a food processor. Super simple, SUPER delicious, and super healthy! No diary, no soy, gluten-free, and  can be made vegan if you substitute out the chicken bullion.


photo 3Potato, Carrot Leek Soup (Dairy Free, Soy Free, Gluten-Free, Vegan)
prep time: 10 min | cook time: 1 hr
5 leeks
2 ½ tsp minced garlic (or 5 fresh cloves)
5 stalks celery + the center lighter part with the leaves
dried Parsley (or fresh!)
5  medium russet potatoes
2-3 large carrots
½ large yellow onion
2 tbsp chicken bullion ( I swear by Better Than Bouillon Organic Chicken Base, Reduced Sodium)
8 cups water
1 tsp ground rosemary
1 tsp fresh thyme
2 bay leaves
fresh sea salt and pepper

Pre-heat oven to 400.

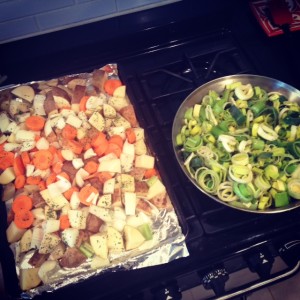
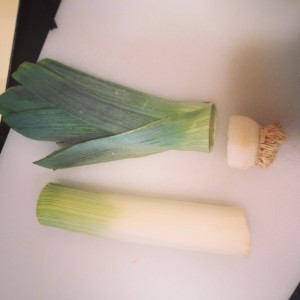
photo 2photo 1 copyWash, peel and chop all vegetables. To clean the leeks, cut just above the roots and just below where the dark green leaves start to branch off. Wash the body of the leek and peel the outside layer off. Cut into disks. For the dark leaves, cut the tips off and be sure you have washed them well. Then slice and set aside. For the potatoes, I usually cut the potato in half, then half again and cut into chunks.

Misto spray a cookie sheet then place carrots, potatoes and onion on cookie sheet. Dust with fresh cracked pepper and dried parsley (unless you have the fresh stuff- in that case add when you puree the soup).  Cook 40 minutes or until potatoes are soft in the center. Turn veggies once or twice so that all surfaces get browned.

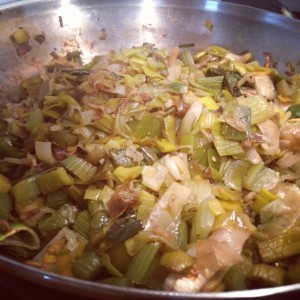
While those veggies are in the oven, get out a large pan and sauté the garlic. Add the leeks, separating the layers of the disks, and the celery. Then add a little fresh cracked pepper and some salt. Sauté until all the veggies are cooked. As I turn the leeks and celery in the pan, I’ll do a light olive oil Misto spray just so everything gets a little charred in the pan and I’ll also coat with pepper. Also, any of the leek that is still held together in the little disk, separate the different layers as you cook.  I never measure pepper and I like the flavor so I usually just cook by sight and will add until I feel like it’s seasoned.

To make the broth, bring the water in a 10-cup stockpot then stir in the chicken bullion. Add the rosemary, thyme and bay leaves. Bring to a boil and simmer for 10-15 minutes.

Once all veggies are cooked and the broth has simmered, remove the bay leaf and get your vita mix ready. Place 1/3 of each of the ingredients in the blender and blend on medium until thoroughly puréed.  Once puréed, place back in the stockpot and repeat until all of the ingredients are puréed. Simmer soup for 10-15 minutes and serve.

Can be frozen up to 4 months in a freezer Ziplocs bag or Tupperware. .

Wine Marinated Crispy Chickpeas (Vegan, Vegetarian, Meat-Free, Dairy-Free)

Simple Tasty Winter Meals(Vegan, Vegetarian, Dairy-Free, Meat-free)
It’s “officially” fall in the Pacific Northwest. All of the normal indications are here: I need sunglasses, a jacket, a scarf, a tank top, gloves and an umbrella all in the course of about five minutes. The sun is setting earlier, waterproofing boots is on my to-do list, and my shorts get packed away.

Another indication that it’s fall is here is the lack of daylight. There is an impending sluggish feeling that starts to set in when we realize that we go to work when it’s dark and leave work it’s dark. Unless you’re one of the lucky few that has a window near your cubicle or in your office, it’s possible to only catch a glimpse of real “light” through ever distant windows on the run from the  much needed afternoon coffee break to back to back afternoon meetings.

When the rain starts, the fall flavor craving starts. These cravings battle the ever sluggish feelings and makes us torn when it comes to dinner. Either it’s the event that keeps me going during the day and I can’t wait to rush home and cook something that I’ve pinned, liked, saved or stashed. Or, the last thing I want to do is be in the kitchen as a continuation of my daily servitude but am conflicted when I mentally explore the ease of ordering pizza.

Marinated Chickpeas

1 can chickpeas, drained
White Wine
Minced garlic
Dried Parsley, garlic, rosemary pepper
EVOO or cooking spray

  1. Open the can of chickpeas, drain and rinse
  2. Marinate the chickpeas in spices, white wine and a few dashes of balsamic in a bowl or tupperware
  3. When you’re about 17 minutes away from the other dishes being ready, pre-heat a pan with some EVOO or cooking spray
  4. Remove the chickpeas from the marinade, I use a slotted spoon to do so, and toast on medium-high until the exterior starts to brown (usually about 10-15 minutes)
  5. Shake the pan every few minutes  to move the chickpeas around so they brown evenly
  6. Once they’re browned to your linking, remove from the heat and serve

I usually pair with baked butternut squash, sauteed garlic kale or kale chips and toasted quinoa.

Cooking Notes:

The Wine:  I NEVER cook with a wine I wouldn’t drink. So, choose whichever you’d like. Anything from a Chardonnay to Riesling works. I usually use a traditional table white wine or a dry Pinot Grigio

Marination Time : Since this is a go-to meal I usually only marinate them for about an hour, but if you can remember in the morning to prepare them it will taste MUCH more delicious

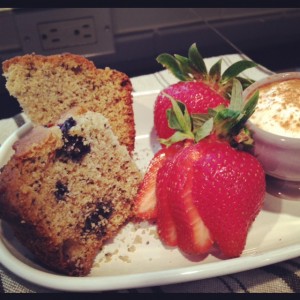
Vegan Blueberry Lemon Poppy Seed Bread

It’s 3:15 am… a time of… well not really day OR night… it’s a time no person should ever experience let alone when they’re SO worn out and sleepy all they want to do is go back to sleep. I’ve you’ve been following A Byte of Life, you’ll have read the post on Spain (also found here) which was a MOST incredible trip! We were seriously debating how long we could just fall off the grid and NOT come home! But alas, common sense or something to that nature won and we got on the multiple planes home. Oh hey jet lag, how are you? Are YOU the reason I’m up at 3:15am!?

Turning to my tried and true comfort, I started googling for recipes. If I can’t sleep I may as well bake right!? My love for lemon poppy-seed is almost as strong as my love for a good bottle of red wine, and thankfully, the mister LOVES a good lemon poppy-seed ANYTHING! The request was made and I had a mission ahead of me: your mission, should you choose to accept it, is to create a delicious lemon poppy-seed baked good that’s not super sweet and melts in your mouth Well, now that’s a fun challenge!

Lemon Blueberry Poppyseed Bread

Vegan Blueberry Lemon Poppy Seed Bread
—-
1/4C canola oil
1/4 C  honey
1/4C applesauce
1/4 C soy milk
zest & juice of 1 lemon
—-
2 C Bob’s Red Mill Gluten-Free flour
3/4 tsp baking soda
1/2 tsp salt
2 tbs poppy seeds
1 C fresh blueberries (put in freezer for about 30 minutes before using)
—-
Pre-heat oven to 375
Combine the oil, applesauce, soy milk, honey , lemon juice and zest in a bowl
Sift together the flour, baking soda and salt. Add the poppy seeds and mix to combine.
Add to the wet ingredients and incorporate
Fold in frozen blueberries. Note that the batter will be thick
Place into a greased loaf pan, sprinkle raw sugar on top
Bake at 375 for 35 minutes(turning once half way through cooking)

Tasting notes:
It’s not your typical fluffy, white flour, white sugar lemon loaf you’d get at Starbucks. This is a more rustic bread and it was quite good! The gluten-free flour lends to a bit more of a mealy texture. Next time I’d add a bit more lemon juice. It’s not a sweet bread at all, so you’d need a lemoncello glaze, or blueberry jam/lemon curd/clotted cream to make it more pastry-ish.

All in all, it’s a good solid rustic breakfast bread…and…I better go taste another slice before posting this review 🙂

Potato Leek Soup (Vegan)

photo 2When the weather turns soggy, I start to practice my winter sport of “being in the kitchen”. From caramelizing and chopping to baking to broiling, when the weather turns to mush I turn to the kitchen. …and a glass of wine, but that’s a year round sport!

This year I’ve really tried to focus on cooking “in season” and challenging myself to prepare my “typical” foods in a different way. While leek’s are not something that we traditionally have on hand in our house, they made the headliner in today recipes. To be honest, the lack of consistent main stage placement in our cabinet is purely due to the fact that I only know two ways to cook them; sautéed or made into leek soup. While they are can be found year round, they are in season November to February and are more readily available.

The more I looked into the nutrition characteristics of leeks, the more I realized that I wasn’t the only one who usually passed up these shallot and garlic relatives in the grocery aisles; many people shy away from these cardio enriching veggies because they don’t know how to cook or prepare them. Leeks are high in folate, which is a key B complex vitamin for supporting and balancing our cardiovascular system (source) as well as being very high in potassium and very low in sodium, giving it naturally diuretic properties (source). Sharing the same family as garlic and onions, they boast immune, antioxidant, and heart-healthy benefits. 

Enjoyed in in salads with vinaigrette, in soups, sautés, risottos, sauces, pastas, frittatas, creamed, carmelized, Bruschettaed… there are SO many ways to prepare leeks it will blow your mind! Check out this Leek Pinterest Board for more inspiration!

When shopping for leeks, look for ones that are  firm and straight, with dark leaves and white bodies. Quality leeks should not be yellowing, wilting or cracking. To store, keep them unwashed and untrimmed,wrapped in a paper towel inside a plastic bag in the fridge up to a week. Cooked leaks should be kept for no more than two days, but you can freeze them up to three months once they’re blanched for three minutes and stored in an airtight bag.

I have to warn you, you’ll need a spoon readily accessible once this soup is cooked, is so good you’ll be eating it out of the pot!

photo 1Vegan Potato Leek Soup
Adapted from recipe posted on Care2.com Serves 4 – 6
Ingredients:

1 tbsp EVOO (extra virgin olive oil)
3 large leeks, whites and greens, washed and sliced
2 medium yellow onions, chopped
½ tsp fresh cracked sea salt
3 cloves garlic, or 1 ½ tsp minced garlic
2 large white potatoes, washed and cubed
5 cups chicken stock (use vegetable stock if you’re making entirely vegan)
½ tsp crushed rosemary

  1. Wash all veggies
  2. Heat EVOO in stock pan with the chopped leeks, onion, garlic and sea salt, sauté  stirring often until the onions begins to turn translucent
  3. Add the potatoes and vegetable stock and bring to a boil. Cover, reduce heat and simmer 20 minutes
  4. Meanwhile, get your blender out and prepared to blend up the soup
  5. Once cooked, remove the soup from the heat and ladle  into your blender, 1 cup at a time (if you have an immersion/stick blender you can blend the soup right in the pot)
  6. Blend the soup  until smooth and free of chunks
  7. Pour smooth soup into a heat-proof bowl and continue until all of the soup has been blended
  8. Transfer the blended soup back to the original soup pot and warm over low heat until heated through
  9. Serve hot

Donuts: Vegan & Gluten-Free

IMG_1701Everyone has a hankering for a donut from time to time. Yes, this includes the healthiest of people! Now, if you’re silently saying, “Why no, I can resist a fluffy, melt in your mouth, little bit of heaven pastry goodness” then 1- you’re either lying or crazy or 2- your just bitter because you’re gluten- intolerant. Well, harbor bitterness NO longer my friend! We have a family member that is gluten intolerant and on his last trip to see us I had the itch to bake.On my recipe hunt, I found QUITE a few recipes for donuts, and once I got my drooling problem under control, created a Pinterest board to keep all my lovely donut finds in one place. But, as I started clicking through the recipes I found that many of them were fried, used gluten-filled flours, and called for  xanthan gum or other additives.

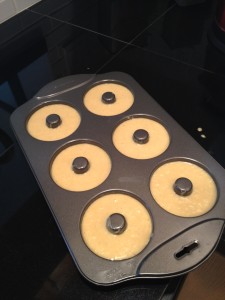
coffee 1While I’m a FIRM believer that deserts should never be desecrated and demoted into the “light” or “non-fat” categories and should remain their butter or chocolate anchored selves, I do also believe it moderation. So, I set out to focus on the baked donut recipes and FINALLY found one that didn’t call for xanthan gum or some other additive that I can’t pronounce or state with confidence what exactly it is. The gal over at Vegan YumYum had a delicious recipe for mini-baked donuts which called for regular flour so I made a few alterations and gave it a shot! I also did my research on baked donuts, and decided to go with the affordable Norpro 6-Count Nonstick Donut Pan from Amazon and purchased a 4-pack of the Bob’s Red Mill All-Purpose Gluten-Free Baking Flour as well. With a few toppings gathered and the ingredients for the glaze in hand, I was ready to BAKE my Vegan* gluten-free goodness! *In order to make these donuts vegan, use the egg replacer in the recipe instead of the egg. 

display 3The donuts turned out to be a success, both men in the house had seconds and my gluten-loving one didn’t complain about the taste or texture. They are not going to be a complete replacement for the real deal full butter and flour style of donuts, and if you prefer a good fried old fashioned donuts beware that this will not replace that hankering and you better go get one..or two immediately! The texture was a bit different but the taste, especially buy the time the various toppings and glaze were applied it all tasted like a delicious donut! I followed the glaze recipe on the same website, and used sprinkles, shaved chocolate, coconut and cinnamon as toppings! You can take a glance at all our delicious toppings below

What’s your favorite donut topping?

Mini Baked Donuts
Recipe adapted from Vegan YumYum
Yield: Her recipe makes 20 mini-donuts but since I purchased the  large donut pan, the recipe wound up  yielding 10-12 donuts… I can’t remember because we were chowing on the  first batch  while the second batch when in!!!

Dry Ingredients:

1 Cup Bob’s Red Mill Gluten-Free Flour
1/2 Cup Organic Sugar
1 1/2 tsp Baking Powder
1/4 tsp Salt
1/4 tsp (scant) Nutmeg
1 tiny pinch or shake Cinnamon

Wet Ingredients:
1/2 Cup Soymilk
1/2 tsp Apple Cider Vinegar
1/2 tsp Pure Vanilla Extract
1 Egg (Or you can use Egg Replacer for 1 Egg)
4 Tbs Earth Balance

batterready for ovenPreheat oven to 350º F. In a large bowl, combine dry ingredients with a whisk to mix thoroughly. Combine wet ingredients in a small sauce pan over medium low heat and mix until earth balance is melted. This mixture should NOT get too hot, you should be able to stick your finger in the mixture. It should feel slightly warm. Add wet to dry and mix until just combined. It should form a very soft dough. Using a tablespoon measure, scoop out dough into your un-greased nonstick donut pan. If you’d like “pretty” donuts, Smooth out the top of the dough with your fingers.

As you can see, the dough sits just below the rim. If you over fill, your donuts will come out looking like it has a little muffin top. Bake for 12 minutes. They should not be browned on top, but a tester will come out clean. Invert hot pan over a cutting board or cooling rack to release donuts. Allow to cool completely before decorating.

Glaze with Sprinkles

1/2 Cup Powdered Sugar (lump free!)
1 Tbs Soymilk
Bowl full of sprinkles (aprox. 1/3 cups

Whisk soy milk and powdered sugar together. Dip the “bottom” half of the donut (the side with the nicer shape) into the glaze, let some drip off, then dip glaze-side down into sprinkles. Transfer to a wire rack that has been set on top of some parchment paper. The excess glaze will drip through the rack onto the paper for easy cleaning later.

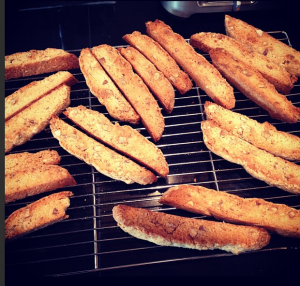
Vegan Almond Biscotti


Screen Shot 2013-05-31 at 8.40.03 AMI love biscotti. It’s crunchy, flavorful with barely a hint of sweetness, and is convenient consume. Paired it with a foamy cappuccino it’s one of the most amazing afternoon treats on cold afternoon. It’s almost summer and this crazy gal is writing about cold days and biscotti? Well, up in Seattle the spring is a time a taunting. It will be gorgeous, no jacket and sun glasses weather for a few days then dissolve into a week of grey skies and soggy drizzle. The up-side is that it’s not freezing like it is during the winter.

When it’s grey or cold out, I get a baking itch. In high-school I developed a dairy allergy, which made baking a much harder task. This was before food allergies were really main stream. It proved quite a task to learn the alternatives for cooking and baking without dairy. I’ve long tweaked and updated different recipes, but this one has been a tried and true biscotti recipe for years.

So, while you may think that biscotti and baking are reserved only for the fall or winter time, but you can personalize this recipe for whatever season you crave biscotti. Give this recipe a spring twist and sub the nuts for poppy seeds and add a little lemon!

Biscotti Vegan Almond Biscotti

Ingredients
3 cups all-purpose flour
1 tablespoon baking powder
1/2 teaspoon salt
1 1/2 cups unbleached cane sugar
3/4 cup smooth unsweetened applesauce
1 -3 tablespoon vegetable oil
 (I used one tbsp apple sauce)
1 ½ teaspoon vanilla extract
 (can also use 1 tsp each vanilla and almond)
1  cups almonds, chopped & toasted

Directions

  1. Pre-heat oven the 325°F
  2. Chop and toast the almonds and put them in the pre-heating oven to toast
  3. Lightly oil two cookie sheets.
  4. In a large bowl, whisk together the flours, baking powder, and salt.
  5. In a medium bowl, whisk together the sugar, applesauce, oil (1 TBS for a hard biscotti, 2-3 TBS for a softer biscuit), and extract.
  6.  
Stir the sugar mixture into the flour mixture, add the nuts
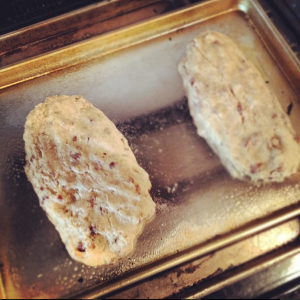
  7. With floured hands, shape the dough into two 3-inch wide “logs” about 3/4 inch thick, with the ends squared off and place on cookie sheets
  8. Bake the logs for 25 minutes.
  9. Remove the pans and reduce the oven heat to 300°F.
  10.  
Cool the logs on a rack for 15 minutes.
  11. Cut the logs carefully with a sharp bread knife straight across into 1/2 inch wide slices.
  12. Place the slices cut side down on the cookie sheets
  13. Bake 5-10 minutes, or until golden on the bottom then turn slices over and repeat on the other side.
  14. Cool on racks, then store airtight for up to two weeks.

Variations

  • Use the original recipe’s method -1 tbsp oil instead of apple sauce which will change the consistency a bit
  • Sub almonds for different nuts (Pistachio, Walnut, hazelnut), chocolate chips, currants, dried cranberries
  • Try cutting the sugar
  • Use 1/2 whole wheat flour and 1/2 white
  • Dip the biscotti in white or dark chocolate for a sweet treat

Healthy Spring Rolls with Garlic Ginger Dipping Sauce (Vegetarian Option)

Spring has sprung friends! As the weather turns from the chilly winter to crisp spring I start to crave the lighter fare: chicken salads, grilled fish and veggies, Rose and bubbly wines, strawberries and all other fresh spring/summer fruit. A few weeks ago, my mother invited me along to a cooking class from Culinary Events Northwest. The class met at the Lynnwood Albert Lee Appliance store so off we went to learn our “Wraps Around the World”. There were a few different interesting offerings, such as crepes with buckwheat flour and strawberry balsamic drizzle. But my favorite from the class was the Vietnamese Style Spring Rolls.

We love ordering these when we eat out but I had NEVER before thought about trying to make them myself! To celebrate the first day of spring it was time to try my hand at some homemade spring rolls for dinner! The hardest part of this project is the prep! Once you get everything washed, chopped and arranged in an assembly line it’s easy peasy and I had 12 of these bad boys made before I knew it!

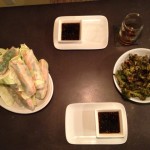
The report from mister Byte of life: Success! His only regret for the meal was that he didn’t have a larger stomach. Chef, happy! Even the next morning at breakfast he was talking about how good they were and how excited he was to be hungry later so he could eat more! These little guys are great as appetizers or served with grilled or steamed veggies for dinner. They make great next day lunches or afternoon snacks. I’ve included a few other ingredient ideas below. What are some of your favorite spring roll ingredients or ones you’d like to try! Also, please feel free to post other dipping sauce recipes!

Healthy Chicken Veggie Spring Rolls
These can be vegetarian by simply omitting the chicken!
Yield you’ll have to play around with the ratios of ingredients but this is a general guideline of ratios from my assembly line. 

12  8 or 9 inch rice-paper sheets
1 c fresh mint, chopped
1 c fresh cilantro, chopped
1 c fresh basil, chopped
1 – 1 1/2 c finely chopped green cabbage
extra full cabbage leaves to separate the spring rolls on your display plate (the rice-paper wrappings will stick to each other)
1 c matchstick-sized cucumber, peeled first
1 c matchstick-sized carrots, peeled first
2 cooked chicken breasts
1 pan, diameter wide enough to soak rice-paper sheets
1 dry dish towel and either a plate or cutting board to turn rice-paper onto

  1. Prep all herbs and veggies into separate bowls and create your assembly line. Carrots and cucumber first followed by the herbs, then your protein and cabbage at the end. Have a plate ready to place your completed spring rolls on, as well the cabbage to separate the spring rolls as the paper wrappers love to stick to each other.  (If you are making ahead and storing, you can also cover with a damp paper towel and plastic wrap, then place directly in fridge)*If you are making the sauce below, prep those veggies after chopping the spring roll ingredients then make the sauce before starting your spring roll assembly line.
  2. Fill your pan with 2-3 inches room temperature to slightly warm water and place at the beginning of your assembly line with the dry dish towel and cutting board or plate where you will be assembling your spring rolls.
  3. Soak the first rice-paper wrapper in the water until it looses it’s rigidity, about 30 seconds, but is still slightly firm. You’ll just have to try a few times and sacrifice a few rice-papers to get the hang of seeing and feeling when the rice paper is ready to be rolled. You don’t want it TOO soft or else it will easily tear. 
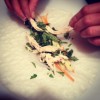
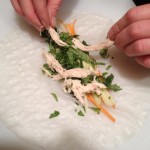
  4. Once the rice paper is ready to be rolled, move onto the paper towel and place another rice paper in the water. Gently dab off the water from the rice paper, it will still be damp and wet but it shouldn’t be soaked. Gently transfer to the cutting board and fill with your ingredients. Arrange a few carrots and cucumber centered in the top 1/3 of the rice paper closest to you, leaving about 3/4 – 1 inch border on each side for rolling. Place the herbs, protein and cabbage in the roll making sure to not fill TOO large to wrap. Fold the top of the rice paper closest to you over the heap of ingredients as tightly as you can without breaking the rice paper. Delicately fold in each side of the rice-paper burrito style and roll away from you to wrap up the spring roll, making sure to keep the rice-paper as taut/tight to the ingredients as you can. You might need to fold in the sides another time or two as you get to the end of the rolling process. The spring roll will seal itself against the rest of the rice-paper.* be sure to keep an eye on the sauce, stirring every few minutes to mix the ingredients together 
  5. Place on one of the large cabbage leaves on your display plate and repeat step 4 until you’re done making spring rolls.

Other roll ideas:
Marinated Baked Tofu with bean sprouts and sliced red peppers
Sashimi with pickled ginger & wasabi or wasabi dipping sauce
Asian Marinated flank steak with fresh ginger and garlic ginger dipping sauce

Garlic Ginger Dipping Sauce
Yield enough for about 6-8 spring rolls
3 cloves fresh garlic, minced (or 1 1/2 tsp jarred minced garlic)
1- 1 1/2 tbsp fresh ginger (or 1 1/2 tsp dried ginger)
1 tbsp toasted sesame oil
1/3 low sodium soy sauce
1/4  c.rice vinegar (or white wine vinegar works as well)
1/4 c. tsp crushed red pepper flakes ( unless you like it SPICY, stick to this ratio or it might overpower the rolls)
1 tbsp sugar

Combine all ingredients in small pot and cook over low heat until mixture bubbles. Can be stored in airtight container and refrigerated for up to three days after making.

Chocolate Chip Walnut Banana Bread (Gluten Free, Vegan, Nut Free Options)

IMG_0325

Other than gingerbread cookies, there is little that makes the house smell as amazing as banana bread! We needed a few last minute “office gifts” so I whipped up a few loaves of fresh banana bread but feeling festive, I decided that we needed to venture from the original recipe a bit so in went the chocolate chips! This recipe yields three mini loaves, one large loaf, or one pan of regular muffins. Wrap them up in some festive wrapping and tie some twine or raffia on them, and there you go! Homemade presents! Be sure to list that they have gluten, dairy and nuts in them unless you choose to make them without any of these which you can!

IMG_0329

Banana Walnut Bread (w/Gluten-Free, Vegan, Nut Free Options)
Adapted from my recipe for Banana Walnut Bread

Ingredients

  • 1 3/4 c. flour (can use Whole-Wheat or Gluten-Free)
  • 2/3 c. white sugar
  • 1 tsp. double-acting baking powder
  • 1/2 tsp. salt
  • 1/4 tsp baking soda
  • 1/2 c. shortening
  • 1 cup mashed bananas ( 2 ripe bananas)
  • 1 small banana, cut into chunks
  • 2 eggs (use egg replacer if going vegan)
  • 1/2 cup walnuts (omit if going nut-free)
  • 1/2 cup chocolate chips (if going diary free, be sure to read the chocolate chip ingredients)
  • 1 fresh orange, squeezed (my addition)

IMG_0327Directions

  1. Pre-heat oven to 350 degrees F
  2. Grease and flour ( or non-stick spray) your baking pan(s)
  3. In a large bowl, mix the first 5 ingredients
  4. Cut in the shortening using a pastry blender (or two knives scissor-fashion) until the mixture resembles coarse crumbs
  5. Stir in the remaining ingredients until just blended
  6. Bake in pre-heated oven as directed below:
    Large loaf pan: 55-60 minutes
    4 Individual Loaf pans: 30-40 minutes
  7. Cool in pan on wire rack

Simple Winter Soup- Butternut Squash, Yam, Carrot & Garlic

Photo from: “inspiring the everyday” post on butternut squash soup

Somehow the winter season always ages my hobbies by about ten years; knitting, roasting whole pumpkins, baking, canning and the strong desire to bake and make breads and pastas, winter meals, soups, stews… wanting to make everything really. I will admit I recently pins a recipe for homemade Wheat thins! (Stay tuned to see how THAT one goes!)

While chatting last night with my impossibly adorable new hairstylist who is also a foodie, she shared with me a new recipe! Cue ridiculous joy and excitement! We proceed to chat the entire time about her recently discovered hobby of making homemade pasta from scratch (a checkbox on my cooking bucket list), reviewing all of our favorite local restaurants and expounding on 15 uses for sage (It truly is an under appreciated herb)!


Cooking doesn’t have to be hard, we both agreed, you just have to have the ingredients in your pantry and a couple of minutes to make it.

So, along with the recently added item “weather proof boots” on my winter weekend to do list, “roast” to appease the pumpkin on my counter, and “meal plan” to attempt an attack plan to actually COOK all of my recently pinned winter dishes, I shall also be making this soup!

I’ll post my own pictures once I cook it up but for now, enjoy a lovely picture from inspiring the everyday’s post on butternut squash soup.
So, stock up on winter goodness, snuggle into your favorite sweater, pour a glass of wine and and let the winter begin!!

What are your warming winter foods or your go to winter dishes?
Winter Warming Squash Soup

1 butternut squash
carrots, yams and fresh garlic (ratio to your preference)
1 large onion to caramelize
chicken stock/broth


Directions- 

  • Pre-heat the oven to 400 or 450 (depends on how quickly you want the veggies and how your oven  heats) and proceed with prepping the butternut squash as you prefer. Note: There are two methods for butternut squash you can either peel it and bake it or slice in half rub with olive oil and bake.
  • Slice the carrots and yams, and chop off the top of your garlic. (I just posted a recipe here on home-roasting your own garlic. You can roast and keep fresh for up to a week, frozen for a few months. It’s GREAT to have on hand for winter meals!)
  • Roast all veggies and garlic in pre-heated oven until golden brown.
  • In the meantime, sauté your onions.
  • Once the squash, veggies and garlic are roasted to your preferred “done-ness”, remove from the oven and blend/ puree in a food processer with some warmed chicken broth and serve warm.