Oven Baked Yam Fries

Oven Baked Yam Fries

Believe it or not, I was a “garbage guts” when I was younger. My mother did a wonderful job of trying to get me to eat my veggies and not letting me leave the table until I’d consumed all my broccoli. But, if I had my wish I would have lived on chicken strips, fries dipped in BBQ or ranch, and any type of candy I could get my hands on. Oh, and a milkshake with LOTS of sprinkles. But no syrup drenched cherry, I did apparently have SOME culinary inclinations as a child. I think we can all agree that those are just gross!

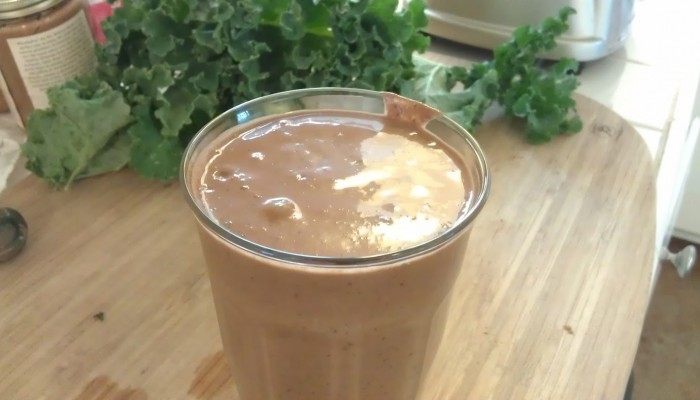
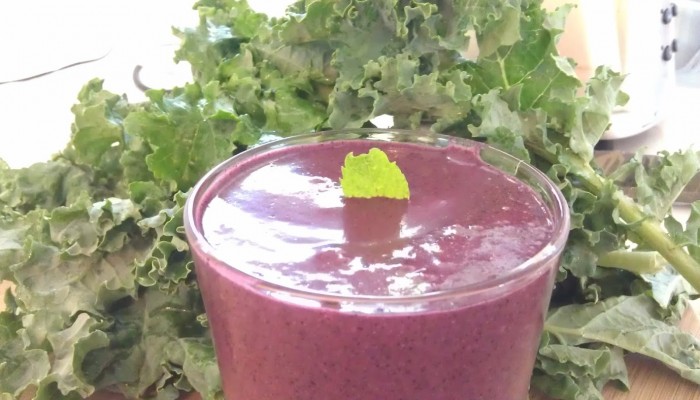
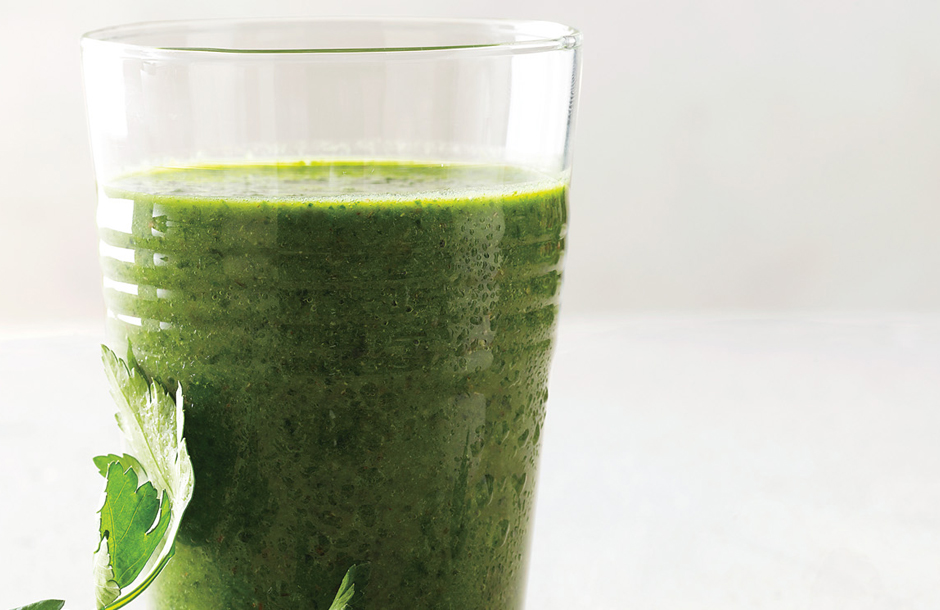
My adult self shudders when I think of that “menu” and makes me want immediately consume a kale smoothie just in an attempt to balance out the years of chicken strip consumption! Even as adults we need a little comfort food. Pie, mashed potatoes, ice cream, onion rings, and, of course, french fries! Traditional french fries get a bad wrap for being…well…basically deep fried in oil which, let’s just call a “spud” a spud and admit that they’re is little to NO nutritional value of the potato left at that point. What if I told you that there was an alternative to “healify” fries and they were still delicious! So delicious, in fact, that I don’t even DIP MINE or miss my trusty BBQ or ranch.

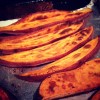
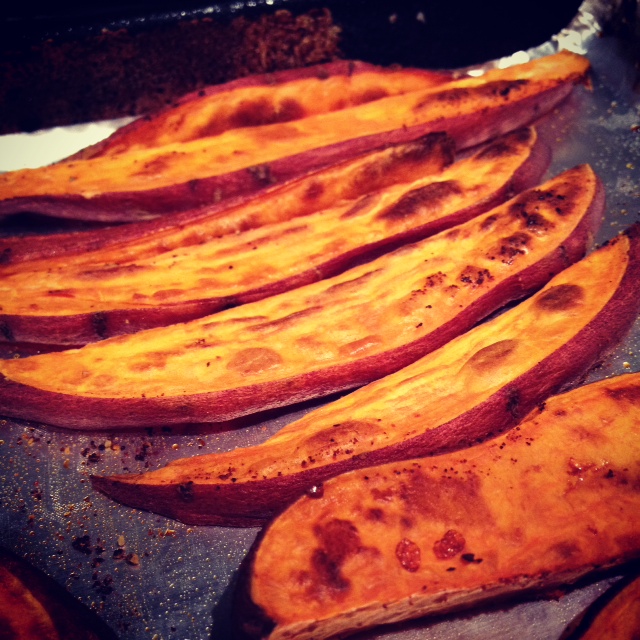
Yes, my fry friends, it’s true! While you can do this with white potatoes, and add a little rosemary and garlic while you cook them, I prefer to do yam fries because I just simply like yams more. These are my go-to side dish when entertaining or just needing to add a carb to the meal. They’re delicious and super simple to make! You can also get “fancy” and experiment with different spices. Post in the comments what you’re favorite spices are!

Yam Fries

2 long skinny yams
EVOO
Smoked Paprika
Fresh Cracked Pepper

  1. Preheat oven to 400 °F (200 °C). Depending on your oven, and how crispy you liked them, you can experiment with 450°F or even 500°F. Cover a baking sheet with non-stick foil and pre-heat the baking sheet (this helps to achieve crispier fries)
  2. Wash and dry the yams, then cut them once lengthwise. Using a very sharp knife makes this easier. Place the halved yams face down on the cutting board, and cut in half again lengthwise and then slice the yams length wise in little strips to create the “fry” form.
  3. Put the cut  fries in a large bowl, drizzle with olive oil, smoked paprika and cracked pepper and toss them until all the fries are covered. You can also brush the olive oil on the fries if you prefer, using a basting brush.
  4. Lay the fries out in a single layer a baking sheet lined with non-stick foil and cook forThe SimplyRecipes.com recipe had a helpful note I’ll try next time, one of their readers recommended laying them on a wire cooling rack on top of a baking sheet, so that the oven air circulates around the sweet potato pieces and you don’t have to flip them over .
  5. Bake for 15- 20 minutes until lightly browned on one side, then flip and bake for an additional 15-20 minutes until they reach the desired browned crispness you desire. 

Kale Smoothies

Photo from MyWholeFood Life.com
Kale and Mixed Berry Smoothie from MyWholeFoodLife.com {Photo from MyWholeFood Life.com}

Okay, let’s pause for just a moment because some of you are already wrinkling up your noses and saying, “KALE!? SMOOTHIES!? Alright that’s just GROSS!” I too though that would be a combo that I would only ever “choke down” because I mentally knew it was good for me but would never actually enjoy. I’ve never been more happy to report that I was wrong!

I’m not sure what started the kale kick, maybe I was just drawn to how fully and richly colored the kale has been at the farmers markets this year. Or, maybe it was a particularly delicious kale salad I had earlier this summer, or the fact that mentally I know it’s good for me. Perhaps it was the sudden realization that it’s SEPTEMBER and I better get started on those new years resolutions! Whatever the reason, two massive bunches of fresh kale decided to come home with me from the farmers market last weekend. The past few weeks I’ve tried to start mixing up what we make at home. I get into a comfort rut where I buy the same veggies and prepare them the exact same way and because I apparently need more of a mental challenge in life (careful what you ask for!) I decided to try using the same veggies we always buy but cooked or prepared in a different way.

Enter the kale smoothie! Now, I consider it a feat that not only do BOTH of us consume these smoothies but we actually ENJOY them! I think the mister has actually had more of them than I have! “I you PLEASE make me one of your amazing smoothies” is not a joke, he really says it! Today one of my girlfriends asked me for my kale recipe when she saw the gorgeous massive bunch of kale peering out proudly form the top of my market bag and I started to tell her about the kale smoothies. She asked for the recipe and I figured, maybe someone else would want to experiment with kale smoothies so I’m putting it out there in the bloggosphere and hoping that someone else will also be able to enjoy kale in liquid form! I’ve started reading up on kale, and there are many different opinions on whether it’s healthier to cook it or eat it raw and I think that a healthy balance of both is important.

Warning, this smoothie will not LOOK pretty. It will however, taste delicious! Here are a few nutrition fun facts about this smoothie. The blueberries and kale do not make for a lovely look, but the nutrition is out of this world! Blueberries are a super food packed with antioxidants which can prevent heart disease can help with memory. In addition to fiber and vitamin c, they also have Manganese which helps with building healthy bones and metabolizing proteins, carbohydrates and fats. Kale contains both protein and fiber, which help you feel full, and also contain cholesterol-lowering traits. It also contains Vitamin K which is vital for blood clotting, Vitamin A which helps with vision and Vitamin C which helps with healing wounds. It also contains many minerals which are helpful for healthy body functions and health. Bananas are a good source of potassium, fiber, manganese and vitamins B6 and C. Oranges are high in Vitamin C and fiber. Apples not only help with sweetening the smoothie, but they contain phytonutrients that are excellent for helping regulate blood sugar and contain fiber which also helps to keep you full. (Nutrition info from WebMD)

Kale Smoothie

1/2 apple
1-2 cups chopped kale, ribs removed
1/2 c blueberries
1 Orange or Oj, to your liking for consistency  (water or almond milk also works)
1/2 banana (I like to freeze bananas to make the consistency a little thicker

Wash all ingredients and place in blender and mix until you reach the consistency that you desire. If it’s too thin, you can freeze the fruit or add ice cubes.

Here are a few more recipes for using Kale in smoothies that you can try! Post in the comments what your favorite kale smoothie recipes are, I’d LOVE to hear them!

And here is a great compilation of Kale smoothie recipes:

Product Review & Recipe: Mandarano Balsamic Glaze with “Stacks” Recipe

Screen Shot 2013-08-22 at 11.32.36 AMThe team over at Mandarano Balsamic Glaze & Sauce,  graciously asked if I be interested in doing a product review. Of course, I was excited to give it a try since I have become obsessed with aged balsamic in the past year. If you have never had an “aged” balsamic and think of only the vinegar style, you are in for a life changing treat. 

Balsamic vinegar has long been a staple in my pantry. I always have a large bottle up on the shelf. Sometimes it’s plain old vinegar, sometimes there are random herbs shoved into the bottle for an infusion, what can I say… we know how to party. Balsamic has many uses in our house,  as a dressing, a marinade for veggies or meat, drizzled on a top of a few slices fresh mozzarella for a caprice salad, the list goes on. Usually, I have the plain old vinegar style, which can be a tad acidic if drizzling straight onto a salad, hence the herbs shoved into the bottle! So, imagine my joy when I discovered “aged balsamic”.

I was SO excited to get my bottle of Mandarano last week and start trying it at…well ever meal actually. In case you were wondering, the answer is yes, it is delicious with scrambled eggs,  fresh basil and avocado toast. It’s much thicker and has a much richer flavor so a little goes a long way with an aged balsamic, or a balsamic glaze. When you first open the bottle, you can smell the vinegar qualities of the balsamic, but once you taste it you’ll find the slight sweetness that perfectly compliments the molasses like texture. Mandarano uses a proprietary blend of 25, 12, and 2 year aged balsamic vinegar and the entire process, grape growing, bottling and production, all happen in Modena, Italy. And if you thought it couldn’t get any better, it’s quite affordable! You can order it HERE from Amazon.com or directly from the Mandarano website HERE. They also have a few delicious recipes using the balsamic glaze posted HERE. I can’t wait to try the Caprese style portobellos with Mandarano balsamic.

As I said, I’ve been trying my balsamic glaze on just about every meal and while I don’t have lovely pictures to show you, because I was too busy scarfing down the amazing meal.  For dinner one night, I drizzled it over prosciutto wrapped chicken and asparagus and it was the perfect finishing touch, adding just the sweetness and flavor that the dish needed!

But my favorite recipe, by far, were the White Nectarine, Mozzarella, Basil and Balsamic “stacks” I made one afternoon for a quick patio happy hour treat. The bag of white nectarines were finally ripe, so I walked down to our Italian market, DeLaurenti, and picked up a few of their fresh house made mozzarella balls and some fresh basil and used my bottle of Mandarano balsamic glaze to make these delicious treat! Recipe was posted yesterday HERE, but I wanted to include it below so you could see how lovely it turned out, the the glaze drizzled over the top!

Stacks

White Nectarine, Mozzarella, Basil, Balsamic “Stacks”
Serves two

2 ripe, but slightly firm white nectarines
2 fresh mozzarella balls
1 bunch fresh basil, washed
Mandarano balsamic glaze

Wash the nectarines and basil, laying the basil out on a paper towel to pat dry. Slice the bottoms of the nectarines, then carefully slice so you have layers to stack.  Taking a sharp knife, slice the mozzarella balls. Stack up the ingredients, starting with a slice of the white nectarine and alternating the other ingredients until you have your “stack” created. Drizzle with the balsamic glaze and enjoy!

Healthy Spring Rolls with Garlic Ginger Dipping Sauce (Vegetarian Option)

Spring has sprung friends! As the weather turns from the chilly winter to crisp spring I start to crave the lighter fare: chicken salads, grilled fish and veggies, Rose and bubbly wines, strawberries and all other fresh spring/summer fruit. A few weeks ago, my mother invited me along to a cooking class from Culinary Events Northwest. The class met at the Lynnwood Albert Lee Appliance store so off we went to learn our “Wraps Around the World”. There were a few different interesting offerings, such as crepes with buckwheat flour and strawberry balsamic drizzle. But my favorite from the class was the Vietnamese Style Spring Rolls.

We love ordering these when we eat out but I had NEVER before thought about trying to make them myself! To celebrate the first day of spring it was time to try my hand at some homemade spring rolls for dinner! The hardest part of this project is the prep! Once you get everything washed, chopped and arranged in an assembly line it’s easy peasy and I had 12 of these bad boys made before I knew it!

The report from mister Byte of life: Success! His only regret for the meal was that he didn’t have a larger stomach. Chef, happy! Even the next morning at breakfast he was talking about how good they were and how excited he was to be hungry later so he could eat more! These little guys are great as appetizers or served with grilled or steamed veggies for dinner. They make great next day lunches or afternoon snacks. I’ve included a few other ingredient ideas below. What are some of your favorite spring roll ingredients or ones you’d like to try! Also, please feel free to post other dipping sauce recipes!

Healthy Chicken Veggie Spring Rolls
These can be vegetarian by simply omitting the chicken!
Yield you’ll have to play around with the ratios of ingredients but this is a general guideline of ratios from my assembly line. 

12  8 or 9 inch rice-paper sheets
1 c fresh mint, chopped
1 c fresh cilantro, chopped
1 c fresh basil, chopped
1 – 1 1/2 c finely chopped green cabbage
extra full cabbage leaves to separate the spring rolls on your display plate (the rice-paper wrappings will stick to each other)
1 c matchstick-sized cucumber, peeled first
1 c matchstick-sized carrots, peeled first
2 cooked chicken breasts
1 pan, diameter wide enough to soak rice-paper sheets
1 dry dish towel and either a plate or cutting board to turn rice-paper onto

  1. Prep all herbs and veggies into separate bowls and create your assembly line. Carrots and cucumber first followed by the herbs, then your protein and cabbage at the end. Have a plate ready to place your completed spring rolls on, as well the cabbage to separate the spring rolls as the paper wrappers love to stick to each other.  (If you are making ahead and storing, you can also cover with a damp paper towel and plastic wrap, then place directly in fridge)*If you are making the sauce below, prep those veggies after chopping the spring roll ingredients then make the sauce before starting your spring roll assembly line.
  2. Fill your pan with 2-3 inches room temperature to slightly warm water and place at the beginning of your assembly line with the dry dish towel and cutting board or plate where you will be assembling your spring rolls.
  3. Soak the first rice-paper wrapper in the water until it looses it’s rigidity, about 30 seconds, but is still slightly firm. You’ll just have to try a few times and sacrifice a few rice-papers to get the hang of seeing and feeling when the rice paper is ready to be rolled. You don’t want it TOO soft or else it will easily tear. 
  4. Once the rice paper is ready to be rolled, move onto the paper towel and place another rice paper in the water. Gently dab off the water from the rice paper, it will still be damp and wet but it shouldn’t be soaked. Gently transfer to the cutting board and fill with your ingredients. Arrange a few carrots and cucumber centered in the top 1/3 of the rice paper closest to you, leaving about 3/4 – 1 inch border on each side for rolling. Place the herbs, protein and cabbage in the roll making sure to not fill TOO large to wrap. Fold the top of the rice paper closest to you over the heap of ingredients as tightly as you can without breaking the rice paper. Delicately fold in each side of the rice-paper burrito style and roll away from you to wrap up the spring roll, making sure to keep the rice-paper as taut/tight to the ingredients as you can. You might need to fold in the sides another time or two as you get to the end of the rolling process. The spring roll will seal itself against the rest of the rice-paper.* be sure to keep an eye on the sauce, stirring every few minutes to mix the ingredients together 
  5. Place on one of the large cabbage leaves on your display plate and repeat step 4 until you’re done making spring rolls.

Other roll ideas:
Marinated Baked Tofu with bean sprouts and sliced red peppers
Sashimi with pickled ginger & wasabi or wasabi dipping sauce
Asian Marinated flank steak with fresh ginger and garlic ginger dipping sauce

Garlic Ginger Dipping Sauce
Yield enough for about 6-8 spring rolls
3 cloves fresh garlic, minced (or 1 1/2 tsp jarred minced garlic)
1- 1 1/2 tbsp fresh ginger (or 1 1/2 tsp dried ginger)
1 tbsp toasted sesame oil
1/3 low sodium soy sauce
1/4  c.rice vinegar (or white wine vinegar works as well)
1/4 c. tsp crushed red pepper flakes ( unless you like it SPICY, stick to this ratio or it might overpower the rolls)
1 tbsp sugar

Combine all ingredients in small pot and cook over low heat until mixture bubbles. Can be stored in airtight container and refrigerated for up to three days after making.