Baked Chicken with Tomatos and Basil

IMG_3795Everyone needs a few of those dishes that can be thrown together and are sure to please. For me, that’s baked chicken. It’s so easy to take a few chicken breasts, spastically cover them in dried herbs and spices, wrap them in aluminum foil and throw it in a pre-heated oven until they reach an internal temperature of 165 degrees. This recipe takes it one step further with a little trick, searing. When you sear the chicken, it locks in the flavor, keeps the chicken most, and  creates a delicious crispy and pretty coating!

Apologies to all of you for not having a better picture of the final product, I got hungry and broke my OWN rule of taking a picture first! I’ll update the post next time I make this dish and have a better “finished product” picture for you!

Baked Chicken with Tomatoes and Basil
Ingredients

  • One chicken breast per guest
  • Heirloom tomatoes (Or Roma tomatoes will work)
  • Optional-one slice of cheese per guest (Fontina or Mozzarella)
  • Fresh Basil
  • Minced Garlic
  • Cracked Pepper and salt
  • Parchment Paper and Baking sheet
  • Frying pan and oil to sear chicken

Directions

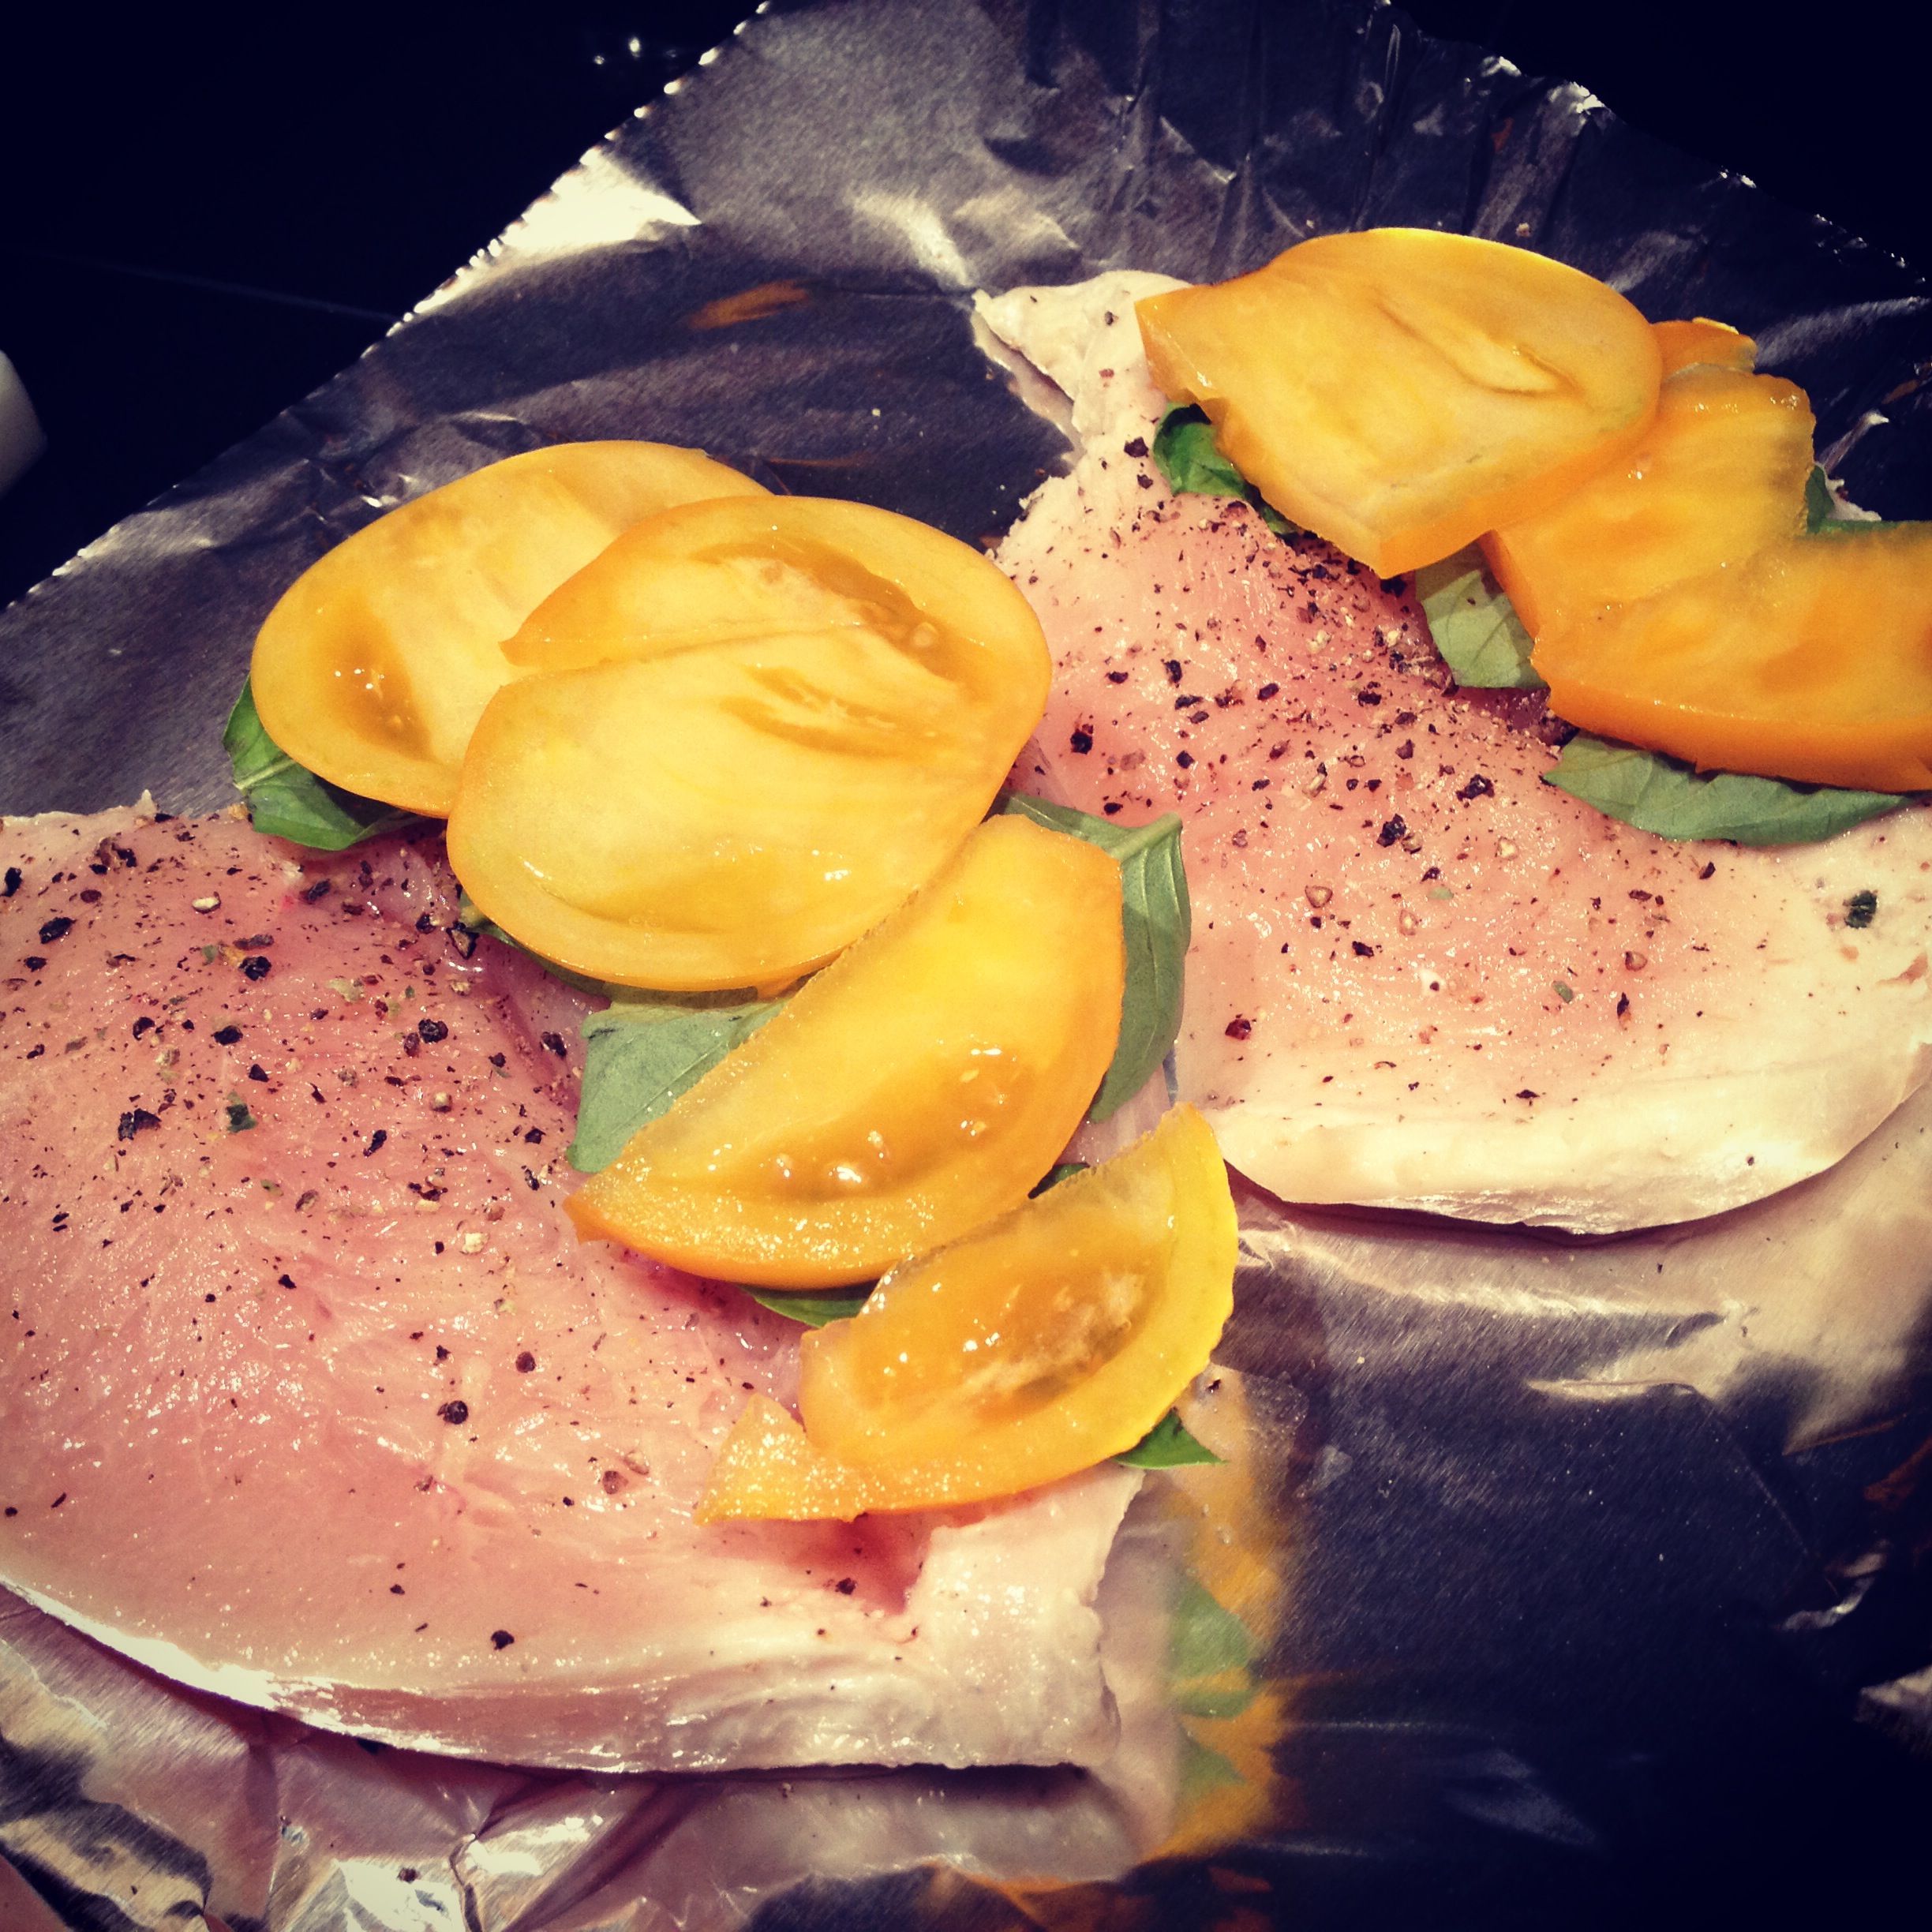
1. Wash and dry the basil. Wash the tomatoes and thinly slice them. Pre-heat the oven to 450 degrees. Cut individual sized pieces of parchment paper or aluminum foil to bake the chicken on. Since the chicken has natural juices, you’ll need to think about how you’re cooking the chicken. If you’re cooking it alone (no other veggies on the pan in the oven) a parchment paper is just fine. But, if you’re making other veggies at the same time as I often do, I find it easier to use aluminum foil so I can curl up the sides and contain the chicken juices so that it doesn’t touch the other veggies.

2. Wash the chicken breasts off, and pat them dry. Lay out chicken on a cutting board and “butterfly” it- which means slicing the chicken lengthwise, but don’t cut it enough to separate the two sides. Pre-heat a pan on the stove and cover with cooking spray or some EVOO (Extra Virgin Olive Oil).

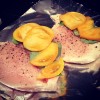
3. Crack fresh pepper over the surface of the chicken. On one side of the chicken, that will be the bottom side, lay the washed basil down, followed by the tomato. (If you want to get really fancy, you can sauté some spinach and garlic and include it in this step). If you’re using cheese, lay it in between the basil and the tomato. Close the top side of the chicken over the bottom side, making sure that the tomato and basil don’t pop out. You can secure them with a tooth pick if needed.

4. Carefully transfer the closed chicken breasts to the pre-heated pan and sear each side until golden brown. I use a wide spatula for this and you have to be careful when turning the chicken breast over so that none of the tomato or basil fall out. When they are seared on both sides, transfer the chicken to the individual pieces of parchment or aluminum foil and secure the openings with a toothpick if they’re still trying to let the tomatoes and basil fall out.

5. Place the chicken on the baking sheet and bake for  for 25-35 minutes or until meat thermometer reads 165 degrees for internal temperature. 

6. Remove the chicken from the oven and serve! I usually like to serve with some toasted quinoa, blasted broccoli, or yam fries.


Healthy Spring Rolls with Garlic Ginger Dipping Sauce (Vegetarian Option)

Spring has sprung friends! As the weather turns from the chilly winter to crisp spring I start to crave the lighter fare: chicken salads, grilled fish and veggies, Rose and bubbly wines, strawberries and all other fresh spring/summer fruit. A few weeks ago, my mother invited me along to a cooking class from Culinary Events Northwest. The class met at the Lynnwood Albert Lee Appliance store so off we went to learn our “Wraps Around the World”. There were a few different interesting offerings, such as crepes with buckwheat flour and strawberry balsamic drizzle. But my favorite from the class was the Vietnamese Style Spring Rolls.

We love ordering these when we eat out but I had NEVER before thought about trying to make them myself! To celebrate the first day of spring it was time to try my hand at some homemade spring rolls for dinner! The hardest part of this project is the prep! Once you get everything washed, chopped and arranged in an assembly line it’s easy peasy and I had 12 of these bad boys made before I knew it!

The report from mister Byte of life: Success! His only regret for the meal was that he didn’t have a larger stomach. Chef, happy! Even the next morning at breakfast he was talking about how good they were and how excited he was to be hungry later so he could eat more! These little guys are great as appetizers or served with grilled or steamed veggies for dinner. They make great next day lunches or afternoon snacks. I’ve included a few other ingredient ideas below. What are some of your favorite spring roll ingredients or ones you’d like to try! Also, please feel free to post other dipping sauce recipes!

Healthy Chicken Veggie Spring Rolls
These can be vegetarian by simply omitting the chicken!
Yield you’ll have to play around with the ratios of ingredients but this is a general guideline of ratios from my assembly line. 

12  8 or 9 inch rice-paper sheets
1 c fresh mint, chopped
1 c fresh cilantro, chopped
1 c fresh basil, chopped
1 – 1 1/2 c finely chopped green cabbage
extra full cabbage leaves to separate the spring rolls on your display plate (the rice-paper wrappings will stick to each other)
1 c matchstick-sized cucumber, peeled first
1 c matchstick-sized carrots, peeled first
2 cooked chicken breasts
1 pan, diameter wide enough to soak rice-paper sheets
1 dry dish towel and either a plate or cutting board to turn rice-paper onto

  1. Prep all herbs and veggies into separate bowls and create your assembly line. Carrots and cucumber first followed by the herbs, then your protein and cabbage at the end. Have a plate ready to place your completed spring rolls on, as well the cabbage to separate the spring rolls as the paper wrappers love to stick to each other.  (If you are making ahead and storing, you can also cover with a damp paper towel and plastic wrap, then place directly in fridge)*If you are making the sauce below, prep those veggies after chopping the spring roll ingredients then make the sauce before starting your spring roll assembly line.
  2. Fill your pan with 2-3 inches room temperature to slightly warm water and place at the beginning of your assembly line with the dry dish towel and cutting board or plate where you will be assembling your spring rolls.
  3. Soak the first rice-paper wrapper in the water until it looses it’s rigidity, about 30 seconds, but is still slightly firm. You’ll just have to try a few times and sacrifice a few rice-papers to get the hang of seeing and feeling when the rice paper is ready to be rolled. You don’t want it TOO soft or else it will easily tear. 
  4. Once the rice paper is ready to be rolled, move onto the paper towel and place another rice paper in the water. Gently dab off the water from the rice paper, it will still be damp and wet but it shouldn’t be soaked. Gently transfer to the cutting board and fill with your ingredients. Arrange a few carrots and cucumber centered in the top 1/3 of the rice paper closest to you, leaving about 3/4 – 1 inch border on each side for rolling. Place the herbs, protein and cabbage in the roll making sure to not fill TOO large to wrap. Fold the top of the rice paper closest to you over the heap of ingredients as tightly as you can without breaking the rice paper. Delicately fold in each side of the rice-paper burrito style and roll away from you to wrap up the spring roll, making sure to keep the rice-paper as taut/tight to the ingredients as you can. You might need to fold in the sides another time or two as you get to the end of the rolling process. The spring roll will seal itself against the rest of the rice-paper.* be sure to keep an eye on the sauce, stirring every few minutes to mix the ingredients together 
  5. Place on one of the large cabbage leaves on your display plate and repeat step 4 until you’re done making spring rolls.

Other roll ideas:
Marinated Baked Tofu with bean sprouts and sliced red peppers
Sashimi with pickled ginger & wasabi or wasabi dipping sauce
Asian Marinated flank steak with fresh ginger and garlic ginger dipping sauce

Garlic Ginger Dipping Sauce
Yield enough for about 6-8 spring rolls
3 cloves fresh garlic, minced (or 1 1/2 tsp jarred minced garlic)
1- 1 1/2 tbsp fresh ginger (or 1 1/2 tsp dried ginger)
1 tbsp toasted sesame oil
1/3 low sodium soy sauce
1/4  c.rice vinegar (or white wine vinegar works as well)
1/4 c. tsp crushed red pepper flakes ( unless you like it SPICY, stick to this ratio or it might overpower the rolls)
1 tbsp sugar

Combine all ingredients in small pot and cook over low heat until mixture bubbles. Can be stored in airtight container and refrigerated for up to three days after making.

Weekend Breakfast: Eggplant and Scrambled Eggs

I love weekends! What’s better than waking up and realizing that the first of two day’s you’ve been looking forward to all week are finally here!

One of the best parts of the weekend, in our house, is weekend breakfast! During the week, breakfast is a chore and provides quite a bit of entertainment while I bang around opening cabinets and drawers in the attempt to find a suitable meal that can be made quickly or eaten on the go.

But Weekends…walking into the kitchen, opening the fridge and creating some delicious weekend masterpiece is nearly a religious experience for me! Today, however, there was little inspiration flowing so I gave creative powers the day off and opted for my simple “go-to” stand by’s of eggplant and and scrambled eggs.

Not only is this meal gluten-free, dairy-free, paleo, low fat but it’s also incredibly simple and quite delicious!

Eggplant & Scrambled Eggs

  • Pre-heat oven to 450
  • Slice eggplant and lay on baking sheet covered with a sheet of Reynolds Wrap Non-stick aluminum foil 
  • Misto Spray olive oil  on the top of the eggplant and season with fresh cracked pepper
  • Cook for 15-17 minutes, or until eggplant is as cooked/crispy as you like
  • When there is about 5 minutes left on the oven timer, scramble one egg with garlic, cayenne pepper, fresh cracked pepper, dried parsley and cook.
  • Enjoy!!

Today I also tried something that we picked up last week and I haven’t yet tried, Reynolds Wrap Non-stick aluminum foil (also available through My Amazon.com Store). We make broiled veggies 3-5 times a week and no matter how much olive oil I lather on the veggies or Misto spray on foil the eggplant ALWAYS sticks! It drives me nuts and has caused a few choice words to escape on various occasions! So, last week we picked up a roll of the alleged “non-stick” foil and today was the day! I was skeptical as I pulled it out of the drawer mentally recounting the countless fights with the baking sheet and foil as it they tried to hold onto my precious eggplant with their sticky powers.

I am quite happy to report that I’m a believer! Foil CAN be non-stick! Ring the bells, sound the horns! That foil worked wonders and I actually liked that it wasn’t quite flawless, as you can see in the photo the end cut of the eggplant stuck to the sheet a bit. Full dramatically narrated product review posted here. This is now a STAPLE of my modest little kitchen! With the tiny space that we have, every utensil, pot, pan and gadget must earn it’s spot!


And on a completely non-related side note… have you ever tried to spell  “utensil” and gotten it right the first time!? I’ll shamelessly admit that it took me a few tries… what a strange word!


Broiled Eggplant

Simple Tapas Dinner

Everyone has had those days where you’d rather gnaw your own arm off than cook. No matter how much you usually adore it, there is just no inspirational energy left in your body. Those types of days pose a special problem for me because, surprise surprise, I’m picky. I like my food how I like it and when I want it and I want to use fresh ingredients. If you opened my freezer you wouldn’t find any Hungry Man dinners or Lean Cuisine Steamers.

But alas, last night I just did NOT want to cook and was so thankful that I’ve learned to plan ahead and stock the kitchen! It’s NOT hard to eat delicious enriching and nutritious meals, even on those days that come hell or high water you are NOT picking up a pan! Below is an illustration of a simple, healthy meal that I literally “threw” together from what was in the fridge.

Those are the days I’m thankful that it is so easy to eat wholesome food if you just plan ahead a bit and stock GOOD quality ingredients. Above is a little plate of broiled zucchini and yams, sliced heirloom tomatoes with cracked sea salt and pepper dusted with dried parsley, a few grapes, fresh basil and arugula and some balsamic drizzled grilled chicken breast and a few rosemary crackers. We recently tried a  salad at Bisato in Seattle (my review posted here) with 20 year aged balsamic dressing and it was INCREDIBLE! We wound up ordering another of the salads and that weekend went on a hunt to Pike Place to find a bottle! Stocking your pantry with fresh ingredients and using quality oils/vinegar and spices really does wonders for sprucing up a meal! Even a simple meal like chicken and veggies becomes a work of art with the right flavors!

Shown in this picture at left clockwise from the wine 🙂 is….
Rook Wine
La Panzonella Rosemary Croccantini (Whole Foods stocks them)
Oven Grilled Zucchini
Baked pepper chicken with 20 year balsamic drizzled over the top
Fresh Basil
Oven Grilled Yam Fries
Heirloom tomatoes with fresh cracked salt and pepper
Red Grapes

How do you spruce up a simple meal?

Soup Season: Cauliflower Garlic Soup

It’s confirmed…Summer is on it’s last leg. The weather has turned, Pumpkin Spice lattes are back at Starbuck’s and I wore a sweater to work.  Here in Seattle we didn’t get very many sunny days but as life is rarely fair so here fall is in all it’s glory and so is my yearning for warm cozy comfort meals. That meal that will just warm the chill in the air right out of you and leave you cozied up to your favorite book enjoying the rain falling. Okay okay, so it’s not THAT cold yet in Seattle but I feel winter coming and tonight I wanted a comfort soup! I didn’t have the energy to cook up a feast so I went with my go-to Cauliflower Garlic soup.  Cauliflower is notoriously low in fat, but high high in dietary fiber and vitamin C and when mixed with garlic provides a host of anti-inflammatory agents as well as a tasty simple meal.

Cauliflower Garlic Soup

1 head cauliflower
minced garlic to taste, (I use about a spoonful)
cracked pepper, dried parsley and fresh ground salt to taste
water

  • cut up the cauliflower and microwave with about 1/3 cup water for 8-10 minutes
  • set out your blender (I swear by my vitamix) and add the garlic and herbs to taste
  • once the cauliflower is done steaming pour the veggies and the water into the blender and cover, mixing on medium/high until all ingredients are blended
  • add more water if needed to texture/consistency mixing
  • garnish with cracked pepper and enjoy
From time to time I add other ingredients like pulled chicken, or grilled onions, substitute the water for soy milk or butternut squash soup, or I add other spices I happen to be in the mood for. Please post with YOUR ideas!