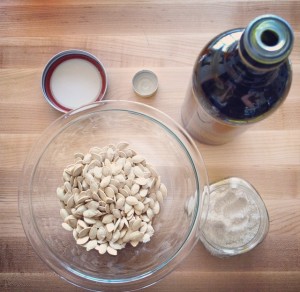
Roasted Pumpkin Seeds

FullSizeRender_3

The leaves are changing, the mornings are colder, and the urge to get cozy under a blanket with a cup of tea is creeping. This means only one thing…it’s pumpkin season! One of my favorite things about Seattle is that we actually get seasons. Spring is rainy, summer is gorgeous, fall is crisp and cozy and while we don’t get snow every winter it has been known to dump a few inches every few years.

Fall might be my favorite season to cook. So many comfort foods like potato leek soup, Ratatouillebutternut squash and my personal favorite- anything with roasted pumpkin. Most people get excited about carving pumpkins and drinking pumpkin spice lattes. I get equally excited about hacking a pumpkin open and roasting that delicious goodness! Cube it and add to salads, make pumpkin soup, puree it for baked goods, add some sautéed spinach and toasted quinoa and you have a wholesome hearty vegan meal.

Roasted pumpkin seeds are a great snack, party appetizer, salad addition or kitchen adventure with aspiring little chefs! The recipe is super simple and can be personalized in so many ways!

Roasted Pumpkin Seeds
Prep Time: About 10 minute to scoop out pumpkin and remove stringy parts from seed
Cook Time: Aprox. 20 minutes 

Rice Bran Oil
Pumpkin or squash seeds
Grey or pink salt
Baking tray
Paper towels
Bowl
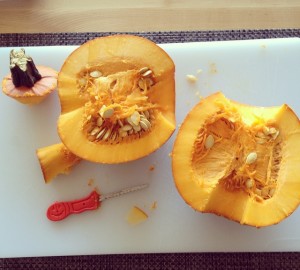
FullSizeRender_4Scoop out the pumpkin and separate the seeds from the stringy insides. Pinching the seeds while you run the strainer under cold water works to remove most of the stringy parts. Line a baking tray with paper towels. Wash the seeds in a strainer, being sure to remove all the stringy parts, and them flat the lined baking sheet. Pat the top of the seeds with a paper towel, it’s okay if they stick a little! Just remove the seeds from the paper towel and keep patting.

Preheat oven to 350°F. Put the seeds in a bowl and toss with oil. I recommend rice bran oil since it doesn’t have a taste and it has a high burn point ensuring that it’s good for baking and grilling. You can also use grapeseed oil, safflower oil or avocado oil. Those each have their own slight taste so it depends on what flavor your’e going with. Add a few pinches of salt, toss, and add a bit more salt. You can add to taste depending one how much you like salt. I use it sparingly.

Remove the paper towels from your baking tray and spread out the oiled seeds on the tray. You won’t need to add additional oil to the tray. Shake the pan out a bit so that most of the seeds are laying in one single layer. Some of the seeds will overlap, which is just fine!

Place the baking sheet in the oven. Turn seeds after ten minutes then allow them to roast until the corners of thee seeds start to brown. Depending on your oven, this could be between 17-25 minutes.

Remove the tray from the oven and allow the seeds to completely cool. Roasted seeds will keep in an airtight container for up to four days!
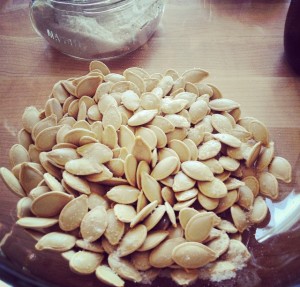
FullSizeRenderThe Kitchn has a few amazing ideas for other ways to flavor pumpkin seeds:

Sweet Pumpkin Seeds: Omit or reduce the salt and roast the seeds on parchment-lined baking sheet. Let cool, then toss with brown sugar or a little maple syrup. Not too much, just enough to lightly coat the seeds. You can also add cinnamon, allspice, nutmeg or other ‘sweet’ spices. Toss well to coat evenly. Return the tray to the oven and continue to roast for another 10 to 15 minutes or so.

Sweet-Hot Pumpkin Seeds: Toss the seeds with a little honey and sriracha or chili flakes. A little cumin might be nice, or curry powder. Roast as with sweet seeds.

Savory Pumpkin Seeds: Add herbs such as chopped rosemary, dried oregano and/or spices such as smoked paprika, chili powder, cumin to the seeds before roasting. Check carefully to be sure the herbs and spices aren’t browning too quickly. If so, roast at a sightly lower heat.

Roasted Garlic

I’m sick. Anyone that know’s me know that’s I’m TERRIBLE at being sick. I mean… TERRIBLE!! I’m grumpy, irritable, independent and needy all at once and just a downright mess. The moment I feel even the slightest hint of energy, I’m off running a marathon. Well, I did it again. Somehow the bug got me something fierce! It just laid me FLAT and thanks to my prince charming with patience as fortified as Knox itself, I was well cared for and starting to feel the slightest bit better today. Which of course meant that I needed to jump into the kitchen and cook up 15 pots of something-or-rather and bake this-and-that.

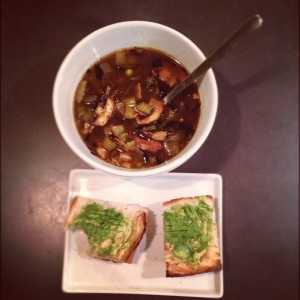
Made myself soup...someday I'll learn to rest when I'm sick...
Made myself soup…someday I’ll learn to rest when I’m sick…

Oh, how very wrong I was! “Simply” whipping up some home roasted garlic turned into chopping two massive leeks, a head of celery, handful of mushrooms, a large onion, a few handfuls of frozen peas and adding a can of white beans to a home prepared chicken stock base with pepper, bay leaves, cayenne and dried parsley (darn not picking up a fresh head at the store!)… see what I mean! I can’t REST! Now, I have to say…the soup smells lovely simmering in the pot but I completely over exerted myself into a grumpy bear and now  I need to go sit in the corner and put myself into what I’m now referring to as an “adult timeout” and think about what I’ve done! New mantra… MUST rest… or at least try harder 🙂

ROASTED GARLIC
Prep: 5 minutes | Cook 30 min
Original recipe from: Simply Recipes – Roasted Garlic
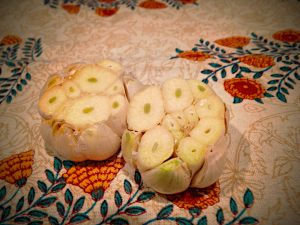
Home Roasted Garlic
Home Roasted Garlic

1. Preheat the oven to 400°F.

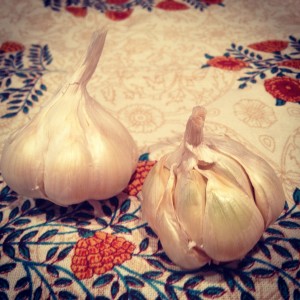
2. Peel away the outer layers of the garlic bulb skin, leaving the skins of the individual cloves intact. Using a knife, cut off 1/4 to a 1/2 inch of the top of cloves, exposing the individual cloves of garlic.

3.
 Place the garlic heads in a baking pan (you can use either muffin or small loaf pans as they both work equally well.) Use Misto spray (or you can free hand pour) olive oil on the open garlic tops.


4. Cover with aluminum foil and bake for 30-35 minutes, or until the cloves feel soft when pressed.

5. Allow the garlic to cool 5-10 minutes so you can handle with bare hands. The garlic should simply slip out of the skins. If it doesn’t, simply use your fingers and peel back the skins and slide the garlic out .

Now you have some delicious home roasted garlic! Roasted garlic should last about a week in the fridge in an airtight container, but can also be frozen and used later in soups, pastas, spreads (especially with heirloom tomatoes basil and fresh potato or sourdough bread!) or any other cooking dish that might call for garlic. The only problem you might encounter, as with many other “make yourself” projects… you’ll be spoiled for the homemade and won’t want to use store bought! That’s what happened when I made Home roasted red peppers!

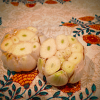
Garlic ready to be roasted!


I LOVE collecting recipes and seeing how others use ingredients! How do you plan to use your home roasted garlic?

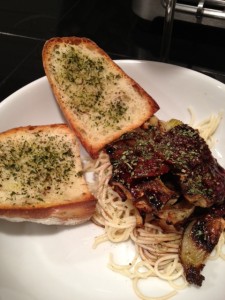
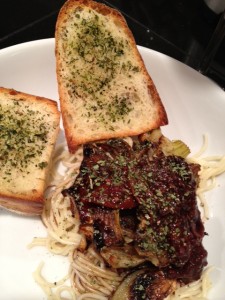
Roasted Fennel Pasta with Tomato Dressing

I don’t make New Year’s resolutions, because if I did then my number one AND two would have been broken for the past few YEARS: cook through my recipes and cook with more diverse foods! Thanks to Presidents Day, a little holiday afforded me the time and the inspiration to try TWO new recipes! Something possessed me to pick up fennel at the market this week and while I can’t remember actually consciously eating fennel up to now something in me decided that we needed to cook it!

Keeping with the homemade and new recipes theme, I found a delicious tomato dressing/compote recipe  Martha Stewart.com (link below) and what was it drizzled over? That’s right…fennel. It was a sign from the cooking gods! Below I’ve worked in both recipes into the overall preparation of the meal but will have links to the specific recipes below.  The recipe below served 3 people healthy portions but there was only leftover pasta. If you want leftovers to enjoy I suggest doubling the fennel and sauce portion of the meal.

This meal is Meat-free, dairy-free (if you omit the Parmesan like I do) AND Vegan; if you use gluten-free bread & pasta it’s also a gluten-free option as well! Look at the endless possibilities!


Ingredients

Pasta

  • 1/2 package pasta of your choice ( I used Angel Hair)

Garlic Bread

  • Whatever rustic loaf you like
  • Optional- Parmesan or Dairy Free Cheese for the garlic bread.We love the grated blend  Parmesan from DeLaurenti that we pick up fresh from Pike Place

Roasted Fennel

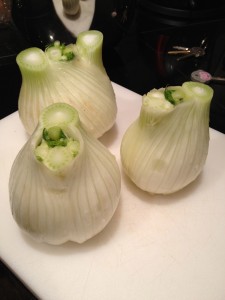
  • 3 fennel bulbs (choose with thick base), stalks cut off, bulbs sliced
  • EVOO (extra virgin olive oil)

Tomato Dressing:

  • EVOO (extra virgin olive oil)
  • 10 ounces (1-pint container) grape or cherry tomatoes
  • minced garlic (to taste in all recipes, I don’t measure much!)
  • 2/3 cup dry red wine
  • 1/4 cup balsamic vinegar
  • 1 tablespoon sugar
  • 1/4 teaspoon salt
  • 1 teaspoon red-wine vinegar

  1. Pre-heat oven to 400°F.
  2. Chop top of fennel stock off, wash bulb and cut as shown below. (Note, the lovely photography is from the Simply Recipes site, I didn’t remember to take a photo of this step). You can wash your tomatoes at this time also if you’d like.
  3. Lay out baking sheet with aluminum foil over it. Toss the fennel in olive oil. This time I used a bowl to coat, which resulted in a bit too much olive oil on the fennel, next time I suggest laying out on a baking sheet and brushing with an OXO Basting Brush.
  4. Crack fresh pepper over fennel and drizzle with balsamic vinegar.
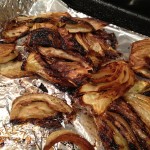
  5. Roast for 30-40 minutes, until fennel is caramelized.
  6. Prep the garlic bread on aluminum foil so it’s ready to put in the oven! I use my handy dandy Misto Sprayer and spray some EVOO over the bread, drizzle with minced garlic, fresh cracked pepper, and dried parsley. If you’re doing cheese (Being lactose intolerant I don’t use the cheese but it’s still quite delicious!)  add the cheese on the top.
  7. When fennel has about 25 minutes left start the water to  boil the water for the spaghetti. Add the spaghetti when the water boils and cook to your desired tenderness.
  8. In a medium pan, drizzle olive oil for the tomato dressing over medium heat. Add the tomatoes when the pan is hot. Make sure you keep swirling the pan around so that all the skins have a chance to cook.
  9. Add the garlic, red wine, and balsamic vinegar to the dressing pan, mixing well. Simmer until the liquid reduces and tomatoes start to get soft (about 5 minutes). At this step I cut the tomatoes in half with my spatula to allow the juices to mix.
  10. Stir in sugar, salt, and red-wine vinegar, and cook for 1 minute.
  11. When there is 10 minutes left on the fennel timer, stick the bread in the oven to toast and the cheese has melted.
  12. Serve and enjoy a culinary masterpiece!!

My overall review:  I think this is one of the best meals I’ve ever made!! The savory grilled and caramelized flavor complimented the liquorice taste of the fennel blended, which perfectly with the tomato balsamic sauce and the texture of the pasta. Add some grilled potato garlic bread and it was simple divine!!!

Recipes this meal was inspired from:
Roasted Fennel Recipe

Warm Tomato Dressing