Weekend Breakfast: Eggplant and Scrambled Eggs

I love weekends! What’s better than waking up and realizing that the first of two day’s you’ve been looking forward to all week are finally here!

One of the best parts of the weekend, in our house, is weekend breakfast! During the week, breakfast is a chore and provides quite a bit of entertainment while I bang around opening cabinets and drawers in the attempt to find a suitable meal that can be made quickly or eaten on the go.

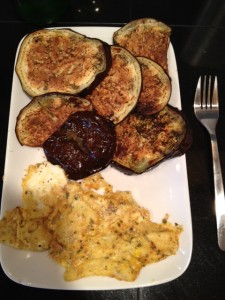
But Weekends…walking into the kitchen, opening the fridge and creating some delicious weekend masterpiece is nearly a religious experience for me! Today, however, there was little inspiration flowing so I gave creative powers the day off and opted for my simple “go-to” stand by’s of eggplant and and scrambled eggs.

Not only is this meal gluten-free, dairy-free, paleo, low fat but it’s also incredibly simple and quite delicious!

Eggplant & Scrambled Eggs

  • Pre-heat oven to 450
  • Slice eggplant and lay on baking sheet covered with a sheet of Reynolds Wrap Non-stick aluminum foil 
  • Misto Spray olive oil  on the top of the eggplant and season with fresh cracked pepper
  • Cook for 15-17 minutes, or until eggplant is as cooked/crispy as you like
  • When there is about 5 minutes left on the oven timer, scramble one egg with garlic, cayenne pepper, fresh cracked pepper, dried parsley and cook.
  • Enjoy!!

Today I also tried something that we picked up last week and I haven’t yet tried, Reynolds Wrap Non-stick aluminum foil (also available through My Amazon.com Store). We make broiled veggies 3-5 times a week and no matter how much olive oil I lather on the veggies or Misto spray on foil the eggplant ALWAYS sticks! It drives me nuts and has caused a few choice words to escape on various occasions! So, last week we picked up a roll of the alleged “non-stick” foil and today was the day! I was skeptical as I pulled it out of the drawer mentally recounting the countless fights with the baking sheet and foil as it they tried to hold onto my precious eggplant with their sticky powers.

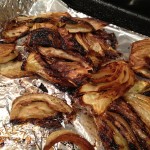
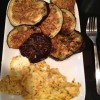
I am quite happy to report that I’m a believer! Foil CAN be non-stick! Ring the bells, sound the horns! That foil worked wonders and I actually liked that it wasn’t quite flawless, as you can see in the photo the end cut of the eggplant stuck to the sheet a bit. Full dramatically narrated product review posted here. This is now a STAPLE of my modest little kitchen! With the tiny space that we have, every utensil, pot, pan and gadget must earn it’s spot!


And on a completely non-related side note… have you ever tried to spell  “utensil” and gotten it right the first time!? I’ll shamelessly admit that it took me a few tries… what a strange word!


Broiled Eggplant
Roasted Fennel Pasta with Tomato Dressing

I don’t make New Year’s resolutions, because if I did then my number one AND two would have been broken for the past few YEARS: cook through my recipes and cook with more diverse foods! Thanks to Presidents Day, a little holiday afforded me the time and the inspiration to try TWO new recipes! Something possessed me to pick up fennel at the market this week and while I can’t remember actually consciously eating fennel up to now something in me decided that we needed to cook it!

Keeping with the homemade and new recipes theme, I found a delicious tomato dressing/compote recipe  Martha Stewart.com (link below) and what was it drizzled over? That’s right…fennel. It was a sign from the cooking gods! Below I’ve worked in both recipes into the overall preparation of the meal but will have links to the specific recipes below.  The recipe below served 3 people healthy portions but there was only leftover pasta. If you want leftovers to enjoy I suggest doubling the fennel and sauce portion of the meal.

This meal is Meat-free, dairy-free (if you omit the Parmesan like I do) AND Vegan; if you use gluten-free bread & pasta it’s also a gluten-free option as well! Look at the endless possibilities!


Ingredients

Pasta

  • 1/2 package pasta of your choice ( I used Angel Hair)

Garlic Bread

  • Whatever rustic loaf you like
  • Optional- Parmesan or Dairy Free Cheese for the garlic bread.We love the grated blend  Parmesan from DeLaurenti that we pick up fresh from Pike Place

Roasted Fennel

  • 3 fennel bulbs (choose with thick base), stalks cut off, bulbs sliced
  • EVOO (extra virgin olive oil)

Tomato Dressing:

  • EVOO (extra virgin olive oil)
  • 10 ounces (1-pint container) grape or cherry tomatoes
  • minced garlic (to taste in all recipes, I don’t measure much!)
  • 2/3 cup dry red wine
  • 1/4 cup balsamic vinegar
  • 1 tablespoon sugar
  • 1/4 teaspoon salt
  • 1 teaspoon red-wine vinegar

  1. Pre-heat oven to 400°F.
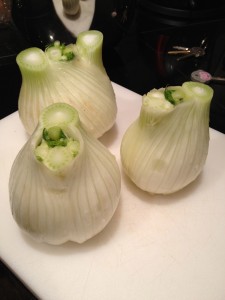
  2. Chop top of fennel stock off, wash bulb and cut as shown below. (Note, the lovely photography is from the Simply Recipes site, I didn’t remember to take a photo of this step). You can wash your tomatoes at this time also if you’d like.
  3. Lay out baking sheet with aluminum foil over it. Toss the fennel in olive oil. This time I used a bowl to coat, which resulted in a bit too much olive oil on the fennel, next time I suggest laying out on a baking sheet and brushing with an OXO Basting Brush.
  4. Crack fresh pepper over fennel and drizzle with balsamic vinegar.
  5. Roast for 30-40 minutes, until fennel is caramelized.
  6. Prep the garlic bread on aluminum foil so it’s ready to put in the oven! I use my handy dandy Misto Sprayer and spray some EVOO over the bread, drizzle with minced garlic, fresh cracked pepper, and dried parsley. If you’re doing cheese (Being lactose intolerant I don’t use the cheese but it’s still quite delicious!)  add the cheese on the top.
  7. When fennel has about 25 minutes left start the water to  boil the water for the spaghetti. Add the spaghetti when the water boils and cook to your desired tenderness.
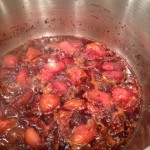
  8. In a medium pan, drizzle olive oil for the tomato dressing over medium heat. Add the tomatoes when the pan is hot. Make sure you keep swirling the pan around so that all the skins have a chance to cook.
  9. Add the garlic, red wine, and balsamic vinegar to the dressing pan, mixing well. Simmer until the liquid reduces and tomatoes start to get soft (about 5 minutes). At this step I cut the tomatoes in half with my spatula to allow the juices to mix.
  10. Stir in sugar, salt, and red-wine vinegar, and cook for 1 minute.
  11. When there is 10 minutes left on the fennel timer, stick the bread in the oven to toast and the cheese has melted.
  12. Serve and enjoy a culinary masterpiece!!

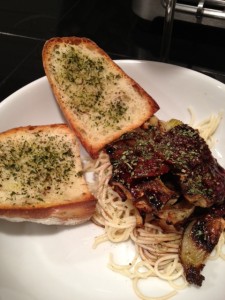
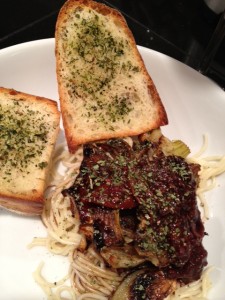
My overall review:  I think this is one of the best meals I’ve ever made!! The savory grilled and caramelized flavor complimented the liquorice taste of the fennel blended, which perfectly with the tomato balsamic sauce and the texture of the pasta. Add some grilled potato garlic bread and it was simple divine!!!

Recipes this meal was inspired from:
Roasted Fennel Recipe

Warm Tomato Dressing

Blueberry Coconut Banana Muffins

You hear it all the time, “Breakfast is a very (or sometimes MOST) important meal” but so is hitting the snooze button! I love simple recipes that fit into my fast paced lifestyle. I found this recipe in the wonderful Martha Stewart’s recipe vaults, and I made a few tweaks for my food allergies.

Made the first batch and I’m proud to say that the taste testers not only survived (phew) but they got raving review’s and a multiple request to be made again! Now that makes a bakers heart happy!

Quick and easy breakfast idea: Make these on a weekend and individually wrap a few and freeze the rest. You can quickly warm one or two up in the microwave and put a almond butter on it for some protein and out the door you go!

Healthy Banana Blueberry Muffins
From: Everyday Food
(Adapted for my allergies)

Ingredients:

  • 1 c. whole wheat flour
  • 3/4 c. all purpose flour
  • 1/4 c. wheat germ
  • 1/2 tsp baking soda
  • 1/2 c.  substituted butter for apple sauce
  • 1/3 c. sugar (I usually cut out the granulated sugar)
  • 1/3 c. brown sugar
  • 2 eggs
  • 2 rape bananas, one mashed and one in chunks
  • 1/3 c. substituted milk for soy milk
  • 1 tsp. vanilla
  • 1 c. blueberries
  • 1/3 cup coconut (my own addition)

Directions

  1. Pre-heat oven to 375 degrees F.
  2. Whisk flours, wheat germ, baking soda, salt together and set aside.
  3. Mix apple sauce and sugars in a medium sized bowl. I usually omit the granulated sugar if a recipe calls for both white and brown.
  4. Add in eggs at one at a time, careful to not over beat with each addition.
  5. In a separate bowl, mash mashed banana and fold in the cut banana pieces, soy milk and vanilla.
  6. Combine the flour mixture and the banana mixture until both are just blended. Be careful to not overwork the batter.
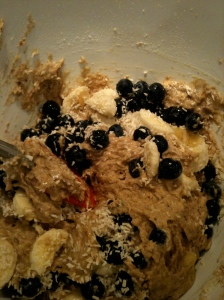
  7. Fold in coconut and blueberries. If you are using frozen blueberries make sure you allow them to thaw and drain the berries out of the juice.
  8. Pour batter into prepared muffin and bake in pre-heated oven. Turn the pan half way through cooking time to ensure even baking. Cook for 25-28 minutes, or until toothpick inserted in the center of a muffin comes out clean.
  9. Cool on wire rack, then enjoy!

See the original recipe here

Soup Season: Cauliflower Garlic Soup

It’s confirmed…Summer is on it’s last leg. The weather has turned, Pumpkin Spice lattes are back at Starbuck’s and I wore a sweater to work.  Here in Seattle we didn’t get very many sunny days but as life is rarely fair so here fall is in all it’s glory and so is my yearning for warm cozy comfort meals. That meal that will just warm the chill in the air right out of you and leave you cozied up to your favorite book enjoying the rain falling. Okay okay, so it’s not THAT cold yet in Seattle but I feel winter coming and tonight I wanted a comfort soup! I didn’t have the energy to cook up a feast so I went with my go-to Cauliflower Garlic soup.  Cauliflower is notoriously low in fat, but high high in dietary fiber and vitamin C and when mixed with garlic provides a host of anti-inflammatory agents as well as a tasty simple meal.

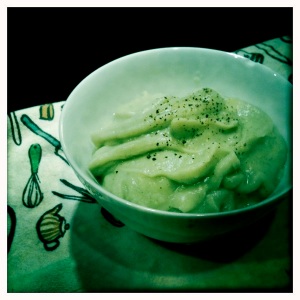
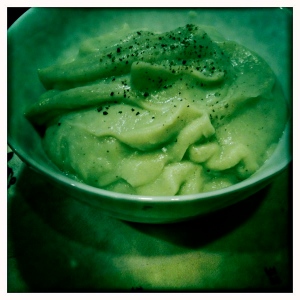
Cauliflower Garlic Soup

1 head cauliflower
minced garlic to taste, (I use about a spoonful)
cracked pepper, dried parsley and fresh ground salt to taste
water

  • cut up the cauliflower and microwave with about 1/3 cup water for 8-10 minutes
  • set out your blender (I swear by my vitamix) and add the garlic and herbs to taste
  • once the cauliflower is done steaming pour the veggies and the water into the blender and cover, mixing on medium/high until all ingredients are blended
  • add more water if needed to texture/consistency mixing
  • garnish with cracked pepper and enjoy
From time to time I add other ingredients like pulled chicken, or grilled onions, substitute the water for soy milk or butternut squash soup, or I add other spices I happen to be in the mood for. Please post with YOUR ideas!