Butternut Squash Couscous (Vegetarian, Vegan, Meat Free, Dairy Free)

photoThe way that I describe this dish, is a middle eastern version of fried rice. It’s a great meal the throw together and one that you can experiment with spices that you don’t likely use in your daily cooking. The original recipe calls for a steaming method of cooking, which is the traditional method. I neglected to read the directions before I started the recipe and didn’t think we even owned a steamer! Well, after I completely revamped the entire cooking method, I realized that we DO have a steamer so I guess I’ll try that next time!

Couscous is very low in fat, and has about the same in protein, fiber and carbs as quinoa. Quinoa beats couscous in the mineral content, but couscous packs an amazing 87% of your daily suggested intake. About 55mcg is suggested daily and couscous has 43mcg per once cup serving. Selenium has antioxidant properties, can help the body regulate the thyroid hormones, support a healthy immune system, and aid in metabolism. One of selenium’s most important roles is as an antioxidant helping to prevent cell damage due to free radicals. (Sources: WebMD and Eating Well)

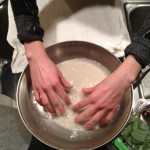
One VERY important thing that I did not note, until I’d already washed and set aside four cups of couscous, is the water to couscous ratio in this recipe. Much like rice or quinoa, there is a two to one ratio for water to couscous. Now, this recipe called for 4 cups of dry couscous. Four cups of dry couscous is quite a large portion, borderline obscene actually. I only realized this fact at the very moment where I was pouring the 8 cups of water and 4 cups of couscous  into my stove top pan and it was nearly brimming over. And, I hadn’t event started it boiling yet! My denial for the amount of couscous I was in the middle of making could no longer be indulged and I pulled out the large stock pot and transferred my absurd amount of couscous into the larger pot. While there was much more couscous than I would normally cook, about 9 servings worth, the ratio of the other ingredients worked perfectly. The only thing I would change is to maybe try cutting the couscous by half. 

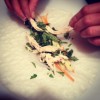
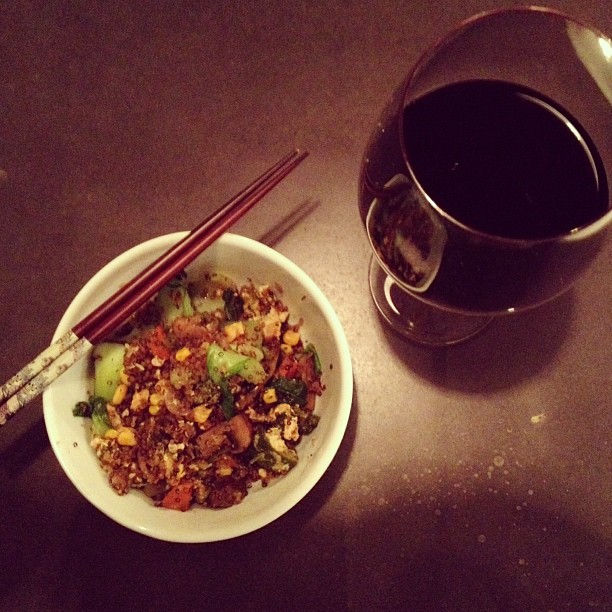
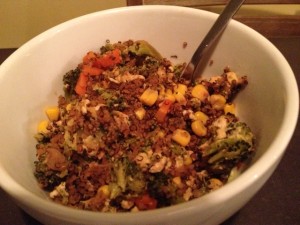
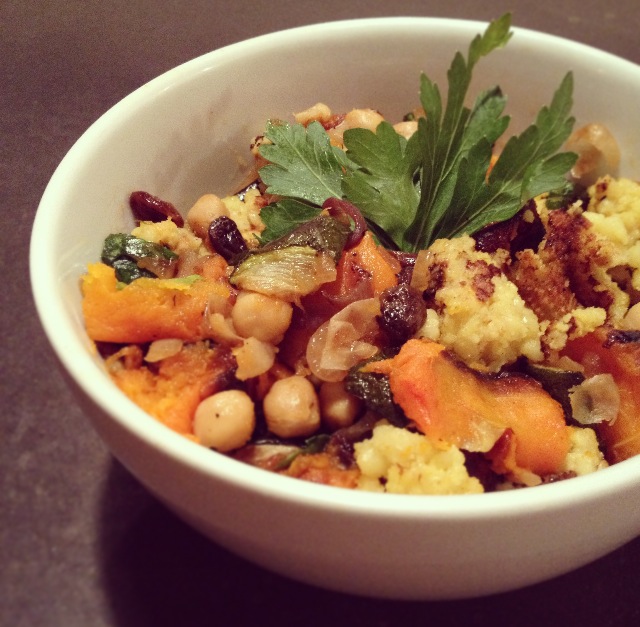
To serve, mix the roasted zucchini and butternut squash, chickpeas, raisins and sautéed onion together in a bowl and add a little more chopped parsley. (Typically, chickpeas from a can are already cooked but double-check.) Add in the couscous and stir well. The couscous will be a little gummy which is possibly due to my cooking method and not steaming it as directed. Garnish with more fresh  parsley if you wish. You can also add grilled chicken or tofu to this if you want more protein like I usually do.

Squash Couscous
Yield: 9 cups of couscous + a good amount of veggies for 4 people 
Recipe and method adapted from the recipe on Canadian Living
*Note: Due to preference and feeding two people versus 6, I suggest cutting the couscous, chicken stock and water in half. If you LOVE couscous or have a lot of people to feed, keep the recipe as is!

Ingredients
1 1/2 lb (one medium large)  butternut squash, peeled and chopped in 2 inch cubed
2 large zucchini, sliced into 2 inch cubes
1 medium yellow onion, diced
1/2 cup raisins
2 cups  ( 1  15 oz can)  chickpeas, drained and rinsed
1/4 c chicken bullion paste for chicken stock
8 cups water
2 tbsp chopped fresh parsley
1 tsp ground ginger
1/2 tsp pepper
1/4 tsp salt
1/2 tsp turmeric
4 cups Israeli couscous ( I only had 3 cups, so I added one cup of the golden small couscous
additional parsley to garnish

Directions
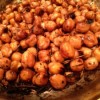
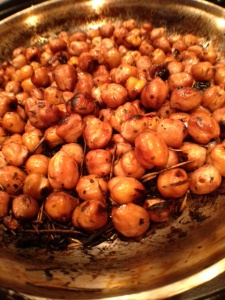
Wash and chop the zucchini and butternut squash. Don’t forget to de-seed the squash. Lay out on aluminum foil on a baking sheet and roast at 450 for 30-45 minutes. Turning every 10 -15 min. Wash the couscous and set aside.

Chop the onion and fry it on the stove with some olive oil in a large stock pot. Set aside in a large bowl which you’ll use to mix up the rest of the ingredients. Drain and rinse the chickpeas and add to the bowl, along with the raisins and some more parsley (to taste). Add the zucchini and butternut squash to this bowl once they’re browned on all sides.

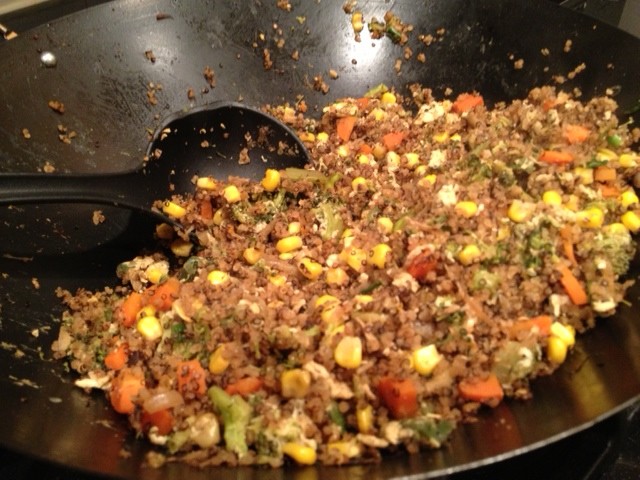
Bring 8 cups of water to a boil in the large stock pot you used for the onions. Stir in the 1/4 cup of bullion, parsley, ginger, pepper, salt, and turmeric. Let boil together for a few minutes. Add the couscous and let it come back to a boil. Be sure to stir it all up every few minutes. Cook until the couscous soaks up the broth and get’s to a consistency you like.

Add the couscous to your large bowl with the onions, raisins and chickpeas, zucchini and butternut squash and stir. Garnish with additional parsley if you wish.

Tonight we’re eating this with some delicious bone in pork chops that are currently brining, but you can serve with grilled chicken, boiled eggs, firm tofu, or grilled steak. The options are endless!

Wine Marinated Crispy Chickpeas (Vegan, Vegetarian, Meat-Free, Dairy-Free)

Simple Tasty Winter Meals(Vegan, Vegetarian, Dairy-Free, Meat-free)
It’s “officially” fall in the Pacific Northwest. All of the normal indications are here: I need sunglasses, a jacket, a scarf, a tank top, gloves and an umbrella all in the course of about five minutes. The sun is setting earlier, waterproofing boots is on my to-do list, and my shorts get packed away.

Another indication that it’s fall is here is the lack of daylight. There is an impending sluggish feeling that starts to set in when we realize that we go to work when it’s dark and leave work it’s dark. Unless you’re one of the lucky few that has a window near your cubicle or in your office, it’s possible to only catch a glimpse of real “light” through ever distant windows on the run from the  much needed afternoon coffee break to back to back afternoon meetings.

When the rain starts, the fall flavor craving starts. These cravings battle the ever sluggish feelings and makes us torn when it comes to dinner. Either it’s the event that keeps me going during the day and I can’t wait to rush home and cook something that I’ve pinned, liked, saved or stashed. Or, the last thing I want to do is be in the kitchen as a continuation of my daily servitude but am conflicted when I mentally explore the ease of ordering pizza.

Marinated Chickpeas

1 can chickpeas, drained
White Wine
Minced garlic
Dried Parsley, garlic, rosemary pepper
EVOO or cooking spray

  1. Open the can of chickpeas, drain and rinse
  2. Marinate the chickpeas in spices, white wine and a few dashes of balsamic in a bowl or tupperware
  3. When you’re about 17 minutes away from the other dishes being ready, pre-heat a pan with some EVOO or cooking spray
  4. Remove the chickpeas from the marinade, I use a slotted spoon to do so, and toast on medium-high until the exterior starts to brown (usually about 10-15 minutes)
  5. Shake the pan every few minutes  to move the chickpeas around so they brown evenly
  6. Once they’re browned to your linking, remove from the heat and serve

I usually pair with baked butternut squash, sauteed garlic kale or kale chips and toasted quinoa.

Cooking Notes:

The Wine:  I NEVER cook with a wine I wouldn’t drink. So, choose whichever you’d like. Anything from a Chardonnay to Riesling works. I usually use a traditional table white wine or a dry Pinot Grigio

Marination Time : Since this is a go-to meal I usually only marinate them for about an hour, but if you can remember in the morning to prepare them it will taste MUCH more delicious

Healthy Spring Rolls with Garlic Ginger Dipping Sauce (Vegetarian Option)

Spring has sprung friends! As the weather turns from the chilly winter to crisp spring I start to crave the lighter fare: chicken salads, grilled fish and veggies, Rose and bubbly wines, strawberries and all other fresh spring/summer fruit. A few weeks ago, my mother invited me along to a cooking class from Culinary Events Northwest. The class met at the Lynnwood Albert Lee Appliance store so off we went to learn our “Wraps Around the World”. There were a few different interesting offerings, such as crepes with buckwheat flour and strawberry balsamic drizzle. But my favorite from the class was the Vietnamese Style Spring Rolls.

We love ordering these when we eat out but I had NEVER before thought about trying to make them myself! To celebrate the first day of spring it was time to try my hand at some homemade spring rolls for dinner! The hardest part of this project is the prep! Once you get everything washed, chopped and arranged in an assembly line it’s easy peasy and I had 12 of these bad boys made before I knew it!

The report from mister Byte of life: Success! His only regret for the meal was that he didn’t have a larger stomach. Chef, happy! Even the next morning at breakfast he was talking about how good they were and how excited he was to be hungry later so he could eat more! These little guys are great as appetizers or served with grilled or steamed veggies for dinner. They make great next day lunches or afternoon snacks. I’ve included a few other ingredient ideas below. What are some of your favorite spring roll ingredients or ones you’d like to try! Also, please feel free to post other dipping sauce recipes!

Healthy Chicken Veggie Spring Rolls
These can be vegetarian by simply omitting the chicken!
Yield you’ll have to play around with the ratios of ingredients but this is a general guideline of ratios from my assembly line. 

12  8 or 9 inch rice-paper sheets
1 c fresh mint, chopped
1 c fresh cilantro, chopped
1 c fresh basil, chopped
1 – 1 1/2 c finely chopped green cabbage
extra full cabbage leaves to separate the spring rolls on your display plate (the rice-paper wrappings will stick to each other)
1 c matchstick-sized cucumber, peeled first
1 c matchstick-sized carrots, peeled first
2 cooked chicken breasts
1 pan, diameter wide enough to soak rice-paper sheets
1 dry dish towel and either a plate or cutting board to turn rice-paper onto

  1. Prep all herbs and veggies into separate bowls and create your assembly line. Carrots and cucumber first followed by the herbs, then your protein and cabbage at the end. Have a plate ready to place your completed spring rolls on, as well the cabbage to separate the spring rolls as the paper wrappers love to stick to each other.  (If you are making ahead and storing, you can also cover with a damp paper towel and plastic wrap, then place directly in fridge)*If you are making the sauce below, prep those veggies after chopping the spring roll ingredients then make the sauce before starting your spring roll assembly line.
  2. Fill your pan with 2-3 inches room temperature to slightly warm water and place at the beginning of your assembly line with the dry dish towel and cutting board or plate where you will be assembling your spring rolls.
  3. Soak the first rice-paper wrapper in the water until it looses it’s rigidity, about 30 seconds, but is still slightly firm. You’ll just have to try a few times and sacrifice a few rice-papers to get the hang of seeing and feeling when the rice paper is ready to be rolled. You don’t want it TOO soft or else it will easily tear. 
  4. Once the rice paper is ready to be rolled, move onto the paper towel and place another rice paper in the water. Gently dab off the water from the rice paper, it will still be damp and wet but it shouldn’t be soaked. Gently transfer to the cutting board and fill with your ingredients. Arrange a few carrots and cucumber centered in the top 1/3 of the rice paper closest to you, leaving about 3/4 – 1 inch border on each side for rolling. Place the herbs, protein and cabbage in the roll making sure to not fill TOO large to wrap. Fold the top of the rice paper closest to you over the heap of ingredients as tightly as you can without breaking the rice paper. Delicately fold in each side of the rice-paper burrito style and roll away from you to wrap up the spring roll, making sure to keep the rice-paper as taut/tight to the ingredients as you can. You might need to fold in the sides another time or two as you get to the end of the rolling process. The spring roll will seal itself against the rest of the rice-paper.* be sure to keep an eye on the sauce, stirring every few minutes to mix the ingredients together 
  5. Place on one of the large cabbage leaves on your display plate and repeat step 4 until you’re done making spring rolls.

Other roll ideas:
Marinated Baked Tofu with bean sprouts and sliced red peppers
Sashimi with pickled ginger & wasabi or wasabi dipping sauce
Asian Marinated flank steak with fresh ginger and garlic ginger dipping sauce

Garlic Ginger Dipping Sauce
Yield enough for about 6-8 spring rolls
3 cloves fresh garlic, minced (or 1 1/2 tsp jarred minced garlic)
1- 1 1/2 tbsp fresh ginger (or 1 1/2 tsp dried ginger)
1 tbsp toasted sesame oil
1/3 low sodium soy sauce
1/4  c.rice vinegar (or white wine vinegar works as well)
1/4 c. tsp crushed red pepper flakes ( unless you like it SPICY, stick to this ratio or it might overpower the rolls)
1 tbsp sugar

Combine all ingredients in small pot and cook over low heat until mixture bubbles. Can be stored in airtight container and refrigerated for up to three days after making.

Quinoa Veggie “Fried Rice”

601230_10152624692795131_821917340_nI LOVE finishing things. It’s weird. The joy that I get from the last bit of toothpaste used up, or taking the last olive of the jar, or finishing a pen….okay that last one is quite a feat ADMIT it… but I digress! The female + Type A + Project Manager/List Lover in me LOVES to feel that sense of completion. Once something is opened in our house it immediately goes into that awkward “use me up” stage and has a bullseye on it. So, the half used bag of quinoa was starting to get on my nerves. Seriously, it was taunting me EVERY time I opened the pantry cabinet and I’d had enough of being laughed at by Quinoa!

Don’t worry, I’m not crazy. The quinoa didn’t actually laugh at me. But I vowed to incorporate into more meals because we both LOVE it and it’s quite the superfood! The mister taught me an amazing trick that makes the quinoa taste AMAZING! Have you ever tried toasting it first!? Serious, life meet changed! Check out the nutrients and protein that this little grain punches in my post for toasted quinoa here.

photo 4

Well, I just have a little extra time on my hands these days So I decided to take up my reoccurring vow to cook through at least a FEW of my million recipes I’ve carefully drooled over and curated on my Pinterest boards. One of the dishes I REALLY wanted to try was for Quinoa Veggie “fried rice”. The mister has commented a few times that he REALLY likes fried rice while I’m not a big “rice” fan, BUT we both love quinoa. I found an AMAZING looking picture on Pinterest, pulled that quinoa out of the pantry and away I went!

I adapted the recipe since I prefer to use recipes as guidelines and then just change it up and see what happens and it was delicious!!

photo 2Quinoa Veggie “Fried Rice”:

Recipe adapted from Dam Delicious Blog Post
Yields 4-6 servings

INGREDIENTS:

  • EVOO
  • 4 eggs
  • 2 cloves garlic, minced
  • 1 small onion, diced
  • 4-5 large mushrooms, sliced (or to taste if you’d like more)
  • 1 head broccoli, cut into florets
  • 1 zucchini, chopped
  • 1 can corn
  • 1 large carrot, peeled and finely chopped
  • 2 cups toasted cooked quinoa (recipe for toasted quinoa here)
  • soy sauce (to taste)
  • 3 green onions, sliced
  • Baby Bok Choy, base cut off so leaves are free, amount to taste

DIRECTIONS:

  1. Heat dash of EVOO (extra virgin olive oil) in a  Wok (or medium skillet) over low heat. Add garlic and onion, and cook, stirring often, until onions become translucent, about 4-5 minutes.
  2. In the mean time, start the quinoa  (full recipe here). Short recipe: Toast quinoa until it starts to pop, like popcorn and the outer shells turn a light to dark brown. Rinse under cold water and return to pan. Add water (1 cup water for ever half cup dry quinoa) and bring to a boil, continuously stirring. Reduce to a simmer and cover for 10 minutes then “fluff” with a fork or spatula.
  3. Add mushrooms, broccoli and zucchini. Cook, stirring constantly, until vegetables are tender. Add a bit of water and soy sauce, cover with large lid and let steam for 5-7 minutes.
  4. Add corn, carrots and quinoa. Cook, stirring constantly, until tender.
  5. Push all veggies to one side of the Wok and crack the eggs into the hotter side of the pan and “beat” in the pan, turning once cooked on the bottom. Mix into the veggies and combine all the goodness.
  6. Stir in green onions and bok choy.
  7. Add quinoa, mix thoroughly and let heat for 3-5 minutes.

Options:

  • Cook eggs in Wok or Skillet first- fry until cooked through, about 2-3 minutes per side, flipping only once. Let cool before dicing into small pieces and add with the green onions at the end
  • Use 1/2 cup corn and half cup peas
  • Include fresh ginger
  • Grate carrots instead of chop them
  • Omit the Boc Choy
  • Make a sauce for the dish and drizzle it over the cooked veggies at the end

Simple Tapas Dinner

Everyone has had those days where you’d rather gnaw your own arm off than cook. No matter how much you usually adore it, there is just no inspirational energy left in your body. Those types of days pose a special problem for me because, surprise surprise, I’m picky. I like my food how I like it and when I want it and I want to use fresh ingredients. If you opened my freezer you wouldn’t find any Hungry Man dinners or Lean Cuisine Steamers.

But alas, last night I just did NOT want to cook and was so thankful that I’ve learned to plan ahead and stock the kitchen! It’s NOT hard to eat delicious enriching and nutritious meals, even on those days that come hell or high water you are NOT picking up a pan! Below is an illustration of a simple, healthy meal that I literally “threw” together from what was in the fridge.

Those are the days I’m thankful that it is so easy to eat wholesome food if you just plan ahead a bit and stock GOOD quality ingredients. Above is a little plate of broiled zucchini and yams, sliced heirloom tomatoes with cracked sea salt and pepper dusted with dried parsley, a few grapes, fresh basil and arugula and some balsamic drizzled grilled chicken breast and a few rosemary crackers. We recently tried a  salad at Bisato in Seattle (my review posted here) with 20 year aged balsamic dressing and it was INCREDIBLE! We wound up ordering another of the salads and that weekend went on a hunt to Pike Place to find a bottle! Stocking your pantry with fresh ingredients and using quality oils/vinegar and spices really does wonders for sprucing up a meal! Even a simple meal like chicken and veggies becomes a work of art with the right flavors!

Shown in this picture at left clockwise from the wine 🙂 is….
Rook Wine
La Panzonella Rosemary Croccantini (Whole Foods stocks them)
Oven Grilled Zucchini
Baked pepper chicken with 20 year balsamic drizzled over the top
Fresh Basil
Oven Grilled Yam Fries
Heirloom tomatoes with fresh cracked salt and pepper
Red Grapes

How do you spruce up a simple meal?