Product Review & Recipe: Mandarano Balsamic Glaze with “Stacks” Recipe

Screen Shot 2013-08-22 at 11.32.36 AMThe team over at Mandarano Balsamic Glaze & Sauce,  graciously asked if I be interested in doing a product review. Of course, I was excited to give it a try since I have become obsessed with aged balsamic in the past year. If you have never had an “aged” balsamic and think of only the vinegar style, you are in for a life changing treat. 

Balsamic vinegar has long been a staple in my pantry. I always have a large bottle up on the shelf. Sometimes it’s plain old vinegar, sometimes there are random herbs shoved into the bottle for an infusion, what can I say… we know how to party. Balsamic has many uses in our house,  as a dressing, a marinade for veggies or meat, drizzled on a top of a few slices fresh mozzarella for a caprice salad, the list goes on. Usually, I have the plain old vinegar style, which can be a tad acidic if drizzling straight onto a salad, hence the herbs shoved into the bottle! So, imagine my joy when I discovered “aged balsamic”.

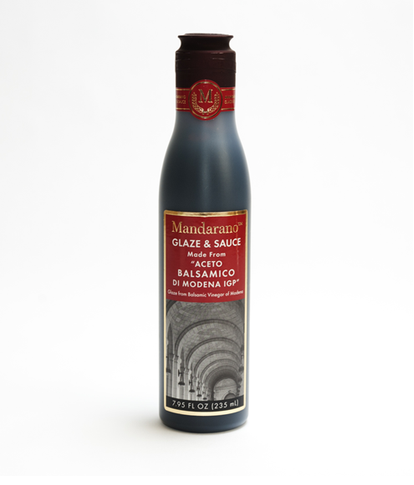
I was SO excited to get my bottle of Mandarano last week and start trying it at…well ever meal actually. In case you were wondering, the answer is yes, it is delicious with scrambled eggs,  fresh basil and avocado toast. It’s much thicker and has a much richer flavor so a little goes a long way with an aged balsamic, or a balsamic glaze. When you first open the bottle, you can smell the vinegar qualities of the balsamic, but once you taste it you’ll find the slight sweetness that perfectly compliments the molasses like texture. Mandarano uses a proprietary blend of 25, 12, and 2 year aged balsamic vinegar and the entire process, grape growing, bottling and production, all happen in Modena, Italy. And if you thought it couldn’t get any better, it’s quite affordable! You can order it HERE from Amazon.com or directly from the Mandarano website HERE. They also have a few delicious recipes using the balsamic glaze posted HERE. I can’t wait to try the Caprese style portobellos with Mandarano balsamic.

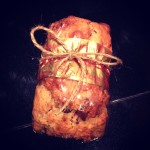
As I said, I’ve been trying my balsamic glaze on just about every meal and while I don’t have lovely pictures to show you, because I was too busy scarfing down the amazing meal.  For dinner one night, I drizzled it over prosciutto wrapped chicken and asparagus and it was the perfect finishing touch, adding just the sweetness and flavor that the dish needed!

But my favorite recipe, by far, were the White Nectarine, Mozzarella, Basil and Balsamic “stacks” I made one afternoon for a quick patio happy hour treat. The bag of white nectarines were finally ripe, so I walked down to our Italian market, DeLaurenti, and picked up a few of their fresh house made mozzarella balls and some fresh basil and used my bottle of Mandarano balsamic glaze to make these delicious treat! Recipe was posted yesterday HERE, but I wanted to include it below so you could see how lovely it turned out, the the glaze drizzled over the top!

Stacks

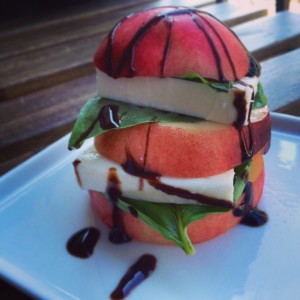
White Nectarine, Mozzarella, Basil, Balsamic “Stacks”
Serves two

2 ripe, but slightly firm white nectarines
2 fresh mozzarella balls
1 bunch fresh basil, washed
Mandarano balsamic glaze

Wash the nectarines and basil, laying the basil out on a paper towel to pat dry. Slice the bottoms of the nectarines, then carefully slice so you have layers to stack.  Taking a sharp knife, slice the mozzarella balls. Stack up the ingredients, starting with a slice of the white nectarine and alternating the other ingredients until you have your “stack” created. Drizzle with the balsamic glaze and enjoy!

Cucumber Tomato Feta Salad


IMG_2818
IMG_2820Summer is FINALLY here!! That’s right, ladies and gents, the Pacific Northwest finally has consistent sunshine! With the change of the weather, comes the change of the taste buds. I trade my warming winter ratatouille  and warming  cast-iron portions of delicious steaming cassoulet for the lighter summer fare like the Cilantro Lime Chicken & Baked Potato Skins I made for dinner TWO nights in a row (yes, they are THAT good and SO simple).

A few of my other “go to” summer meals are:
Hawaiian Poke & Ginger Ono Sashimi
Prosciutto Wrapped Chicken & Asparagus
Healthy Chicken Veggie Spring Rolls with Garlic Ginger Dipping Sauce

This year I needed a new salad, something that was out of my normal cooking pallet. I’ve had different variations of this type of salad (Fez on Wheels Turkish Shepherd Salad, and Tom Douglas’ Home Remedy Jackie’s Greek Salad are two of my favorites) and decided it was time to make it myself.

Of course, after I used the “wing it” approach I realized that looking for a recipe could have been smart idea. Psh, who needs a recipe when you have a photo of the ingredients and taste testing! Next time I WONT forget the mint or the fresh lemon juice. The Epicruious version called for scallions instead of the red pepper and the Simply Recipes version called for 1 tsp fresh chopped oregano.  There is also a more italian style version that A Taste of Home posted with mozzarella that I’ll be trying next week! Whatever the variations you use,  it’s even better than next day once the flavors marinate together for a while. Also makes a great potluck or BBQ side!

Do you have any special additions or variations of this delicious dish? Next time I’m thinking I’ll add some quinoa!

IMG_2814Ingredients
2 tbsp red wine vinegar
1/4 c fresh squeezed lemon juice
fresh cracked salt and pepper to taste
drizzle of EVOO (extra virgin olive oil)
2 large cucumbers, peeled and seeded
cherry tomatoes (to taste), washed and halved
1/2 c chopped fresh mint, Chiffonade
7 oz fresh sheep feta, crumbled
1 cup pitted halved Kalamata olives

IMG_2816Directions

To make the dressing, mix the red wine vinegar, lemon juice, cracked pepper and drizzle of EVOO to a small bowl and whisk together then set aside. If you have a jar, you can also just add the ingredients and shake the living heck out of the ingredients to mix. Wash and half the cucumbers, then use a spoon to scoop out the seeds in the center then slice and place in a medium bowl. Add olives. Wash and half the tomatoes and add them to the cucumber bowl. Rinse and pat the mint dry, then  Chiffonade it. That’s a fancy little french term for stacking herb leaves on top of each other than tightly rolling them and cutting horizontally to produce long thin strips. Add the dressing to the cucumber bowl and toss lightly, sprinkling in the feta and tossing all the goodness together. Serve as a main with some humus and pita bread, or as a delicious side!

Enjoy!

Chocolate Chip Cookies (From the Flying Apron Cookbook)

Fresh Flying Apron Cookies (Gluten-Free, Dairy- Free)There are some days you just NEED a cookie. Yep, you heard me, NEED. Cookies have that magic power to transport you out of your current location and into a place of yumminess. Like a shield that goes up, even if just for a moment as you take that fist glorious bite of fresh baked gooey sweet bliss, you are hidden from the world and it can’t get you.

Well, today is one of those days and its not even 8am. Goody. Lets just say that I didn’t get to consume the better part of my morning coffee because my jeans go thirsty (and selfish) and wanted a drink. Rude. The .ease they could have done was ask. But, then I would have said no, AND wondered why my pants were talking. So, already one of “those days”. While I yearn for a fresh baked cookie (with how this days going, obsess might be a better word) and try to hide the coffee on my jeans from my client meeting today, I wanted to post a recipe for one of m FAVORITE cookies from a local vegan bakery, The Flying Apron. If you’re smart enough to whip up a batch, save me one! I’ll bring the pants and we can wring out a cup of coffee to share!

Chocolate Chip Cookies
From: The Flying Apron Cook Book
makes: 25 cookies

2 ¾ c. brown rice flour
1 ½ + 1 tbsp c. garbanzo flour
1 tsp baking powder
½ tsp baking soda
¾ tsp salt
1 c. canola oil
1 c. organic whole cane sugar
1 tsp vanilla
1 c. rice milk
1 c. (8 oz) dairy-free dark chocolate chips

Preheat the oven to 350
Combine flours through salt in a large bowl
In the bowl of a standing mixer combine canola oil, cane sugar and vanilla until well mixed
With the mixture at low speed, add the flour mixtures and the rice milk alternately, a little at a time until smooth, about 3 minutes
Stir in chocolate cips

Scoop dough onto greased baking sheet and bake until golden and slightly firm to the touch, about 17 minutes.

Quinoa Veggie “Fried Rice”

601230_10152624692795131_821917340_nI LOVE finishing things. It’s weird. The joy that I get from the last bit of toothpaste used up, or taking the last olive of the jar, or finishing a pen….okay that last one is quite a feat ADMIT it… but I digress! The female + Type A + Project Manager/List Lover in me LOVES to feel that sense of completion. Once something is opened in our house it immediately goes into that awkward “use me up” stage and has a bullseye on it. So, the half used bag of quinoa was starting to get on my nerves. Seriously, it was taunting me EVERY time I opened the pantry cabinet and I’d had enough of being laughed at by Quinoa!

Don’t worry, I’m not crazy. The quinoa didn’t actually laugh at me. But I vowed to incorporate into more meals because we both LOVE it and it’s quite the superfood! The mister taught me an amazing trick that makes the quinoa taste AMAZING! Have you ever tried toasting it first!? Serious, life meet changed! Check out the nutrients and protein that this little grain punches in my post for toasted quinoa here.

photo 4

Well, I just have a little extra time on my hands these days So I decided to take up my reoccurring vow to cook through at least a FEW of my million recipes I’ve carefully drooled over and curated on my Pinterest boards. One of the dishes I REALLY wanted to try was for Quinoa Veggie “fried rice”. The mister has commented a few times that he REALLY likes fried rice while I’m not a big “rice” fan, BUT we both love quinoa. I found an AMAZING looking picture on Pinterest, pulled that quinoa out of the pantry and away I went!

I adapted the recipe since I prefer to use recipes as guidelines and then just change it up and see what happens and it was delicious!!

photo 2Quinoa Veggie “Fried Rice”:

Recipe adapted from Dam Delicious Blog Post
Yields 4-6 servings

INGREDIENTS:

  • EVOO
  • 4 eggs
  • 2 cloves garlic, minced
  • 1 small onion, diced
  • 4-5 large mushrooms, sliced (or to taste if you’d like more)
  • 1 head broccoli, cut into florets
  • 1 zucchini, chopped
  • 1 can corn
  • 1 large carrot, peeled and finely chopped
  • 2 cups toasted cooked quinoa (recipe for toasted quinoa here)
  • soy sauce (to taste)
  • 3 green onions, sliced
  • Baby Bok Choy, base cut off so leaves are free, amount to taste

DIRECTIONS:

  1. Heat dash of EVOO (extra virgin olive oil) in a  Wok (or medium skillet) over low heat. Add garlic and onion, and cook, stirring often, until onions become translucent, about 4-5 minutes.
  2. In the mean time, start the quinoa  (full recipe here). Short recipe: Toast quinoa until it starts to pop, like popcorn and the outer shells turn a light to dark brown. Rinse under cold water and return to pan. Add water (1 cup water for ever half cup dry quinoa) and bring to a boil, continuously stirring. Reduce to a simmer and cover for 10 minutes then “fluff” with a fork or spatula.
  3. Add mushrooms, broccoli and zucchini. Cook, stirring constantly, until vegetables are tender. Add a bit of water and soy sauce, cover with large lid and let steam for 5-7 minutes.
  4. Add corn, carrots and quinoa. Cook, stirring constantly, until tender.
  5. Push all veggies to one side of the Wok and crack the eggs into the hotter side of the pan and “beat” in the pan, turning once cooked on the bottom. Mix into the veggies and combine all the goodness.
  6. Stir in green onions and bok choy.
  7. Add quinoa, mix thoroughly and let heat for 3-5 minutes.

Options:

  • Cook eggs in Wok or Skillet first- fry until cooked through, about 2-3 minutes per side, flipping only once. Let cool before dicing into small pieces and add with the green onions at the end
  • Use 1/2 cup corn and half cup peas
  • Include fresh ginger
  • Grate carrots instead of chop them
  • Omit the Boc Choy
  • Make a sauce for the dish and drizzle it over the cooked veggies at the end

Toasted Quinoa

Quinoa has grown in popularity in the past few years as a “super food” and a building block for gluten-free eating. But, did you know that it’s been around for thousands of years?

That’s right! It was used by the Incas over 5,000 years ago! Now it’s making a “superfood” name for itself again as a staple in pantries and meals everywhere. The Whole Foods Blog had this to say about our little grain, “Quinoa (pronounced KEEN-wah) has all the goodness of whole grains — the B vitamins, the fiber, the minerals — and it’s actually a small dried seed that’s been cultivated for thousands of years in South America. This little powerhouse has the highest protein content of any other grain. And since it contains all eight essential amino acids, quinoa is considered a complete protein.”

Toasted Quinoa
Forbs published an article on the 7 Health Benefits of Quinoa , which stated that Quinoa is not only one of the most protein-rich foods we can eat but it is a complete protein containing all nine essential amino acids. Spoiler alert, it also contains almost twice as much fiber as other grains…think feeling fuller longer! It also contains iron which supports increased Brain function, regulation of body temperature, enzyme activity and energy metabolism. Quinoa also packs Lysine, which is essential for tissue growth and repair, and magnesium that helps to relax blood vessels and thereby to alleviate migraines. Other health benefits of magnesium include transmission of nerve impulses, body temperature regulation, detoxification, energy production, and the formation of healthy bones and teeth. It also packs Riboflavin (B2) for improved energy metabolism within brain and muscle cells and manganese, which is an antioxidant that helps to prevent damage of mitochondria during energy production as well as to protect red blood cells and other cells from injury by free radicals.

Quinoa is a pretty amazing kitchen staple, and can be used in many dishes as a main protein source, side dish or substitute for rice, potatoes or even pasta. You can cook the quinoa according to the package instructions, OR you can liven up your meal and add another layer of amazing dynamic flavor punch! Yep, I said flavor punch! Toasting quinoa before cooking opens up the nutty, toasted and almost smoky flavor. Cook up a batch to use during the week for quick dinners or add to salads for lunch. You can even cook quinoa for breakfast!

What is YOUR favorite quinoa recipe?

Toasted Quinoa
1/2 c quinoa
1 c water or chicken broth
Salt and Pepper to taste

  • Pour quinoa into pot on stove top over medium/high heat
  • Toast until it starts to pop, like popcorn and the outer shells turn a light to dark brown
  • Rinse the quinoa in a strainer under cold water and return to pot (always rinse your quinoa, like you would rice)
  • Add water to the pot and bring to a boil, continuously stirring
  • Reduce to a simmer and cover for 10 minutes then “fluff” with a fork or spatula and serve


Chocolate Chip Walnut Banana Bread (Gluten Free, Vegan, Nut Free Options)

IMG_0325

Other than gingerbread cookies, there is little that makes the house smell as amazing as banana bread! We needed a few last minute “office gifts” so I whipped up a few loaves of fresh banana bread but feeling festive, I decided that we needed to venture from the original recipe a bit so in went the chocolate chips! This recipe yields three mini loaves, one large loaf, or one pan of regular muffins. Wrap them up in some festive wrapping and tie some twine or raffia on them, and there you go! Homemade presents! Be sure to list that they have gluten, dairy and nuts in them unless you choose to make them without any of these which you can!

IMG_0329

Banana Walnut Bread (w/Gluten-Free, Vegan, Nut Free Options)
Adapted from my recipe for Banana Walnut Bread

Ingredients

  • 1 3/4 c. flour (can use Whole-Wheat or Gluten-Free)
  • 2/3 c. white sugar
  • 1 tsp. double-acting baking powder
  • 1/2 tsp. salt
  • 1/4 tsp baking soda
  • 1/2 c. shortening
  • 1 cup mashed bananas ( 2 ripe bananas)
  • 1 small banana, cut into chunks
  • 2 eggs (use egg replacer if going vegan)
  • 1/2 cup walnuts (omit if going nut-free)
  • 1/2 cup chocolate chips (if going diary free, be sure to read the chocolate chip ingredients)
  • 1 fresh orange, squeezed (my addition)

IMG_0327Directions

  1. Pre-heat oven to 350 degrees F
  2. Grease and flour ( or non-stick spray) your baking pan(s)
  3. In a large bowl, mix the first 5 ingredients
  4. Cut in the shortening using a pastry blender (or two knives scissor-fashion) until the mixture resembles coarse crumbs
  5. Stir in the remaining ingredients until just blended
  6. Bake in pre-heated oven as directed below:
    Large loaf pan: 55-60 minutes
    4 Individual Loaf pans: 30-40 minutes
  7. Cool in pan on wire rack

Flying Apron Chocolate Chip Cookies (Gluten-Free, Dairy-Free)

I fell in love with Flying Apron  bakery a bout 6 years ago when I was diagnosed with a dairy allergy. No dairy…means… no… BAKED GOODS!? What about my cookies, muffins, and scones!?  While lactose was the allergy, being a digestive tract allergy meant that gluten would quite possibly be an “irritant” for me even thought I wasn’t necessarily allergic to it. “Oh Joy” … my first thoughts… and many of the subsequent thoughts afterward. This diagnoses came before food allergies were really becoming main stream and I must confess it was a very rough life adjustment for me, being miss baked goods lover, to find things that were both dairy-free and yet still tasteful. Flying Apron specializes in gluten-free, vegan baked goods, and breads as well as savory lunch items including savory veggie hand-pies, macaroni dishes, pizzas, soups, and salads to name a few. They rotate their menu to feature dishes that incorporate seasonal and local ingredients.

It was at their Fremont Cafe that I first had the realization that gluten-free and/or dairy-free baked goods didn’t have sacrifice taste and make me feel like I was chewing on a soggy 10 day old strip of cardboard! Previously, adhering to food allergies meant an immediate departure from any sort of taste, texture or delightful food experience.  But when I first bit into a Flying Apron muffin, my food allergic life changed for the better. Their baked goods, breads, and savory items are really delicious and intensely palatable. Mind you, this review is coming from both the dairy-free AND the “MORE BUTTER PLEASE” review voice of this household. I’ve got him hooked on both the  Flying Apron  Chocolate Chip Cookies (which are both Gluten-free & Dairy-Free) as well as the Mighty O Vegan Sprinkle Doughnuts. Muwahaha!!)

Well, I’m quite obsessed with their chocolate chip cookies which is saying a LOT for someone who isn’t particularly fond of chocolate. My all to often nightly ritual consists of mixing a Flying Apron cookie and a few small scoops of LivingHemp Ice Cream which can actually become an expensive habit and deprives me of both my baking fix and smelling the house up with cookie scent!


Flying Apron’s Gluten-Free Chocolate Chip Cookies
15 cookies 

2 3/4 cups brown rice flour
1 1/2 cups plus 1 tablespoon garbanzo bean flour
1 teaspoon baking powder
1/2 teaspoon baking soda
3/4 teaspoon sea salt
1 cup canola oil
1 cup organic whole cane sugar
1 teaspoon vanilla extract
1 cup soy milk
1 cup (8 ounces) dairy-free dark chocolate chips

1. Preheat the oven to 350 degrees F.
2. Combine the brown rice flour, garbanzo bean flour, baking powder, baking soda, and salt in a large bowl. In the bowl of a standing mixer fitted with the paddle attachment, combine the canola oil, organic whole cane sugar, and vanilla until well mixed. With the mixer on low speed, add the flour mixture and rice milk alternately, a little at a time, until smooth, about 3 minutes. Stir in the chocolate chips.
3. Scoop the dough onto greased or parchment-lined baking sheets with an ice cream scoop. Bake until golden and slightly firm to the touch, about 17 minutes. For a fancy look, dust the cookies with cocoa powder while they are still hot.


Banana Walnut Bread (gluten-free, dairy-free)

There is something about the smell of fresh baked banana bread that warms the heart and soul. “Summer”, and I use the term loosely, has started to creep around Seattle. Today is a balmy and overcast 70 degrees but whenever it’s grey I always get the cozy urge to bake. This weekend, we’re adventuring up to see my family and while I’m baking the bread for both my roomie and his mum who’s visiting us, I’m also baking this to surprise my dad.

Since I was a little girl, whenever there were bananas that were even one day past perfect my father would take my hand and guide me to the fruit bowl and say “Kate, you know what THAT means right!? … BANANA BREAD”!!! I always loved baking this for him, and filling the house with the warm smells of bread and seeing his joy as I would pull that loaf out of the oven, hovering as all good taste tester seems to do, barely waiting for it to cool before cutting thick slices and serving it up to one very happy man!

Like clockwork, whenever the weather in Seattle is grey, ahem most of the year, my ache to bake exponentially increases. Even if I don’t particularly WANT a baked good at that moment, sacrilege I know, I just can’t calm the urge until I’m mixing up the dough and filling the house with the smells of a bakery then fending off the taste tester as I try to pull it out of the oven.

Truth be told, I simply LOVE baking! For myself and more so for others to enjoy . While I can’t have you all in my kitchen this moment eagerly awaiting the “ding” of the kitchen timer indicating that fresh baked goodness is ready to being it’s futile attempt to cool before being devoured, I CAN share with you by posting this tried and true recipe!

This recipe yields one large loaf or three small individual loaves. Personally, I prefer to use smaller individual size loaf pans and because they’re easier to gift and look cuter on a plate (true story!). I’m not allowed to freeze bread in our house but these loaves freeze quite well for future rainy day enjoyment or to give as a hostess gift for a last minute dinner party! They also make great muffins!!

My loaves are in the oven now so here’s a sneak peek of THIS batch. (Photos below are previous completed batches)

Banana Walnut Bread
Banana Walnut Bread


Banana Walnut Bread
From:The Good Housekeeping Cookbook

Ingredients

  • 1 3/4 c. flour (can use Whole-Wheat or Gluten-Free)
  • 2/3 c. white sugar
  • 1 tsp. double-acting baking powder
  • 1/2 tsp. salt
  • 1/4 tsp baking soda
  • 1/2 c. shortening
  • 1 cup mashed bananas ( 2 ripe bananas)
  • 1 small banana, cut into chunks
  • 2 eggs
  • 1/2 cup walnuts (my own addition)
  • 1 fresh orange, squeezed (my addition)
Banana Walnut Muffins and Bread

Directions

  1. Pre-heat oven to 350 degrees F
  2. Grease and flour ( or non-stick spray) your baking pan(s)
  3. In a large bowl, mix the first 5 ingredients
  4. Cut in the shortening using a pastry blender (or two knives scissor-fashion) until the mixture resembles coarse crumbs
  5. Stir in the remaining ingredients until just blended
  6. Bake in pre-heated oven as directed below:
    Large loaf pan: 55-60 minutes
    4 Individual Loaf pans: 30-40 minutes
  7. Cool in pan on wire rack
  8. ENJOY!!!

Ratatouille

Antigüedades Bar (Sevilla, Spain)

The obsession with Ratatouille started on our recent trip to Seville, Spain. We decided to meander the alleys and streets for the 30 minute walk from our flat to the city center . Bar Antigüedades caught my eye as an adorable little café from the exterior (of course…look at the photos!) and reading the menu board when we passed I made the mental note to come back for lunch. We did, and loved the Ratatouille SOOO much that we returned for dinner and had the exact same meal! It was so warm, hearty, tasty, flavorful and just… well… cozy! We ordered a bowl and cleaned and had I not ordered an actual meal I would have ordered another Ratatouille! As it was I had to refrain from licking the bowl since 1. it’s rude to do in public 2. we were sitting outside and I couldn’t sneak it 3. I’d be pegged as a ridiculous American for SURE! Three sadly legitimate reasons why I had to refrain from one last taste of the very miniscule remains of wonderful veggies. I vowed to make it once we got home.

Sevilla...where it all began
Sevilla…where it all began

Of course, in order to make the dish I first had to find 15 recipes, make an entire Pintrest board devoted to my found ratatouille recipes (yes I’m that ridiculous organized..or maybe obsessive?). Of course I had to print out each recipe, lay them side by side, and pour over each minute difference and detail deciding which was the perfect recipe. Which was possibly closest to recreating the most incredibly wonderful cozy meal. My perfection was finally challenged by my need to make a grocery shopping trip and get ON with the actual MAKING of the dish so I picked one to use as a guideline because, and yes I’m a total girl, the picture looked the yummiest.  The recipe that I landed on was posted on the blog A Lady in France.

A brief history of Ratatoulie. It is usually served as a side dish but can also be a main, which is how we eat it with some crusty potato bread. For protein, I usually poach an egg or sprinkle some cheese on the top.

The hardest part of this meal is letting it cook those last 30 minutes without devouring it from the pan! The house starts to smell of wonderful cooked vegetables and herbs.

Ratatouille Prep
Ratatouille Prep

Tips:

  • The Pan: be sure to use a large deep pan so that the heat and evenly distribute and cook
  • Saute each round of veggies VERY well! Once you add the tomato it’s really just melding of the flavors and not really “cooking”
  • Don’t go light on the canned tomatoes! This is what makes or breaks the consistency of the Ratatouille. If it seems like the stew is a bit dry add another can of tomates or a 25 oz jar of basil marinera sauce. You’ll realize the consistency within 5-8 minutes and you really need to add within the 5-8 minutes so the consistency and the flavors are able to meld correctly.
  • Cook all the veggies without a lid until you add the tomatoes. The veggies really need to breathe and have the heat to saute up.
  • Liquid: keep stirring to move the liquid around and assure that it’s not too liquidy. If it feels like it’s becoming more soupy than thicker stewey, turn the heat up  and if it’s sticking to the pan turn the head down a bit.
Ratatouille
Ratatouille

Cucina de Kate Ratatouille

½ large onion
2 tsp (heaping) minced garlic
drizzle of olive oil (to cook the onions/garlic)
1 red pepper, chopped
1 good sized eggplant, cut up in to chunks
4 small zucchini, cut up into chunks
1 ½ tbsp. herbs de province
few fresh basil leaf’s
1 ½ c. diced canned tomatoes (I sometimes add a 25oz jar of 365 tomato basil marinera sauce)

Instructions

  1. Heat oil in your large pan while you chop the onions and garlic. Cook until translucent.
  2. Chop and add peppers. When they start to look a little cooked, chop and add the eggplant in medium chunks. I like them a bit larger so they retain some form as opposed to getting a bit more mushy when they’re smaller.
  3. Keep stirring the veggies in the pan until they eggplant starts to look a little cooked, then chop up and add the zucchini. Again, I liked keeping my chunks a bit larger to add to the stew-type texture and avoid a must consistency.
  4. Once the zucchini starts to look like it’s a little cooked, add the herbs and chopped basil and assure it’s all mixed together well. Then add the tomatoes. At this point you’ll have to keep an eye and stir frequently but you can multi-task and just remember to stir every few minutes.
  5. Keep stirring and cook for another 30 minutes (or so) until all the vegies are tender…and of course taste along the way!

Serve with a protein (egg or meat) and some rustic bread (or omit if you’re gluten-free)


Ratatouille for Dinner
Ratatouille with Rustic Bread


Dinner Table of Ratatouille with Rust Bread and Menage a Trios Red
Ratatouille with Rust Bread for Dinner
Ratatouille with Rust Bread for


Provençal ratatouille

Golden Vanilla Cupcakes (Gluten-Free, Vegan)

Gluten & Dairy Free Vanilla Cupcakes

Birthdays are wonderful and they are especially for someone who LOVES to bake! Bakers invent holidays just for the opportunity to whip up some delicious treat! Growing up I was given the nickname “Martha Stewart” because I was the chick who showed up for every holiday with the corresponding cookie/treat. Gingerbread for Christmas, heart-shaped shortbread with pink and red frosting at for Valentines Day, Shamrock cookies and green frosting for St. Patty’s, Easter treats, May Day cookies, July 4th something-or-rather,  Halloween trick or treat bags… Thanksgiving…Birthday’s Cupcakes…Picnic Pies and never white frosting after Labor Day!

Well, that was “back in the day” (am I even old enough to say that!?) before food allergies became so prevalent. Now, a baker must be VERY aware of those that might not be able to join in the sugary delicious consumption of a well-baked treat. Well, those bakers that want friends do!

It was a co-workers birthday a few weeks back and I immediately went into “Martha Mode”… “IF cupcakes just happened to show up on your desk what flavor would they be?” I inquired. “Not made by me” was the response…every bakers dream or dread! That is either the field of dreams to explore or a stress sentence of deciding what kind of baked good says what about you. Quickly I got over my female phobias (it’s true… women DO think of things like this!) and decided that I’d just make cupcakes that I’d be happy to take home if no one ate them.

 Gluten & Dairy Free Vanilla Cupcakes Texture
Gluten & Dairy Free Vanilla Cupcakes Texture

Being mindful of both a gluten AND a dairy intolerance I quickly realized that I didn’t have a go-to cupcake recipe to suffice. So I did what any good, sound, logical baking blogger did and headed to Google! This recipe is from Vegan Cupcakes Take Over the World  and they were a HIT!!!! Not just… hey this doesn’t taste like a rotten breaded sardine but actually got compliments of “These are AMAZING!” Even the birthday boy was skeptical when I told him they were gluten-free (omitted the dairy free part…have to ease them into the idea you know) said they were, and I do directly quote, “DELICIOUS! I was worried when you said gluten-free but those are REALLY GOOOOOOOD!

I LIVE BY Bob’s Red Mill Gluten-Free Flour for my gluten-free recipes so with that, ladies and gentlemen, I give you the ultimate go-to birthday baked good! It’s chewy and moist with the correct density and texture of a “real” cupcake while incorporating various intolerance’s. It’s pretty much amazing! I also love the other book from these authors and have it on the cookbook shelf, Vegan Cookies Invade Your Cookie Jar.

Culinate, who also posted this recipe suggested  Vegan Fluffy Buttercream Frosting or Not-Too-Sweet Blueberry Mousse for a topping but since I was short on time I just picked up a ready-made can from the grocery store and let people frost themselves. Okay…short on time AND lazy.

Golden Vanilla Cupcakes

Yield: 12 cupcakes
Ingredients
1 c. Soy Milk
1 tsp. apple cider vinegar
1 1/4 c. Bob’s Red Mill Gluten-Free Flour
2 tbsp. cornstarch
3/4 tsp. baking powder
1/2 tsp. baking soda
1/2 tsp salt
1/3 c. canola oil
3/4 c. sugar
2 1/4 tsp vanilla extract

Directions

  1.  Preheat oven to 350 degrees. Line muffin pan with cupcake liners.
  2. Whisk the soy milk and vinegar in a measuring cup and set aside for a 4-5 minutes to get good and curdled.
  3. Beat together the soy milk mixture, oil, sugar, vanilla, and vanilla in a large bowl.
  4. Sift in the flour, cornstarch, baking powder, baking soda, and salt, and mix until no large lumps remain.
  5. Fill cupcake liners two-thirds of the way and bake for 20 to 22 minutes.
  6. Transfer to a cooling rack, and let cool completely before frosting.


Cooking Cupcakes