 Pizza…is…DELICIOUS! With a plethora of options, toppings, styles, crusts and meals that it can be served for Pizza is pretty much an ultimate food. Eat it cold the next morning or poach an egg on it and Viola, Breakfast! It’s the perfect brown bag lunch or picnic lunch option. It can be served flatbread style is an appetizer or tapas course, or loaded with amazing toppings and served as a dinner delight! Now, there is some debate between Pizza and flatbread so let’s review the three-step by step criteria for granted a place in the hierarchy of acceptable pies.
 CRUST: This can be a chat of endearment or an all out fight in certain areas of the world. There are crust aficionados that take this topic very seriously. Whether you’re in thin crust camp or a lover of the thick bready crust, this is the foundation of the dish. With Pizza it seems that there can be variation in the crust whereas a flatbread will typically be a little thicker on the crust but there could be blurred lines here so let’s proceed.
BASE LAYER: Then you have the cheese vs. sauce or olive oil assessment. I call this the base layer since it seems to set the tone for how the rest of the topping architecture. With the increase in food allergies and culinary progression pizzas without cheese is no longer a cardinal sin. It is now more common to find pizzas and flatbread without cheese, topped with a traditional tomato sauce or simply brushed with olive oil. This too can be a blur in the pizza or flatbread debate, so it seems that we must proceed to the last criteria.
 TOPPINGS: Now we have the “finitura” (finishing touch in Italian), the toppings. If you saw broccoli on a pizza you might do a double take and wonder if your mother was in the kitchen sneaking in your daily dose of veggies. But on a flatbread, you wouldn’t think twice (I would think?) It seems that a flatbread is a trendy version of a pizza? Maybe we just needed to change the name and feel better about eating pizza with our wine, a ritual that is not only perfectly acceptable but the highlight of my week when it occurs!
So my verdict: Flat bread is to pizza what sliders are to burgers…an open interpretation depending on the chef’s whim and creativity.
With that, I give you my current recipe for the crust, now the flatbread or pizza question is up to you to decide! BON APPETIT!!
Homemade Pizza
Prepare the dough according to the directions below
Cast Iron Pizza Stone
Clean Kitchen shears for cutting
Pizza Paddle (super hand for transfering to the already HOT cast iron!)
Toppings
Onion, sliced
Garlic, thinly sliced or minced
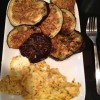
Eggplant, cut in strips or wedges
Peppadew, cut in half out of the jar (I like the flavor of this brand)
Cracked pepper
Fresh or dried parsley
Fresh Basil
Shredded Mozzarella
Scamorza Mozzarella, sliced into medallions
For Serving: Balsamic, olive oil, red pepper flakes, and arugula
Sprayed the cast iron before and pre-heat in the oven on “broil” for 15+ minutes then turn down to 475
In the meantime, chop and saute the onion, garlic, sliced eggplant and peppadew with parsley and cracked pepper on the stove.
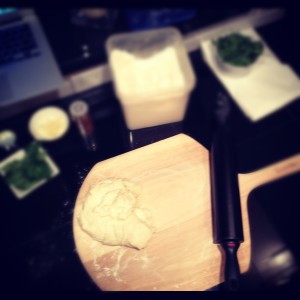
When the cast iron is ready dusted it with flour and assemble the pizza right on the pizza stone. It will be HOT and a little hard to spread out the dough so be careful!
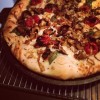
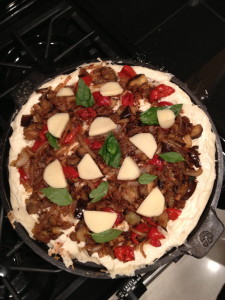
One light layer of shredded mozzarella, then add the sautéed onion, garlic, eggplant and seared peppadew.
Add fresh basil then the medallions of Scamorza cheese and another light layer of Mozzarella.
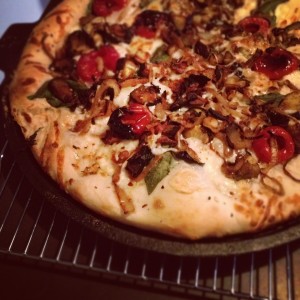
Cook at 475 for 8-12 minutes, until edges started to bubble up and show signs of crisping.
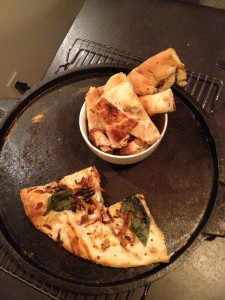
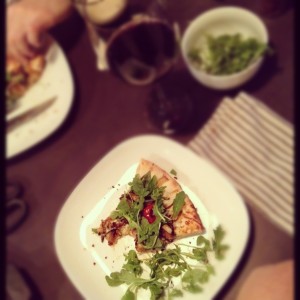
Remove and cut in the traditional style, with clean kitchen scissors.
Serve with balsamic, olive oil, red pepper flakes, arugula and plates/cooking.
Notes-
We loved that the cast iron kept the pizza warm even 20+minutes after we took it out of the oven!
I used too much of the dough so the crust was too thick so less dough next time and spread the topping to the outer edges.
It was perfectly seared on the bottom and the dough didn’t stick to the cast iron pan as we expected it would, it actually slid right off.
 Olive Oil Dough
Makes 4-1 lb loaves
Originally found on http://www.
Ingredients:
2-3/4 cups lukewarm water
1-1/2 tablespoon granulated yeast (2 packets)
1-1/2 tablespoons Kosher salt
1 tablespoon sugar
1/4 cup extra virgin olive oil
6-1/2 cups unbleached all-purpose flour
Directions:
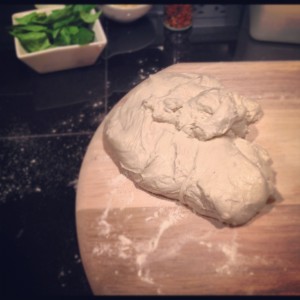
In a 5 quart bowl mix the yeast, salt, sugar, and olive oil with the water without kneading. Think of the motion of a dough hook working the dough and mix that way. You might need to wet your hands a little and mix by hand but I found a spatula to do just fine. (Notes: Original recipe called for using a standing mixer fitted with the dough hook attachment but I don’t have that so I went with the old fashion handmade tactics).
Transfer dough into another large bowl. The dough will be a little sticky but will stick together pretty well. Cover (not airtight), and allow to rest at room temperature until dough rises and collapses (or flattens on top), approximately 2 hours.
The dough can be used immediately after the initial rise, though it is easier to handle when cold. Refrigerate in a lidded (not airtight) container and use over the next 12 days.
If you like more of the deep dish style, and care to explore out of the pizza stone category, here is a cool recipe I found on Flourishing Foodie for Cast Iron Pizzas!
.
")