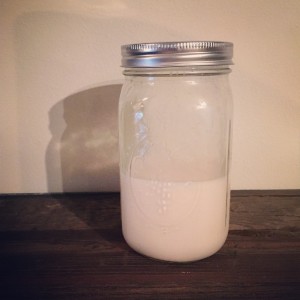
Homemade Almond Milk

aomond milkAhh the weekend. Wonderful, sweet weekend. It’s 48 hours to unplug, relax, catch up, and generally not be in an office. This was the first full week back at work after the shortened work weeks through the holidays and I won’t lie, Monday and Tuesday I was a little ‘struggles’.  But Friday was here in no time and I was actually surprised how quickly the week flew by and left me at another Friday night. Phew, MADE IT!

Saturdays are my favorite. You can stay up late on Friday if you want because it’s not a school night, and you know when you wake up that there are 24 more hours where these came from just waiting for you to enjoy! Saturday’s have a pretty regular ritual. The morning starts with a trip to my AMAZING acupuncturist, followed by grocery shopping. Then I head home to focus on food prep and house cleaning. I wash and chop all the veggies and prepare as many meals as I can for the upcoming week. Every week there is a batch of homemade almond butter, a pot of toasted quinoa in the mix and every other week Saturday is Kombucha bottling day too. I’m going to try out the continuous brew method this next batch so stay tuned for the results!

Today I got sucked into reading one of my favorite healthy living sites, Wellness Mama, and saw her recipe for homemade almond milk. We go through about a gallon of almond milk per week and Whole Foods hasn’t been carrying the vanilla kind so we’ve been stuck with the ‘original’ flavor for months. I’m a DIY/Homemade fanatic and I can’t believe I haven’t tried my hand at making almond milk myself yet! It always seemed a little daunting when I’ve read about it before, needing nut bags, sprouting, blanching, it always just seemed easier to pick it up at the store. The recipe on Wellness Mama seemed attainable and I was well over due to give it a try.

I love how she explains the reason for soaking the almonds and even gives an idea for how to use the leftover almond pulp that remains after you squeeze the milk thorough cheese cloth. Done and done!

It didn’t come out as thick as the store-bought kind I like but I’ll just try a bit less water next time. I omitted the dates on the first batch and that is a MUST (also confirmed by the mister on a blind taste test of each version). Use high quality vanilla and start with a 1/2 teaspoon (NOT tablespoon like I did). All in all, the first batch was actually good which is a win since I would have taken ‘drinkable’ as a passing grade!

Homemade Almond Milk

2 cup raw organic sprouted almonds – soaked overnight
7 cups pure filtered water (not your soaking water)
1  teaspoons high-quality vanilla extract
5 large dates  (honey, stevia if you prefer)
Nut bag to strain (Recommended Nut Bag)
You can use cheese cloth, but it’s WAY more work!
1 tsp sea salt for soaking

Directions:

Soak almonds overnight (at least 8 hours, preferable 10-12) in pure water with 1 tsp sea salt. Wellness Mama says that this is an important step as it breaks down the phytic acid and enzyme inhibitors and cultures beneficial enzymes in the almonds. Basically, doing this helps your body to absorb the enzymes and nutrients in the almonds.
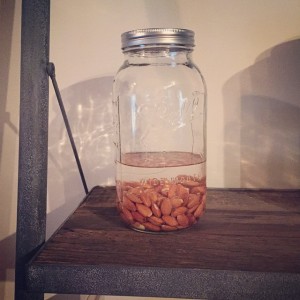
soak almondsRinse the almonds well and add to the blender.

Add in the 7  cups of filtered water and blend on high until the mixture looks smooth.  Work in half batches if your blender won’t fit the whole batch. You’ll see that it can get quite frothy so don’t fill your blender to capacity.

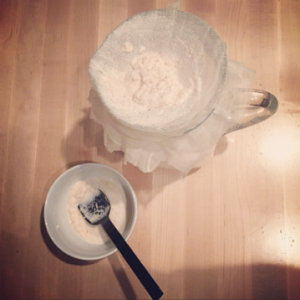
If using nut bag: secure bag around the top of a pitcher or 8 cup container and pour the mixture through the bag. Squeeze the bag and wring out as much almond milk as you can from the bag. You can retain the almond mixture and make almond flour if you want.

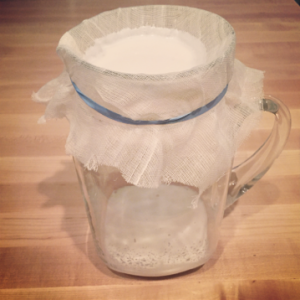
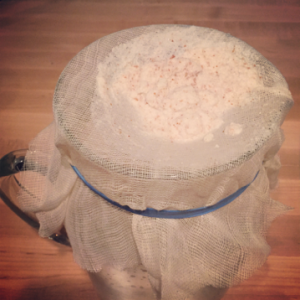
If using cheese cloth: secure the cheese cloth (with a rubber band or string) over the top of a canning jar or large pitcher and also get a medium-sized bowl and  a spoon for the almond mixture. Make dip in the cheese cloth dip deep into the container but make sure it’s still secure. Slowly pour the almond milk through a cheese cloth and use the back of the spoon to press down on the almond mixture to press the water out. Remove the rubber band and squeeze the last liquid from the remaining almond meal and set the meal aside.
IMG_1598

IMG_1599

IMG_1600

Pour the strained almond milk  back into blender and blend it again with whatever sweeteners you’d like… vanilla bean, dates, warmed honey etc.

Pour your homemade almond milk into a glass jar or pitcher with a lid and store in fridge for up to one week.

Recipe Notes

  • For the first batch, The vanilla I used was NOT high quality and you could totally taste it. That, and I put in 1/2 tbsp which might have been a bit excessive. Next time I’ll try with high quality vanilla. It seems like a waste to blend a vanilla bean just to strain it all out (they’re not cheap)
  • A few recipes call for 3 1/2 cups of filtered water versus 4 which would make a creamier texture
  • All of the other recipes called for dates to be added so I’ll have to remember that next time too since I didn’t add anything but the vanilla in
  • I poured a little of the milk into the blender and tried it with a date and it did add a little sweetness to the milk
  • Next time I’ll try blending the vanilla bean with the almonds and water, then straining the mixture and see how that works
  • Some recipes also suggest blending in a 1/4 tsp cinnamon or nutmeg
  • A nut bag might be easier than working with cheese cloth so I might try that too
Save the Pulp
Save the pulp of the almonds, put on cookie sheet and dehydrate in oven on lowest heat until completely dry. Run through blender or food processor to make almond flour, which can be used in recipes in place of flour.
I’ll be posting about this soon!

Pecan Brittle

IMG_1066 Tis the season for joy, decorations, lots of food, family and giving.  Most people these days have a good sized Christmas shopping list to take care of. You’ve got your immediate family, significant other, siblings, nieces, nephews, co-workers, friends, neighbors, acquaintances….it’s likely quite a list! Then, there is always that person who got you something and you didn’t get them something but now you have to think quick because they’re handing you a present and you have no idea how to dig out of this one gracefully.

Well, what if I told you that there is an awesome one-size fits all option that will knock out a solid half of your Christmas list and it comes with a homemade touch? It can even be make last minute or say, Christmas eve day before you head to that evening party you don’t have a hostess gift for! What to get the guy who has everything? Food. Stocking stuffers for the kids? Food. Co-workers, neighbors, that person who got you a gift and you didn’t get them one? Food. Food is a universally accepted amazing gift that, when homemade, has a perfect thoughtful holiday gifting touch! 

I count my blessings this time of  year because I truly enjoy cooking and being in the kitchen and homemade goodies are always well received! I’ve always tried to make as many of my gifts as I can. Homemade notecards, scarves, loaves of bread, cookies in a jar. Well, this year mum and I decided to try a new recipe from a friend of hers that has used it the past few years. We made pecan brittle, or candied pecans, or whatever it is you’d like to officially call it. It’s a buttload of butter and sugar mixed together with pecans. It’s Christmas crack. It’s sugary, crunchy, melty, yummy, addictive and down right deviously delicious.  And yes, I did say a buttload. It was pretty fun actually, we spent a weekend making these addictive morsels, Cranberry Grand Marnier Cake Muffins and Canned 48 jars of Cranberry Jelly. It was a gift making extravaganza!

IMG_1063These little guys hit it out of the park. They were THE perfect gift that had the thoughtful, homemade touch but could be made in larger quantities to check multiple people off the list. It’s actually a pretty easy recipe, when you start getting into candy thermometers it’s out of my league and attention span. The only thing to note about this recipe, which we learned the hard way, was that you can’t just double it or make batch after batch without cleaning the pan. Because you’re basically making caramel if you try to make a new batch with residue from the previous recipe it just messes everything up. Don’t ask me how or why… I didn’t major in science but just take it from us and quickly wash the pan after each batch, okay?!

Candied Pecans// Pecan Brittle 

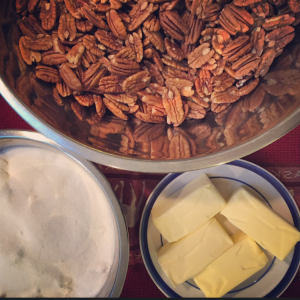
8 tablespoons butter (one stick)
1 cup sugar
3 cups of pecan halves

Directions
Line a baking skeet with parchment paper and set the baking sheet to the side of stove top.


We used a stainless stele copper-clad bottom 10-inch skillet but a cast iron skillet would have worked better. Heat your pan over medium low heat. A fork works best to stir the butter and sugar mixture, and fold in pecans.

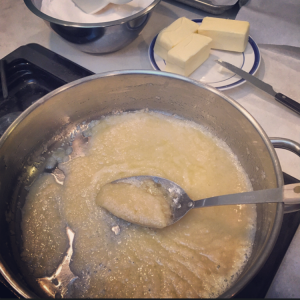
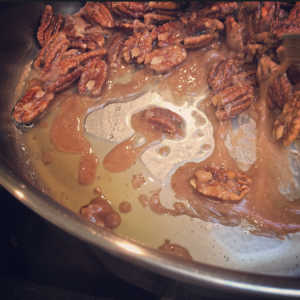
Once pan is fully heated, add 3 tablespoons of the butter and stir until melted. Add the full 1 cup of sugar to the melted butter and continue to stir until the mixture is pale and thoroughly mixed (no butter chunks or large chunks of sugar). Constantly stir the mixture, which should be thickening, so you don’t burn the butter or the sugar.

IMG_1064

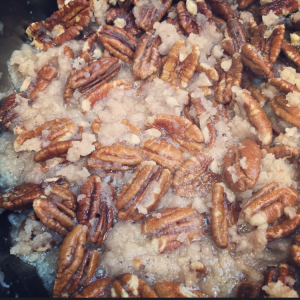
Add the 3 cups of pecan halves and fold into the mixture. Continue to cook over medium-low heat, stirring constantly.

IMG_1067

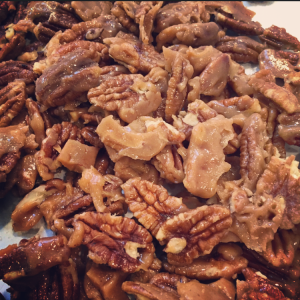
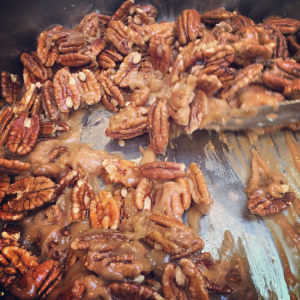
Watch for the mixture to bubble, and at that point it should start to turn a golden-brown color similar to toffee.

IMG_1065

This process takes about 6-9 minutes to see the toffee color. Be patient and make sure you cook the long enough so you don’t have clumps or sugar or butter.

You will start to see clarified butter separating from the mixture and this indicates that they’re done.

IMG_1068

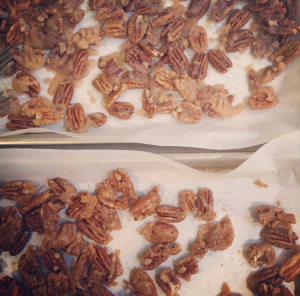
Remove skillet from heat. Tilt the pan and spoon out the clarified butter (or tilt the pan and scoop out the mixture to the prepared parchment lined baking sheet. Using two forks, quickly separate the pecan halves and make sure they are all laying flat.   

Let the candied pecans cool completely. Break pecan mixture into small pieces and package or store in an airtight container.

IMG_1070

These are a nice snack but are also amazing to sprinkle in salads, add to roasted beets, used when baking seasonal bread or as part of a cheese plate. You could use them as a pancake, waffle or ice cream topping or even crush a few on top of cheese cake. Are there other ways that you use candied pecans or could think of to enjoy pecan brittle?

DIY Turkey Frills

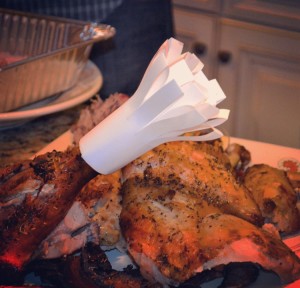
FullSizeRenderThanksgiving is in a matter of hours. Are you in denial too!? Okay, now back to the matter at hand. Turkey. Twenty pounds of turkey. Turkey that still needs to be brined. This year we decided that we’d stay put for the holidays so my dear side of the family gets us and the misters cuzzie who’s up to visit from Portland. Mum and I decided that we’ split Thanksgiving cooking so I’m on turkey, pie, gravy and side dish duty! Pie crust, pumpkin pie and pecan pie recipe are already posted  but stay tuned for the others!

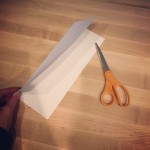
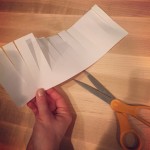
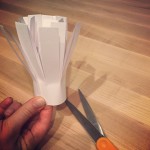
No Thanksgiving turkey would be complete in presentation without the little turkey frills! Hey Google, thanks for the help! Below is a super simple Turkey Frill DIY, just remember to put them on for the presentation part and don’t cook them in the oven!

DIY Turkey Frills
1 sheet of white copy paper
scissors
tape

Homemade Kombucha: A Step-by-Step Guide

IMG_3770When I first thought about making my own Kombucha at home I was a little wary. What if I do it wrong it turns out horrible and make myself sick! For those of you that are like me, all you really know about Kombucha is that is some healthy drink that you see littering the aisles of health stores and somehow helps you be healthy and has something to do with mushrooms.

The Kombucha starter, often called a “mother” or a scoby, stands for symbiotic colony of bacteria & yeast. The reference to mushrooms comes with the disc like form that the scoby grows into, which can sometimes look like a Portobello mushroom or to be more specific, a very slimy slightly yeasty smelling version of a mushroom. So, there you have it, there are no mushrooms involved in the making of Kombucha! There are a bunch of SCOBYs out there, Amazon has a bunch of options and the only recommendation I’d make is to ensure that you get one that is hydrated – the dehydrated ones are a pain!

This drink is made from a process called fermentation, which simply means that bacteria or yeast is used to chemically break down a substance. While the sounds a little gross, I’ll admit, it’s quite good for you! It contains healthy bacteria called probiotics which support intestinal health and help with digestion and elimination as well as encouraging detoxification. For an extended list of possible health benefits, please visit Kombucha Kamp.

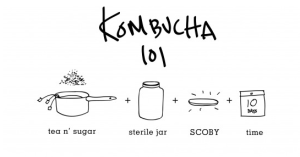
The process of making Kombucha is actually much easier that I thought it would be! I LOVE this picture below from a the Eat Life Whole post on Kombucha.

Screen Shot 2013-09-25 at 2.41.12 PM

See it’s simple! First, you’ll need to purchase a scoby from a reputable source. Unless you have a friend that has a baby scoby to share, you can purchase the same on that I did from Yemoos or Cultures for Health.  Next, you brew some tea with sugar, which feeds the bacteria, let it cool COMPLETELY to room temperature, then pour it into the jar with the scoby and let it hang out for 5-10 days and viola, you have Kombucha! I have to lead this post with a shout out to one of my dearest friends who’s pioneering into the world of Kombucha (and responsiveness to my contestant Kombucha support line texts of “DOES THIS LOOK NORMAL!?”) really helped me in making my first few batches. If you’re lucky enough to have someone that’s also making Kombucha you can trade stories and pictures of your ever growing SCOBYS (yes, you’ll want to take pictures as gross as that might seem) but if you DON’T have someone making it at the same time as you, please consider this your Kombucha support forum! Post pictures of your scoby, ask questions, let us know your favorite flavors that you’re brewing, and anything else Kombucha that comes to mind.

One of the most important things you have to remember when making Kombucha, and most other fermentations, is that metal utensils/containers and plastic containers are not a good idea. The metal and plastic can actually harm the fermentation so it’s best to brew using plastic utensils and a glass jar, which are easily sanitized.

If possible, try to prepare your first batch of Kombucha the day your scoby arrives. You can store the scoby in a cool cabinet until you’re ready to brew your first batch. I have to tell you, I put mine in the fridge because I thought it needed to be kept cold, and THEN decided to read the direction and freaked out thinking I had already killed my little scoby. It was in there over night and I contacted the team at Yemoos right away who quickly settled my worry and said that it would likely be just fine having spent the night in the fridge. Phew, guess I should read the directions FIRST next time hey? The nice thing about this process is that the scoby is pretty resilient so you don’t have to worry too much about “messing it up”.

As far as drinking this good stuff, most people are fine starting off with a full glass but for a few people it can be a little shock for the body since it’s packed with probiotics that encourage, well, elimination and promote intestinal balance. If you find that you DO have a little tummy rumbling response to the Kombucha, back off to a half glass and work up your consumption level daily.

So, are you ready to make some Kombucha!? I got my ball gallon glass jar and sling top bottle at Cost Plus. The quart glass jar came with the yemoos Sourdough kit I ordered at the same time as the Kombucha SCOBY starter, but you can get a great gallon jar HERE on Amazon.com them or find jars of various sizes at Cost Plus.

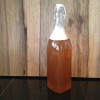
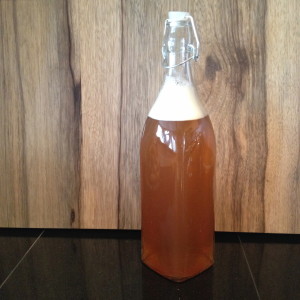
finished kombuchaHomemade Kombucha: A Step-by-Step Guide

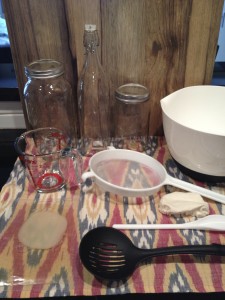
Tools:
1 gallon glass jar
Plastic spoon or spatula
Pyrex glass measuring cup (for measuring the water)
1 Plastic bowl for steeping and cooling the tea (one with a pour spout is easiest)
3 Sling top glass bottle to store finished Kombucha
Funnel that fits in the top your sling top bottle
(Optional) Strainer, used to strain out the little strands of Kombucha if  bother you
Cover for the Kombucha- cloth or paper towel secured with a rubber band works

Ingredients:
1 Scoby (called the “Mother) & Starter Tea liquid it arrived in
8 tea bags or 3 tbsp loose leaf tea  in a tea bag
14 cups filtered water
1 cup organic white sugar

  1. Get your large bowl and get your tea bags out, tying the strings together. Add in one cup of organic sugar.
  2. Boil your filtered water then add it to the bowl with the tea and sugar, stirring with your plastic spoon while you pour so the sugar dissolves.
  3. Let the tea steep and cool COMPLETELY to room temperature, if you pour it in with the scoby when it’s too hot it can harm the scoby cultures.
  4. While the tea is cooling, wash your hands and carefully open the scoby packet, which should also contain the starter tea. Gently pour the tea and the scoby into your sanitized jar that you will be brewing your kombucha in.
  5. Once the tea and sugar mixture is cooled, tilt your brewing jar to the side and carefully pour the cooled tea mixture into the jar trying to get the tea under the scoby. Cover the jar with a cloth or paper towel, something breathable, and secure with a rubber band. Place your Kombucha out of direct sunlight and let it brew for 7-10 days undisturbed.
  6. You can taste your Kombucha around day 5 if you’d like by dipping a straw into the Kombucha, covering the exposed end with your finger, then removing the straw so you don’t contaminate the rest of the batch. The sugar is what feeds the scoby, so if the tea still states sweet, it needs to brew longer. When you taste it, it should be a little acidic or tart first, then have a little touch of a sweet finish.
  7. When you have reached your desired taste, you’re ready to bottle! Get your sanitized swing top bottle, a strainer, and a funnel.  I didn’t actually use the strainer. This is an optional step where you can strain out the dead yeas cultures that you will see floating in the brewed tea- they’re just little pieces of dead yeast and are perfectly fine to consume. They don’t bother me but if you’d prefer to strain them out while you bottle it, you can. Place the funnel in the top of the swing top bottle and carefully pour the finished Kombucha into the bottle. Reserve about a cup of the liquid for the next batch of Kombucha and repeat the steps!
  8. Keep your finished tea in the fridge to slow down the fermenting that can slowly continued even after you’ve removed it from the scoby jar.

IMG_4118A Few Notes:

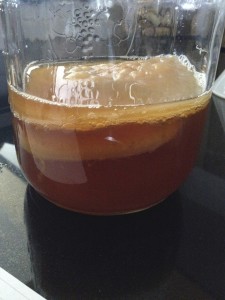
  • As the Kombucha brews, you’ll see another layer growing on top of the Kombucha. While it might resemble mold, it’s simply the start of a “baby scoby”. This is perfectly normal and actually what you will be using to keep brewing Kombucha at home. As long as the baby scoby isn’t thick, you can brew both the scobys together for your second batch. After the second brewing, you’ll want to carefully separate the bottom scoby, which is the mother, and continue to brew using only the baby scoby. You can either discard the mother scoby, or give it to someone else so they can home-brew Kombucha!
  • The scoby can sometimes sink a little, and it’s completely fine if it does. Just make sure it doesn’t completely sink to the bottom.
  • If you’re worried about the sugar, remember that this is what the scoby metabolizes, along with a good portion of the caffeine in the tea so there will be very little of either left in the final product. While it won’t completely remove the caffeine it will greatly reduce it.
  • You can use the same jar for your second batch, but make sure to separate the mother and baby scoby after the second brewing.
  • If you prefer your Kombucha fizzy, I suggest using a bottle with a sling back top so any pressure that accumulates can release itself. Simply pour the Kombucha almost to the top of the sling back bottle and set it on the counter for 2-5 days. You can also manually “burp” the Kombucha if you start to notice pressure on the lid.

You can also make flavored kombucha soda on a second ferment!

Blueberry Ginger Kombucha


Shake & Bake…Homestyle

IMG_0598

We don’t do freezer dinners. Actually, we don’t really use our freezer. If you were to take an inventory you’d find a LOT of homemade Limoncello, Jägermeister, a box of frozen waffles and ice. Hungry man dinners were created for a reason… luckily the man of the house has his own short order chef to replace a TV dinner and microwave love child.

Being little miss do it yourself, I couldn’t bring myself to give up a chance to “make it from scratch”. If it gives you any indication about my infatuation with DIY food, a few of my other make from scratch adventures yet to come: wheat thins, graham crackers, english muffins and beet chips. So, when presented with the request for Shake & Bake, I flew to the bloggosphere and found a recipe to tweak!

Homestyle Shake & Bake
Yield: 1 cup  = one chicken breast 

IMG_06001 cups dry bread crumbs (can be gluten-free too!!)
1 tsp paprika
few grins of fresh black pepper
1/4 tsp garlic
small pinch of: dried basil, dried parsley. oregano
1 egg, beat with a dash of olive oil
(the recipe also said to include 1 part celery salt to half part garlic salt to 1/4 part minced onion. I had none of these so I simply omitted)


IMG_0599


Preheat the oven to 400 degrees Fahrenheit.

In a large resealable plastic bag combine the crumbs, oil, salt, paprika, celery salt, pepper, garlic salt, minced garlic, minced onion, basil, parsley and oregano.

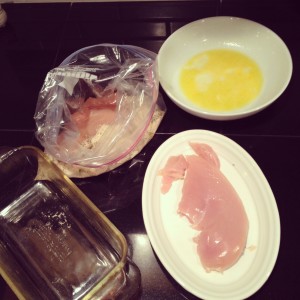
Dip the chicken breast in the egg it in egg.

Place no more than two chicken breasts in bag, seal and shake all ingredients together.

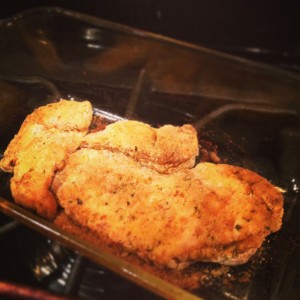
Bake the breasts for 20 minutes if the chicken is boneless, or 45 minutes if it does have bone, or until the internal temperature reaches 165-170.

DIY Holiday Decorations (Christmas & Chanukah)

DIY Christmas Tree
DIY Christmas Tree

Do-It-Yourself Holiday Decorations

It’s that time of year: the lights are sparkling, holiday music is playing everywhere you turn, and gingerbread lattes are readily available! I get so excited to decorate for the holidays, but I do dread the credit card bill at the end of the month. This year, I decided that there has to be some holiday decorating ideas that are chic, classy and personalized without busting my budget.

After sleuthing around on Pinterest and exploring the blogosphere, I was amazed at a multitude of great and incredibly inexpensive holiday decorating ideas. Decking the halls shouldn’t put you in the poor house, so let’s get started!

Set the Mood

You don’t have to purchase holiday music to feel that holiday cheer or set the tone for your gift wrapping, decorating or dinner party. Try making a Pandora station or Spotify playlist and include a few of your favorite artists. You might even find a few new festive songs to enjoy.

When decorating, candles are my go-to, as candlelight always creates such a lovely ambiance. Use various heights of candles in different colors and arrange them in glass mason jars with cranberries around the base of the candle. You can even make a menorah using craft boxes and candles from the dollar store. One fun project is to use old tin cans and make a holiday luminary to decorate the inside and outside of your home, which can be reused year after year.

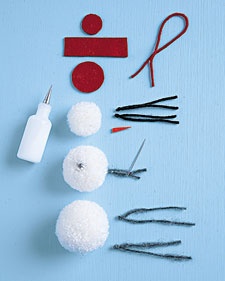
Snow Men!
Snow Men!

Use What You’ve Got

When it comes to decoration, natural elements give a very classy touch. It’s amazing how many uses there are for tree branches and pine cones. Pick up a few extra boughs when you select your Christmas tree and take them home to decorate with metallic or colored spray paint. Make your own wreath or place them on the table with a candle in a glass jar for a festive centerpiece. You can also do the same spray-paint treatment to fruit to use as centerpieces, accent colors in glass bowls or jars, or as place settings for dinner party guests. I just love these little decorative pieces using Christmas tree sprigs and wine corks.

Want to be even more frugal? Use pine cones from your own backyard to decorate your home. You can also spray-paint them like this with metallic or sparkled paint for an extra pinch of pizzaz! The options are endless.

Meanwhile, make holiday cards multitask by hanging a ribbon and getting wooden clothespins to hang the cards as they come. Check out this roundup of festive ways to display your holiday cards.

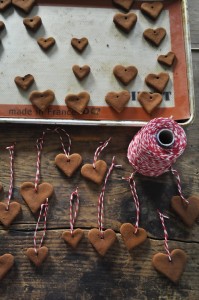
Homemade Cinnamon Ornaments

Scour the Kitchen

There are quite a few things that are probably already in your house and kitchen that can be used to make amazing holiday decorations. For example, you could make a popcorn and cranberry garland for your tree or banister. For snacking and decoration, try these marshmallow dreidels. You can also float cranberries in water for an unconventional decoration piece like this. Use up festive paper and make paper Christmas trees or felt trees in various sizes. The paper trees also make great table top décor or name cards for dinner parties.

Some of my favorite holiday memories are around baking for the holidays and decorating the house. Mom brought both of them together and had us make our own ornaments one year. It was so much fun and my little angel still hangs on her tree each Christmas! Make your own cinnamon or salt dough ornaments and bring some personalized holiday cheer to your tree. They also make great gifts or even gift tags. You can also use model magic and create some lovely ornaments like these snowflake ornaments.

I love the smells of Christmas as much as the sights and sounds. One of the most common decorations that’s most readily available for any budget is to decorate oranges with cloves, called pomanders, like this. Use a large needle to poke holes and insert the cloves. You can even spell out festive words. Hang them around your house or on your tree or mantle and enjoy the fresh smell of citrus and spice!

Wine Bottle Advent Calendar

D.I.Y.

The anticipation that comes with counting down to the holidays might be one of my favorite parts to incorporate into holiday décor. Try making your own advent calendar using paper bags and string. You could also paint a piece of wood and adhere number painted clothespins and dangle little presents like this advent calendar. If you are feeling festive as a wino, check out my favorite advent calendar of all time.

To make you own tree adornment, get clear glass ball ornaments at a craft store and paint them with festive and metallic paint like this or this. For Chanukah, these felt dreidel pouches can easily be stitched together to stash some goodies.

That should be enough to get your house somewhere near as festive as the Macy’s window in New York! For more décor, baking and holiday entertaining ideas visit my Christmas and Chanukah Pinterest boards.

(Original Publication, feature on Levo League here)

What are some of your tips and tricks for decorating on a budget? Share them in the comments section!