Strawberry Basil Bread {Gluten-Free}

IMG_7300Updated Post: When the mister starts his taste-tester review with “I already convinced myself that I would NOT like this, but, it’s actually AMAZING!” you get pretty thrilled. And yes, he did speak in ALL CAPS for that last word, just in case you were wondering if I embellished the story at all. “And you used the bullshit {aka Gluten-Free} flour for this?” he asked. “Yes, I sure did”. To which he responds: “It’s not ridiculously sweet, and if you hadn’t told me there was basil in here I would have never known. This is REAAAALLLLY good!” Now that, ladies and gentlemen, is a seal of approval on a recipe if I’ve EVER heard one! Updated recipe below and images are my own! Enjoy!!!

————–

Hello friends! I’m so sorry it’s been ages since I posted and we’ve been stuck on Blueberry Kombucha and Summer Sangria for… let’s just leave it at a “while”. Starting a new job sure has a way of changing nearly everything about life as you know it! I’ve been in my new job about 4 months now, and loving it. I’m also loving having a little bit of mental brain power when I get home in the evening, which has been lacking for about four months now. Between not having mental energy and somehow just really busy, I’ve found a little space where I simply just decide to relax a little instead of burning the midnight oil EVERY night. Hmm, guess you can teach a moderately aged dog a new trick hey? Needless to say, writing on the blog has been sitting on the “to do” list for a while and that list has been taking a little rest and relaxation time as well. For those of you still burning the midnight oil every single night: you should try the whole relaxing thing every now and then. It’s actually quite nice once you start to get used to it. And to my mother and father who I’m convinced are my only readers, you were right. J

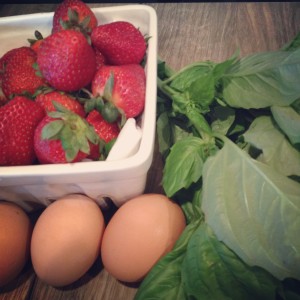
Like many 9-5 worker bees, evenings usually consist of getting home after work, and if I’m good and motivated, the gym. Then, I’m off! Figuring what to cook up for dinner, thinking about packing both lunches for the next day, triage height of the laundry pile, and trying not to see the “to do” pile of papers and other things that have been taking a little relaxation break which has whittled out a few of them but there sits the remainder that still, at some point, to get done. We worker bees cherish our weekends to sleep in, brunch, relax, and yet still get to all the chores that we push-off during the week. My push-off pile takes the form of a pile of papers tucked into my shelf in the closet. On the top of that pile is deliciously summer recipe for strawberry basil bread that I decided this past Sunday, needed to become a real, baked, edible thing.

That’s not to say I’ve baked it. Because, well, I haven’t. You know that bit about the road to hell being paved with good intentions and all? That road never met a week of long work-days and a weekend of 80 degree and blindingly sunny Seattle days! In addition, when I purchased the basil on my few hours of shopping and running errands this weekend, I did have the best intentions of using most of it for the bread and then looked next to the basil and you know what was staring up at me? Sitting there looking ever so plump and inviting were gorgeous heirloom tomatoes. Somehow, four of them jumped into my basket, as did rosemary crackers, mozzarella, and a bottle of delicious Italian Chianti. Can you guess how much basil was left for baking the bread? I bet you can! I had even picked up extra strawberries this weekend so I could bake! Well, the sunshine and Caprese won over the baking, and I’ll pick up more basil at Pike Place tomorrow after work and bake this week.

The recipe was passed along to me by a friend who’s gluten-free. I’ll be making the recipe with Bob’s Red Mill Gluten-Free flour so I can share it with her but you can use regular flour if you prefer. I’m also I’m going to sub out the heavy cream because 1) I feel compelled to somehow tinker with and personalize every recipe possible, and 2) heavy cream just seem so “Fall-ish” doing without it makes it feel like a more a summer bread. Hey, I never claimed to be logical!  Other than that the recipe is pretty straight forward and a little out of the realm of what I would usually bake so I’m pretty excited to give it a go! I’ll be sure to update this post with my own pictures and a description of how it turns out!

Strawberry Basil Bread
Adapted the Recipe By Rebecca Franklin posted on About.com
Prep: 10 min | Cook: 50 min
Yield: 1 9×5 Loaf

Ingredients:
3 cups Bob’s Red Mill Gluten-Free flour
1 1/2 cups organic granulated sugar
1 teaspoon baking soda
7 ounces plain Greek-style yogurt + 3 tablespoons
3 eggs, brought to room temperature
1/2 cup extra virgin olive oil
1 teaspoon vanilla extract
1 tablespoon chopped, fresh basil leaves (about 4 large leaves)
12 ounces fresh, washed, chopped strawberries

Preparation:

Pre-heat the oven to 350F and prepare a 9-inch by 5-inch loaf pan with a light coating of vegetable oil spray.
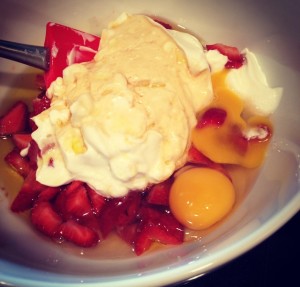
photoIn a large bowl, stir the flour, sugar, and baking soda together. In a separate bowl, lightly beat the yogurt, eggs, oil, cream, and vanilla together until the mixture is smooth. Add the wet ingredients to the dry ingredients and stir until the batter is nearly smooth with only a few, small lumps remaining. Gently fold the chopped basil and fresh strawberries into the batter.

Spoon the strawberry-basil batter into the prepared loaf pan and bake it for 45 to 55 minutes, until it tests done in the center.

photo 2Allow the bread to cool in the pan for 15 minutes before loosening the sides and transferring it to a wire rack to continue cooling.


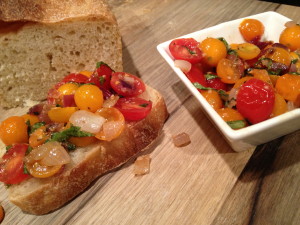
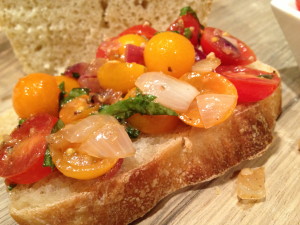
Fresh Heirloom Tomato Bruschetta

IMG_3815Somewhere in my DNA, there is an Italian heritage hanging out. Though I haven’t yet been to the country I seem to have an affinity for anything Italian. The culture, language, food, and history are all part of Italys draw on me.  Italy is a country that has always had a pull on my heartstrings. Chianti is my favorite wine AND Italy was my favorite part of Eat, Pray, Love. Honestly, I usually start the book with the intention to simply stop after Italy but I always get wrapped up in the purpose of the book and wind up reading India and Indonesia and mirroring her own journey in my life as I read it.

While pasta and pizza are the two dishes that will likely come to mind when you think of Italian cooking, there are SO many other amazing and unique recipes and preparation styles that grace us from that fantastic country. I don’t remember the first time that I had bruschetta, but I do remember the first time that I had my other half’s bruschetta. It was after one of our first road trips together, the sun was shining, we were in the honeymoon of early enamoration and the world was our oyster. Yep, I just made up a word variation for enamored! He “whipped” up his now famous bruschetta while I arranged some tapas on a plate then we grabbed a bottle of wine, our sunglasses, and headed up to the roof to eat alfresco. This is one of my favorite meals I’ve actually ever had because it combined so many of my all time favorite things: those I love, wine, tapas style eating, sunshine, eating outside and fresh foods.

IMG_3818This bruschetta has been requested MANY times and while he’s never used a recipe, it always has that taste of spending a summer day eating outside on the roof with someone you love. You’ll notice there are not measurements. In the true Italian form, this is a dish that is best mastered over multiple and personalized to the chef and guests tastes so you can experiment with the ratios on each of the ingredients and put your own spin on the taste and texture.

One thing I will note about this dish, is how little oil you need. Olive Oil is both delicious and good for you when used in moderation, but this spread needs very little olive oil which increases the flavor and allows you to focus on the texture of the herbs and tomatoes versus any exceeding amount of oil. The shallots, onion and garlic have their own natural oils and juices, and finding a balance between those natural oils and a minimal amount of EVOO to sauté in will be the key!

Fresh Garden Bruschetta

heirloom cherry tomatoes, washed and halved
basil, washed and chiffonaded
fresh cracked black pepper and sea salt, to taste
aged balsamic
EVOO, used sparingly
minced garlic
red onion, chopped
shallots, chopped
grated parmesan or mozzarella cheese
artisan bread slices

  1. Wash and prepared each of the veggies as directed and slice up the artisan bread
  2. In a medium bowl, mix the tomatoes, basil, cheese and a drizzle of balsamic, adding fresh cracked pepper and sea salt to taste
  3. Heat a pan over medium-high heat, using the EVOO sparingly
  4. Add onions and shallots and cook until they start to turn translucent
  5. Add the garlic to the pan and reduce to medium low, cooking just a few minutes longer to mix flavors 
  6. Pour the hot mixture into the bowl, and gingerly toss all ingredients together
  7. You can either serve this immediately or make it ahead of time, cover and refrigerate up to 3 hours

Product Review & Recipe: Mandarano Balsamic Glaze with “Stacks” Recipe

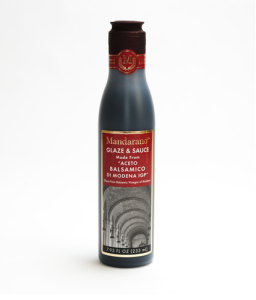
Screen Shot 2013-08-22 at 11.32.36 AMThe team over at Mandarano Balsamic Glaze & Sauce,  graciously asked if I be interested in doing a product review. Of course, I was excited to give it a try since I have become obsessed with aged balsamic in the past year. If you have never had an “aged” balsamic and think of only the vinegar style, you are in for a life changing treat. 

Balsamic vinegar has long been a staple in my pantry. I always have a large bottle up on the shelf. Sometimes it’s plain old vinegar, sometimes there are random herbs shoved into the bottle for an infusion, what can I say… we know how to party. Balsamic has many uses in our house,  as a dressing, a marinade for veggies or meat, drizzled on a top of a few slices fresh mozzarella for a caprice salad, the list goes on. Usually, I have the plain old vinegar style, which can be a tad acidic if drizzling straight onto a salad, hence the herbs shoved into the bottle! So, imagine my joy when I discovered “aged balsamic”.

I was SO excited to get my bottle of Mandarano last week and start trying it at…well ever meal actually. In case you were wondering, the answer is yes, it is delicious with scrambled eggs,  fresh basil and avocado toast. It’s much thicker and has a much richer flavor so a little goes a long way with an aged balsamic, or a balsamic glaze. When you first open the bottle, you can smell the vinegar qualities of the balsamic, but once you taste it you’ll find the slight sweetness that perfectly compliments the molasses like texture. Mandarano uses a proprietary blend of 25, 12, and 2 year aged balsamic vinegar and the entire process, grape growing, bottling and production, all happen in Modena, Italy. And if you thought it couldn’t get any better, it’s quite affordable! You can order it HERE from Amazon.com or directly from the Mandarano website HERE. They also have a few delicious recipes using the balsamic glaze posted HERE. I can’t wait to try the Caprese style portobellos with Mandarano balsamic.

As I said, I’ve been trying my balsamic glaze on just about every meal and while I don’t have lovely pictures to show you, because I was too busy scarfing down the amazing meal.  For dinner one night, I drizzled it over prosciutto wrapped chicken and asparagus and it was the perfect finishing touch, adding just the sweetness and flavor that the dish needed!

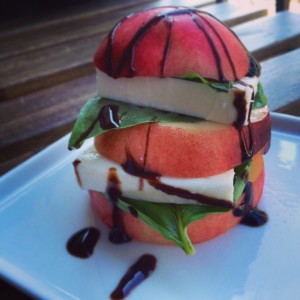
But my favorite recipe, by far, were the White Nectarine, Mozzarella, Basil and Balsamic “stacks” I made one afternoon for a quick patio happy hour treat. The bag of white nectarines were finally ripe, so I walked down to our Italian market, DeLaurenti, and picked up a few of their fresh house made mozzarella balls and some fresh basil and used my bottle of Mandarano balsamic glaze to make these delicious treat! Recipe was posted yesterday HERE, but I wanted to include it below so you could see how lovely it turned out, the the glaze drizzled over the top!

Stacks

White Nectarine, Mozzarella, Basil, Balsamic “Stacks”
Serves two

2 ripe, but slightly firm white nectarines
2 fresh mozzarella balls
1 bunch fresh basil, washed
Mandarano balsamic glaze

Wash the nectarines and basil, laying the basil out on a paper towel to pat dry. Slice the bottoms of the nectarines, then carefully slice so you have layers to stack.  Taking a sharp knife, slice the mozzarella balls. Stack up the ingredients, starting with a slice of the white nectarine and alternating the other ingredients until you have your “stack” created. Drizzle with the balsamic glaze and enjoy!

White Nectarine, Mozzarella, Basil “Stacks”

StacksWhite Nectarine, Mozzarella, Basil “Stacks”
Serves two

2 ripe, but slightly firm white nectarines
2 fresh mozzarella balls
1 bunch fresh basil, washed
Mandarano balsamic glaze

Wash the nectarines and basil, laying the basil out on a paper towel to pat dry. Slice the bottoms of the nectarines, then carefully slice so you have layers to stack.  Taking a sharp knife, slice the mozzarella balls. Stack up the ingredients, starting with a slice of the white nectarine and alternating the other ingredients until you have your “stack” created. Drizzle with the balsamic glaze and enjoy!

Homemade Pizza

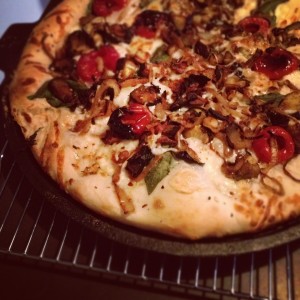
IMG_3399Pizza…is…DELICIOUS! With a plethora of options, toppings, styles, crusts and meals that it can be served for Pizza is pretty much an ultimate food. Eat it cold the next morning or  poach an egg on it and Viola, Breakfast! It’s the perfect brown bag lunch or picnic lunch option. It can be served flatbread style is an appetizer or tapas course, or loaded with amazing toppings and served as a dinner delight! Now, there is some debate between Pizza and flatbread so let’s review the three-step by step criteria for granted a place in the hierarchy of acceptable pies.
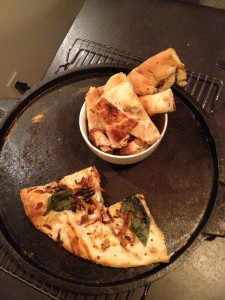
IMG_3383CRUST: This can be a chat of endearment or an all out fight in certain areas of the world. There are crust aficionados that take this topic very seriously. Whether you’re in thin crust camp or a lover of the thick bready crust, this is the foundation of the dish. With Pizza it seems that there can be variation in the crust whereas a flatbread will typically be a little thicker on the crust but there could be blurred lines here so let’s proceed.
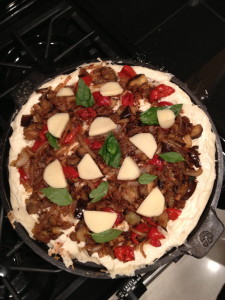
BASE LAYER: Then you have the cheese vs. sauce or olive oil assessment. I call this the base layer since it seems to set the tone for how the rest of the topping architecture. With the increase in food allergies and culinary progression pizzas without cheese is no longer a cardinal sin. It is now more common to find pizzas and flatbread without cheese, topped with a traditional tomato sauce or simply brushed with olive oil. This too can be a blur in the pizza or flatbread debate, so it seems that we must proceed to the last criteria.

IMG_3603TOPPINGS: Now we have the “finitura” (finishing touch in Italian), the toppings.  If you saw broccoli on a pizza you might do a double take and wonder if your mother was in the kitchen sneaking in your daily dose of veggies. But on a flatbread, you wouldn’t think twice (I would think?) It seems that a flatbread is a trendy version of a pizza? Maybe we just needed to change the name and feel better about eating pizza with our wine, a ritual that is not only perfectly acceptable but the highlight of my week when it occurs!
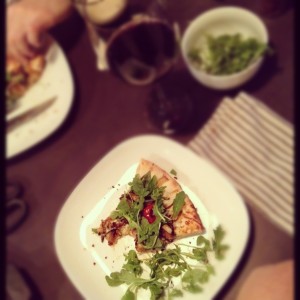
So my verdict: Flat bread is to pizza what sliders are to burgers…an open interpretation depending on the chef’s whim and creativity.

With that, I give you my current recipe for the crust, now the flatbread or pizza question is up to you to decide! BON APPETIT!!

IMG_3398

Homemade Pizza

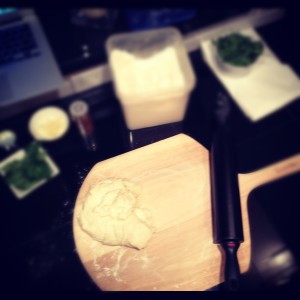
Prepare the dough according to the directions below

IMG_3604


Cast Iron Pizza Stone
Clean Kitchen shears for cutting
Pizza Paddle (super hand for transfering to the already HOT cast iron!)

Toppings
Onion, sliced
Garlic, thinly sliced or minced
Eggplant, cut in strips or wedges
Peppadew, cut in half out of the jar (I like the flavor of this brand)
Cracked pepper
Fresh or dried parsley
Fresh Basil
Shredded Mozzarella
Scamorza Mozzarella, sliced into medallions
For Serving: Balsamic, olive oil, red pepper flakes, and arugula

Sprayed the cast iron before and pre-heat in the oven on “broil” for 15+ minutes then turn down to 475
In the meantime, chop and saute the onion, garlic, sliced eggplant and peppadew with parsley and cracked pepper on the stove.
When the cast iron is ready dusted it with flour and assemble the pizza right on the pizza stone. It will be HOT and a little hard to spread out the dough so be careful!

One light layer of shredded mozzarella, then add the sautéed onion, garlic, eggplant and seared peppadew.
Add fresh basil then the medallions of Scamorza cheese and another light layer of Mozzarella.
Cook at 475 for 8-12 minutes, until edges started to bubble up and show signs of crisping.
Remove and cut in the traditional style, with clean kitchen scissors.
Serve with balsamic, olive oil, red pepper flakes,  arugula and plates/cooking.

Notes-
We loved that the cast iron kept the pizza warm even 20+minutes after we took it out of the oven!
I used too much of the dough so the crust was too thick so less dough next time and spread the topping to the outer edges.
It was perfectly seared on the bottom and the dough didn’t stick to the cast iron pan as we expected it would, it actually slid right off.

IMG_3607Olive Oil Dough
Makes 4-1 lb loaves
Originally found on http://www.mybakingaddiction.com/no-knead-pizza-dough-recipe/

Ingredients:
2-3/4 cups lukewarm water
1-1/2 tablespoon granulated yeast (2 packets)
1-1/2 tablespoons Kosher salt
1 tablespoon sugar
1/4 cup extra virgin olive oil
6-1/2 cups unbleached all-purpose flour

Directions:

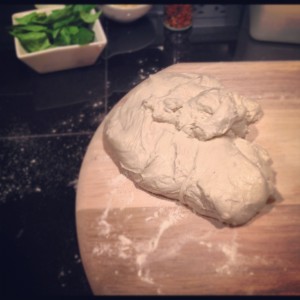
In a 5 quart bowl mix the yeast, salt, sugar, and olive oil with the water without kneading. Think of the motion of a dough hook working the dough and mix that way. You might need to wet your hands a little and mix by hand but I found a spatula to do just fine. (Notes: Original recipe called for using a standing mixer fitted with the dough hook attachment but I don’t have that so I went with the old fashion handmade tactics).

Transfer dough into another large bowl. The dough will be a little sticky but will stick together pretty well. Cover (not airtight), and allow to rest at room temperature until dough rises and collapses (or flattens on top), approximately 2 hours.

The dough can be used immediately after the initial rise, though it is easier to handle when cold. Refrigerate in a lidded (not airtight) container and use over the next 12 days.

If you like more of the deep dish style, and care to explore out of the pizza stone category, here is a cool recipe I found on Flourishing Foodie for Cast Iron Pizzas!


.


Ratatouille

Antigüedades Bar (Sevilla, Spain)

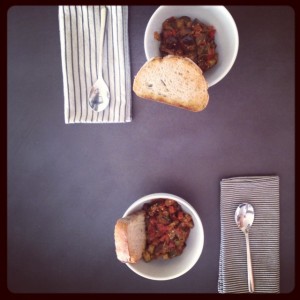
The obsession with Ratatouille started on our recent trip to Seville, Spain. We decided to meander the alleys and streets for the 30 minute walk from our flat to the city center . Bar Antigüedades caught my eye as an adorable little café from the exterior (of course…look at the photos!) and reading the menu board when we passed I made the mental note to come back for lunch. We did, and loved the Ratatouille SOOO much that we returned for dinner and had the exact same meal! It was so warm, hearty, tasty, flavorful and just… well… cozy! We ordered a bowl and cleaned and had I not ordered an actual meal I would have ordered another Ratatouille! As it was I had to refrain from licking the bowl since 1. it’s rude to do in public 2. we were sitting outside and I couldn’t sneak it 3. I’d be pegged as a ridiculous American for SURE! Three sadly legitimate reasons why I had to refrain from one last taste of the very miniscule remains of wonderful veggies. I vowed to make it once we got home.

Sevilla...where it all began
Sevilla…where it all began

Of course, in order to make the dish I first had to find 15 recipes, make an entire Pintrest board devoted to my found ratatouille recipes (yes I’m that ridiculous organized..or maybe obsessive?). Of course I had to print out each recipe, lay them side by side, and pour over each minute difference and detail deciding which was the perfect recipe. Which was possibly closest to recreating the most incredibly wonderful cozy meal. My perfection was finally challenged by my need to make a grocery shopping trip and get ON with the actual MAKING of the dish so I picked one to use as a guideline because, and yes I’m a total girl, the picture looked the yummiest.  The recipe that I landed on was posted on the blog A Lady in France.

A brief history of Ratatoulie. It is usually served as a side dish but can also be a main, which is how we eat it with some crusty potato bread. For protein, I usually poach an egg or sprinkle some cheese on the top.

The hardest part of this meal is letting it cook those last 30 minutes without devouring it from the pan! The house starts to smell of wonderful cooked vegetables and herbs.

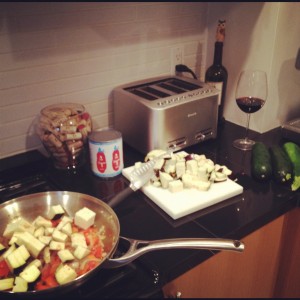
Ratatouille Prep
Ratatouille Prep

Tips:

  • The Pan: be sure to use a large deep pan so that the heat and evenly distribute and cook
  • Saute each round of veggies VERY well! Once you add the tomato it’s really just melding of the flavors and not really “cooking”
  • Don’t go light on the canned tomatoes! This is what makes or breaks the consistency of the Ratatouille. If it seems like the stew is a bit dry add another can of tomates or a 25 oz jar of basil marinera sauce. You’ll realize the consistency within 5-8 minutes and you really need to add within the 5-8 minutes so the consistency and the flavors are able to meld correctly.
  • Cook all the veggies without a lid until you add the tomatoes. The veggies really need to breathe and have the heat to saute up.
  • Liquid: keep stirring to move the liquid around and assure that it’s not too liquidy. If it feels like it’s becoming more soupy than thicker stewey, turn the heat up  and if it’s sticking to the pan turn the head down a bit.
Ratatouille
Ratatouille

Cucina de Kate Ratatouille

½ large onion
2 tsp (heaping) minced garlic
drizzle of olive oil (to cook the onions/garlic)
1 red pepper, chopped
1 good sized eggplant, cut up in to chunks
4 small zucchini, cut up into chunks
1 ½ tbsp. herbs de province
few fresh basil leaf’s
1 ½ c. diced canned tomatoes (I sometimes add a 25oz jar of 365 tomato basil marinera sauce)

Instructions

  1. Heat oil in your large pan while you chop the onions and garlic. Cook until translucent.
  2. Chop and add peppers. When they start to look a little cooked, chop and add the eggplant in medium chunks. I like them a bit larger so they retain some form as opposed to getting a bit more mushy when they’re smaller.
  3. Keep stirring the veggies in the pan until they eggplant starts to look a little cooked, then chop up and add the zucchini. Again, I liked keeping my chunks a bit larger to add to the stew-type texture and avoid a must consistency.
  4. Once the zucchini starts to look like it’s a little cooked, add the herbs and chopped basil and assure it’s all mixed together well. Then add the tomatoes. At this point you’ll have to keep an eye and stir frequently but you can multi-task and just remember to stir every few minutes.
  5. Keep stirring and cook for another 30 minutes (or so) until all the vegies are tender…and of course taste along the way!

Serve with a protein (egg or meat) and some rustic bread (or omit if you’re gluten-free)


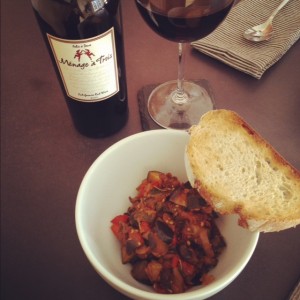
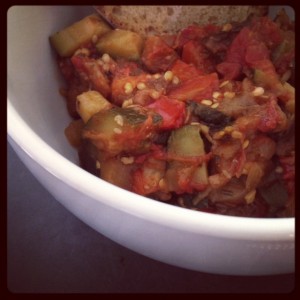
Ratatouille for Dinner
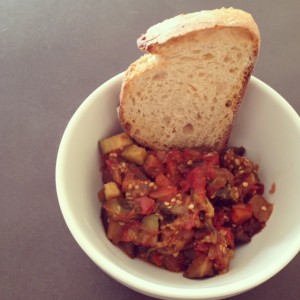
Ratatouille with Rustic Bread


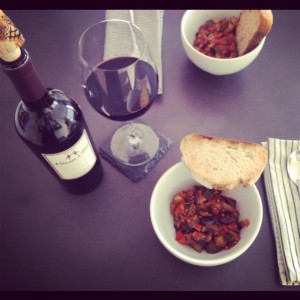
Dinner Table of Ratatouille with Rust Bread and Menage a Trios Red
Ratatouille with Rust Bread for Dinner
Ratatouille with Rust Bread for


Provençal ratatouille

Simple Tapas Dinner

Everyone has had those days where you’d rather gnaw your own arm off than cook. No matter how much you usually adore it, there is just no inspirational energy left in your body. Those types of days pose a special problem for me because, surprise surprise, I’m picky. I like my food how I like it and when I want it and I want to use fresh ingredients. If you opened my freezer you wouldn’t find any Hungry Man dinners or Lean Cuisine Steamers.

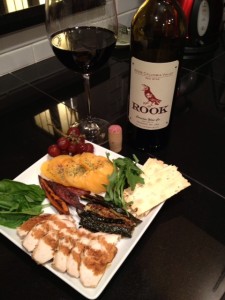
But alas, last night I just did NOT want to cook and was so thankful that I’ve learned to plan ahead and stock the kitchen! It’s NOT hard to eat delicious enriching and nutritious meals, even on those days that come hell or high water you are NOT picking up a pan! Below is an illustration of a simple, healthy meal that I literally “threw” together from what was in the fridge.

Those are the days I’m thankful that it is so easy to eat wholesome food if you just plan ahead a bit and stock GOOD quality ingredients. Above is a little plate of broiled zucchini and yams, sliced heirloom tomatoes with cracked sea salt and pepper dusted with dried parsley, a few grapes, fresh basil and arugula and some balsamic drizzled grilled chicken breast and a few rosemary crackers. We recently tried a  salad at Bisato in Seattle (my review posted here) with 20 year aged balsamic dressing and it was INCREDIBLE! We wound up ordering another of the salads and that weekend went on a hunt to Pike Place to find a bottle! Stocking your pantry with fresh ingredients and using quality oils/vinegar and spices really does wonders for sprucing up a meal! Even a simple meal like chicken and veggies becomes a work of art with the right flavors!

Shown in this picture at left clockwise from the wine 🙂 is….
Rook Wine
La Panzonella Rosemary Croccantini (Whole Foods stocks them)
Oven Grilled Zucchini
Baked pepper chicken with 20 year balsamic drizzled over the top
Fresh Basil
Oven Grilled Yam Fries
Heirloom tomatoes with fresh cracked salt and pepper
Red Grapes

How do you spruce up a simple meal?