Krusteaz Gluten-Free Giveaway

January is the month of giveaways over here and it’s awesome! Score for YOU! Earlier this week I posted about my AstroTwins giveaway so if you haven’t had a chance to enter yet you still have a little bit of time before it’s over! This weeks giveaway is back to a food focus and we all have resolutions and goals that we set in January. If you resolution is to incorporate more Gluten-Free living into your diet are you in LUCK! I’ve partnered with Krusteaz to do a giveaway of the same prize pack that they sent me when I wrote my The Gluten-free Gobble Waffle recipe using the gluten-free buttermilk pancake mix! My entire family is still raving about those waffles and how amazingly delicious they were! Trust me, you’ll want to get in on this giveaway! You can click THIS link to learn more about the mixes, find recipes and a retailer near you.

Screen Shot 2015-01-04 at 6.59.44 PM

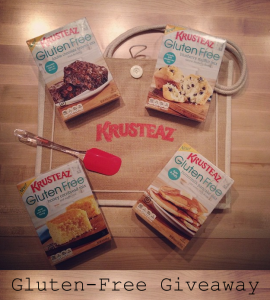
You can win this Krusteaz Prize:

  • Gluten-Free Buttermilk Pancake Mix
  • Gluten-Free Honey Cornbread Mix
  • Gluten-Free Double Chocolate Brownie Mix
  • Gluten-Free Blueberry Muffin Mix
  • Krusteaz Tote
  • Krusteaz Spatula

Enter Here:

Strawberry Basil Bread {Gluten-Free}

IMG_7300Updated Post: When the mister starts his taste-tester review with “I already convinced myself that I would NOT like this, but, it’s actually AMAZING!” you get pretty thrilled. And yes, he did speak in ALL CAPS for that last word, just in case you were wondering if I embellished the story at all. “And you used the bullshit {aka Gluten-Free} flour for this?” he asked. “Yes, I sure did”. To which he responds: “It’s not ridiculously sweet, and if you hadn’t told me there was basil in here I would have never known. This is REAAAALLLLY good!” Now that, ladies and gentlemen, is a seal of approval on a recipe if I’ve EVER heard one! Updated recipe below and images are my own! Enjoy!!!

————–

Hello friends! I’m so sorry it’s been ages since I posted and we’ve been stuck on Blueberry Kombucha and Summer Sangria for… let’s just leave it at a “while”. Starting a new job sure has a way of changing nearly everything about life as you know it! I’ve been in my new job about 4 months now, and loving it. I’m also loving having a little bit of mental brain power when I get home in the evening, which has been lacking for about four months now. Between not having mental energy and somehow just really busy, I’ve found a little space where I simply just decide to relax a little instead of burning the midnight oil EVERY night. Hmm, guess you can teach a moderately aged dog a new trick hey? Needless to say, writing on the blog has been sitting on the “to do” list for a while and that list has been taking a little rest and relaxation time as well. For those of you still burning the midnight oil every single night: you should try the whole relaxing thing every now and then. It’s actually quite nice once you start to get used to it. And to my mother and father who I’m convinced are my only readers, you were right. J

Like many 9-5 worker bees, evenings usually consist of getting home after work, and if I’m good and motivated, the gym. Then, I’m off! Figuring what to cook up for dinner, thinking about packing both lunches for the next day, triage height of the laundry pile, and trying not to see the “to do” pile of papers and other things that have been taking a little relaxation break which has whittled out a few of them but there sits the remainder that still, at some point, to get done. We worker bees cherish our weekends to sleep in, brunch, relax, and yet still get to all the chores that we push-off during the week. My push-off pile takes the form of a pile of papers tucked into my shelf in the closet. On the top of that pile is deliciously summer recipe for strawberry basil bread that I decided this past Sunday, needed to become a real, baked, edible thing.

That’s not to say I’ve baked it. Because, well, I haven’t. You know that bit about the road to hell being paved with good intentions and all? That road never met a week of long work-days and a weekend of 80 degree and blindingly sunny Seattle days! In addition, when I purchased the basil on my few hours of shopping and running errands this weekend, I did have the best intentions of using most of it for the bread and then looked next to the basil and you know what was staring up at me? Sitting there looking ever so plump and inviting were gorgeous heirloom tomatoes. Somehow, four of them jumped into my basket, as did rosemary crackers, mozzarella, and a bottle of delicious Italian Chianti. Can you guess how much basil was left for baking the bread? I bet you can! I had even picked up extra strawberries this weekend so I could bake! Well, the sunshine and Caprese won over the baking, and I’ll pick up more basil at Pike Place tomorrow after work and bake this week.

The recipe was passed along to me by a friend who’s gluten-free. I’ll be making the recipe with Bob’s Red Mill Gluten-Free flour so I can share it with her but you can use regular flour if you prefer. I’m also I’m going to sub out the heavy cream because 1) I feel compelled to somehow tinker with and personalize every recipe possible, and 2) heavy cream just seem so “Fall-ish” doing without it makes it feel like a more a summer bread. Hey, I never claimed to be logical!  Other than that the recipe is pretty straight forward and a little out of the realm of what I would usually bake so I’m pretty excited to give it a go! I’ll be sure to update this post with my own pictures and a description of how it turns out!

Strawberry Basil Bread
Adapted the Recipe By Rebecca Franklin posted on About.com
Prep: 10 min | Cook: 50 min
Yield: 1 9×5 Loaf

Ingredients:
3 cups Bob’s Red Mill Gluten-Free flour
1 1/2 cups organic granulated sugar
1 teaspoon baking soda
7 ounces plain Greek-style yogurt + 3 tablespoons
3 eggs, brought to room temperature
1/2 cup extra virgin olive oil
1 teaspoon vanilla extract
1 tablespoon chopped, fresh basil leaves (about 4 large leaves)
12 ounces fresh, washed, chopped strawberries

Preparation:

Pre-heat the oven to 350F and prepare a 9-inch by 5-inch loaf pan with a light coating of vegetable oil spray.

photoIn a large bowl, stir the flour, sugar, and baking soda together. In a separate bowl, lightly beat the yogurt, eggs, oil, cream, and vanilla together until the mixture is smooth. Add the wet ingredients to the dry ingredients and stir until the batter is nearly smooth with only a few, small lumps remaining. Gently fold the chopped basil and fresh strawberries into the batter.

Spoon the strawberry-basil batter into the prepared loaf pan and bake it for 45 to 55 minutes, until it tests done in the center.
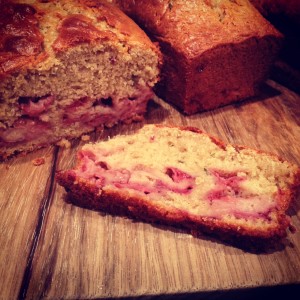
photo 2Allow the bread to cool in the pan for 15 minutes before loosening the sides and transferring it to a wire rack to continue cooling.



Vegan Blueberry Lemon Poppy Seed Bread

It’s 3:15 am… a time of… well not really day OR night… it’s a time no person should ever experience let alone when they’re SO worn out and sleepy all they want to do is go back to sleep. I’ve you’ve been following A Byte of Life, you’ll have read the post on Spain (also found here) which was a MOST incredible trip! We were seriously debating how long we could just fall off the grid and NOT come home! But alas, common sense or something to that nature won and we got on the multiple planes home. Oh hey jet lag, how are you? Are YOU the reason I’m up at 3:15am!?

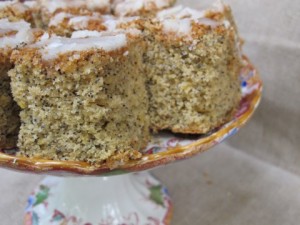
Turning to my tried and true comfort, I started googling for recipes. If I can’t sleep I may as well bake right!? My love for lemon poppy-seed is almost as strong as my love for a good bottle of red wine, and thankfully, the mister LOVES a good lemon poppy-seed ANYTHING! The request was made and I had a mission ahead of me: your mission, should you choose to accept it, is to create a delicious lemon poppy-seed baked good that’s not super sweet and melts in your mouth Well, now that’s a fun challenge!

Lemon Blueberry Poppyseed Bread

Vegan Blueberry Lemon Poppy Seed Bread
—-
1/4C canola oil
1/4 C  honey
1/4C applesauce
1/4 C soy milk
zest & juice of 1 lemon
—-
2 C Bob’s Red Mill Gluten-Free flour
3/4 tsp baking soda
1/2 tsp salt
2 tbs poppy seeds
1 C fresh blueberries (put in freezer for about 30 minutes before using)
—-
Pre-heat oven to 375
Combine the oil, applesauce, soy milk, honey , lemon juice and zest in a bowl
Sift together the flour, baking soda and salt. Add the poppy seeds and mix to combine.
Add to the wet ingredients and incorporate
Fold in frozen blueberries. Note that the batter will be thick
Place into a greased loaf pan, sprinkle raw sugar on top
Bake at 375 for 35 minutes(turning once half way through cooking)

Tasting notes:
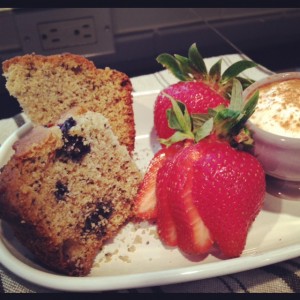
It’s not your typical fluffy, white flour, white sugar lemon loaf you’d get at Starbucks. This is a more rustic bread and it was quite good! The gluten-free flour lends to a bit more of a mealy texture. Next time I’d add a bit more lemon juice. It’s not a sweet bread at all, so you’d need a lemoncello glaze, or blueberry jam/lemon curd/clotted cream to make it more pastry-ish.

All in all, it’s a good solid rustic breakfast bread…and…I better go taste another slice before posting this review 🙂

Donuts: Vegan & Gluten-Free

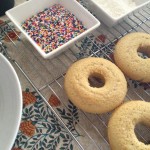
IMG_1701Everyone has a hankering for a donut from time to time. Yes, this includes the healthiest of people! Now, if you’re silently saying, “Why no, I can resist a fluffy, melt in your mouth, little bit of heaven pastry goodness” then 1- you’re either lying or crazy or 2- your just bitter because you’re gluten- intolerant. Well, harbor bitterness NO longer my friend! We have a family member that is gluten intolerant and on his last trip to see us I had the itch to bake.On my recipe hunt, I found QUITE a few recipes for donuts, and once I got my drooling problem under control, created a Pinterest board to keep all my lovely donut finds in one place. But, as I started clicking through the recipes I found that many of them were fried, used gluten-filled flours, and called for  xanthan gum or other additives.

coffee 1While I’m a FIRM believer that deserts should never be desecrated and demoted into the “light” or “non-fat” categories and should remain their butter or chocolate anchored selves, I do also believe it moderation. So, I set out to focus on the baked donut recipes and FINALLY found one that didn’t call for xanthan gum or some other additive that I can’t pronounce or state with confidence what exactly it is. The gal over at Vegan YumYum had a delicious recipe for mini-baked donuts which called for regular flour so I made a few alterations and gave it a shot! I also did my research on baked donuts, and decided to go with the affordable Norpro 6-Count Nonstick Donut Pan from Amazon and purchased a 4-pack of the Bob’s Red Mill All-Purpose Gluten-Free Baking Flour as well. With a few toppings gathered and the ingredients for the glaze in hand, I was ready to BAKE my Vegan* gluten-free goodness! *In order to make these donuts vegan, use the egg replacer in the recipe instead of the egg. 

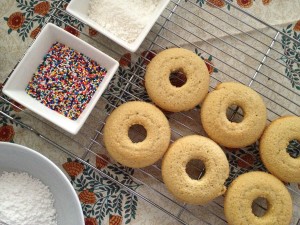
display 3The donuts turned out to be a success, both men in the house had seconds and my gluten-loving one didn’t complain about the taste or texture. They are not going to be a complete replacement for the real deal full butter and flour style of donuts, and if you prefer a good fried old fashioned donuts beware that this will not replace that hankering and you better go get one..or two immediately! The texture was a bit different but the taste, especially buy the time the various toppings and glaze were applied it all tasted like a delicious donut! I followed the glaze recipe on the same website, and used sprinkles, shaved chocolate, coconut and cinnamon as toppings! You can take a glance at all our delicious toppings below

What’s your favorite donut topping?

Mini Baked Donuts
Recipe adapted from Vegan YumYum
Yield: Her recipe makes 20 mini-donuts but since I purchased the  large donut pan, the recipe wound up  yielding 10-12 donuts… I can’t remember because we were chowing on the  first batch  while the second batch when in!!!

Dry Ingredients:

1 Cup Bob’s Red Mill Gluten-Free Flour
1/2 Cup Organic Sugar
1 1/2 tsp Baking Powder
1/4 tsp Salt
1/4 tsp (scant) Nutmeg
1 tiny pinch or shake Cinnamon

Wet Ingredients:
1/2 Cup Soymilk
1/2 tsp Apple Cider Vinegar
1/2 tsp Pure Vanilla Extract
1 Egg (Or you can use Egg Replacer for 1 Egg)
4 Tbs Earth Balance

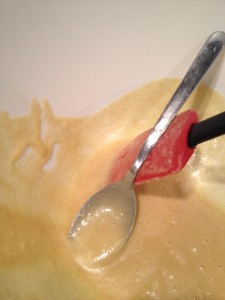
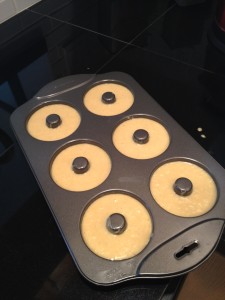
batterready for ovenPreheat oven to 350º F. In a large bowl, combine dry ingredients with a whisk to mix thoroughly. Combine wet ingredients in a small sauce pan over medium low heat and mix until earth balance is melted. This mixture should NOT get too hot, you should be able to stick your finger in the mixture. It should feel slightly warm. Add wet to dry and mix until just combined. It should form a very soft dough. Using a tablespoon measure, scoop out dough into your un-greased nonstick donut pan. If you’d like “pretty” donuts, Smooth out the top of the dough with your fingers.

As you can see, the dough sits just below the rim. If you over fill, your donuts will come out looking like it has a little muffin top. Bake for 12 minutes. They should not be browned on top, but a tester will come out clean. Invert hot pan over a cutting board or cooling rack to release donuts. Allow to cool completely before decorating.
Glaze with Sprinkles

1/2 Cup Powdered Sugar (lump free!)
1 Tbs Soymilk
Bowl full of sprinkles (aprox. 1/3 cups

Whisk soy milk and powdered sugar together. Dip the “bottom” half of the donut (the side with the nicer shape) into the glaze, let some drip off, then dip glaze-side down into sprinkles. Transfer to a wire rack that has been set on top of some parchment paper. The excess glaze will drip through the rack onto the paper for easy cleaning later.

Vegan Almond Biscotti


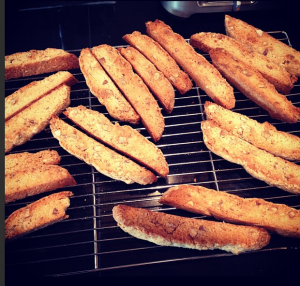
Screen Shot 2013-05-31 at 8.40.03 AMI love biscotti. It’s crunchy, flavorful with barely a hint of sweetness, and is convenient consume. Paired it with a foamy cappuccino it’s one of the most amazing afternoon treats on cold afternoon. It’s almost summer and this crazy gal is writing about cold days and biscotti? Well, up in Seattle the spring is a time a taunting. It will be gorgeous, no jacket and sun glasses weather for a few days then dissolve into a week of grey skies and soggy drizzle. The up-side is that it’s not freezing like it is during the winter.
When it’s grey or cold out, I get a baking itch. In high-school I developed a dairy allergy, which made baking a much harder task. This was before food allergies were really main stream. It proved quite a task to learn the alternatives for cooking and baking without dairy. I’ve long tweaked and updated different recipes, but this one has been a tried and true biscotti recipe for years.

So, while you may think that biscotti and baking are reserved only for the fall or winter time, but you can personalize this recipe for whatever season you crave biscotti. Give this recipe a spring twist and sub the nuts for poppy seeds and add a little lemon!

Biscotti Vegan Almond Biscotti

Ingredients
3 cups all-purpose flour
1 tablespoon baking powder
1/2 teaspoon salt
1 1/2 cups unbleached cane sugar
3/4 cup smooth unsweetened applesauce
1 -3 tablespoon vegetable oil
 (I used one tbsp apple sauce)
1 ½ teaspoon vanilla extract
 (can also use 1 tsp each vanilla and almond)
1  cups almonds, chopped & toasted

Directions

  1. Pre-heat oven the 325°F
  2. Chop and toast the almonds and put them in the pre-heating oven to toast
  3. Lightly oil two cookie sheets.
  4. In a large bowl, whisk together the flours, baking powder, and salt.
  5. In a medium bowl, whisk together the sugar, applesauce, oil (1 TBS for a hard biscotti, 2-3 TBS for a softer biscuit), and extract.
  6.  
Stir the sugar mixture into the flour mixture, add the nuts
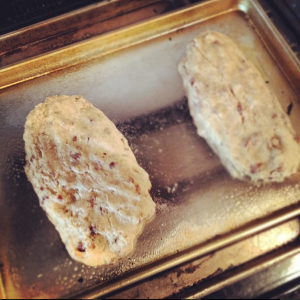
  7. With floured hands, shape the dough into two 3-inch wide “logs” about 3/4 inch thick, with the ends squared off and place on cookie sheets
  8. Bake the logs for 25 minutes.
  9. Remove the pans and reduce the oven heat to 300°F.
  10.  
Cool the logs on a rack for 15 minutes.
  11. Cut the logs carefully with a sharp bread knife straight across into 1/2 inch wide slices.
  12. Place the slices cut side down on the cookie sheets
  13. Bake 5-10 minutes, or until golden on the bottom then turn slices over and repeat on the other side.
  14. Cool on racks, then store airtight for up to two weeks.

Variations

  • Use the original recipe’s method -1 tbsp oil instead of apple sauce which will change the consistency a bit
  • Sub almonds for different nuts (Pistachio, Walnut, hazelnut), chocolate chips, currants, dried cranberries
  • Try cutting the sugar
  • Use 1/2 whole wheat flour and 1/2 white
  • Dip the biscotti in white or dark chocolate for a sweet treat

Blueberry Streusel Muffins

photo 1

“I taste… baked goods, and a bit of cream. Crispy warm blueberry notes at the start and a soft lingering finish. A hit of cinnamon. Nice tannins. Pairs well with fruit” he said as he finished his bite and pops a half strawberry in his mouth with a smile.

This is the verdict from the master muffin taster (and wise guy!) himself on this mornings baking experiment. I couldn’t sleep last night so early this morning I decided to throw in the towel and let the day start. Apparently my body wanted to see what it was like to live a day in the life of a true baker: up at the crack of dawn in the kitchen among the aromas of creamed butter and cinnamon baking into fresh morning goodness for those lucky enough to sleep until a decent hour of the morning.
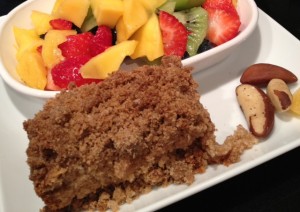
photo 5

The mister has been asking me for months to make blueberry streusel muffins and this was the week. It was even on my calendar with a few recipes that I’d “Pinned” on my Pinterest Muffin Board. Yep, I’m that obsessive planner that I actually schedule making muffins in my calendar.
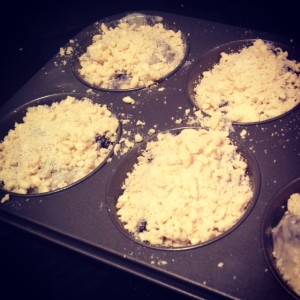
One thing that I think everyone can agree on is that the muffin top is THE BEST PART of the muffin. Right? Okay, if you answered “No, I think the bottom is actually tastier” you can just stop reading now because that’s ridiculous! I’ve been researching how to make the nice big crispy muffin tops and tried on this recipe. (More attempts in future blog posts!). I’m learning that it’s a mixture of batter consistency and HIGH heat. For this attempt I used some tips form the blog Meat Free for Three from her “Perfecting the Muffin Top” post. She uses a banana batter and I wanted blueberry muffins so I used a muffin and Streusel recipe from A Taste of Home and have a few personalized notes now that we’ve made the first batch.

photo 2I made a few alterations to the recipe below after the final muffin tasting was complete and I had the tasting notes back from the judge. The muffin tops were crispy and billowy and I hoped they would be! The larger tray turned out just fine for baking the interior and not burning the top which I was a little worried about. The batter might be a little too thick for the muffin top to get super large on the larger 6 muffins so maybe I’ll see if the results are different when using a 12 muffin tray. The consistency of the muffin and it’s flavor were nice but a little too sweet for us so I’ll cut the white sugar and use brown sugar and honey next time. Also, we like oats in our muffins so I might try substituting 1 cup old fashioned oats for 1 cup of the flour.

Please leave comments below on your favorite muffin techniques or any tips you have for “the perfect muffin top”, streusel recipes or bran Morning Glory muffin recipes. Yes, I realize that the Bran Morning glory muffin request came a little out of left field but those are MY two favorite muffins and I’m still on the search for a great recipe that combines them both!

Bon Appetit!

Blueberry Streusel Muffins
Makes 12 regular or 6 large muffins 

Ingredients
1/4 cup butter, softened
1/3 cup sugar  honey
1 egg
1 teaspoon vanilla extract
2-1/3 cups all-purpose flour
4 teaspoons baking powder
1/2 teaspoon salt
1 cup milk
1 cup fresh or frozen blueberries
Note: If using frozen blueberries, use without thawing to avoid discoloring the batter.

Streusel:
1/2 cup sugar  1/4 cup brown sugar
2 tbsp 1/3 cup all-purpose flour
dash of ground cinnamon
2-3 tbsp cold butter, sliced

Directions

  • Pre-heat Oven to 500 degrees (don’t worry, you won’t be cooking them at this temp! This is just to get the oven super hot for the muffin tops!) and either grease your muffin pan or insert the muffin liners
  • In a large bowl, cream butter and sugar together. Beat in egg and vanilla and mix well
  • In a separate bowl, combine the flour, baking powder and salt
  • Alternate adding the flour mixture and the 1 cup of milk to the to creamed mixture making sure you mix well but don’t over work
  • Fold in blueberries
  • Turn the oven down to 400 degrees
  • Fill prepared muffin tray 2/3 full
  • Make the  streusel in a small  by combining the sugar, flour and cinnamon then cut in butter until crumbly then sprinkle over muffins
  • Bake at 400° for 30-35 minutes or until tops are browned and a toothpick inserted to the center of the muffin comes out clean
  • Cool for 5 minutes before removing to a wire rack

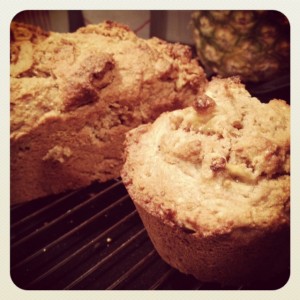
Banana Walnut Bread (gluten-free, dairy-free)

There is something about the smell of fresh baked banana bread that warms the heart and soul. “Summer”, and I use the term loosely, has started to creep around Seattle. Today is a balmy and overcast 70 degrees but whenever it’s grey I always get the cozy urge to bake. This weekend, we’re adventuring up to see my family and while I’m baking the bread for both my roomie and his mum who’s visiting us, I’m also baking this to surprise my dad.

Since I was a little girl, whenever there were bananas that were even one day past perfect my father would take my hand and guide me to the fruit bowl and say “Kate, you know what THAT means right!? … BANANA BREAD”!!! I always loved baking this for him, and filling the house with the warm smells of bread and seeing his joy as I would pull that loaf out of the oven, hovering as all good taste tester seems to do, barely waiting for it to cool before cutting thick slices and serving it up to one very happy man!

Like clockwork, whenever the weather in Seattle is grey, ahem most of the year, my ache to bake exponentially increases. Even if I don’t particularly WANT a baked good at that moment, sacrilege I know, I just can’t calm the urge until I’m mixing up the dough and filling the house with the smells of a bakery then fending off the taste tester as I try to pull it out of the oven.

Truth be told, I simply LOVE baking! For myself and more so for others to enjoy . While I can’t have you all in my kitchen this moment eagerly awaiting the “ding” of the kitchen timer indicating that fresh baked goodness is ready to being it’s futile attempt to cool before being devoured, I CAN share with you by posting this tried and true recipe!

This recipe yields one large loaf or three small individual loaves. Personally, I prefer to use smaller individual size loaf pans and because they’re easier to gift and look cuter on a plate (true story!). I’m not allowed to freeze bread in our house but these loaves freeze quite well for future rainy day enjoyment or to give as a hostess gift for a last minute dinner party! They also make great muffins!!

My loaves are in the oven now so here’s a sneak peek of THIS batch. (Photos below are previous completed batches)

Banana Walnut Bread
Banana Walnut Bread


Banana Walnut Bread
From:The Good Housekeeping Cookbook

Ingredients

  • 1 3/4 c. flour (can use Whole-Wheat or Gluten-Free)
  • 2/3 c. white sugar
  • 1 tsp. double-acting baking powder
  • 1/2 tsp. salt
  • 1/4 tsp baking soda
  • 1/2 c. shortening
  • 1 cup mashed bananas ( 2 ripe bananas)
  • 1 small banana, cut into chunks
  • 2 eggs
  • 1/2 cup walnuts (my own addition)
  • 1 fresh orange, squeezed (my addition)
Banana Walnut Muffins and Bread

Directions

  1. Pre-heat oven to 350 degrees F
  2. Grease and flour ( or non-stick spray) your baking pan(s)
  3. In a large bowl, mix the first 5 ingredients
  4. Cut in the shortening using a pastry blender (or two knives scissor-fashion) until the mixture resembles coarse crumbs
  5. Stir in the remaining ingredients until just blended
  6. Bake in pre-heated oven as directed below:
    Large loaf pan: 55-60 minutes
    4 Individual Loaf pans: 30-40 minutes
  7. Cool in pan on wire rack
  8. ENJOY!!!

Vegan Poppy Seed Cake: Which Cake Will Win?

I’m home sick today and completely miserable. Tea, tissues and my fluffy duvet are my best friends. Always the busy body, it’s really hard for me to sit and be calm for any amount of time. Now, as my friends and family read this they’ll be saying something along the lines of one of two thought steams:
1. DUH!!!
2. The first step to recovery is admitting you have a problem!

Hehe.. yeah yeah… love you guys too!

With quite a few family birthday’s coming up I consider that an excellent excuse, er, opportunity to bake a few cakes! While perusing my instagram feed earlier today, I came across a LOVELY picture from one of my favorite food photography blogs; “Le Chou Sauvage” . It was for vegan lemon poppy seed cake and it was just too delicious looking!

Lemon Poppy Seed Cake: Captured by Le Chou Sauvage on instagram

SEE WHAT I MEAN! Are you drooling now or what!? But thanks to the picture above all I’ve been thinking about all afternoon, between cups of tea and blowing my little nose (too much info?!), and I had to go out to the blogosphere and find at least 15 recipes for a vegan lemon poppy seed cake that I can personalize and try!

Vegan/ dairy-free baking has long been a hobby of mine. When I realized I was allergic to dairy it nearly ended me… no…no more scones and muffins!? There is little more in life than a truly delicious muffin or scone homemade fresh out of the oven with a side of fresh fruit and a good cup of coffee. I digress… and wish I was enjoying that right this moment!

Well, jumping into vegan cooking can be a rough transition because the eggs and butter, which are both excluded from the vegan diet,  in recipes act as a binding agent to hold all the ingredients together as well as providing texture and flavor.  With vegan cooking and baking those qualities still need to exist in a baked good and there are many alternatives. Keeping with my tenants of mindful eating, try to stay away from processed foods as much as is feasible and since I’m really only dairy-free and not vegan I do include eggs in my diet. If you’d like to understand a bit more of the science behind how ingredients work in a recipe, as well as outlining a few alternatives depending on your dietary preferences and restrictions check out the blog, Real Sustenance: 101 in Baking.

Finding recipes that are vegan or dairy-free without using xanthan gum or some other processed replace thrill me! They truly make me so excited!

After a few cups of tea and some perusing I came upon the two recipes below and will (oh “darn”) have to try out both to see which wins! Please weigh in on which has your vote and I’ll update this with a review of each cake and updated pictures of our taste testing!

——————————————————————————————————————————————————————————-

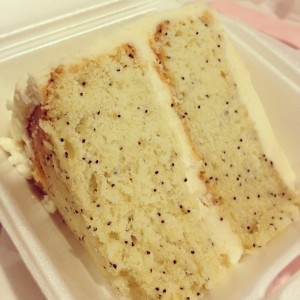
Vegan Poppy Seed Cake
Recipe from blog: Feed Me I’m Cranky 

Picture from Feed Me I'm Cranky
Picture from Feed Me I’m Cranky

Ingredients

  • 3 cups all-purpose flour
  • 2 cups vegan sugar
  • 2 teaspoons baking soda
  • 1 teaspoon salt
  • 2 cups water
  • 3/4 cup canola oil
  • 2 tablespoons vinegar
  • 2 teaspoons almond extract
  • 1/3 cup fresh lemon juice
  • 1/4 cup poppy seeds

Directions

  • Preheat oven to 350 degrees and spray a 9×13 baking pan with non-stick spray.
  • Mix together first four dry ingredients, then add in wet ingredients.
  • Make sure you mix thoroughly, then fold in poppy seeds
  • Pour mixture into pan and bake for 40 minutes. Check the center with a toothpick to make sure it comes out dry (that means done and voila!)
  • YUM!

Frosting: She used a favorite butter cream frosting recipe from The Vegan Chef, here, but substituted one tablespoon lemon extract for the two teaspoons vanilla.

——————————————————————————————————————————————————————————-

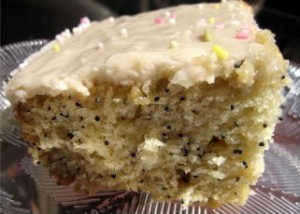
Lemon Poppy Seed Cake
recipes from blog: v:gourmet

picture of vegan lemon poppy seed cake from v:gourmet

ingredients
2  cups pastry flour
2 cups all-purpose flour
1 tbsp plus 1 tsp baking powder
2 tsps baking soda
1/3 cup poppy seeds
1 tsp sea salt
1/2 cup lemon juice (juice from approx 2 lemons)
1/3 cup water
1 cup apple cider or apple juice
1 2/3 cups maple syrup
2/3 cup olive oil or sunflower oil
2 tsps vanilla extract
4 tbsps lemon zest (zest from approx 2 lemons)
1 cup super fine sugar
Juice from 1 lemon

  • Preheat the oven to 350 degrees. Lightly brush 8 x 12 baking pan with oil. Add several tablespoons of flour and shake to coat evenly. Invert pans and knock against the counter to rid them of excess flour.
  • Whisk the flour, baking power, baking soda, salt, and poppy seeds together in a medium-size mixing bowl.
  • In a separate bowl, whisk together the lemon and apple juices, maple syrup, oil, vanilla, and zest. Using a wooden spoon, stir the wet mixture into the dry to form a batter. Do not overmix.
  • Transfer batter to the baking pan and bake on the middle rack of the oven for 25 minutes or until a toothpick comes out clean. Cool for 30 minutes before removing.
  • Meanwhile, mix together the super fine sugar and lemon juice. Once cake is removed from the pan, place on a serving dish and drizzle with the lemon sugar icing.

——————————————————————————————————————————————————————————-


Vegan Coffee Cake


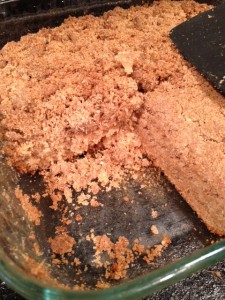
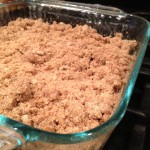
The crumble topping was good, not too sweet and had a balanced cinnamon spice-ness. The cake was pretty simple. I like a more fluffy cake, but in it’s defense, this one did have a ‘melt in your mouth’ quality to it. Overall, it’d say its a solid cake, but it’s not necessarily the most amazing one ever. I’ll be experimenting with different recipes to find the ultimate and will keep you all posted!!


Vegan Coffee Cake
(Adapted from Usually Vegan)

Ingredients
Topping
1 cup whole wheat flour
1/3 cup brown sugar
1 tsp cinnamon
1/4 tsp nutmeg
1/4 c.+ tbps canola oil


Cake
3/4 cup soy-dairy milk
1 tsp apple cider vinegar
1/3 cup (half sugar, half honey)
1/2 cup canola oil
1 tsp vanilla
1 1/4 whole wheat flour
2 tsp baking powder
1/2 tsp salt


Directions

  • Preheat oven to 375°F
  • Grease an 8 in. pan,
  • In a mug, mix  milk for the cake and the vinegar; set aside to curdle (trust me… you’ll know when it’s curdled)
  • Mix dry ingredients for topping well in a bowl. Slowly drizzle in canola oil by the tablespoon, using your fingers to swish around the mixture until crumbs form. Alternate drizzling and mixing until all the oil is used and large crumbs have formed.
  • Mix cake ingredients together. For this recipe, I just threw it all in a bowl and I”m wondering if maybe that lent a hand to the non-fluffy nature of the cake. next time I’ll try mixing the wet ingredients together, including the curdled milk, and separately mix the dry ingredients then combine.
  • Pour the cake batter into the prepared pan. Sprinkle crumbles on top.
  • Bake for 35 to 40 min. or until a knife inserted through the center comes out clean
  • We were supposed to let it cook for an hour before eating it, but let’s be real, who can wait an hour when the house smells like coffee cake!

Blueberry Coconut Banana Muffins

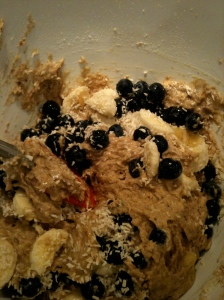
You hear it all the time, “Breakfast is a very (or sometimes MOST) important meal” but so is hitting the snooze button! I love simple recipes that fit into my fast paced lifestyle. I found this recipe in the wonderful Martha Stewart’s recipe vaults, and I made a few tweaks for my food allergies.

Made the first batch and I’m proud to say that the taste testers not only survived (phew) but they got raving review’s and a multiple request to be made again! Now that makes a bakers heart happy!

Quick and easy breakfast idea: Make these on a weekend and individually wrap a few and freeze the rest. You can quickly warm one or two up in the microwave and put a almond butter on it for some protein and out the door you go!

Healthy Banana Blueberry Muffins
From: Everyday Food
(Adapted for my allergies)

Ingredients:

  • 1 c. whole wheat flour
  • 3/4 c. all purpose flour
  • 1/4 c. wheat germ
  • 1/2 tsp baking soda
  • 1/2 c.  substituted butter for apple sauce
  • 1/3 c. sugar (I usually cut out the granulated sugar)
  • 1/3 c. brown sugar
  • 2 eggs
  • 2 rape bananas, one mashed and one in chunks
  • 1/3 c. substituted milk for soy milk
  • 1 tsp. vanilla
  • 1 c. blueberries
  • 1/3 cup coconut (my own addition)

Directions

  1. Pre-heat oven to 375 degrees F.
  2. Whisk flours, wheat germ, baking soda, salt together and set aside.
  3. Mix apple sauce and sugars in a medium sized bowl. I usually omit the granulated sugar if a recipe calls for both white and brown.
  4. Add in eggs at one at a time, careful to not over beat with each addition.
  5. In a separate bowl, mash mashed banana and fold in the cut banana pieces, soy milk and vanilla.
  6. Combine the flour mixture and the banana mixture until both are just blended. Be careful to not overwork the batter.
  7. Fold in coconut and blueberries. If you are using frozen blueberries make sure you allow them to thaw and drain the berries out of the juice.
  8. Pour batter into prepared muffin and bake in pre-heated oven. Turn the pan half way through cooking time to ensure even baking. Cook for 25-28 minutes, or until toothpick inserted in the center of a muffin comes out clean.
  9. Cool on wire rack, then enjoy!

See the original recipe here