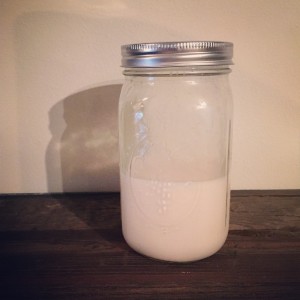
Homemade Almond Milk

aomond milkAhh the weekend. Wonderful, sweet weekend. It’s 48 hours to unplug, relax, catch up, and generally not be in an office. This was the first full week back at work after the shortened work weeks through the holidays and I won’t lie, Monday and Tuesday I was a little ‘struggles’.  But Friday was here in no time and I was actually surprised how quickly the week flew by and left me at another Friday night. Phew, MADE IT!

Saturdays are my favorite. You can stay up late on Friday if you want because it’s not a school night, and you know when you wake up that there are 24 more hours where these came from just waiting for you to enjoy! Saturday’s have a pretty regular ritual. The morning starts with a trip to my AMAZING acupuncturist, followed by grocery shopping. Then I head home to focus on food prep and house cleaning. I wash and chop all the veggies and prepare as many meals as I can for the upcoming week. Every week there is a batch of homemade almond butter, a pot of toasted quinoa in the mix and every other week Saturday is Kombucha bottling day too. I’m going to try out the continuous brew method this next batch so stay tuned for the results!

Today I got sucked into reading one of my favorite healthy living sites, Wellness Mama, and saw her recipe for homemade almond milk. We go through about a gallon of almond milk per week and Whole Foods hasn’t been carrying the vanilla kind so we’ve been stuck with the ‘original’ flavor for months. I’m a DIY/Homemade fanatic and I can’t believe I haven’t tried my hand at making almond milk myself yet! It always seemed a little daunting when I’ve read about it before, needing nut bags, sprouting, blanching, it always just seemed easier to pick it up at the store. The recipe on Wellness Mama seemed attainable and I was well over due to give it a try.

I love how she explains the reason for soaking the almonds and even gives an idea for how to use the leftover almond pulp that remains after you squeeze the milk thorough cheese cloth. Done and done!

It didn’t come out as thick as the store-bought kind I like but I’ll just try a bit less water next time. I omitted the dates on the first batch and that is a MUST (also confirmed by the mister on a blind taste test of each version). Use high quality vanilla and start with a 1/2 teaspoon (NOT tablespoon like I did). All in all, the first batch was actually good which is a win since I would have taken ‘drinkable’ as a passing grade!

Homemade Almond Milk

2 cup raw organic sprouted almonds – soaked overnight
7 cups pure filtered water (not your soaking water)
1  teaspoons high-quality vanilla extract
5 large dates  (honey, stevia if you prefer)
Nut bag to strain (Recommended Nut Bag)
You can use cheese cloth, but it’s WAY more work!
1 tsp sea salt for soaking

Directions:

Soak almonds overnight (at least 8 hours, preferable 10-12) in pure water with 1 tsp sea salt. Wellness Mama says that this is an important step as it breaks down the phytic acid and enzyme inhibitors and cultures beneficial enzymes in the almonds. Basically, doing this helps your body to absorb the enzymes and nutrients in the almonds.
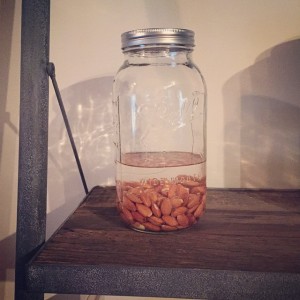
soak almondsRinse the almonds well and add to the blender.

Add in the 7  cups of filtered water and blend on high until the mixture looks smooth.  Work in half batches if your blender won’t fit the whole batch. You’ll see that it can get quite frothy so don’t fill your blender to capacity.

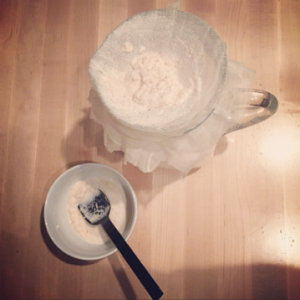
If using nut bag: secure bag around the top of a pitcher or 8 cup container and pour the mixture through the bag. Squeeze the bag and wring out as much almond milk as you can from the bag. You can retain the almond mixture and make almond flour if you want.

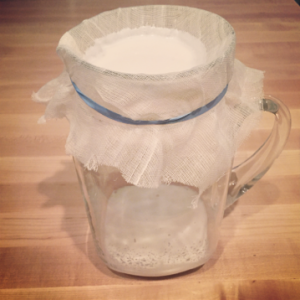
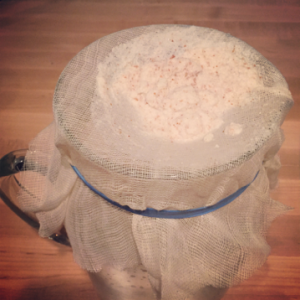
If using cheese cloth: secure the cheese cloth (with a rubber band or string) over the top of a canning jar or large pitcher and also get a medium-sized bowl and  a spoon for the almond mixture. Make dip in the cheese cloth dip deep into the container but make sure it’s still secure. Slowly pour the almond milk through a cheese cloth and use the back of the spoon to press down on the almond mixture to press the water out. Remove the rubber band and squeeze the last liquid from the remaining almond meal and set the meal aside.
IMG_1598

IMG_1599

IMG_1600

Pour the strained almond milk  back into blender and blend it again with whatever sweeteners you’d like… vanilla bean, dates, warmed honey etc.

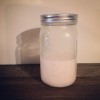
Pour your homemade almond milk into a glass jar or pitcher with a lid and store in fridge for up to one week.

Recipe Notes

  • For the first batch, The vanilla I used was NOT high quality and you could totally taste it. That, and I put in 1/2 tbsp which might have been a bit excessive. Next time I’ll try with high quality vanilla. It seems like a waste to blend a vanilla bean just to strain it all out (they’re not cheap)
  • A few recipes call for 3 1/2 cups of filtered water versus 4 which would make a creamier texture
  • All of the other recipes called for dates to be added so I’ll have to remember that next time too since I didn’t add anything but the vanilla in
  • I poured a little of the milk into the blender and tried it with a date and it did add a little sweetness to the milk
  • Next time I’ll try blending the vanilla bean with the almonds and water, then straining the mixture and see how that works
  • Some recipes also suggest blending in a 1/4 tsp cinnamon or nutmeg
  • A nut bag might be easier than working with cheese cloth so I might try that too
Save the Pulp
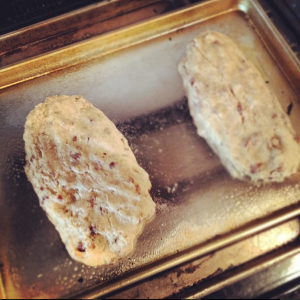
Save the pulp of the almonds, put on cookie sheet and dehydrate in oven on lowest heat until completely dry. Run through blender or food processor to make almond flour, which can be used in recipes in place of flour.
I’ll be posting about this soon!

Pumpkin Seed Butter (Gluten-Free, Dairy Free)

FullSizeRenderLast summer I got hooked on pumpkin seed butter. Before that, I didn’t even know such a thing existed. I felt pretty nut-butter gourmet knowing that there was macadamia butter as well as cashew butter. I knew that you could grind your own; I’ve seen and even used the machines in my local Whole Foods to make fresh almond butter. But those machines were big, and scary, not to mention loud and quite menacing to look at. The though had NEVER dawned on me that it was something that could be made at home. Until a combination of a strong desire for a food processor, DIY itch and budgeting came together. Random components, but quite a story!

This recipe was adapted from the the kitchn’s Pumpkin Seed Butter recipe. I LOVE that they say it was inspired by a nut butter that they tasted at the Portland Farmers Market because I’m pretty sure it’s the same nut butter that hooked me on Pumpkin Seed Butter. Nut-Tritious Foods is a wonderful little company based out of  Vancouver, Washington.  They do a great job of educating customers why cold-pressed nut butters are better for you. I pulled the info below from their about page because it’s REALLY important to know!

“… we COLD-PROCESS and don’t use heat to get our nut butter into the tub. Heat will oxidize the healthy fats (poly- & mono-unsaturated) and make them more like a saturated fat! Most all jar nut butters have been heat processed – you can tell by the ‘nutcrete’ in the bottom of the glass jar.” An additional note, the heat processing method allows the nut butter to sit on the shelf in a jar until it’s purchased. Personally, I’d much rather have the fresh stuff that I know is perishable and know that I’m getting the most nutrition out of my consumption.

Check out my Almond butter recipe here.

Pumpkin Seed Butter

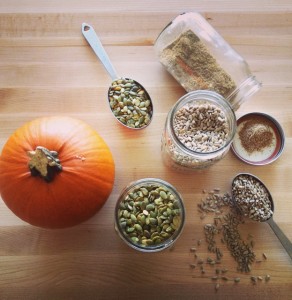
2 cup raw pumpkin seeds, without shells
1/2 cup ground sunflower seeds
1/4 cup flax meal*
1/4 cup  grapeseed oil
1 spoon of honey (to taste)
pinch grey salt

*Flax Meal: You can easily make flax meal in a coffee

Combine  pumpkin seeds, sunflower seeds , and flaxseed meal in your food processor. Blend until the ingredients are well chopped and blended. You’ll need to stop and scrape the sides down so all the ingredients get blended together.

Add the honey and blend until the nut butter starts to form. This can take up to ten full minutes so have patience! Once you see the play dough texture, where the seed butter starts to form a ball and move around the bowl you’re getting close! Add the oil and continue to blend 5-10 minutes more until the butter is consistently smooth. Your food processor might get warm but don’t worry too much, you can always let it cool a little bit and then blend away. I used the 1/4 cup of oil and it was just fine, but you may want to add more depending on how you like your nut butter.

Place in an airtight container (tupperware or glass jar) and store in refrigerator up to 2 weeks.

There are plenty of additions to this recipe, you can mix up the ratios. You can choose olive oil or coconut oil. You might want to add salt, or use salted pumpkin seeds. You can also pre-heat the oven to about 350 and roast the seeds on a parchment paper or foil wrapped cookie sheet for 10-15 minutes. If you oven roast them, stir the seeds once or twice during cooking and let them cool before adding to the food processor. There is also a delicious looking adaption for Maple Pumpkin Seed Butter and Chocolate Pumpkin butter.

Vegan Almond Biscotti


Screen Shot 2013-05-31 at 8.40.03 AMI love biscotti. It’s crunchy, flavorful with barely a hint of sweetness, and is convenient consume. Paired it with a foamy cappuccino it’s one of the most amazing afternoon treats on cold afternoon. It’s almost summer and this crazy gal is writing about cold days and biscotti? Well, up in Seattle the spring is a time a taunting. It will be gorgeous, no jacket and sun glasses weather for a few days then dissolve into a week of grey skies and soggy drizzle. The up-side is that it’s not freezing like it is during the winter.

When it’s grey or cold out, I get a baking itch. In high-school I developed a dairy allergy, which made baking a much harder task. This was before food allergies were really main stream. It proved quite a task to learn the alternatives for cooking and baking without dairy. I’ve long tweaked and updated different recipes, but this one has been a tried and true biscotti recipe for years.

So, while you may think that biscotti and baking are reserved only for the fall or winter time, but you can personalize this recipe for whatever season you crave biscotti. Give this recipe a spring twist and sub the nuts for poppy seeds and add a little lemon!

Biscotti Vegan Almond Biscotti

Ingredients
3 cups all-purpose flour
1 tablespoon baking powder
1/2 teaspoon salt
1 1/2 cups unbleached cane sugar
3/4 cup smooth unsweetened applesauce
1 -3 tablespoon vegetable oil
 (I used one tbsp apple sauce)
1 ½ teaspoon vanilla extract
 (can also use 1 tsp each vanilla and almond)
1  cups almonds, chopped & toasted

Directions

  1. Pre-heat oven the 325°F
  2. Chop and toast the almonds and put them in the pre-heating oven to toast
  3. Lightly oil two cookie sheets.
  4. In a large bowl, whisk together the flours, baking powder, and salt.
  5. In a medium bowl, whisk together the sugar, applesauce, oil (1 TBS for a hard biscotti, 2-3 TBS for a softer biscuit), and extract.
  6.  
Stir the sugar mixture into the flour mixture, add the nuts
  7. With floured hands, shape the dough into two 3-inch wide “logs” about 3/4 inch thick, with the ends squared off and place on cookie sheets
  8. Bake the logs for 25 minutes.
  9. Remove the pans and reduce the oven heat to 300°F.
  10.  
Cool the logs on a rack for 15 minutes.
  11. Cut the logs carefully with a sharp bread knife straight across into 1/2 inch wide slices.
  12. Place the slices cut side down on the cookie sheets
  13. Bake 5-10 minutes, or until golden on the bottom then turn slices over and repeat on the other side.
  14. Cool on racks, then store airtight for up to two weeks.

Variations

  • Use the original recipe’s method -1 tbsp oil instead of apple sauce which will change the consistency a bit
  • Sub almonds for different nuts (Pistachio, Walnut, hazelnut), chocolate chips, currants, dried cranberries
  • Try cutting the sugar
  • Use 1/2 whole wheat flour and 1/2 white
  • Dip the biscotti in white or dark chocolate for a sweet treat