Toasted Quinoa

Quinoa has grown in popularity in the past few years as a “super food” and a building block for gluten-free eating. But, did you know that it’s been around for thousands of years?

That’s right! It was used by the Incas over 5,000 years ago! Now it’s making a “superfood” name for itself again as a staple in pantries and meals everywhere. The Whole Foods Blog had this to say about our little grain, “Quinoa (pronounced KEEN-wah) has all the goodness of whole grains — the B vitamins, the fiber, the minerals — and it’s actually a small dried seed that’s been cultivated for thousands of years in South America. This little powerhouse has the highest protein content of any other grain. And since it contains all eight essential amino acids, quinoa is considered a complete protein.”

Toasted Quinoa
Forbs published an article on the 7 Health Benefits of Quinoa , which stated that Quinoa is not only one of the most protein-rich foods we can eat but it is a complete protein containing all nine essential amino acids. Spoiler alert, it also contains almost twice as much fiber as other grains…think feeling fuller longer! It also contains iron which supports increased Brain function, regulation of body temperature, enzyme activity and energy metabolism. Quinoa also packs Lysine, which is essential for tissue growth and repair, and magnesium that helps to relax blood vessels and thereby to alleviate migraines. Other health benefits of magnesium include transmission of nerve impulses, body temperature regulation, detoxification, energy production, and the formation of healthy bones and teeth. It also packs Riboflavin (B2) for improved energy metabolism within brain and muscle cells and manganese, which is an antioxidant that helps to prevent damage of mitochondria during energy production as well as to protect red blood cells and other cells from injury by free radicals.

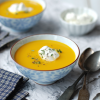
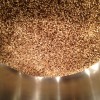
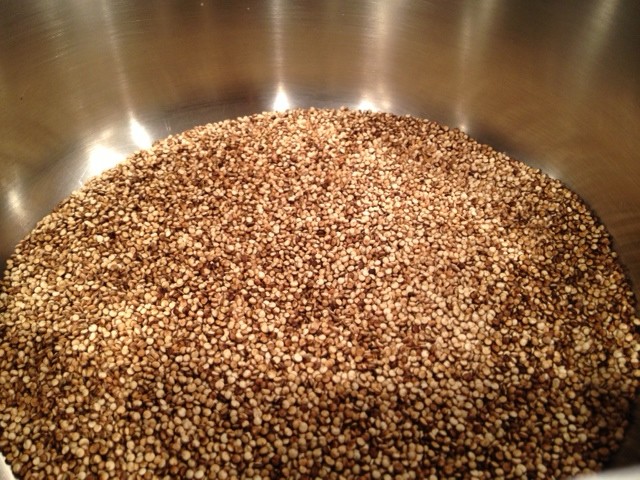
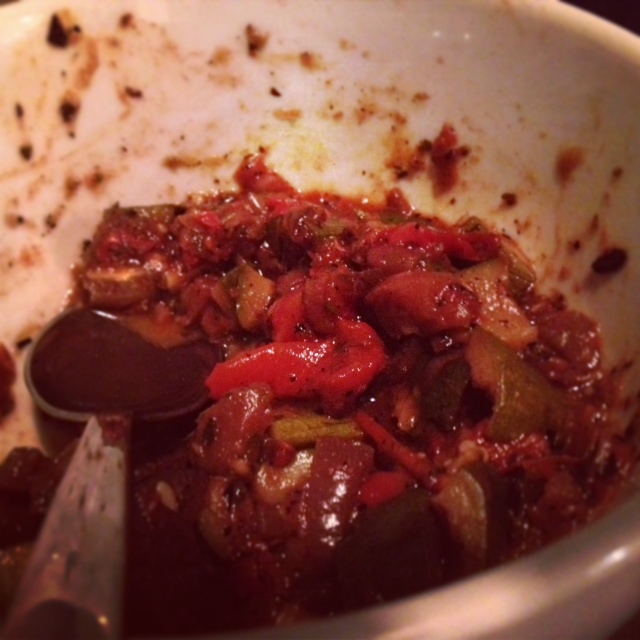
Quinoa is a pretty amazing kitchen staple, and can be used in many dishes as a main protein source, side dish or substitute for rice, potatoes or even pasta. You can cook the quinoa according to the package instructions, OR you can liven up your meal and add another layer of amazing dynamic flavor punch! Yep, I said flavor punch! Toasting quinoa before cooking opens up the nutty, toasted and almost smoky flavor. Cook up a batch to use during the week for quick dinners or add to salads for lunch. You can even cook quinoa for breakfast!

What is YOUR favorite quinoa recipe?

Toasted Quinoa
1/2 c quinoa
1 c water or chicken broth
Salt and Pepper to taste

  • Pour quinoa into pot on stove top over medium/high heat
  • Toast until it starts to pop, like popcorn and the outer shells turn a light to dark brown
  • Rinse the quinoa in a strainer under cold water and return to pot (always rinse your quinoa, like you would rice)
  • Add water to the pot and bring to a boil, continuously stirring
  • Reduce to a simmer and cover for 10 minutes then “fluff” with a fork or spatula and serve


Red Pepper Overload…Homemade Herbs De Province Ratatouille

Ratatouille Being sick sucks . Plain and simple. Truth fact. The End. Well… okay NOT “the end” but it feels like it! The problem with being sick is that I’m a “doer”. I like to “do” things, accomplish, check off my long to DO list. Now that we’ve established this. Guess what sickness resigns you to? Yep, you guessed it… BEING! I don’t “be”… I DO! When one is sick, they’re told to “just be” and rest. Yeah, go ahead. See how well THAT goes over. This time the stupid flu won this round and I was resigned to exploring what a “be”- er feels like. Two days on the couch with the only excursion to the gym where all I was allowed to do was steam. On day three, which is today, I’m feeling a little better and my stir crazy is kicking in!

Soooo… I decided to use up the 10 Red Peppers hanging out on my balcony. What!? They were on SALE! How can someone who LOVES peppers pass up 10/$10!? Well, thankfully it was cold enough outside to keep them fresh for four days because I completely forgot them! That is, until I was So completely dying for lack of DOING anything! So, I decided use up the veggies in the fridge to make some Ratatouille and make a jar of home Roasted Red Peppers. There are still three left over, so I’m thinking of trying some quinoa stuffed peppers tomorrow night! I’ll keep you posted!

I realized, as I was chopping my veggies and already elbow deep in delicious simmering goodness of Ratatouille, that I didn’t have the Herbs de Province that I needed for the flavor of the dish. Of COURSE I didn’t have herbs de province, why would I? I use it ALL the time and added it to my “next time I’m down at Pike Place list” which has been put on hold due to FREEZING temperatures. No one wants to walk in THAT weather. ANd of course, no fresh basil either. Well, what are you going to do? Give up the whole shabang? No chance, not when I’m THIS stir-crazy! Do you think that stopped me!? No way! There are plenty of spices in my cabinet and a half bottle of red wine within arms reach, something can be done! And if not, there’s the wine! 🙂

I have to say, this was lauded as THE BEST batch of Ratatouille I’ve made yet! It’s even better when you let it

Homemade Herbs De Province Ratatouille:

3/4 sliced red onion,
a good handfuls of fresh chopped garlic
EVOO for sautéing
2 Red Peppers
1 Eggplant
1/2   c Red Wine to simmer veggies in
4  Zucchini
Homemade Herbs de Province –Mix together and add more spices to taste 
1/2 tsp each of ground rosemary, ground thyme
1 tsp dried oregano, dried basil
1 tsp + some of dried parsley
1 14 oz Can fire roasted Tomatoes
(Follow the original Ratatouille recipe for cooking instructions) 

Cauliflower Pizza Crust

Pizza w/ Cauliflower Crust 
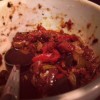
We…LOVE…Pizza! There have been a few kitchen adventures making regular pizza and I’ve got that queued up so in the next week so you’ll just have to stay tuned! In the course of my many Pinterest adventures I found quite a few recipes for Cauliflower pizza crust which intrigued me! I like pizza, I like cauliflower…sounds like a win/win situation! Less bread and more veggies and an alternative spin “cooking adventure” to try!? Count me in!
My mister is pretty adventurous  but when I start to mess with the crust of his pizza he’s not as excited as I am SO, I monopolized on the few days at home with my family for the holiday and mum and I ventured into bread free pizza world!

IMG_0405
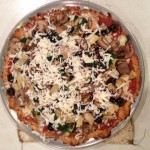
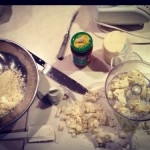
While the flavor of the cauliflower was DELICIOUS with the other italian pizza deliciousness, the texture of the crust wasn’t as “bread alternative” option as I would have hoped. It would make a great quiche or casserole, which is usually a swear word to me, but with the melty top and the crumbly bottom that word just seemed appropriate. So, in short I give you a “DELICIOUS work in progress, the Cauliflower crust”! Play, alternate toppings, crust consistency and leave your comments below! We’re in this together and we MUSt find the perfect Cauliflower crust!
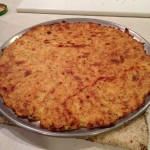
Bon Appetit!!

Cauliflower Crust Pizza (Toppings of your choice)

Crust Ingredients
3 cups cauliflower “meal”
1 cup grated low-fat mozzarella cheese
5 T  corn meal
3 T finely grated Parmesan cheese
2 tsp. dried oregano
1 tsp. garlic powder
pinch of salt
2 eggs, beaten (*make that three, one egg fore each cup of cauliflower “meal”)

Pizza Toppings
pizza sauce (we used store bought!)
grated mozzarella cheese
sautéed red onion, black olives, artichoke hearts, mushrooms
arugula

Instructions:
Preheat oven to 460F

Chop cauliflower into chunks and place in food processor (or a larger cheese grater) until it resembles a coarse “meal” texture then microwave covered in a bowl for 8-9 minutes or until it’s soft and cooked. (The Cauliflower will release natural moisture, so don’t add any when you microwave it). In the mean time, slice and sauté the red onion, black olives and artichoke hearts then place on a paper towel to dry. You don’t want extra moisture. Saute the mushrooms, flash saute some arugula with the mushrooms then add the other veggies and saute.
cooked crust
In a medium bowl mix the mozzarella, corn meal,  parmesan, spices and eggs and add the cauliflower when it’s done, mixing well. Coat a pizza pan with non-stick spray and transfer the “dough” to the pan then Use your fingers to spread out onto the pan, getting it as thin as you can. Cook in the pre-heated oven for 17-18 minutes until the crust is golden brown.

photo

Remove from the oven and coat with pizza sauce, a layer of mozzarella cheese, veggies and a light top layer of cheese then put back in the oven to melt the cheese for 5 minutes.  Remove and serve!

*Note: The flavors were PERFECT, but the crust was crumbly and we think it needed more moisture so I made the notation to add another egg into the mixture. The ratio should be one egg to every cup of cauliflower “meal”. I’ll update this post on the next “go around”!

Home Roasted Pumpkins

As the weather starts to turn, I start to crave warm comforting foods. My mind becomes preoccupied with slow-cooker Soups, fresh out of the oven baked goods, fresh gingerbread and roasted pumpkin. A few years ago, I roasted my first pumpkin and have been hooked on home roasting ever since. There might be a common misconception that roast pumpkins is tedious, messy, hard, impossible or time consuming. Well, all of the above are wrong! It’s ridiculously easy, cleaner than the carving process and once you hack it, rub it with olive oil and place it in the oven you free for the next 45 minutes!

With the first pumpkin spotting for the season, I have had it on my mind to start my pumpkin roasting. I’ve been pinning recipes on my Pumpkin & Winter Squash Pinterest board, drooling over recipes and even quite nearly gave in and ordered a Starbucks Pumpkin Loaf with my Americano last week. Breathe a sigh of relief, I have held out! I wanted my home roasted pumpkin to make some muffins and I wasn’t going to settle for anything less!

My lovely pumpkin and I had a 3/4 mile walk home in the Seattle drizzle three weeks ago. On that walk I learned a few things, first,  it’s truly the simple joys in life that matter most and for me that simply joy was fixating on a pumpkin and finally picking one up, grinning ear to ear as we walked home! Second, a 7 pound pumpkin gets heavy after a few blocks and seems to double in weight every block there after! And third, taking a pumpkin for a walk sure get’s you noticed… “hey nice pumpkin”, “my my, that’s a nnniiicceee looking pumpkin you have there”, and my favorite, “your pumpkin is nice, want to talk to me?”


Lovely photo from David Lebovitz- Roasted Pumpkin Wedges


Now, I have to admit that the poor thing sat on the counter and stared me down for the past 3 weeks and finally…FINALLY last night I figured that Halloween was the perfect night to roast a pumpkin! We don’t get trick or treaters, nor are we too into dressing up and going out to celebrate so pumpkin roasting it was! The nice thing about pumpkin, is that it’s not a sweet squash like butternut can be, it’s not stringy like spaghetti squash, and it’s not nutty flavored like acorn… it’s just the perfect mix of them all and quite delicious! I call it the tofu of squash, you can literally use it in ANY type of meal!!!I challenge you, find a meal that it wouldn’t go good in because it’s delicious in pasta, baked goods, ice cream, sauces, oatmeal, smoothies, sandwiches, spreads, soups, desserts, by it self… see!? It’s amazing!!

Home Roasted Pumpkin
Pumpkin
Rimmed Baking sheet
Foil
Cutting board and knife
Spoon to scrape seeds and bowl to hold seeds

How To:
First, wash and dry the outside of your pumpkin. The outside flesh is tough and the pumpkin is round…and I’m pretty clumsy… annddd my wielding a knife is a good idea HOW!? Just to be safe,  I opted for the horizontal half method. Using a sharp knife cut out the stem of the pumpkin as if you would to create a Jack o Lantern then cut the pumpkin in half from top to bottom.

Pre-heat the oven to 450 (*Tip- I increased the heat from the suggested 400 to 450 because I’m impatient and wanted dinner and it actually turned out just fine. The temp and amount of roasting time depends on your preferred texture and firmness for the pumpkin.) De-gut the pumpkin and separate out the seeds in the bowl to roast later. Be sure to remove all the stringy parts since they don’t taste as good.

De-gut the pumpkin

Prep the Pumpkin- now at this part you have an option. I wanted half my pumpkin to puree for baked goods and half to cut into chunks and add to salads and pasta for the next few days. So, for my recipe I roasted half the pumpkin whole, and the cut the other half into wedges, rubbed the outside with olive oil and laid out on the aluminum foil lined baking sheet. Be sure to use a baking sheet with edges because the pumpkin holds water that actually releases during cooking so you’ll need those rimmed sides of the baking sheet to keep it contained.

Bake at 450 for 30 minutes, flip and cook for 15-20 minutes more or until pumpkin is cooked your desire. To tell if it’s done, carefully press the outside of the pumpkin skin making sure not to burn yourself (yes, that’s more a note to myself!) and it should yield to a gentle press.

Remove from the oven and let the pumpkin cool on a wire rack. Once it’s cool, use a spoon to scoop out your roasted pumpkin or a fork to peel away the skin from the wedges. The flesh of the pumpkin should fall away from the outer shell. I place the pumpkin in a strainer for about 10 minutes to let the additional water drain so it doesn’t get mushy.

At this point, the fun just continues and you can prepare the pumpkin for whatever you have in mind! Blend it up to make a puree, slice up the wedges, mash it with herbs, bake it into delicious goodies, blend up a smoothie or make a pumpkin spice latte, mix with your oatmeal…the options are endless!

Storing: The pumpkin will last in an air-tight container in the fridge for about a week. You can also freeze it for future use, and I wouldn’t let it go more than a few months in the freezer.

Roasting the seeds
Wash the seeds and separate from the stringy pumpkin parts. Pat them dry with a paper towel then lay them out on a greased cookie sheet. Dust with sea salt, or whatever your preferred spice or seasoning is and toast in 325 degree oven for about 20-25 minutes, stirring the seeds around on the tray half way through the cooking.

Check out a few ideas on my Pumpkin & Winter Squash Pinterest board for inspiration!

What do you plan to do with your roasted pumpkin! Post pictures and recipes below!

Simple Winter Soup- Butternut Squash, Yam, Carrot & Garlic

Photo from: “inspiring the everyday” post on butternut squash soup

Somehow the winter season always ages my hobbies by about ten years; knitting, roasting whole pumpkins, baking, canning and the strong desire to bake and make breads and pastas, winter meals, soups, stews… wanting to make everything really. I will admit I recently pins a recipe for homemade Wheat thins! (Stay tuned to see how THAT one goes!)

While chatting last night with my impossibly adorable new hairstylist who is also a foodie, she shared with me a new recipe! Cue ridiculous joy and excitement! We proceed to chat the entire time about her recently discovered hobby of making homemade pasta from scratch (a checkbox on my cooking bucket list), reviewing all of our favorite local restaurants and expounding on 15 uses for sage (It truly is an under appreciated herb)!


Cooking doesn’t have to be hard, we both agreed, you just have to have the ingredients in your pantry and a couple of minutes to make it.

So, along with the recently added item “weather proof boots” on my winter weekend to do list, “roast” to appease the pumpkin on my counter, and “meal plan” to attempt an attack plan to actually COOK all of my recently pinned winter dishes, I shall also be making this soup!

I’ll post my own pictures once I cook it up but for now, enjoy a lovely picture from inspiring the everyday’s post on butternut squash soup.
So, stock up on winter goodness, snuggle into your favorite sweater, pour a glass of wine and and let the winter begin!!

What are your warming winter foods or your go to winter dishes?
Winter Warming Squash Soup

1 butternut squash
carrots, yams and fresh garlic (ratio to your preference)
1 large onion to caramelize
chicken stock/broth


Directions- 

  • Pre-heat the oven to 400 or 450 (depends on how quickly you want the veggies and how your oven  heats) and proceed with prepping the butternut squash as you prefer. Note: There are two methods for butternut squash you can either peel it and bake it or slice in half rub with olive oil and bake.
  • Slice the carrots and yams, and chop off the top of your garlic. (I just posted a recipe here on home-roasting your own garlic. You can roast and keep fresh for up to a week, frozen for a few months. It’s GREAT to have on hand for winter meals!)
  • Roast all veggies and garlic in pre-heated oven until golden brown.
  • In the meantime, sauté your onions.
  • Once the squash, veggies and garlic are roasted to your preferred “done-ness”, remove from the oven and blend/ puree in a food processer with some warmed chicken broth and serve warm.