Spaghetti Squash- A simple fall meal

Photo from Roost
Spaghetti Squash (Photo from Roost)

Fall is on its way… leaves are turning colors, the air is crisp and the pumpkin spice latte signs abound. Today it feels like a cozy grey blanket was spread across the city, and it’s tucked up under my chin making me feel like I’ve found the warm part of the bed and don’t want to rustle the covers. You know what I’m talking about? It’s the same feeling as the morning when you wake up and the mattress is perfectly indented with your body and you can feel the cold air in the room on your nose but under the covers it’s all warm! Well, that’s how today feels.

I LOVE fall! Boot season, reaching for scarves, leaves turning, impending holidays in the planning… I love ALL that fall brings with it but mostly I LOVE Fall cooking! I can’t walk past a pumpkin without sizing it up for how much pumpkin it would yield for after roasting, mentally creating a cutting plan in my head of how I would slice it to fit on a roasting sheet!

One of my fall favorites is spaghetti squash. It is such a simple and warming dish to make for those nights you don’t want to spend your night in the kitchen making dinner! I love to make extra and pour cinnamon and soy milk over it the next morning for breakfast or pack some for lunch sprinkled with cheese! I was going to write my own recipe and include pictures BUT as luck would have it one of my favorite food blogs to read, Roost, posted this very day (yep you guessed it!) Spaghetti Squash!

Caitlin is the author and creator of Roost, and her photography is out of this world! I want to curl up and live in every picture she takes while I devour ALL of the lovely food! She created Roost when her husband was diagnosed with Crohn’s and focused on all things gluten-free. In this recipe, She makes her spaghetti squash with meatballs and sauce, but I love to make my Roasted Fennel and Tomato Dressing and Homemade Turkey Meatballs!

So,  head on over to Roost for the Spaghetti Squash Pasta with Meatballs recipe and gawk at her lovely photos and let me know how you dress up your spaghetti squash! Feel free to post your own recipes in the comments!

Happy Fall Everyone!

 

Homemade Cold Brew Coffee

If you have…

Then you too can make and enjoy some Cold Brew Coffee in the comfort of your own fabulous home!
This past weekend I attended a Creative Leadership Summit in California and like all wonderful gatherings of creative minds, I went without expectations and was blown away by the talent that I saw! There were different areas of concentration as well as one-off classes sprinkled into our weekend schedules where we could explore different industries and skills that we might not otherwise be exposed to. One of the classes on that list was “Cold Brew Coffee”. I’m from Seattle, OBSESSED with good coffee, and for those few days a year that Seattle puts on her make up and turns the heat up, I’d love to be sipping on a glass of good chilled coffee!
I’m always amazed at the different flavor of cold brew coffee. With regular coffee brewing, the hot water and the oils from the bean swiftly pressed together are what combine to provide that deep, rich, roasted flavor and the slight bitterness you might taste in hot coffee comes from the acidity in the beans. Icing coffee that is hot-brewed simply puts that same flavor on ice…surprise surprise!

BUT, the cold brew method actually brings out a different part of the beans flavor and the lengthened steeping process combined with the coarse texture of the grinds reduces the acidity which makes for a  sweeter and more syrup type flavor which is actually quite delightful even for someone who doesn’t like any sweetness in her coffee!

Apart from challenging all my urges for instant gratification, cold brew coffee is so simple to make at home and completely worth the forethought to make ahead of time.While there is a bit of science to cold brew coffee is very forgiving so you can mix up the temp, how much you layer, length of time you steep, ratio of coffee to water, etc! The method below was developed by hipster teacher/coffee guru, Mason,and  follows the Toddy method (Link directs you to the Toddy Website which lists cold brew instructions for both coffee and tea.)

So, grab a mason jar and wow your friends with you home cold brew coffee skills! These are also great frozen into a popsicle or tray for coffee ice cubes!!

Cold Brew Coffee Prep


Cold brew coffee

-yield depends on the ratios you use
-coffee lasts up to two weeks in  a sealed container the fridge

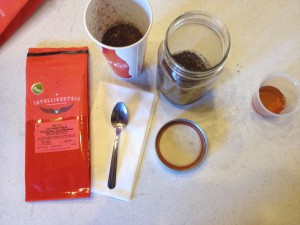
You’ll Need…
16 oz mason jar
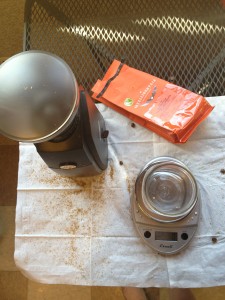
coffee grinder (I suggest the affordable Krups, Stylish Bodum Bistro or the classic Kyocera)
Single Cup Coffee Filter like the Melitta Ready Set Joe and with filters,  ,
kitchen scale to measure the water and coffee
Small Bowl
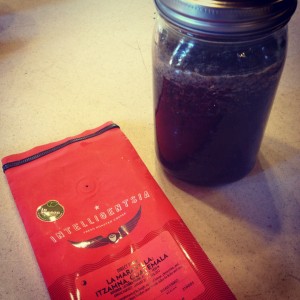
Coffee of choice (We used the amazing Intelligenstia La Marvailla blend)
Water

Tips…
The ratio is 1 part coffee to 4 parts water, so you can mess around with the different ratios to create a different flavor if you so desire. The key in this process is that you want to be as mindful as possible and don’t agitate the coffee. Use a coarse grind, even a step more coarse than you would for a french press so that the water can have a larger surface of the coffee bean to steep with.

Making the coffee…

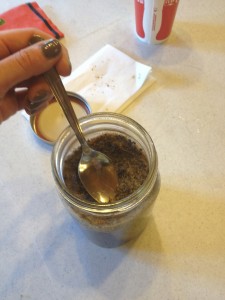
  • Set jar on scale and zero out the weight. Measure 125g coffee into jar and grind in a coarse texture then pour into bowl and set aside
  • Measure 80g room temp water into jar and add half the grinds from the bowl
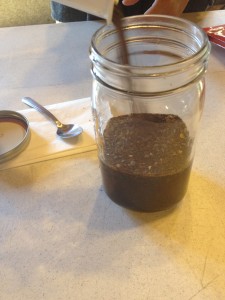
  • Measure 240g water and pour into your jar in a slow circular motion then gently spread other half of coffee grinds on top and let set for 5 min
  • Measure out another 240g water and pour in slow circular motion over the layer of grinds and with minimal agitation, gently press sides of the grinds down with spoon to fully saturate then cover with lid and set aside at room temperature for 8-12 hours
  • Filter coffee through the single cup coffee filter (don’t forget to insert an actual filter into the strainer) by gently pouring from the side of the jar then inverting the entire jar so gravity can do its job pulling the water through the grinds in the jar
  • You can then rinse your jar and pour your cold brew right back into your mason jar or put into little bottles to share or store (just remember to refrigerate after you filter!)
  • Pour over ice or dilute with water/milk to tast


How did your cold brew turn out! Did you mix up the layers, ratio, steeping time or other variable? Would LOVE to her any tips and tricks that you discover in your homemade cold brew coffee process!!

Cheers!

Slow Cooker Pork & Southern Coleslaw

I do most of the cooking in the house. Not, mind you, out of a lack of additional cooking talent but more so out of how picky I can be with my meals. Typically, I do the cooking and he does the grilling. This past weekend we headed up to see my family for the weekend. My sister, her husband, and a family friend were also up visiting so it was a full house! Our family friend is in cooking school and he was tasked with making the dinner. BBQ pulled chicken, coleslaw and grilled veggies it was. The meal was “BBQ”: meat (in this case chicken) was smothered in typical sweet BBQ sauce and the slaw was mayonnaise drippy. Picky little me, doesn’t really like BBQ OR mayo so I saved out some chicken and had a chicken veggie sandwich…yes… I was that person.

So, upon returning home it was decided that our house needed a “BBQ re-do” with the real stuff: PORK. I have to start off by saying, I don’t really like pork. Never have I drooled over a honey baked ham, enjoyed a croquet madame or met a slice of bacon I wasn’t happy to walk away from. Actually, in full disclosure I DISlike pork. So when it was announced, “This week I’m making BBQ pulled pork and coleslaw in the slow cooker!” I can’t say I jumped for joy. No, I more so mustered up a happy face and tried to be supportive of trying a new dish and get the suffocating thought of the entire house wreaking of overly sweet BBQ and pork. So here’s the problem, I do not like pork. I do not like BBQ sauce. How is this going to be a positive experience!?


Now that you have a back story including my perspective of pork, let me introduce you to one of the most delicious, and SIMPLE, dishes that might have ever been made in our house. Two days of brining in a BBQ rub from our local World Spice shop at Pike Place Market, a quick sear in the oven the morning of, into the slow cooker it goes and out comes a lovely and perfect for pulling pork hunk.

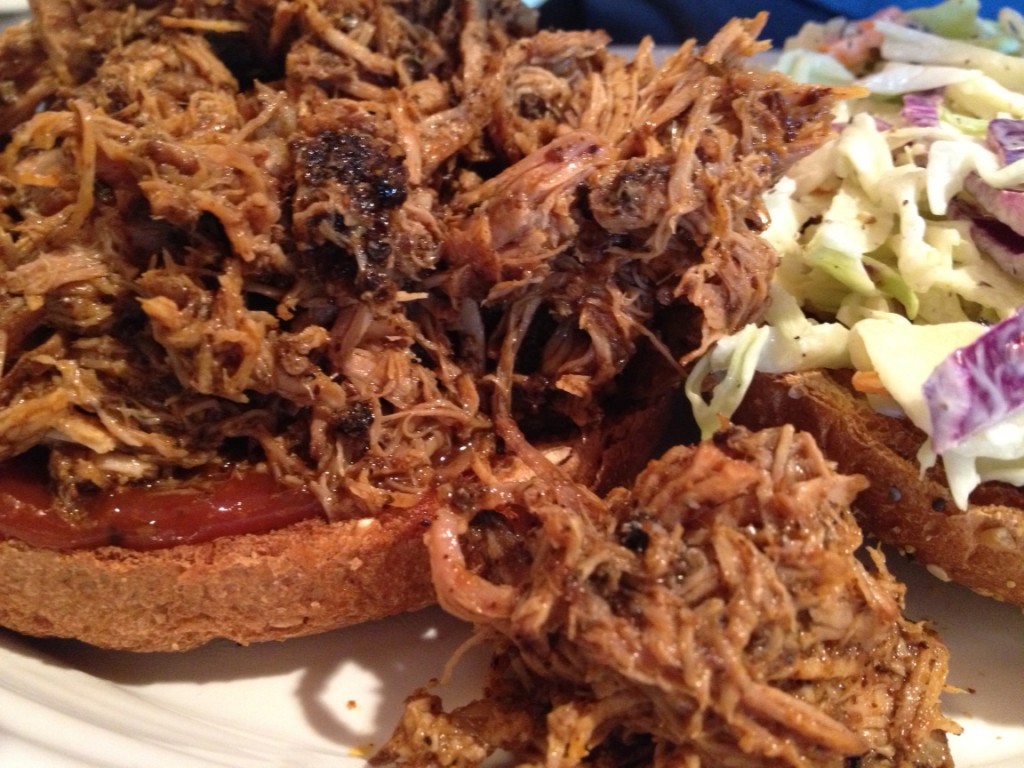
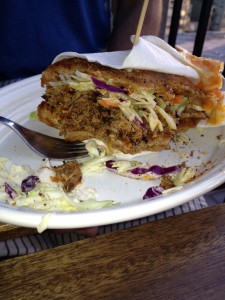
What I loved about this meal is that it wasn’t too sweet or drippy! The Stubb’s BBQ sauce has a nice Smokey and spicy flavor unlike most BBQ sauces that are overwhelming sweet! The meat was perfectly cooked and just fell apart, but wasn’t too drippy and thanks to a good prepping job, very lean on the fat content. When assembled, the flavors mixed perfectly together! The dry rubbed pork, the spice and flavor of the Stubbs, the fresh crutch of the slaw piled on a toasted whole wheat bun… you have yourself a downright AMAZING weeknight meal. And, it’s even better the next day!!


Pulled Pork
(makes 3 servings…ish)
1 ¾  lbs pork, fat trimmed this will equal about 1 ¼ lb
Salt-free BBQ Dry Rub spice- to taste
Stubbs BBQ Sauce- to taste
Coleslaw Mix + Mayo or Yellow Mustard for “slaw”
Fresh cracked Black Pepper to taste
Buns (We use Whole Wheat)- toasted


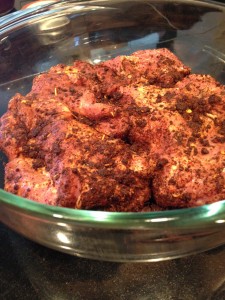
Day 1-Trim the fat off of the pork and cover with the BBQ dry rub, massaging into the meat and let marine 24 – 48 hours in a pyrex glass bowl.

Trim the fat
Trim the fat
Coat with BBQ Dry Rub

Day 2- DON’T touch! 🙂

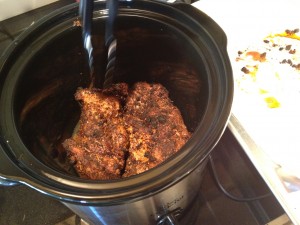
Day 3- Morning: Pre-heat the oven to Broil and sear in the glass dish for 10 minutes. Place meat in the slow cooker with 2 oz water. Cover and set to low for 12 hours.Evening: Come home to the wonderful smell of the pulled pork!

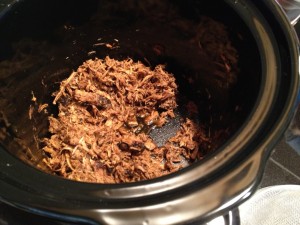
Shred the meat with two forks, and see how wonderfully it falls apart, the lovely moist meat!

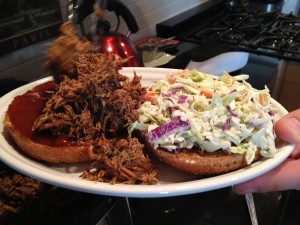
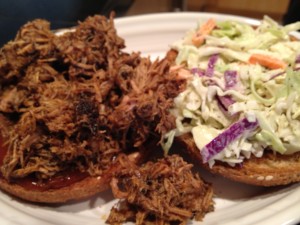
Toast bun, Mix slaw to taste with mayo or yellow mustard. There is an option to chop your own green and purple cabbage and a few carrots but we find it easier to get the pre-made and mix a little for each sandwich so it doesn’t get soggy and we can mayo to taste, I use yellow mustard instead of mayo in mine. Mix the meat with BBQ to taste. Heap up the slaw and the BBQ-ed meat and enjoy!!!

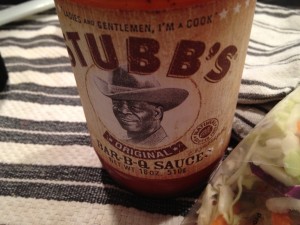
Stubbs BBQ Sauce
Stubbs BBQ Sauce

We used Stubbs BBQ sauce for the reason, as I mentioned before, that it’s not your typically drenched with sweetness sauce that over powers the sandwich. With Stubbs, you get more of the smoked and spice in the flavor to balance the sandwich and accompany the slaw and the dry rub flavor that you’ve slow cooked into the meat.

Step 1: Assemble Sandwich
Step 2: Devour Sandwich


Breakfast Sandwiches & Snooze Buttons

I love breakfast, a good cup of coffee and sleep. What’s wrong with that equation? They don’t always belong in the same sentence. The snooze button is my best friend. Which, means I wind up eating the same thing for breakfast EVERY morning because opening a yogurt and making a slice of toast is quick! But, BORING! Especially for someone who actually enjoys cooking.

Life is too short to be boring and breakfast is a very important meal! It sets the tone for your whole day, gives you the energy you need, gets your metabolism going, and reduces hunger throughout the day.

There is more than a bowl of cereal or yogurt for breakfast! Put down the McBreakfast, refrain from that high-sugar muffin staring through the pastry case and yes…that Starbucks breakfast sandwich can’t compare! Making breakfast can be fast, simple AND cost effective! You’ll get your snooze button, save money and eat healthier! Have I addressed all of your excuses yet?

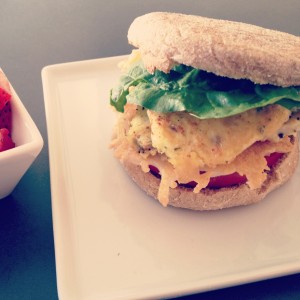
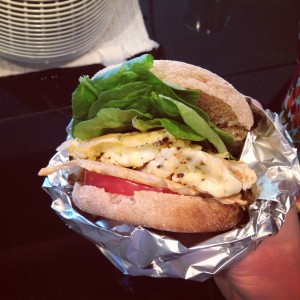
English Muffin w/ Tomato, Spinach, Egg, Cheese & Avocado

I love a good breakfast sandwich! Homemade breakfast sandwiches are typically healthier for you and are made fresh in your very own kitchen, with real ingredients instead of assembled, frozen and re-heated. Fresh food always tastes better!

So, I decided a little planning ahead needed to happen so I could have it all: the snooze button AND a delicious quick breakfast sandwich! I promise, they’re simple and delicious! Give it a try see how much more delicious breakfast can be!

Breakfast Sandwiches
1 English Muffin
1-2 Eggs
Avocado
Heirloom tomato slice
Avocado

  • While your egg pan heats (over medium heat), slice your tomato and avocado and get out any other toppings or spreads you’ll use. Split the English muffin and place in toasted, but don’t toast yet.
  • (Go about your morning routine while the pan heats)
  • Once the pan is warm (hover your hand over the pan and you should feel the heat), scramble the eggs into your pre-heated pan and stir so that they get all cooked.
  • Push down your English muffin and spread your avocado once it’s toasted then assemble the rest of your sandwich (veggies, spread, herbs, etc) and decide if you want your cheese melted on your eggs or right on the English muffin.
  • Place the eggs on top of your prepared masterpiece and enjoy!!

See!? Swift, simple and delicious as promised! Enjoy a wonderful breakfast at home, saving money and eating healthier!

Even the best egg sandwich can get boring so I wanted to include a few other ideas for those who want to mix it up or might not be thrilled with English Muffins!

Breakfast Sandwich Variations:

  • Carb: crumpet, whole wheat wrap, corn or flour tortilla, pita, slice of toast or rustic bread
  • Protein: eggs, tofu, cheese (feta, mozzarella, cheddar), dairy-free cheese (my favorite that actually melts is Galaxy Mozzarella (review here),  turkey or Canadian bacon, ham
  • Veggies: spinach, arugula, tomato, roasted peppers, sun dried tomato
  • Spread: avocado, pesto, Dijon, Cholula
  • Herbs: basil, cilantro, or parsley (fresh is best but dried is great and can be mixed into eggs, tofu, spreads, etc)

Your Homework
If we can’t eat together, we may as well be together in social spirit!  Post what your favorite homemade quick breakfast idea or breakfast sandwich variation is with a picture on Twitter, Instagram or Facebook and tag with #socialbreakfast to get ideas and inspiration! We can enjoy each others company for a  lovely breakfast by photo! Invite others to social breakfast and let’s see what breakfast ideas others have!

I’ll be gathering the pictures into a Pinterest board and linking back to other blogs so you can also nominate your favorite blog or breakfast post.

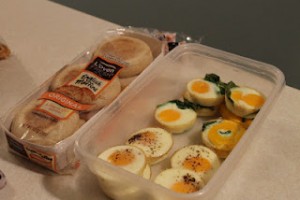
Make Ahead Eggs for Breakfast Sandwiches (Recipe and Photo from Amy’s Kitchen Creations)
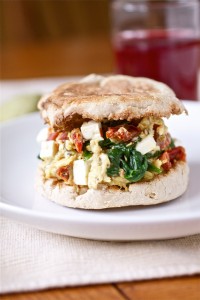
Spinach feta sun dried tomato breakfast sandwich (Recipe and Photo from Smells Like Home)


Don’t forget to check out My Pintrest Boards if you need a little more breakfast inspiration:

Elote: Spanish Style Grilled Corn Dip

What do you get when you mix sunshine, grilled amazing food, a nice cold beer or chilled wine and a rooftop? A VERY happy lady! Grilling is one of my favorite ways to cook food. Growing up in California, my family is accustomed to grilling in any type of weather. Neither wind nor rain nor inches of snow can keep us from firing up the grill!

One of my favorite things to grill is corn on the cob. But, there are so many other great ways to enjoy corn! For example, Elote! We first experienced Elote on our trip to Sedona this past spring. The winter in Seattle was starting to chill the bones a bit too much so off to warm up with sun and family! Elote is the namesake dish of a wonderful Spanish restaurant and it is a dip which is made of fire roasted corn and spicy mayo and is traditionally garnished with lime and Cotija cheese.

We took home the Elote restaurant cookbook as a birthday present, which included the restaurant’s recipe (posted here), and couldn’t wait to get home and make it ourselves. As you may know, I view recipes a general taste and texture guidelines. I love to tinker with recipes and personalize them. The dish at the restaurant had a very creamy consistency and was heavy on the mayo. I don’t like the super creamy aspect and neither of us really like mayo so we tinkered around and came up with the recipe below. Just took it to a birthday BBQ and it was a hit!

We grill our corn to make the Elote which gives it a wonderful charred flavor but you can also use canned corn and pan roast it for a few minutes until it starts to brown. I bet you could also bake it up in the oven…I’ll give that a try once fresh corn is out of season and see how that works out.

To test, we started with one ear of corn to play with the flavors and personalize then for the bbq we grilled up 6 ears of corn and it was a great amount for a side dish. The recipe below is for one ear of corn so you can multiply as needed for how many servings you desire.

Sommer Style Elote
Serves 1-2

1/2 tsp chicken stock + 2  cups water
1 small packet mayo
1 tbsp. Cholula hot sauce
1/2 lime, juiced
Salt & Cracked pepper
¼ c fresh chopped cilantro
dashes of: fresh cracked salt and pepper, cayenne, paprika, garlic
1 ear char grilled corn
Sliced Emmental cheese (the original recipe calls for cotija but we aren’t really fond of it)

For the Corn
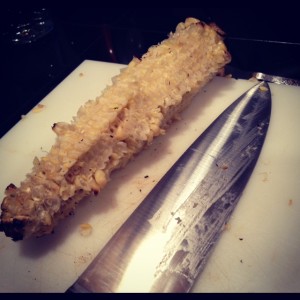
Soak the corn for 20 minutes in salt water to brine. Then, cook the corn in aluminum foil in the oven to cook at 400degrees for 20 minutes then finish on the grill. Set the corn aside to cool, then cut the kernels off the cobs.


Making the Elote
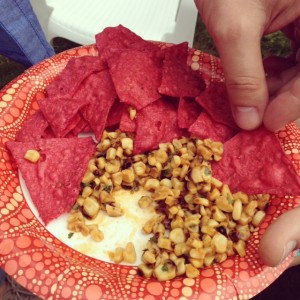
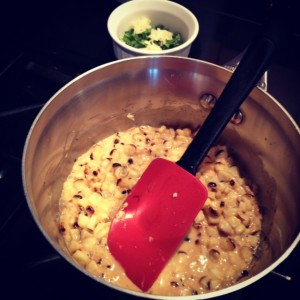
Mix the chicken stock, mayo, hot sauce, lime juice, salt and pepper, sugar and chicken stock in a sauté pan over medium heat. Once that’s all mixed up, add the corn kernels and stir until the corn is warmed and the water boils off. Add the sliced cheese and mix until melted then mix in the chopped cilantro and keep on the heat for a minute or two longer. Garnish with fresh cilantro and a dash of chile and serve with tortilla chips. We found that the red or blue tortilla chips were quite delicious and looked so festive! Food should always be fun!


Flying Apron Chocolate Chip Cookies (Gluten-Free, Dairy-Free)

I fell in love with Flying Apron  bakery a bout 6 years ago when I was diagnosed with a dairy allergy. No dairy…means… no… BAKED GOODS!? What about my cookies, muffins, and scones!?  While lactose was the allergy, being a digestive tract allergy meant that gluten would quite possibly be an “irritant” for me even thought I wasn’t necessarily allergic to it. “Oh Joy” … my first thoughts… and many of the subsequent thoughts afterward. This diagnoses came before food allergies were really becoming main stream and I must confess it was a very rough life adjustment for me, being miss baked goods lover, to find things that were both dairy-free and yet still tasteful. Flying Apron specializes in gluten-free, vegan baked goods, and breads as well as savory lunch items including savory veggie hand-pies, macaroni dishes, pizzas, soups, and salads to name a few. They rotate their menu to feature dishes that incorporate seasonal and local ingredients.

It was at their Fremont Cafe that I first had the realization that gluten-free and/or dairy-free baked goods didn’t have sacrifice taste and make me feel like I was chewing on a soggy 10 day old strip of cardboard! Previously, adhering to food allergies meant an immediate departure from any sort of taste, texture or delightful food experience.  But when I first bit into a Flying Apron muffin, my food allergic life changed for the better. Their baked goods, breads, and savory items are really delicious and intensely palatable. Mind you, this review is coming from both the dairy-free AND the “MORE BUTTER PLEASE” review voice of this household. I’ve got him hooked on both the  Flying Apron  Chocolate Chip Cookies (which are both Gluten-free & Dairy-Free) as well as the Mighty O Vegan Sprinkle Doughnuts. Muwahaha!!)

Well, I’m quite obsessed with their chocolate chip cookies which is saying a LOT for someone who isn’t particularly fond of chocolate. My all to often nightly ritual consists of mixing a Flying Apron cookie and a few small scoops of LivingHemp Ice Cream which can actually become an expensive habit and deprives me of both my baking fix and smelling the house up with cookie scent!


Flying Apron’s Gluten-Free Chocolate Chip Cookies
15 cookies 

2 3/4 cups brown rice flour
1 1/2 cups plus 1 tablespoon garbanzo bean flour
1 teaspoon baking powder
1/2 teaspoon baking soda
3/4 teaspoon sea salt
1 cup canola oil
1 cup organic whole cane sugar
1 teaspoon vanilla extract
1 cup soy milk
1 cup (8 ounces) dairy-free dark chocolate chips

1. Preheat the oven to 350 degrees F.
2. Combine the brown rice flour, garbanzo bean flour, baking powder, baking soda, and salt in a large bowl. In the bowl of a standing mixer fitted with the paddle attachment, combine the canola oil, organic whole cane sugar, and vanilla until well mixed. With the mixer on low speed, add the flour mixture and rice milk alternately, a little at a time, until smooth, about 3 minutes. Stir in the chocolate chips.
3. Scoop the dough onto greased or parchment-lined baking sheets with an ice cream scoop. Bake until golden and slightly firm to the touch, about 17 minutes. For a fancy look, dust the cookies with cocoa powder while they are still hot.


Banana Walnut Bread (gluten-free, dairy-free)

There is something about the smell of fresh baked banana bread that warms the heart and soul. “Summer”, and I use the term loosely, has started to creep around Seattle. Today is a balmy and overcast 70 degrees but whenever it’s grey I always get the cozy urge to bake. This weekend, we’re adventuring up to see my family and while I’m baking the bread for both my roomie and his mum who’s visiting us, I’m also baking this to surprise my dad.

Since I was a little girl, whenever there were bananas that were even one day past perfect my father would take my hand and guide me to the fruit bowl and say “Kate, you know what THAT means right!? … BANANA BREAD”!!! I always loved baking this for him, and filling the house with the warm smells of bread and seeing his joy as I would pull that loaf out of the oven, hovering as all good taste tester seems to do, barely waiting for it to cool before cutting thick slices and serving it up to one very happy man!

Like clockwork, whenever the weather in Seattle is grey, ahem most of the year, my ache to bake exponentially increases. Even if I don’t particularly WANT a baked good at that moment, sacrilege I know, I just can’t calm the urge until I’m mixing up the dough and filling the house with the smells of a bakery then fending off the taste tester as I try to pull it out of the oven.

Truth be told, I simply LOVE baking! For myself and more so for others to enjoy . While I can’t have you all in my kitchen this moment eagerly awaiting the “ding” of the kitchen timer indicating that fresh baked goodness is ready to being it’s futile attempt to cool before being devoured, I CAN share with you by posting this tried and true recipe!

This recipe yields one large loaf or three small individual loaves. Personally, I prefer to use smaller individual size loaf pans and because they’re easier to gift and look cuter on a plate (true story!). I’m not allowed to freeze bread in our house but these loaves freeze quite well for future rainy day enjoyment or to give as a hostess gift for a last minute dinner party! They also make great muffins!!

My loaves are in the oven now so here’s a sneak peek of THIS batch. (Photos below are previous completed batches)

Banana Walnut Bread
Banana Walnut Bread


Banana Walnut Bread
From:The Good Housekeeping Cookbook

Ingredients

  • 1 3/4 c. flour (can use Whole-Wheat or Gluten-Free)
  • 2/3 c. white sugar
  • 1 tsp. double-acting baking powder
  • 1/2 tsp. salt
  • 1/4 tsp baking soda
  • 1/2 c. shortening
  • 1 cup mashed bananas ( 2 ripe bananas)
  • 1 small banana, cut into chunks
  • 2 eggs
  • 1/2 cup walnuts (my own addition)
  • 1 fresh orange, squeezed (my addition)
Banana Walnut Muffins and Bread

Directions

  1. Pre-heat oven to 350 degrees F
  2. Grease and flour ( or non-stick spray) your baking pan(s)
  3. In a large bowl, mix the first 5 ingredients
  4. Cut in the shortening using a pastry blender (or two knives scissor-fashion) until the mixture resembles coarse crumbs
  5. Stir in the remaining ingredients until just blended
  6. Bake in pre-heated oven as directed below:
    Large loaf pan: 55-60 minutes
    4 Individual Loaf pans: 30-40 minutes
  7. Cool in pan on wire rack
  8. ENJOY!!!

Ratatouille

Antigüedades Bar (Sevilla, Spain)

The obsession with Ratatouille started on our recent trip to Seville, Spain. We decided to meander the alleys and streets for the 30 minute walk from our flat to the city center . Bar Antigüedades caught my eye as an adorable little café from the exterior (of course…look at the photos!) and reading the menu board when we passed I made the mental note to come back for lunch. We did, and loved the Ratatouille SOOO much that we returned for dinner and had the exact same meal! It was so warm, hearty, tasty, flavorful and just… well… cozy! We ordered a bowl and cleaned and had I not ordered an actual meal I would have ordered another Ratatouille! As it was I had to refrain from licking the bowl since 1. it’s rude to do in public 2. we were sitting outside and I couldn’t sneak it 3. I’d be pegged as a ridiculous American for SURE! Three sadly legitimate reasons why I had to refrain from one last taste of the very miniscule remains of wonderful veggies. I vowed to make it once we got home.

Sevilla...where it all began
Sevilla…where it all began

Of course, in order to make the dish I first had to find 15 recipes, make an entire Pintrest board devoted to my found ratatouille recipes (yes I’m that ridiculous organized..or maybe obsessive?). Of course I had to print out each recipe, lay them side by side, and pour over each minute difference and detail deciding which was the perfect recipe. Which was possibly closest to recreating the most incredibly wonderful cozy meal. My perfection was finally challenged by my need to make a grocery shopping trip and get ON with the actual MAKING of the dish so I picked one to use as a guideline because, and yes I’m a total girl, the picture looked the yummiest.  The recipe that I landed on was posted on the blog A Lady in France.

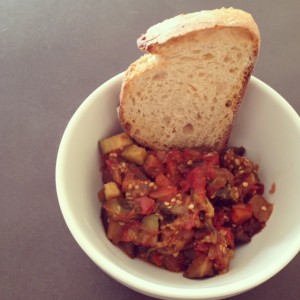
A brief history of Ratatoulie. It is usually served as a side dish but can also be a main, which is how we eat it with some crusty potato bread. For protein, I usually poach an egg or sprinkle some cheese on the top.

The hardest part of this meal is letting it cook those last 30 minutes without devouring it from the pan! The house starts to smell of wonderful cooked vegetables and herbs.

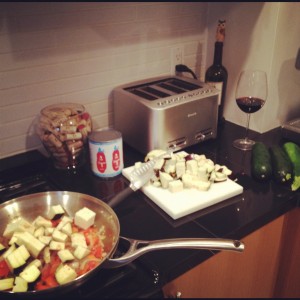
Ratatouille Prep
Ratatouille Prep

Tips:

  • The Pan: be sure to use a large deep pan so that the heat and evenly distribute and cook
  • Saute each round of veggies VERY well! Once you add the tomato it’s really just melding of the flavors and not really “cooking”
  • Don’t go light on the canned tomatoes! This is what makes or breaks the consistency of the Ratatouille. If it seems like the stew is a bit dry add another can of tomates or a 25 oz jar of basil marinera sauce. You’ll realize the consistency within 5-8 minutes and you really need to add within the 5-8 minutes so the consistency and the flavors are able to meld correctly.
  • Cook all the veggies without a lid until you add the tomatoes. The veggies really need to breathe and have the heat to saute up.
  • Liquid: keep stirring to move the liquid around and assure that it’s not too liquidy. If it feels like it’s becoming more soupy than thicker stewey, turn the heat up  and if it’s sticking to the pan turn the head down a bit.
Ratatouille
Ratatouille

Cucina de Kate Ratatouille

½ large onion
2 tsp (heaping) minced garlic
drizzle of olive oil (to cook the onions/garlic)
1 red pepper, chopped
1 good sized eggplant, cut up in to chunks
4 small zucchini, cut up into chunks
1 ½ tbsp. herbs de province
few fresh basil leaf’s
1 ½ c. diced canned tomatoes (I sometimes add a 25oz jar of 365 tomato basil marinera sauce)

Instructions

  1. Heat oil in your large pan while you chop the onions and garlic. Cook until translucent.
  2. Chop and add peppers. When they start to look a little cooked, chop and add the eggplant in medium chunks. I like them a bit larger so they retain some form as opposed to getting a bit more mushy when they’re smaller.
  3. Keep stirring the veggies in the pan until they eggplant starts to look a little cooked, then chop up and add the zucchini. Again, I liked keeping my chunks a bit larger to add to the stew-type texture and avoid a must consistency.
  4. Once the zucchini starts to look like it’s a little cooked, add the herbs and chopped basil and assure it’s all mixed together well. Then add the tomatoes. At this point you’ll have to keep an eye and stir frequently but you can multi-task and just remember to stir every few minutes.
  5. Keep stirring and cook for another 30 minutes (or so) until all the vegies are tender…and of course taste along the way!

Serve with a protein (egg or meat) and some rustic bread (or omit if you’re gluten-free)


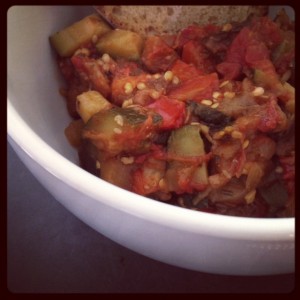
Ratatouille for Dinner
Ratatouille with Rustic Bread


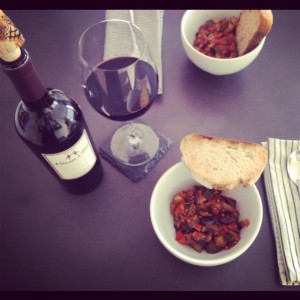
Dinner Table of Ratatouille with Rust Bread and Menage a Trios Red
Ratatouille with Rust Bread for Dinner
Ratatouille with Rust Bread for


Provençal ratatouille

Golden Vanilla Cupcakes (Gluten-Free, Vegan)

Gluten & Dairy Free Vanilla Cupcakes

Birthdays are wonderful and they are especially for someone who LOVES to bake! Bakers invent holidays just for the opportunity to whip up some delicious treat! Growing up I was given the nickname “Martha Stewart” because I was the chick who showed up for every holiday with the corresponding cookie/treat. Gingerbread for Christmas, heart-shaped shortbread with pink and red frosting at for Valentines Day, Shamrock cookies and green frosting for St. Patty’s, Easter treats, May Day cookies, July 4th something-or-rather,  Halloween trick or treat bags… Thanksgiving…Birthday’s Cupcakes…Picnic Pies and never white frosting after Labor Day!

Well, that was “back in the day” (am I even old enough to say that!?) before food allergies became so prevalent. Now, a baker must be VERY aware of those that might not be able to join in the sugary delicious consumption of a well-baked treat. Well, those bakers that want friends do!

It was a co-workers birthday a few weeks back and I immediately went into “Martha Mode”… “IF cupcakes just happened to show up on your desk what flavor would they be?” I inquired. “Not made by me” was the response…every bakers dream or dread! That is either the field of dreams to explore or a stress sentence of deciding what kind of baked good says what about you. Quickly I got over my female phobias (it’s true… women DO think of things like this!) and decided that I’d just make cupcakes that I’d be happy to take home if no one ate them.

 Gluten & Dairy Free Vanilla Cupcakes Texture
Gluten & Dairy Free Vanilla Cupcakes Texture

Being mindful of both a gluten AND a dairy intolerance I quickly realized that I didn’t have a go-to cupcake recipe to suffice. So I did what any good, sound, logical baking blogger did and headed to Google! This recipe is from Vegan Cupcakes Take Over the World  and they were a HIT!!!! Not just… hey this doesn’t taste like a rotten breaded sardine but actually got compliments of “These are AMAZING!” Even the birthday boy was skeptical when I told him they were gluten-free (omitted the dairy free part…have to ease them into the idea you know) said they were, and I do directly quote, “DELICIOUS! I was worried when you said gluten-free but those are REALLY GOOOOOOOD!

I LIVE BY Bob’s Red Mill Gluten-Free Flour for my gluten-free recipes so with that, ladies and gentlemen, I give you the ultimate go-to birthday baked good! It’s chewy and moist with the correct density and texture of a “real” cupcake while incorporating various intolerance’s. It’s pretty much amazing! I also love the other book from these authors and have it on the cookbook shelf, Vegan Cookies Invade Your Cookie Jar.

Culinate, who also posted this recipe suggested  Vegan Fluffy Buttercream Frosting or Not-Too-Sweet Blueberry Mousse for a topping but since I was short on time I just picked up a ready-made can from the grocery store and let people frost themselves. Okay…short on time AND lazy.

Golden Vanilla Cupcakes

Yield: 12 cupcakes
Ingredients
1 c. Soy Milk
1 tsp. apple cider vinegar
1 1/4 c. Bob’s Red Mill Gluten-Free Flour
2 tbsp. cornstarch
3/4 tsp. baking powder
1/2 tsp. baking soda
1/2 tsp salt
1/3 c. canola oil
3/4 c. sugar
2 1/4 tsp vanilla extract

Directions

  1.  Preheat oven to 350 degrees. Line muffin pan with cupcake liners.
  2. Whisk the soy milk and vinegar in a measuring cup and set aside for a 4-5 minutes to get good and curdled.
  3. Beat together the soy milk mixture, oil, sugar, vanilla, and vanilla in a large bowl.
  4. Sift in the flour, cornstarch, baking powder, baking soda, and salt, and mix until no large lumps remain.
  5. Fill cupcake liners two-thirds of the way and bake for 20 to 22 minutes.
  6. Transfer to a cooling rack, and let cool completely before frosting.


Cooking Cupcakes

Taco Tuesday & Wine Parings


Tacos & Wine

Taco Tuesday is a weekly tradition in our house. It’s healthy, easy to make, and delicious! Taco’s might be the ultimate meal, you can drink them with beer/wine/cocktail, are able to accommodate ANY  dietary restrictions!! They can be gluten-free, vegan, dairy-free, paleo, vegetarian, the list goes on!

I’m a FIRM believer that there is truly a good wine paring for ANY food! While taco’s might not instinctively have you reaching for the wine glass and adding to the cork graveyard, I wanted to explore some tacos and wine’s that others enjoy! So, I headed out to the blogoshpere and tweeted to enlist some help. Thanks to Menage a Trois Wines for posting on their Facebook page! (in case you missed it… I was last week’s Facebook “superfan” and first ever twitter Superfan! and was quite excited about it! Check out the post here. )


Now… ON TO THE TACOS!!!!

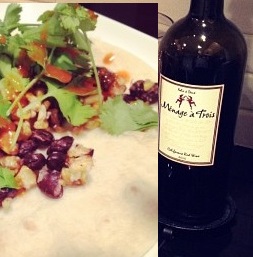
Our most recent Taco Tuesday was Black bean & lime taco (recipe here)  with Menage a Trios table red wine. Of course, no taco would be complete in our house with out some grilled cabbage slaw. Simple, crunchy, incredibly flavorful and adds some extra veggie and spice to any taco! So delicious!

John Bell (Fashion Photographer, Seattle) Twitter Response:  @johnleebell “pulled pork with sour cream…. Just got an idea to add cream cheese!”
A few followers asked to remain anonymous but wanted to share their go-to’s
“Grenache and halibut fish tacos and some shredded cabbage”
“I love a nicely chilled Gewürztraminer and some Spicy Chicken Tacos! Flour tortillas please!”
“Pinot Gris is very balanced and drinkable, pairs well with both fish and chicken tacos! You could even drink with a Carne Asada”
“A good full-bodied Merlot is GREAT with steak/beef tacos! Shredded beef, cheese, fresh avocado and tomato… melted cheese… mmm!”
“If you’re doing beef, try a Zinfandel, Rioja or Malbec”
“ANY taco goes with a good Tempranillo! ENJOY!”

Menage a Trois Facebook Responses: 

Sherry Smith “slowed cooked pork with a sauce made of jalepenos garlic lime juice and cumin anchote once it is cooked i drain sauce and pull pork off and serve with warm flour tortillas and red onions and home-made salsa served with red wine”

Brenda Hudson Mcrae “fish tacos, with advacado salsa and sour cream”

Bobbijean Blackinton “I can not take credit for my favorite tacos .. but in the summer I love these taco’s … so easy to triple or double depending on the summer gathering!!!http://www.patiodaddiobbq.com/2010/05/spicy-grilled-fish-tacos.html

Holly Le Du “I sautee finely chopped onions and raisins together for a couple of minutes, then add freshly ground beef with sea salt, pepper, chili powder, cumin, and a tiny bit of dried oregano. I put them in handmade tortillas (I prefer flour) with lettuce, tomatoes, cheddar cheese, and avocados and a homemade salsa. Sooo yummy!”

Tamasin Noyes “Mine is here, on my blog, and I would love to have it featured. Thanks in advance! http://www.veganappetite.com/2010/02/15-minute-chipotle-black-bean-tacos.html”

Spirited Shipper “Tacos are our favorite! We love tiger shrimp tacos with avocado, slaw, lime, and cilantro garlic sauce!”

Kim Smith Saghy “I think the Eagles Nest on Pier 39 in San Francisco has the absolute best fish tacos! And they will share their recipe.”
What’s YOUR favorite Taco and Wine mix!? I’ll be happy to keep updating the post as more recipes come in!  Moral of the story… make tacos every tuesday and enjoy with some type of wine! 🙂 Life is better that way!