Last summer I got hooked on pumpkin seed butter. Before that, I didn’t even know such a thing existed. I felt pretty nut-butter gourmet knowing that there was macadamia butter as well as cashew butter. I knew that you could grind your own; I’ve seen and even used the machines in my local Whole Foods to make fresh almond butter. But those machines were big, and scary, not to mention loud and quite menacing to look at. The though had NEVER dawned on me that it was something that could be made at home. Until a combination of a strong desire for a food processor, DIY itch and budgeting came together. Random components, but quite a story!
This recipe was adapted from the the kitchn’s Pumpkin Seed Butter recipe. I LOVE that they say it was inspired by a nut butter that they tasted at the Portland Farmers Market because I’m pretty sure it’s the same nut butter that hooked me on Pumpkin Seed Butter. Nut-Tritious Foods is a wonderful little company based out of Vancouver, Washington. They do a great job of educating customers why cold-pressed nut butters are better for you. I pulled the info below from their about page because it’s REALLY important to know!
“… we COLD-PROCESS and don’t use heat to get our nut butter into the tub. Heat will oxidize the healthy fats (poly- & mono-unsaturated) and make them more like a saturated fat! Most all jar nut butters have been heat processed – you can tell by the ‘nutcrete’ in the bottom of the glass jar.” An additional note, the heat processing method allows the nut butter to sit on the shelf in a jar until it’s purchased. Personally, I’d much rather have the fresh stuff that I know is perishable and know that I’m getting the most nutrition out of my consumption.
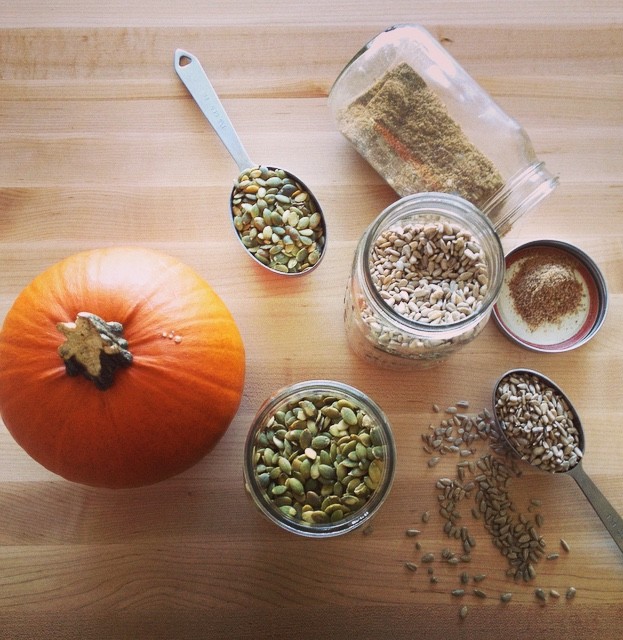
2 cup raw pumpkin seeds, without shells
1/2 cup ground sunflower seeds
1/4 cup flax meal*
1/4 cup grapeseed oil
1 spoon of honey (to taste)
pinch grey salt
*Flax Meal: You can easily make flax meal in a coffee
Combine pumpkin seeds, sunflower seeds , and flaxseed meal in your food processor. Blend until the ingredients are well chopped and blended. You’ll need to stop and scrape the sides down so all the ingredients get blended together.
Add the honey and blend until the nut butter starts to form. This can take up to ten full minutes so have patience! Once you see the play dough texture, where the seed butter starts to form a ball and move around the bowl you’re getting close! Add the oil and continue to blend 5-10 minutes more until the butter is consistently smooth. Your food processor might get warm but don’t worry too much, you can always let it cool a little bit and then blend away. I used the 1/4 cup of oil and it was just fine, but you may want to add more depending on how you like your nut butter.
Place in an airtight container (tupperware or glass jar) and store in refrigerator up to 2 weeks.
There are plenty of additions to this recipe, you can mix up the ratios. You can choose olive oil or coconut oil. You might want to add salt, or use salted pumpkin seeds. You can also pre-heat the oven to about 350 and roast the seeds on a parchment paper or foil wrapped cookie sheet for 10-15 minutes. If you oven roast them, stir the seeds once or twice during cooking and let them cool before adding to the food processor. There is also a delicious looking adaption for Maple Pumpkin Seed Butter and Chocolate Pumpkin butter.
When I first thought about making my own Kombucha at home I was a little wary. What if I do it wrong it turns out horrible and make myself sick! For those of you that are like me, all you really know about Kombucha is that is some healthy drink that you see littering the aisles of health stores and somehow helps you be healthy and has something to do with mushrooms.
The Kombucha starter, often called a “mother” or a scoby, stands for symbiotic colony of bacteria & yeast. The reference to mushrooms comes with the disc like form that the scoby grows into, which can sometimes look like a Portobello mushroom or to be more specific, a very slimy slightly yeasty smelling version of a mushroom. So, there you have it, there are no mushrooms involved in the making of Kombucha! There are a bunch of SCOBYs out there, Amazon has a bunch of options and the only recommendation I’d make is to ensure that you get one that is hydrated – the dehydrated ones are a pain!
This drink is made from a process called fermentation, which simply means that bacteria or yeast is used to chemically break down a substance. While the sounds a little gross, I’ll admit, it’s quite good for you! It contains healthy bacteria called probiotics which support intestinal health and help with digestion and elimination as well as encouraging detoxification. For an extended list of possible health benefits, please visit Kombucha Kamp.
The process of making Kombucha is actually much easier that I thought it would be! I LOVE this picture below from a the Eat Life Whole post on Kombucha.
See it’s simple! First, you’ll need to purchase a scoby from a reputable source. Unless you have a friend that has a baby scoby to share, you can purchase the same on that I did from Yemoos or Cultures for Health. Next, you brew some tea with sugar, which feeds the bacteria, let it cool COMPLETELY to room temperature, then pour it into the jar with the scoby and let it hang out for 5-10 days and viola, you have Kombucha! I have to lead this post with a shout out to one of my dearest friends who’s pioneering into the world of Kombucha (and responsiveness to my contestant Kombucha support line texts of “DOES THIS LOOK NORMAL!?”) really helped me in making my first few batches. If you’re lucky enough to have someone that’s also making Kombucha you can trade stories and pictures of your ever growing SCOBYS (yes, you’ll want to take pictures as gross as that might seem) but if you DON’T have someone making it at the same time as you, please consider this your Kombucha support forum! Post pictures of your scoby, ask questions, let us know your favorite flavors that you’re brewing, and anything else Kombucha that comes to mind.
One of the most important things you have to remember when making Kombucha, and most other fermentations, is that metal utensils/containers and plastic containers are not a good idea. The metal and plastic can actually harm the fermentation so it’s best to brew using plastic utensils and a glass jar, which are easily sanitized.
If possible, try to prepare your first batch of Kombucha the day your scoby arrives. You can store the scoby in a cool cabinet until you’re ready to brew your first batch. I have to tell you, I put mine in the fridge because I thought it needed to be kept cold, and THEN decided to read the direction and freaked out thinking I had already killed my little scoby. It was in there over night and I contacted the team at Yemoos right away who quickly settled my worry and said that it would likely be just fine having spent the night in the fridge. Phew, guess I should read the directions FIRST next time hey? The nice thing about this process is that the scoby is pretty resilient so you don’t have to worry too much about “messing it up”.
As far as drinking this good stuff, most people are fine starting off with a full glass but for a few people it can be a little shock for the body since it’s packed with probiotics that encourage, well, elimination and promote intestinal balance. If you find that you DO have a little tummy rumbling response to the Kombucha, back off to a half glass and work up your consumption level daily.
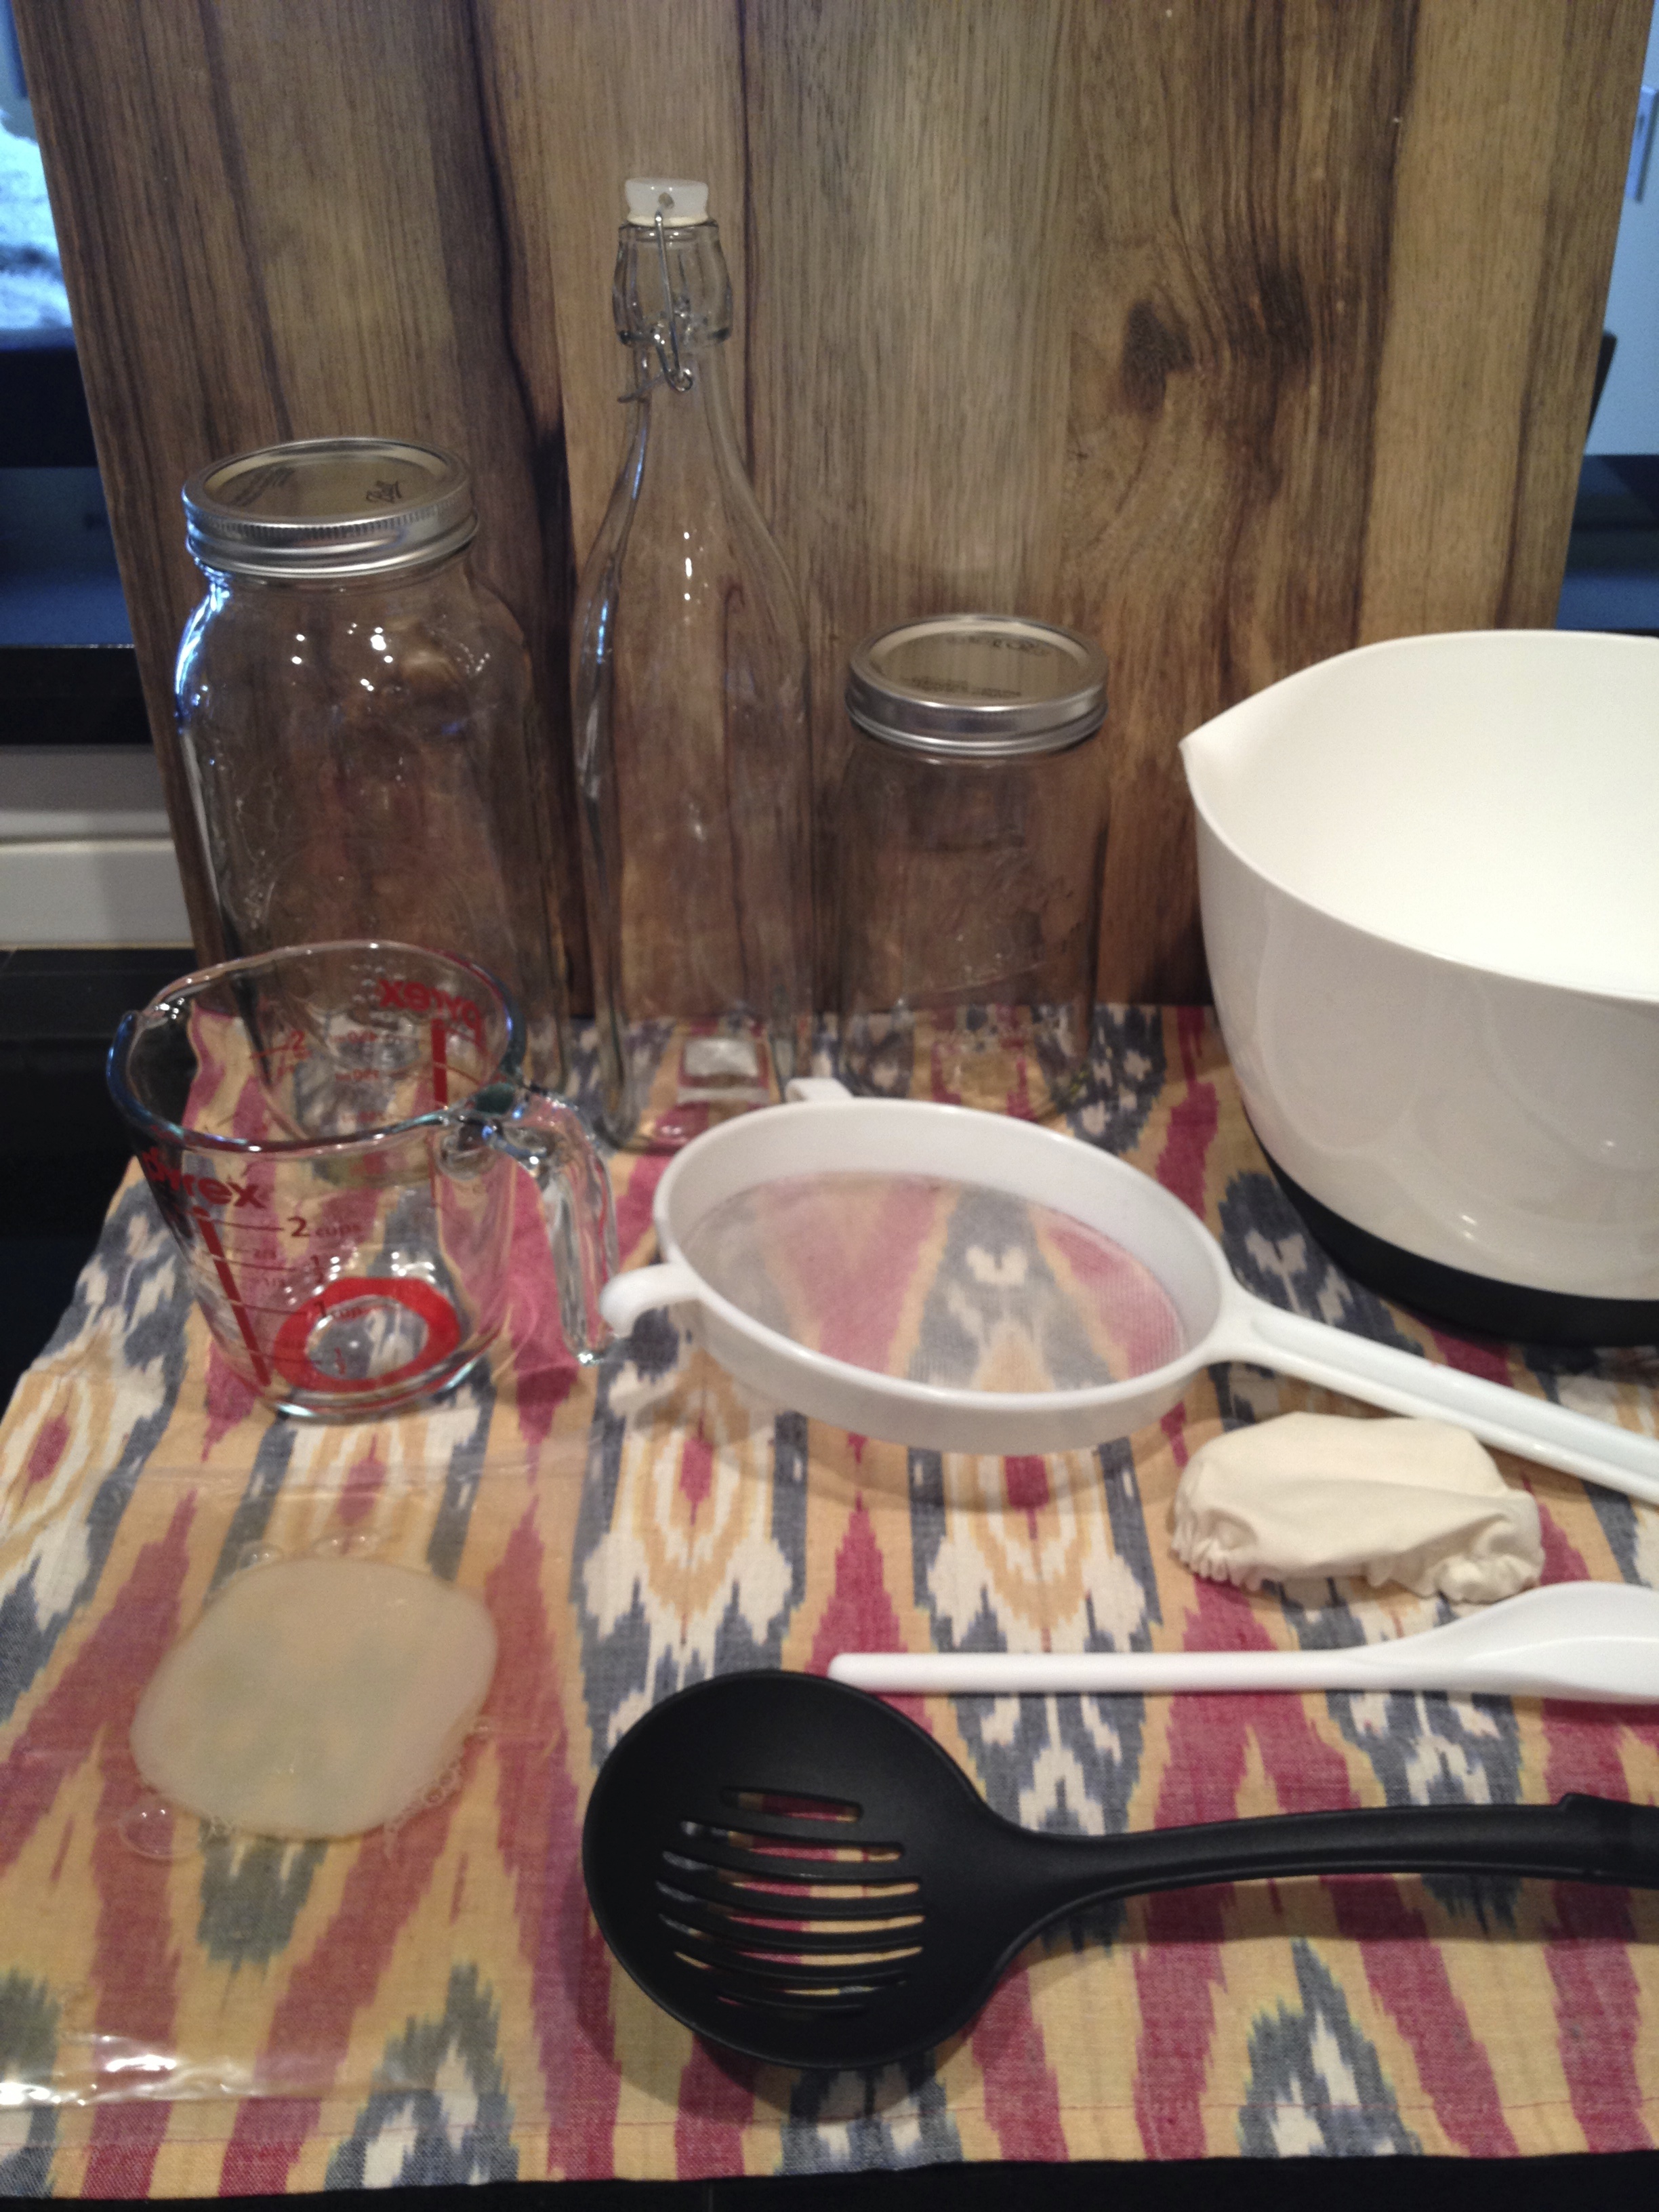
So, are you ready to make some Kombucha!? I got my ball gallon glass jar and sling top bottle at Cost Plus. The quart glass jar came with the yemoos Sourdough kit I ordered at the same time as the Kombucha SCOBY starter, but you can get a great gallon jar HERE on Amazon.com them or find jars of various sizes at Cost Plus.
Homemade Kombucha: A Step-by-Step Guide
Tools:
1 gallon glass jar
Plastic spoon or spatula
Pyrex glass measuring cup (for measuring the water)
1 Plastic bowl for steeping and cooling the tea (one with a pour spout is easiest)
3 Sling top glass bottle to store finished Kombucha
Funnel that fits in the top your sling top bottle
(Optional) Strainer, used to strain out the little strands of Kombucha if bother you
Cover for the Kombucha- cloth or paper towel secured with a rubber band works
Ingredients:
1 Scoby (called the “Mother) & Starter Tea liquid it arrived in
8 tea bags or 3 tbsp loose leaf tea in a tea bag
14 cups filtered water
1 cup organic white sugar
Get your large bowl and get your tea bags out, tying the strings together. Add in one cup of organic sugar.
Boil your filtered water then add it to the bowl with the tea and sugar, stirring with your plastic spoon while you pour so the sugar dissolves.
Let the tea steep and cool COMPLETELY to room temperature, if you pour it in with the scoby when it’s too hot it can harm the scoby cultures.
While the tea is cooling, wash your hands and carefully open the scoby packet, which should also contain the starter tea. Gently pour the tea and the scoby into your sanitized jar that you will be brewing your kombucha in.
Once the tea and sugar mixture is cooled, tilt your brewing jar to the side and carefully pour the cooled tea mixture into the jar trying to get the tea under the scoby. Cover the jar with a cloth or paper towel, something breathable, and secure with a rubber band. Place your Kombucha out of direct sunlight and let it brew for 7-10 days undisturbed.
You can taste your Kombucha around day 5 if you’d like by dipping a straw into the Kombucha, covering the exposed end with your finger, then removing the straw so you don’t contaminate the rest of the batch. The sugar is what feeds the scoby, so if the tea still states sweet, it needs to brew longer. When you taste it, it should be a little acidic or tart first, then have a little touch of a sweet finish.
When you have reached your desired taste, you’re ready to bottle! Get your sanitized swing top bottle, a strainer, and a funnel. I didn’t actually use the strainer. This is an optional step where you can strain out the dead yeas cultures that you will see floating in the brewed tea- they’re just little pieces of dead yeast and are perfectly fine to consume. They don’t bother me but if you’d prefer to strain them out while you bottle it, you can. Place the funnel in the top of the swing top bottle and carefully pour the finished Kombucha into the bottle. Reserve about a cup of the liquid for the next batch of Kombucha and repeat the steps!
Keep your finished tea in the fridge to slow down the fermenting that can slowly continued even after you’ve removed it from the scoby jar.
A Few Notes:
As the Kombucha brews, you’ll see another layer growing on top of the Kombucha. While it might resemble mold, it’s simply the start of a “baby scoby”. This is perfectly normal and actually what you will be using to keep brewing Kombucha at home. As long as the baby scoby isn’t thick, you can brew both the scobys together for your second batch. After the second brewing, you’ll want to carefully separate the bottom scoby, which is the mother, and continue to brew using only the baby scoby. You can either discard the mother scoby, or give it to someone else so they can home-brew Kombucha!
The scoby can sometimes sink a little, and it’s completely fine if it does. Just make sure it doesn’t completely sink to the bottom.
If you’re worried about the sugar, remember that this is what the scoby metabolizes, along with a good portion of the caffeine in the tea so there will be very little of either left in the final product. While it won’t completely remove the caffeine it will greatly reduce it.
You can use the same jar for your second batch, but make sure to separate the mother and baby scoby after the second brewing.
If you prefer your Kombucha fizzy, I suggest using a bottle with a sling back top so any pressure that accumulates can release itself. Simply pour the Kombucha almost to the top of the sling back bottle and set it on the counter for 2-5 days. You can also manually “burp” the Kombucha if you start to notice pressure on the lid.
You can also make flavored kombucha soda on a second ferment!
“Organize my fridge!?”…you might be thinking… “Don’t be ridiculous!” Take this scenario: You’ve been craving {insert food here} and it’s time to enjoy! You go to the fridge, open the door and riffle around to find the leftovers box! You open it and…wait {chosen food} isn’t supposed to be THAT {color/texture/smell}… because it’s SPOILED! You think to yourself, but I JUST put it in there a few days ago! Sadly I think that everyone has had this happen at least ONCE in our lives. Hey, it happens! Life gets busy, last minute plans happen and leftovers should be sacrificed, especially when they’re REALLY good!
Enter “The Organized Fridge”. Start the New Year with a clean and organized fridge! Between hosting and attending holiday parties, office gatherings and family meals the fridge can start to get packed during the holiday season. Read these tips below and keep that food on the safe side of becoming a science experiment!
Fridge “Deep Clean”
Triage the fridge of all expired items. Between “Sell By”, “Use By”, “Best Before” and “Package Date” it can feel like another language trying to decide if something is safe to keep. Here are a few simple ways to remember.
Do the sniff test, if something smells funny EVEN if it’s not expired go with your gut and toss it. Forget about “Sell By” and never eat past the “Use By” date. Kiss it good bye and put it on the shopping list.
As for “Best Before” and “Package Date”, those you can look at together. If stored correctly, things like dairy products and meats can go a day or two past the listed date. Now, if it’s growing green foliage throw that sucker out!“Best Before” doesn’t always mean “Spoiled After”. Keep an eye and know that you have a day or two leeway.
The “Package Date” comes in handy on things like meats where you want to know when it was, well, packaged to determine when the proper waste basket toss needs to happen. Long winded, but I hope it helped clarify a little!
Clean the fridge: Empty your fridge and give it a thorough sanitizing cleaning! I’m talking remove those shelves and drawers and give them a good deep wash and sanitation cycle also! You should be wiping down your fridge weekly and deep cleaning no more than once a month. Wipe the exterior and handles and check that none of the door seals are broken. If they are, you’ll need to replace them ASAP since that is what keeps the cool in and the “spoil” out!
Reload: Putting the food and such back in the fridge, make a note of what was spoiled or needs to be replaced on your shopping list. This is also a good time to do some mental meal planning and use up ingredients that might be on the cusp of consumable.
Leftovers: The rule in our house is NO longer than 4 day son leftovers EVEN if they don’t make the sniffer pass out. We make sure to put the date on the top of the box before we put it in the fridge. If you so choose, you can transfer your home cooked or takeout leftovers to a plastic or glass container and use a sticky note to list the contents and date. Glass is nice when re-heating since you don’t have to transfer it from the plastic container and there is less dishes to clean up. Remember, you can also freeze quite a few things and if you think ahead that you might have leftovers and won’t eat them in the 4 day window, pop those guys in the freezer with a date on them and use them at a later date!
Tip: Storing leftovers at eye level will help you remember they’re there and use them up!
When you read the word fiber what do you think of? Now, a little song might have popped into your head, “Bean’s bean their magical fruit the more you eat, the more you toot!”… okay well if it wasn’t there already it is now! (Your welcome!)
There are hundreds of articles on fiber and its benefits. To save you time, I read QUITE a few and have complied a little cheat sheet of what it is and why you should care!
To begin with, let’s address the first question!
“Why the heck should I care about fiber? ”
Well, first off it keeps you regular! Those of us that are part of the food intolerance or delicate stomach club are all too familiar digestion issues and regularly consuming fiber will help. It helps to soften and bulk up your stool as well as promoting the elimination of waste through your digestion system. Studies have also shown that keeping up a regular suggested intake of fiber can help lower blood cholesterol levels and control blood sugar levels.
Another useful benefit of fiber is that it helps fill you up. If you love to eat salads and lighter meals, or you often feel hungry shortly after you eat one thing that might help with that is making sure you get enough fiber so you can feel full. Fiber takes longer to digest, which makes your body work for a longer period of time to digest and use the nutrition which helps to keep you satisfied longer.
One word of caution before we dig in, make sure to slowly introduce and increase your fiber intake as well as drinking PLENTY of water. Adding too much fiber to your diet can lend itself to some… let’s call them uncomfortable side effects. (Bloating, diarrhea or constipation)
“What is Fiber?”
There are two types of Fiber that should be included in your diet.
1. Soluble fiber which dissolves in water, digests into the body and helps you feel full. This soluble fiber breaks down and forms into a gel-like substance during digestion. You can find it in foods like oatmeal, oat bran, beans, peas, flaxseeds and fruits.
2. Insoluble fiber which retails it’s bulk and helps things get moving by promoting movement through digestive system. This type is typically found in whole wheat and grains, wheat bran, brown rice, dark leafy and root vegetables, cabbage, tomatoes, raisins, grapes, etc.
“How do I get Fiber?” At the end of this article, I include a graph that the Mayo Clinic published which illustrates serving size and the equavalent grams of fiber per serving for some popular high-fiber foods but I wanted to break it down and give you a genera “cheat-sheet” of some easy to incorporate high-fiber foods.
Beans
Whole Grains & Brown Rice
Popcorn & Nuts
Fruits like: Apples, Raspberries, Pears
Bran (oat, wheat, cereal, muffins)
Oatmeal
Veggies like: artichoke, peas,
Veggies (1 artichoke has 10 grams!1 c of peas is 8 grams)
“How much do I need?”
Now that you have an idea for what fiber is and where to find it let’s move on to the meat and potatoes (ha…cooking blog…meat and potatoes…get it?). How much do you need? According to a WebMD article I read, “the average adult only eats 15 grams of dietary fiber per day.” Wow! That’s half of what The National Academy of Sciences’ Institute of Medicine recommends for fiber intake. They suggest that women need 25 grams per day and men should get 38 grams per day (for those under 50).
“Now, what do I do?”
So, now that you know what it is, where to find it, how much you need and realize that you’re likely not getting enough let’s put the frosting on the cake (wow ladies and gentlemen I’m on a cinnamonroll today! Okay okay… I’ll stop) how to add more to your diet. Now that you now what contains fiber and have an idea of what to look for you can make choices to include more in your diet throughout the day. But remember, drink water with and fiber increase. American’s dont get enough water daily either! Men should drink 13 eight ounce cups of liquid a day and women need about 9 cups per day. I usually shoot for two Nalgene bottles of liquid (not including coffee/wine) per day. But back to fiber! One simple way to include more fiber throughout the day is to eat more beans with your meals and munch on fruit, nuts and popcorn for snacks.
Another easy way to add fiber is to start the day off right and find a bran cereal that you like. Bran is the outside part of a grain kernel. I’m sure you’ve seen the various bran cereals lining the shelves of the grocery store and might even have a mental picture of watching your grandparents mix up a chalky, lumpy glass of Metamucil. Oh wait, is that just my mental image? You might have to try a few cereals before you find the right one. I’m convinced that some of the “flavors” on the boxes of bran cereal should just read “cardboard”.
My favorite way to get some fiber is with bran muffins. I LOVE a good bran muffin. Not only when I’m … ahem… in neeeeeeeed of one but on a rainy morning, sunny afternoon, midnight snack. Anytime of the day is muffin time if you ask me! I’ve LONG been on the hunt for the ULTIMATE bran muffin. I’ve tried countless recipes including vegan, dairy-free and with dairy and just haven’t found the right mix of sweet enough, moist enough, anti-cardboard tasting.
I’ve seen both wheat and oat bran used in recipes. Wheat bran is lower in calories and fat and has much higher fiber content than the oat bran. It contains B vitamins such as Niacin and B6 and contains insoluble fibers to bulk up while oat bran is denser and contains vitamins such as folate and thiamine as well as soluble fibers which gel-up and absorb. It’s also a great option to consume on its own as a warm breakfast cereal. Eating wheat bran as a cold breakfast cereal by itself would be like gnawing on a bowl of shredded soggy cardboard.
So, while I’m still on the hunt for the PERFECT bran muffin recipe (if you have one you like PLEASE send it my way! I’m happy to guest feature you!) here are a few recipes that look delicious!

 Last summer I got hooked on pumpkin seed butter. Before that, I didn’t even know such a thing existed. I felt pretty nut-butter gourmet knowing that there was macadamia butter as well as cashew butter. I knew that you could grind your own; I’ve seen and even used the machines in my local Whole Foods to make fresh almond butter. But those machines were big, and scary, not to mention loud and quite menacing to look at. The though had NEVER dawned on me that it was something that could be made at home. Until a combination of a strong desire for a food processor, DIY itch and budgeting came together. Random components, but quite a story!


")
")
")
")
")