Hawaiian Poke & Ginger Ono Sashimi

Sam-Style Poke Aloha! We’re celebrating my parents 30th anniversary in  Hawaiian WARMTH and relaxing style! (For some reason they decided to invite us along, so we bought our plane tickets before they had time to change their minds!)

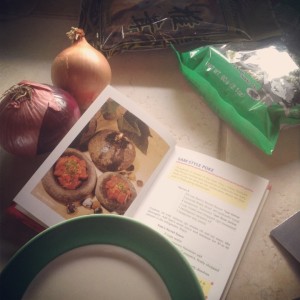
While relaxation is the name of this game, there are a few things I wanted to do: paddle board, sleep, eat my weight in pineapple and consume as much fresh fish and shrimp as I can possibly hold! Browsing around the ABC store in Downtown Kona (We needed to stock up on some “beverages” for our beach happy hour) Mom came across Sam Choy’s Little Hawaiian Cookbook for Big Appetites and it had some delicious looking recipes so we picked it up and had a tried a few for our sunset picnic at the beach! 

And here is a shot of our Beach Picnic!
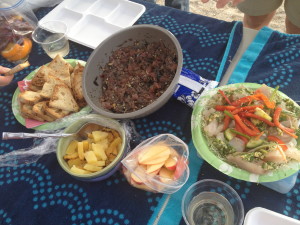
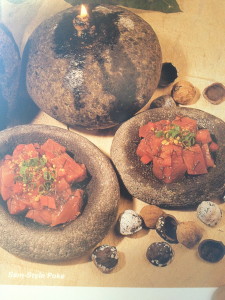
 IMG_0794

Sam Stye Poke (Photo from Recipe Book)

Sam-Style Poke

Serves 8

2/3 c Sam’s Secret Sauce (see below)
2 lbs finely diced ‘ahi (yellowfin tuna)
4 tsp ‘inamona (which is crushed and roasted kukui nuts, can sub 4-6 tsp crushed cashews for same taste)
1 c rinsed and chopped ogo (seaweed)
1 tbsp sesame oil
1 tsp soy sauce

Sam’s Secret Sauce

2 c water

2 tbsp Hawaiian Salt
2 Hawaiian chili peppers, finely chopped (or red pepper flakes)

Make Sam’s Secret Sauce first by combining all ingredients and stirring until salt dissolves and set aside (not heated, just mix at room temperature). Cut the ‘ahi into chunks, no more than an inch square. Sometimes ‘ahi has white bands, or strings, of fat and with the raw fish you’ll want to remove some of this if you can so you might have to determine the size of the poke around whatever size results after removing the strings.  Combine ‘ahi with ‘inamona (or crushed cashews), ogo (seaweed), sesame oil, and soy sauce. Mix thoroughly. Add Sam’s secret sauce and marinate for 60 minutes in refrigerator.

There are a few ways you can serve this dish but we found that serving on rustic bread, cut into “serving sizes” and toasted in the oven was by far the most delicious! Just make sure they’re not TOO done… some of ours came out a bit too toasted and scraped our mouths! You could also serve on cucumber slices!
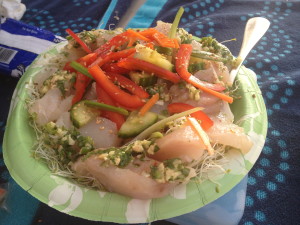
Ginger Ono
Ginger Ono

Ginger Ono

Serves 6 

Local Pepe’ekeo Dip
1/2 c oil 

1/2 tsp salt
1 clove garlic, minced
1/4 c ginger, minced
1/4 c green onion, minced
1/4 c lightly packed Chinese Parsley, minced (We used Cilantro and it was delicious)
1/8 tsp White Pepper
1/4 Tsp red pepper flakes or 1 fresh Hawaiian chili pepper, minced

1 lb Raw Ono
1 1/2 c assorted sprouts
1/2 cup Local Pepe’ekeo Dip (recipe above)


Make the Local Pepe’ekeo Dip first.

In a small sauce pan heat the oil then add the salt and cook for 2-3 minutes. Remove from heat and let cool. Stir in garlic, ginger, green onions, Chinese Parsley/Cilantro, white pepper and red peppers. Chill. To serve, thinly Slice raw ono. Line small platter or individual plates with sprouts of our choice. Arrange ono slices on sprouts. Spook the Local Pepe’ekeo Dip over the fish and serve chilled.

Baked Beet Chips

IMG_0640
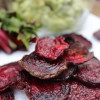
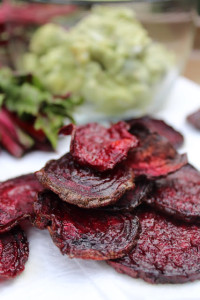
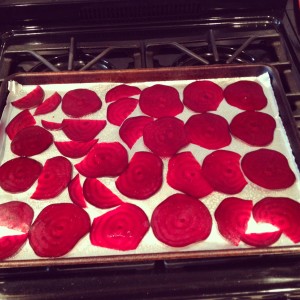
Roasted, canned, sliced, boiled, pureed, fried, baked into chips. Any way you serve them, sans raw on a plate, I’ll eat em! I LOVE beets! On one of my ritual weekend trips to shop at the best farmers market EVER I was strolling out of our amazing italian speciality market, De Laurenti, and stopped to watch them throw the fish when I hear a lady behind me say, “And this is a beet chip! Give that a try and tell me how amazing THAT tastes!” Immediately I turned around and found myself facing the dried fruit stand which I had never before given a second thought to.


IMG_0639But, now the game was changed she said beet and chip in the SAME sentence! I tried one and was HOOKED! They were even part of my Christmas stocking last year. Seriously! I put chocolate in his stocking and he put beet chips in mine!  Of course, being little miss DIY I had to figure out how to make them at home! I knew she flash fried them, half of why there were so good but I wanted to see if I could recreate the goodness at home with less oil and keep the same crispy delicious flavor.

So, I searched the blogosphere, Pinterest-ed and Martha Stewart stalked to find and read as many recipes as I could to assimilate the ultimate recipe.

Many recipes called for using a mandoline to slice the beets which I don’t have! Thinking I’ll invest in one, which would not only be safer and swifter but it would also make much more uniform chips! They also said to cut the beets 1/16th of an inch, which I actually had no idea what that size was on a beet because I have ZERO depth perception so I just eyeballed what I felt was “thin” sliced then got curious so I pulled out the measuring tape and what do you know… it was 1/16 inch exactly! I also found the using my misto sprayer with EVOO in it worked better than brushing each chip for my goal of using less oil. It gave a nice even spray of olive oil to crisp it up and give it some flavor instead of bathing the beets in oil.

My take one...
My take one…


How they CAN look! Photo courtesy of Simply Whole Kitchen


Baked Beet Chips
1 large beet
Misto Sprayer + EVOO
Fresh cracked salt and pepper to taste

Preheat the oven to 350 and line a baking sheet with non-stick foil.

Wash your beet(s) and pat dry with a paper towel. Keep another paper towel handy to hold the beet when cutting. The skin will help to keep the purple of the beet from staining your hands, but if you’re half as clumsy as I am it’s smart to keep one handy!

Using a sharp knife (or mandolin), slice the beets into thin 1/16 inch slices.

Spray with the Misto Sprayer then crack fresh Salt & Pepper to taste.

Bake for 15-20 minutes until crisp then cool on a wire rack until completely cool. (I found that using less oil and the low heat of 350 took about 40 minutes to get them crisp. Next time I’ll try upping the heat and doing a double misto spray to see how that works!

IMG_0637

Prosciutto Wrapped Chicken & Asparagus

The plate
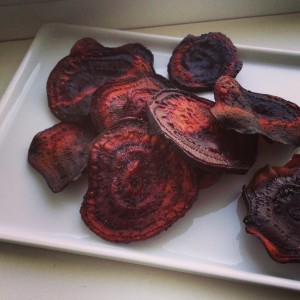
January is about fresh starts, renewal, clean slates and expansive opportunity ahead. I’m not big on “resolutions” necessarily but I do like the atmosphere of new beginnings that January holds.

In an effort to combat the grey day and finding myself with a night at home to relax and unwind, I decided that it was time to cook a recipe from my many Pinterest “pins”. This meal finds its way to us from my “A Meal A Day” Pinterest Board, where I keep all my for a “Rainy Day” recipes to try, and today was as rainy as it will get!

up close 
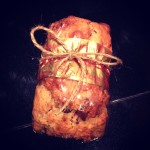
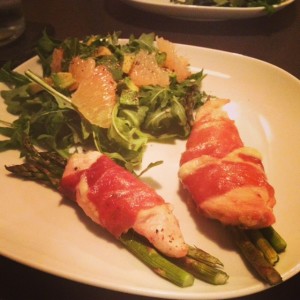
The fresh light yet peppery flavor of the salad paired perfectly with the cured meat and cheesy flavors of the chicken!

Tips:
Measurements Everything on this meal should be “to taste”. I actually HATE having measurements on there since everyone likes their meals a different way but experiment with the flavors and ratios and have fun!

Prosciutto Choose a lean cut that  isn’t too salty and ask your butcher to slice it a bit thinner than lunch meat so it will not be an overpowering flavor but will still hold its integrity when you wrap it.

Prosciutto Wrapped Chicken & Asparagus
(Kale Grapefruit Salad with Avocado and EVOO Recipe Below)
Recipe Adapted from Inspired.ca

2 boneless and skinless chicken breasts
Fresh cracked pepper to taste
8 slices prosciutto
½  bunch young green asparagus, washed and trimmed
Shredded mozzarella, to taste (approx. ½ cup)

Pre-heat the oven to 375°F. Line a baking sheet with foil or parchment paper.

Wash the chicken and pat it dry. Then, slice each chicken breast in half horizontally to make four equal sized cutlets and set aside. Depending on the ratio of chicken to prosciutto you like, you may want to half each cutlet. Lay out the chicken on a plate so you can crack fresh pepper on the surface of each chicken breast.

Pre heat a sauté pan on the stove. You’ll place the wrapped chicken in the hot pan to sear the prosciutto closed before placing on the baking sheet so make sure you have a spatula handy to transfer the wrapped chicken.

Lay two slices of prosciutto side by side, slightly overlapping. Sprinkle with mozzarella. Place one piece of chicken horizontally across the prosciutto so the prosciutto is vertical and the chicken completes a cross horizontally across the center.

PrepLay a few springs of asparagus on top of the chicken, also in a horizontal pattern. Carefully wrap the prosciutto around the chicken and asparagus tightly and place into the pre-heated sauté pan with the seam on the bottom. Sauté for a few seconds until the seam on the prosciutto is closed, then turn over for a few additional seconds to get a nice crisp to the prosciutto then transfer to the lined baking sheet with your spatula.

Repeat with the remaining prosciutto, chicken and asparagus.

Bake the chicken 15-18 minutes, until the internal temperate of the chicken reaches 165°F. When you transfer the chicken to the plate, there will be some juice from the chicken so let that drip into the lined baking sheet before placing on your plate. You can garnish with more mozzarella or cracked pepper if you desire, but we liked it just as it was!

up close


Kale Grapefruit Salad with Avocado and EVOO
Kale
Grapefruit, cubed and peeled from the flesh
Avocado, cubed into whatever size you desire
EVOO (Extra Virgin Olive Oil)

Wash the Kale and pat dry. Pull the leaves from the stock and chop. Wash the outside of the grapefruit and avocado, slice in half and cube. For the grapefruit, pull the each of the sections out of the fleshy membrane and use only the citrus “meat” portion.

Assemble all ingredients on the plate drizzle with EVOO . (Optional Addition: toasted Almonds)


Shake & Bake…Homestyle

IMG_0598

We don’t do freezer dinners. Actually, we don’t really use our freezer. If you were to take an inventory you’d find a LOT of homemade Limoncello, Jägermeister, a box of frozen waffles and ice. Hungry man dinners were created for a reason… luckily the man of the house has his own short order chef to replace a TV dinner and microwave love child.

Being little miss do it yourself, I couldn’t bring myself to give up a chance to “make it from scratch”. If it gives you any indication about my infatuation with DIY food, a few of my other make from scratch adventures yet to come: wheat thins, graham crackers, english muffins and beet chips. So, when presented with the request for Shake & Bake, I flew to the bloggosphere and found a recipe to tweak!

Homestyle Shake & Bake
Yield: 1 cup  = one chicken breast 

IMG_0600
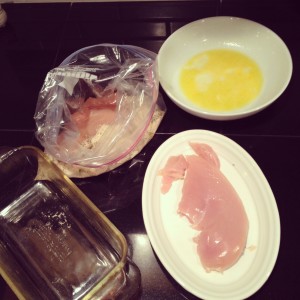
1 cups dry bread crumbs (can be gluten-free too!!)
1 tsp paprika
few grins of fresh black pepper
1/4 tsp garlic
small pinch of: dried basil, dried parsley. oregano
1 egg, beat with a dash of olive oil
(the recipe also said to include 1 part celery salt to half part garlic salt to 1/4 part minced onion. I had none of these so I simply omitted)


IMG_0599


Preheat the oven to 400 degrees Fahrenheit.

In a large resealable plastic bag combine the crumbs, oil, salt, paprika, celery salt, pepper, garlic salt, minced garlic, minced onion, basil, parsley and oregano.

Dip the chicken breast in the egg it in egg.

Place no more than two chicken breasts in bag, seal and shake all ingredients together.

Bake the breasts for 20 minutes if the chicken is boneless, or 45 minutes if it does have bone, or until the internal temperature reaches 165-170.

Homemade Pizza

IMG_3399
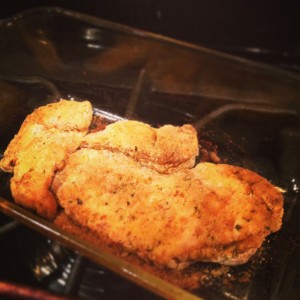
Pizza…is…DELICIOUS! With a plethora of options, toppings, styles, crusts and meals that it can be served for Pizza is pretty much an ultimate food. Eat it cold the next morning or  poach an egg on it and Viola, Breakfast! It’s the perfect brown bag lunch or picnic lunch option. It can be served flatbread style is an appetizer or tapas course, or loaded with amazing toppings and served as a dinner delight! Now, there is some debate between Pizza and flatbread so let’s review the three-step by step criteria for granted a place in the hierarchy of acceptable pies.

IMG_3383
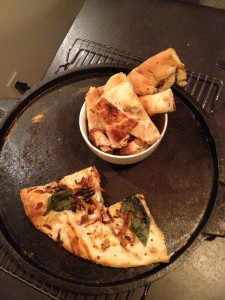
CRUST: This can be a chat of endearment or an all out fight in certain areas of the world. There are crust aficionados that take this topic very seriously. Whether you’re in thin crust camp or a lover of the thick bready crust, this is the foundation of the dish. With Pizza it seems that there can be variation in the crust whereas a flatbread will typically be a little thicker on the crust but there could be blurred lines here so let’s proceed.

BASE LAYER: Then you have the cheese vs. sauce or olive oil assessment. I call this the base layer since it seems to set the tone for how the rest of the topping architecture. With the increase in food allergies and culinary progression pizzas without cheese is no longer a cardinal sin. It is now more common to find pizzas and flatbread without cheese, topped with a traditional tomato sauce or simply brushed with olive oil. This too can be a blur in the pizza or flatbread debate, so it seems that we must proceed to the last criteria.

IMG_3603
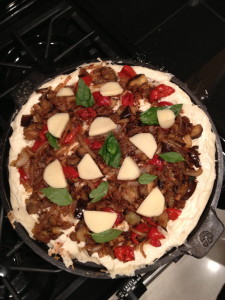
TOPPINGS: Now we have the “finitura” (finishing touch in Italian), the toppings.  If you saw broccoli on a pizza you might do a double take and wonder if your mother was in the kitchen sneaking in your daily dose of veggies. But on a flatbread, you wouldn’t think twice (I would think?) It seems that a flatbread is a trendy version of a pizza? Maybe we just needed to change the name and feel better about eating pizza with our wine, a ritual that is not only perfectly acceptable but the highlight of my week when it occurs!
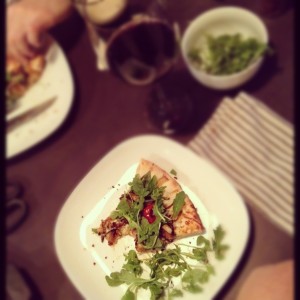
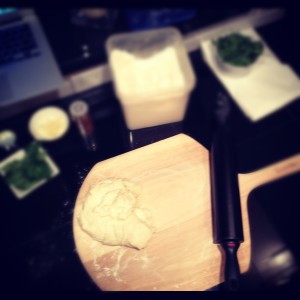
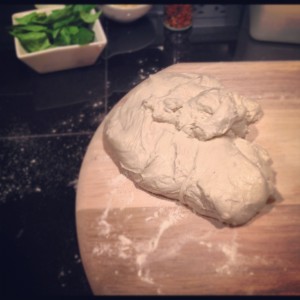
So my verdict: Flat bread is to pizza what sliders are to burgers…an open interpretation depending on the chef’s whim and creativity.

With that, I give you my current recipe for the crust, now the flatbread or pizza question is up to you to decide! BON APPETIT!!

IMG_3398

Homemade Pizza

Prepare the dough according to the directions below

IMG_3604


Cast Iron Pizza Stone
Clean Kitchen shears for cutting
Pizza Paddle (super hand for transfering to the already HOT cast iron!)

Toppings
Onion, sliced
Garlic, thinly sliced or minced
Eggplant, cut in strips or wedges
Peppadew, cut in half out of the jar (I like the flavor of this brand)
Cracked pepper
Fresh or dried parsley
Fresh Basil
Shredded Mozzarella
Scamorza Mozzarella, sliced into medallions
For Serving: Balsamic, olive oil, red pepper flakes, and arugula

Sprayed the cast iron before and pre-heat in the oven on “broil” for 15+ minutes then turn down to 475
In the meantime, chop and saute the onion, garlic, sliced eggplant and peppadew with parsley and cracked pepper on the stove.
When the cast iron is ready dusted it with flour and assemble the pizza right on the pizza stone. It will be HOT and a little hard to spread out the dough so be careful!

One light layer of shredded mozzarella, then add the sautéed onion, garlic, eggplant and seared peppadew.
Add fresh basil then the medallions of Scamorza cheese and another light layer of Mozzarella.
Cook at 475 for 8-12 minutes, until edges started to bubble up and show signs of crisping.
Remove and cut in the traditional style, with clean kitchen scissors.
Serve with balsamic, olive oil, red pepper flakes,  arugula and plates/cooking.

Notes-
We loved that the cast iron kept the pizza warm even 20+minutes after we took it out of the oven!
I used too much of the dough so the crust was too thick so less dough next time and spread the topping to the outer edges.
It was perfectly seared on the bottom and the dough didn’t stick to the cast iron pan as we expected it would, it actually slid right off.

IMG_3607Olive Oil Dough
Makes 4-1 lb loaves
Originally found on http://www.mybakingaddiction.com/no-knead-pizza-dough-recipe/

Ingredients:
2-3/4 cups lukewarm water
1-1/2 tablespoon granulated yeast (2 packets)
1-1/2 tablespoons Kosher salt
1 tablespoon sugar
1/4 cup extra virgin olive oil
6-1/2 cups unbleached all-purpose flour

Directions:

In a 5 quart bowl mix the yeast, salt, sugar, and olive oil with the water without kneading. Think of the motion of a dough hook working the dough and mix that way. You might need to wet your hands a little and mix by hand but I found a spatula to do just fine. (Notes: Original recipe called for using a standing mixer fitted with the dough hook attachment but I don’t have that so I went with the old fashion handmade tactics).

Transfer dough into another large bowl. The dough will be a little sticky but will stick together pretty well. Cover (not airtight), and allow to rest at room temperature until dough rises and collapses (or flattens on top), approximately 2 hours.

The dough can be used immediately after the initial rise, though it is easier to handle when cold. Refrigerate in a lidded (not airtight) container and use over the next 12 days.

If you like more of the deep dish style, and care to explore out of the pizza stone category, here is a cool recipe I found on Flourishing Foodie for Cast Iron Pizzas!


.


Cauliflower Pizza Crust

Pizza w/ Cauliflower Crust 
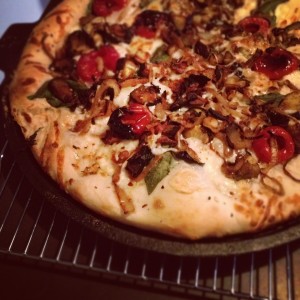
We…LOVE…Pizza! There have been a few kitchen adventures making regular pizza and I’ve got that queued up so in the next week so you’ll just have to stay tuned! In the course of my many Pinterest adventures I found quite a few recipes for Cauliflower pizza crust which intrigued me! I like pizza, I like cauliflower…sounds like a win/win situation! Less bread and more veggies and an alternative spin “cooking adventure” to try!? Count me in!
My mister is pretty adventurous  but when I start to mess with the crust of his pizza he’s not as excited as I am SO, I monopolized on the few days at home with my family for the holiday and mum and I ventured into bread free pizza world!

IMG_0405While the flavor of the cauliflower was DELICIOUS with the other italian pizza deliciousness, the texture of the crust wasn’t as “bread alternative” option as I would have hoped. It would make a great quiche or casserole, which is usually a swear word to me, but with the melty top and the crumbly bottom that word just seemed appropriate. So, in short I give you a “DELICIOUS work in progress, the Cauliflower crust”! Play, alternate toppings, crust consistency and leave your comments below! We’re in this together and we MUSt find the perfect Cauliflower crust!
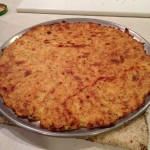
Bon Appetit!!

Cauliflower Crust Pizza (Toppings of your choice)

Crust Ingredients
3 cups cauliflower “meal”
1 cup grated low-fat mozzarella cheese
5 T  corn meal
3 T finely grated Parmesan cheese
2 tsp. dried oregano
1 tsp. garlic powder
pinch of salt
2 eggs, beaten (*make that three, one egg fore each cup of cauliflower “meal”)

Pizza Toppings
pizza sauce (we used store bought!)
grated mozzarella cheese
sautéed red onion, black olives, artichoke hearts, mushrooms
arugula

Instructions:
Preheat oven to 460F

Chop cauliflower into chunks and place in food processor (or a larger cheese grater) until it resembles a coarse “meal” texture then microwave covered in a bowl for 8-9 minutes or until it’s soft and cooked. (The Cauliflower will release natural moisture, so don’t add any when you microwave it). In the mean time, slice and sauté the red onion, black olives and artichoke hearts then place on a paper towel to dry. You don’t want extra moisture. Saute the mushrooms, flash saute some arugula with the mushrooms then add the other veggies and saute.
cooked crust
In a medium bowl mix the mozzarella, corn meal,  parmesan, spices and eggs and add the cauliflower when it’s done, mixing well. Coat a pizza pan with non-stick spray and transfer the “dough” to the pan then Use your fingers to spread out onto the pan, getting it as thin as you can. Cook in the pre-heated oven for 17-18 minutes until the crust is golden brown.

photo

Remove from the oven and coat with pizza sauce, a layer of mozzarella cheese, veggies and a light top layer of cheese then put back in the oven to melt the cheese for 5 minutes.  Remove and serve!

*Note: The flavors were PERFECT, but the crust was crumbly and we think it needed more moisture so I made the notation to add another egg into the mixture. The ratio should be one egg to every cup of cauliflower “meal”. I’ll update this post on the next “go around”!

Chocolate Chip Walnut Banana Bread (Gluten Free, Vegan, Nut Free Options)

IMG_0325

Other than gingerbread cookies, there is little that makes the house smell as amazing as banana bread! We needed a few last minute “office gifts” so I whipped up a few loaves of fresh banana bread but feeling festive, I decided that we needed to venture from the original recipe a bit so in went the chocolate chips! This recipe yields three mini loaves, one large loaf, or one pan of regular muffins. Wrap them up in some festive wrapping and tie some twine or raffia on them, and there you go! Homemade presents! Be sure to list that they have gluten, dairy and nuts in them unless you choose to make them without any of these which you can!

IMG_0329

Banana Walnut Bread (w/Gluten-Free, Vegan, Nut Free Options)
Adapted from my recipe for Banana Walnut Bread

Ingredients

  • 1 3/4 c. flour (can use Whole-Wheat or Gluten-Free)
  • 2/3 c. white sugar
  • 1 tsp. double-acting baking powder
  • 1/2 tsp. salt
  • 1/4 tsp baking soda
  • 1/2 c. shortening
  • 1 cup mashed bananas ( 2 ripe bananas)
  • 1 small banana, cut into chunks
  • 2 eggs (use egg replacer if going vegan)
  • 1/2 cup walnuts (omit if going nut-free)
  • 1/2 cup chocolate chips (if going diary free, be sure to read the chocolate chip ingredients)
  • 1 fresh orange, squeezed (my addition)

IMG_0327Directions

  1. Pre-heat oven to 350 degrees F
  2. Grease and flour ( or non-stick spray) your baking pan(s)
  3. In a large bowl, mix the first 5 ingredients
  4. Cut in the shortening using a pastry blender (or two knives scissor-fashion) until the mixture resembles coarse crumbs
  5. Stir in the remaining ingredients until just blended
  6. Bake in pre-heated oven as directed below:
    Large loaf pan: 55-60 minutes
    4 Individual Loaf pans: 30-40 minutes
  7. Cool in pan on wire rack

Protein Pumpkin Bran Muffins with Walnuts & Raisins

Who doesn’t love muffins? Delicious, warming, hearty and the thing I love the most is the crunchy muffin top! On more than one occasion I’ve eaten the muffin top and left the rest, usually because there isn’t enough goodness throughout the rest of the muffin to keep my interest. I might have muffin ADD. That’s one of the reasons I LOVE making muffins at home, not only does the whole house smell amazing, but I love baking and it’s fun to make them exactly how I want and they are a wonderful easy breakfast option!


Wednesday night I roasted my own pumpkin (you can read the post here) in the effort to prepare the delicious pumpkin for baking. Pumpkin muffins have been on my mind for WEEKS! Well, last night was FINALLY the night! We had dinner plans with friends so it was the perfect time to make them and then LEAVE them to cool while we went out. This was my tricky methodology to keep myself from eating one… two …tasting my wonderful pumpkin creation!

I…LOVE…BAKING!! Fresh roasted pumpkin!? Check! Throw a few raisins and walnuts in there… let’s see what other spices can I throw in this bowl? Cloves are one of my favorite holiday spices because it always remind me of gingerbread, which is tied for first favorite holiday flavor right along with Pumpkin and Gingersnap.

The first words as he walked in the door were: “It smells like CHRISTMAS in here!” Holiday baking is one of my favorite hobbies of the entire year, and that declaration my foodie friends  made my little baking heart well up with joy! Those muffins smelled as amazing when they were cooking as they did this morning for breakfast! Now, he’s NOT a pumpkin fan so I figured I’d be eating a dozen by myself (Oh darn), but dolled out some high compliments this morning as we both enjoyed them for breakfast. I reduced the sugar from the original recipe and they were still the perfect mix between spiced, pumpkin and sweet flavors and hearty enough to be satisfied with one muffin and some yogurt. It was the perfect fall breakfast!  The garbanzo flour and Greek yogurt gave an extra protein punch which I appreciate in a muffin.  I can’t WAIT to get home and eat another one two wonderful pumpkin creation! 🙂

Protein Pumpkin Bran Muffins with Walnuts & Raisins
Yield: 12 muffins

Photo from: Green Lite Bites

Adapted from Green Lite Bites Recipe

  • 1 ½ c. Flour ( I like garbanzo, Whole Wheat or Almond but any flour will do)
  • 1 tsp. baking soda
  • 1 tsp. baking powder
  • ¼ tsp. salt
  • ½ tsp. ground cinnamon
  • ½ tsp. ground ginger
  • ½ tsp. ground cloves
  • ½ tsp. fresh grated nutmeg (you can also use ground if you have/prefer)
  • 2 cups of fresh roasted pumpkin (or 1 15oz can of pumpkin)
  • 2 tbsp. molasses
  • 1 tbsp. honey (double if you like sweeter muffins)
  • 1 egg
  • 2 egg whites
  • ¼ c. unsweetened applesauce
  • ½ c. vanilla Greek yogurt
  • Raisins and crushed walnuts to taste
  • ¾ cup Wheat Bran

Pre-heat the oven to 400 degrees and grease your muffin tin or line with festive muffin cups

Mix the flour, baking soda, baking powder, salt, cinnamon, ginger, cloves and nutmeg in a medium bowl. The recipe called for double sifting, but since I don’t have a sifter and I’m way too lazy I just too my pastry blender (or you can use a whisk) and added a little fluffing to it!

In another large bowl, add the pumpkin, molasses, honey, egg, egg whites, applesauce and yogurt. Beat until all ingredients are mixed well.

Add the wheat bran to the flour mixture and mix.

Pour the flour/bran mixture into the pumpkin mixture and combine until just moistened. Don’t over mix. Add raisins and walnuts if you like them and pour into greased muffin tin. These muffins are pretty moist and I like the crunchier outside so I don’t use the paper cups since the muffins tend to stick. Don’t worry, they’ll be full and the pan will feel a bit heavy but they bake up with nice muffin tops! Optional: sprinkle the top with oats, wheat bran or pumpkin seeds.

Bake for 20 minutes in pre-heated oven. Muffins are cooked when a toothpick inserted into the middle of the muffin comes out clean. Cook on wire rack and enjoy!

Home Roasted Pumpkins

As the weather starts to turn, I start to crave warm comforting foods. My mind becomes preoccupied with slow-cooker Soups, fresh out of the oven baked goods, fresh gingerbread and roasted pumpkin. A few years ago, I roasted my first pumpkin and have been hooked on home roasting ever since. There might be a common misconception that roast pumpkins is tedious, messy, hard, impossible or time consuming. Well, all of the above are wrong! It’s ridiculously easy, cleaner than the carving process and once you hack it, rub it with olive oil and place it in the oven you free for the next 45 minutes!

With the first pumpkin spotting for the season, I have had it on my mind to start my pumpkin roasting. I’ve been pinning recipes on my Pumpkin & Winter Squash Pinterest board, drooling over recipes and even quite nearly gave in and ordered a Starbucks Pumpkin Loaf with my Americano last week. Breathe a sigh of relief, I have held out! I wanted my home roasted pumpkin to make some muffins and I wasn’t going to settle for anything less!

My lovely pumpkin and I had a 3/4 mile walk home in the Seattle drizzle three weeks ago. On that walk I learned a few things, first,  it’s truly the simple joys in life that matter most and for me that simply joy was fixating on a pumpkin and finally picking one up, grinning ear to ear as we walked home! Second, a 7 pound pumpkin gets heavy after a few blocks and seems to double in weight every block there after! And third, taking a pumpkin for a walk sure get’s you noticed… “hey nice pumpkin”, “my my, that’s a nnniiicceee looking pumpkin you have there”, and my favorite, “your pumpkin is nice, want to talk to me?”


Lovely photo from David Lebovitz- Roasted Pumpkin Wedges


Now, I have to admit that the poor thing sat on the counter and stared me down for the past 3 weeks and finally…FINALLY last night I figured that Halloween was the perfect night to roast a pumpkin! We don’t get trick or treaters, nor are we too into dressing up and going out to celebrate so pumpkin roasting it was! The nice thing about pumpkin, is that it’s not a sweet squash like butternut can be, it’s not stringy like spaghetti squash, and it’s not nutty flavored like acorn… it’s just the perfect mix of them all and quite delicious! I call it the tofu of squash, you can literally use it in ANY type of meal!!!I challenge you, find a meal that it wouldn’t go good in because it’s delicious in pasta, baked goods, ice cream, sauces, oatmeal, smoothies, sandwiches, spreads, soups, desserts, by it self… see!? It’s amazing!!

Home Roasted Pumpkin
Pumpkin
Rimmed Baking sheet
Foil
Cutting board and knife
Spoon to scrape seeds and bowl to hold seeds

How To:
First, wash and dry the outside of your pumpkin. The outside flesh is tough and the pumpkin is round…and I’m pretty clumsy… annddd my wielding a knife is a good idea HOW!? Just to be safe,  I opted for the horizontal half method. Using a sharp knife cut out the stem of the pumpkin as if you would to create a Jack o Lantern then cut the pumpkin in half from top to bottom.

Pre-heat the oven to 450 (*Tip- I increased the heat from the suggested 400 to 450 because I’m impatient and wanted dinner and it actually turned out just fine. The temp and amount of roasting time depends on your preferred texture and firmness for the pumpkin.) De-gut the pumpkin and separate out the seeds in the bowl to roast later. Be sure to remove all the stringy parts since they don’t taste as good.

De-gut the pumpkin

Prep the Pumpkin- now at this part you have an option. I wanted half my pumpkin to puree for baked goods and half to cut into chunks and add to salads and pasta for the next few days. So, for my recipe I roasted half the pumpkin whole, and the cut the other half into wedges, rubbed the outside with olive oil and laid out on the aluminum foil lined baking sheet. Be sure to use a baking sheet with edges because the pumpkin holds water that actually releases during cooking so you’ll need those rimmed sides of the baking sheet to keep it contained.

Bake at 450 for 30 minutes, flip and cook for 15-20 minutes more or until pumpkin is cooked your desire. To tell if it’s done, carefully press the outside of the pumpkin skin making sure not to burn yourself (yes, that’s more a note to myself!) and it should yield to a gentle press.

Remove from the oven and let the pumpkin cool on a wire rack. Once it’s cool, use a spoon to scoop out your roasted pumpkin or a fork to peel away the skin from the wedges. The flesh of the pumpkin should fall away from the outer shell. I place the pumpkin in a strainer for about 10 minutes to let the additional water drain so it doesn’t get mushy.

At this point, the fun just continues and you can prepare the pumpkin for whatever you have in mind! Blend it up to make a puree, slice up the wedges, mash it with herbs, bake it into delicious goodies, blend up a smoothie or make a pumpkin spice latte, mix with your oatmeal…the options are endless!

Storing: The pumpkin will last in an air-tight container in the fridge for about a week. You can also freeze it for future use, and I wouldn’t let it go more than a few months in the freezer.

Roasting the seeds
Wash the seeds and separate from the stringy pumpkin parts. Pat them dry with a paper towel then lay them out on a greased cookie sheet. Dust with sea salt, or whatever your preferred spice or seasoning is and toast in 325 degree oven for about 20-25 minutes, stirring the seeds around on the tray half way through the cooking.

Check out a few ideas on my Pumpkin & Winter Squash Pinterest board for inspiration!

What do you plan to do with your roasted pumpkin! Post pictures and recipes below!

Simple Winter Soup- Butternut Squash, Yam, Carrot & Garlic

Photo from: “inspiring the everyday” post on butternut squash soup

Somehow the winter season always ages my hobbies by about ten years; knitting, roasting whole pumpkins, baking, canning and the strong desire to bake and make breads and pastas, winter meals, soups, stews… wanting to make everything really. I will admit I recently pins a recipe for homemade Wheat thins! (Stay tuned to see how THAT one goes!)

While chatting last night with my impossibly adorable new hairstylist who is also a foodie, she shared with me a new recipe! Cue ridiculous joy and excitement! We proceed to chat the entire time about her recently discovered hobby of making homemade pasta from scratch (a checkbox on my cooking bucket list), reviewing all of our favorite local restaurants and expounding on 15 uses for sage (It truly is an under appreciated herb)!


Cooking doesn’t have to be hard, we both agreed, you just have to have the ingredients in your pantry and a couple of minutes to make it.

So, along with the recently added item “weather proof boots” on my winter weekend to do list, “roast” to appease the pumpkin on my counter, and “meal plan” to attempt an attack plan to actually COOK all of my recently pinned winter dishes, I shall also be making this soup!

I’ll post my own pictures once I cook it up but for now, enjoy a lovely picture from inspiring the everyday’s post on butternut squash soup.
So, stock up on winter goodness, snuggle into your favorite sweater, pour a glass of wine and and let the winter begin!!

What are your warming winter foods or your go to winter dishes?
Winter Warming Squash Soup

1 butternut squash
carrots, yams and fresh garlic (ratio to your preference)
1 large onion to caramelize
chicken stock/broth


Directions- 

  • Pre-heat the oven to 400 or 450 (depends on how quickly you want the veggies and how your oven  heats) and proceed with prepping the butternut squash as you prefer. Note: There are two methods for butternut squash you can either peel it and bake it or slice in half rub with olive oil and bake.
  • Slice the carrots and yams, and chop off the top of your garlic. (I just posted a recipe here on home-roasting your own garlic. You can roast and keep fresh for up to a week, frozen for a few months. It’s GREAT to have on hand for winter meals!)
  • Roast all veggies and garlic in pre-heated oven until golden brown.
  • In the meantime, sauté your onions.
  • Once the squash, veggies and garlic are roasted to your preferred “done-ness”, remove from the oven and blend/ puree in a food processer with some warmed chicken broth and serve warm.