Seared Scallops

seared scallops, scrambled eggs, grilled asparagus and sautéed purple onion’s & spinach, vino

I have to admit something to you. I’m having an affair. Before you’re too shocked, let me get into the nitty-gritty details of who it’s with. It’s….it’s…SCALLOPS! I can’t resist them! They are the menu item that trumps all other items. Hangar steak, caprese or beet salad, grilled shrimp, roasted brussels sprouts, none of them stand a chance against an order of seared scallops.

They are bites of soft, flavorful, delicate, melt in your mouth goodness! One of the joys of living in Seattle is being so close to Pikes Place. Almost every weekend you can find me walking to get my morning coffee and heading down to Pikes Place market to visit my fruit and veggie stand and get my weekly supply of local grown fresh fruits and veggies. I then of course MUST look at each of the flower stands, now that they’re in season, and pick up a $5 bouquet to spruce up the house!

Well, last weekend, I decided to follow a whim! That whims name was scallops. For as many times as I’ve ordered and enjoyed them at a restaurant,  I seldom cook them myself.  But having fresh fish at my beck and call just go the better of me last weekend and I had to have them!

I remember the first time I made scallops. I was  SO nervous that I would mess them up and let’s be real, their  price point does not lend itself to an “oops” scallop. Rest assured, they are actually pretty simple to make. Two things to know when cooking scallops; first, don’t move them around the pan when you’re cooking them. Put them in the pan and let them be. Second, have all your other food ready and waiting. Once the scallops are cooked, you’ll want to plate and eat them.

Seared Scallops

Ingredients

  • Fresh Scallops
  • Olive Oil
  • Fresh pepper and/or sea salt (optional)
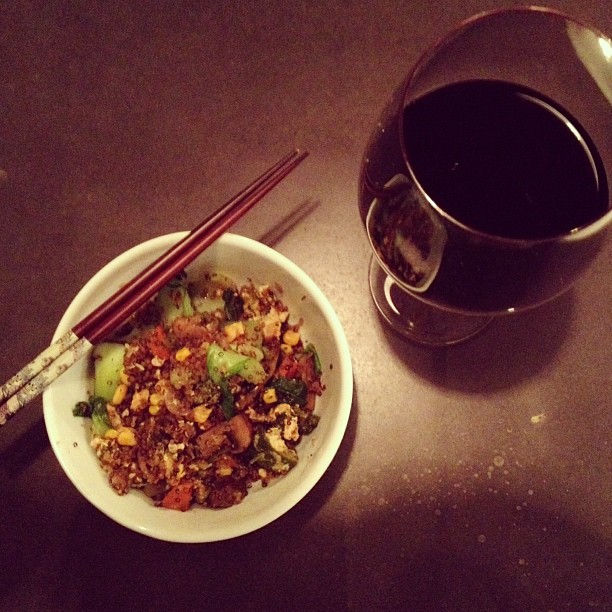
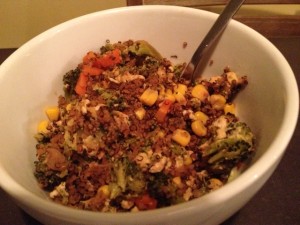
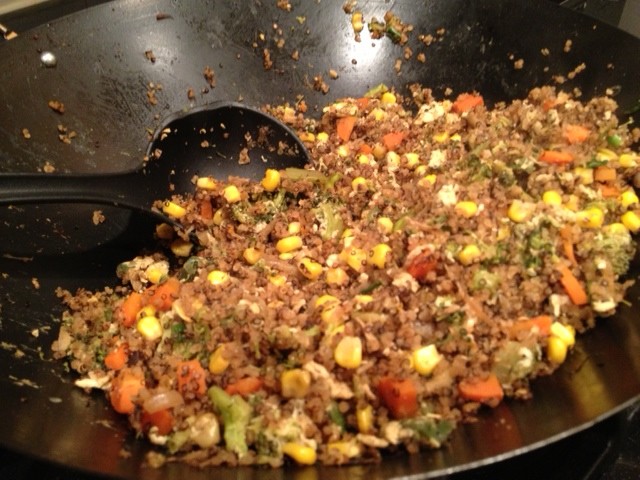
  1. Start by preparing your side dish or plate decoration that you will be serving the scallops on. Once they are cooked you will want to consume them right away.
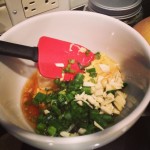
  2. Rinse the scallops and pat dry. I like mine without salt, but this is the part where you season with cracked sea salt and or pepper .
  3. Heat a non-stick sauté pan over a high heat and a tablespoon of olive oil. Your pan needs to be VERY hot, so seeing a tiny bit of smoke is okay.
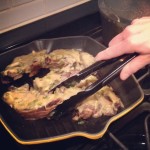
  4. Place your scallops in your VERY hot pan, and DO NOT MOVE THEM! You want them to sear each scallop on the flat side and seal in the crisp flavors.
  5. After about two minutes flip the scallops. You can peek underneath before flipping to assure that you see a nice caramel-colored crust forming on the underside.
  6. Cook the scallops for about another minute. You don’t want to over cook them and you will want to sear them right after removing from the pan. Once the centers are still slightly translucent they’re ready to eat!
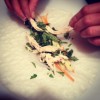
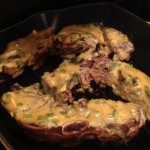
  7. Plate your scallops quickly and enjoy!


Mexican Scallop Salad with Prosecco


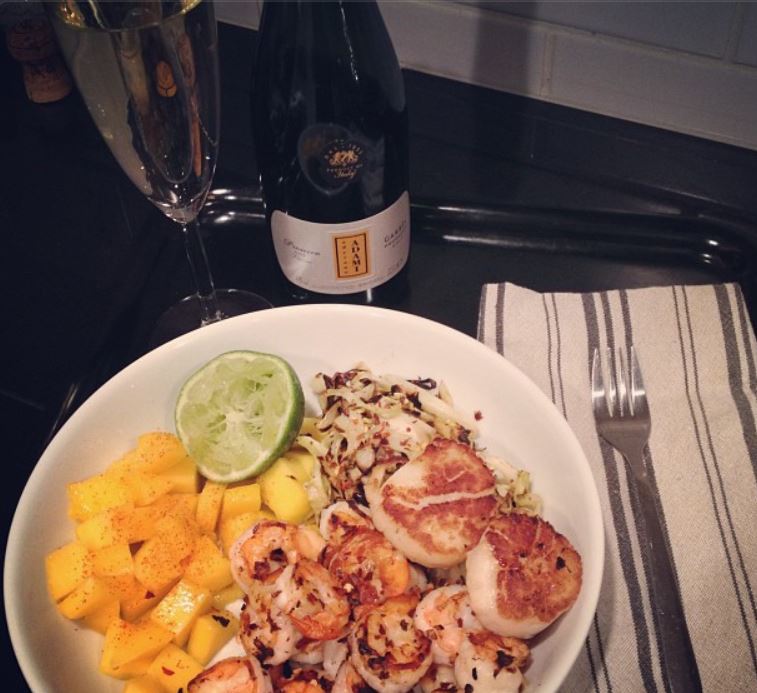
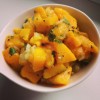
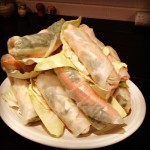
Another way you can serve scallops is seared with grilled shrimp, grilled cabbage slaw, cut mango and fresh lime. This is one of my favorite spring and summer meals. This makes for a delightful summer meal that’s healthy, and pairs perfect with one of my  favorite summer libations, Adami prosecco!

Chocolate Chip Cookies (From the Flying Apron Cookbook)

Fresh Flying Apron Cookies (Gluten-Free, Dairy- Free)There are some days you just NEED a cookie. Yep, you heard me, NEED. Cookies have that magic power to transport you out of your current location and into a place of yumminess. Like a shield that goes up, even if just for a moment as you take that fist glorious bite of fresh baked gooey sweet bliss, you are hidden from the world and it can’t get you.

Well, today is one of those days and its not even 8am. Goody. Lets just say that I didn’t get to consume the better part of my morning coffee because my jeans go thirsty (and selfish) and wanted a drink. Rude. The .ease they could have done was ask. But, then I would have said no, AND wondered why my pants were talking. So, already one of “those days”. While I yearn for a fresh baked cookie (with how this days going, obsess might be a better word) and try to hide the coffee on my jeans from my client meeting today, I wanted to post a recipe for one of m FAVORITE cookies from a local vegan bakery, The Flying Apron. If you’re smart enough to whip up a batch, save me one! I’ll bring the pants and we can wring out a cup of coffee to share!

Chocolate Chip Cookies
From: The Flying Apron Cook Book
makes: 25 cookies

2 ¾ c. brown rice flour
1 ½ + 1 tbsp c. garbanzo flour
1 tsp baking powder
½ tsp baking soda
¾ tsp salt
1 c. canola oil
1 c. organic whole cane sugar
1 tsp vanilla
1 c. rice milk
1 c. (8 oz) dairy-free dark chocolate chips

Preheat the oven to 350
Combine flours through salt in a large bowl
In the bowl of a standing mixer combine canola oil, cane sugar and vanilla until well mixed
With the mixture at low speed, add the flour mixtures and the rice milk alternately, a little at a time until smooth, about 3 minutes
Stir in chocolate cips

Scoop dough onto greased baking sheet and bake until golden and slightly firm to the touch, about 17 minutes.

Carne Asada Steak Tacos

photo 3Taco Tuesday is a long-standing tradition in our house. As we start to get the pockets of good weather in Seattle I get more and more excited about one of my favorite things, roof top grilling. Now, we are not just your casual  everyday grill people. We’re Californian, which means we’re dedicated grillers;  we grill in all-weather! Neither rain, nor sleet nor wind or snow shall keep us from the grill! True story, my dad’s been known to put on his boots and grill in the SNOW! Luckily Taco Tuesday was somewhat sunny so the grilling experience was more leisurely than it is when you’re all out fighting wind or snow.

As you may have seen from this weeks Mango Salsa post, I had some Carne Asada tacos at our local Farmers Market and that started the obsession fever. They were amazing tacos and I had to try my hand at replicating that amazing experience. I’m happy to report, this little recipe made it in the top 5 BEST MEALS EVER list from the mister! Even I was speechless after my first bite…and realized that my biggest problem in life at the moment was that I didn’t have a bigger stomach!

Carne Asada Steak Tacos with Pico De Gallo, Grilled Cabbage Slaw
(Various parts of recipe adapted from Food Network)

Flank Steak: 

2 pounds flank or skirt steak, trimmed of excess fat
1 large baking dish, to prepare
1 large ziplock bag, to marinate
1 recipe Mojo, recipe follows
Olive oil, for coating the grill
Kosher salt and freshly ground black pepper

Mojo:
5 garlic cloves, minced*
1/2 jalapeno, minced
2 large handfuls fresh cilantro leaves, finely chopped
Kosher salt and freshly ground black pepper
2 limes, juiced
1 orange, juiced
2 tablespoons white vinegar
1/4 cup olive oil

For Serving:
Tortillas (We ” Home-Style” flour tortillas)
Cilantro
Lime wedges
Cheese
Pico de Gallo, recipe here
Grilled Cabbage Slaw, recipe here
Mango Salsa, recipe here

*Conversions for garlic if you don’t have the fresh stuff: 1 clove = 1 teaspoon chopped garlic = 1/2 teaspoon minced garlic = 1/8 teaspoon garlic powder = 1/2 teaspoon garlic flakes = 1/4 teaspoon granulated garlic = 1/2 teaspoon garlic juice

Directions
If you are using the Pico de Gallo, Cabbage Slaw, or Mango Salsa prepare all of the herbs and veggies at the same time before you prepare the meat. Getting all the chopping done at once makes the job easier and all of these dishes and side dishes are better when they’re left to marinate for a while!

To make the mojo, wash and chop all ingredients into a bowl and mix well. Lay steak out in a large baking dish and lightly coat with black pepper then pour the mojo over the steak making sure to spread out the clumps of cilantro and garlic. Fold the top of your plastic bag over itself twice, to keep any juices from interfering with the zip lock seal. Fold the meat over itself in quarters, with the mojo on the inside, and place in the plastic bag. Pour remaining mojo juices over the meat. Seal the bag and refrigerate for 1- 8 hours. I prefer a longer marinate time so the juices really soak into the meat, but don’t marinate longer than 8 hours as the citrus in the mojo will break down the delicate cut of meat and render it mushy.

Once you’re ready to cook the meat, pre-heat the grill and start a pan on the stove to cook the cabbage slaw. (You can also broil the meat, but we prefer to grill if that option is available). Brush the grill with olive oil to keep the meat from sticking. Grill (or broil) the steak for 7 to 10 minutes per side, turning once, until medium-rare. (At once you do the first turn, you can get out the toppings and have them ready.) Remove the steak to a cutting board and let it rest for 5 minutes to allow the juices to settle. Thinly slice meat, heat up tortillas over open flame on the stove and assemble a masterpiece!


Pico De Gallo

Pico De Gallo
Pico De Gallo

Pico De Gallo
(Recipe adapted from Food Network)
Yield: 2 cups

4 vine-ripe tomatoes, chopped
1/2 medium white or red onion, chopped
2 green onions, white and green parts, sliced
1 Serrano or Jalapeño chile, minced
fresh cilantro leaves, chopped
3 garlic cloves, minced
1 lime, juiced
Salt, to taste (a little goes a long way)

Wash & prep ingredients. Place in large bowl, toss ingredients together. Cover, place in fridge and let the flavors marinate for at 15 minutes before serving.

Mango Salsa

Fresh Mango Salsa
Fresh Mango Salsa

With the fresh feeling of spring, I trade my winter cravings of spaghetti squash and Ratatouille for the “fresh and light” fare. On Sunday I went over to our Ballard Farmers market and got the tastiest Carne Asada tacos I maybe have ever had! Seriously, I want to huddle in the corner and lick the plate they were THAT good!

Well, that of course challenged the cook in me that said, “Hey, can I make that!?” and off I was planning taco Monday/Tuesday/Wednesday and likely Quesadilla Thursday. Since the Carne Asada steak needed to marinate (that’s for dinner tonight so check back for the recipe) I decided that tonight would be fish tacos.

Menu: Grilled halibut, Grilled Cabbage Slaw & Mango Salsa
Full Menu Prep time: 15 -20 minutes || Full Menu Cook time 20 minutes

This meal is actually pretty quick to make, it’s really just the prep-time that takes little time investment. The Mango salsa and cabbage slaw can be prepared earlier in the day but only take about 15 minutes of cleaning and chopping. Cooking the fish takes about 12 minutes on a pre-heated grill and the cabbage slaw will cook up in a pan on the stove in about  18-20 minutes.  

Mango Salsa

3 Ripe Mangos, Peeled and cubed
1/2 Small White Onion
1/2 – 1 Jalapeño chile, minced (include ribs and seeds for a hotter taste if desired)
Fresh Cilantro, washed and chopped with stems removed
1 Fresh lime, juiced
Cracked Pepper to taste

Wash and prep ingredients then combine in large bowl. Cover and let sit in refrigerator for an hour or over night to let the flavors mix! If the salsa ends up being a little too hot or acidic for your taste, you can temper it by adding some diced avocado.


Healthy Spring Rolls with Garlic Ginger Dipping Sauce (Vegetarian Option)

Spring has sprung friends! As the weather turns from the chilly winter to crisp spring I start to crave the lighter fare: chicken salads, grilled fish and veggies, Rose and bubbly wines, strawberries and all other fresh spring/summer fruit. A few weeks ago, my mother invited me along to a cooking class from Culinary Events Northwest. The class met at the Lynnwood Albert Lee Appliance store so off we went to learn our “Wraps Around the World”. There were a few different interesting offerings, such as crepes with buckwheat flour and strawberry balsamic drizzle. But my favorite from the class was the Vietnamese Style Spring Rolls.

We love ordering these when we eat out but I had NEVER before thought about trying to make them myself! To celebrate the first day of spring it was time to try my hand at some homemade spring rolls for dinner! The hardest part of this project is the prep! Once you get everything washed, chopped and arranged in an assembly line it’s easy peasy and I had 12 of these bad boys made before I knew it!

The report from mister Byte of life: Success! His only regret for the meal was that he didn’t have a larger stomach. Chef, happy! Even the next morning at breakfast he was talking about how good they were and how excited he was to be hungry later so he could eat more! These little guys are great as appetizers or served with grilled or steamed veggies for dinner. They make great next day lunches or afternoon snacks. I’ve included a few other ingredient ideas below. What are some of your favorite spring roll ingredients or ones you’d like to try! Also, please feel free to post other dipping sauce recipes!

Healthy Chicken Veggie Spring Rolls
These can be vegetarian by simply omitting the chicken!
Yield you’ll have to play around with the ratios of ingredients but this is a general guideline of ratios from my assembly line. 

12  8 or 9 inch rice-paper sheets
1 c fresh mint, chopped
1 c fresh cilantro, chopped
1 c fresh basil, chopped
1 – 1 1/2 c finely chopped green cabbage
extra full cabbage leaves to separate the spring rolls on your display plate (the rice-paper wrappings will stick to each other)
1 c matchstick-sized cucumber, peeled first
1 c matchstick-sized carrots, peeled first
2 cooked chicken breasts
1 pan, diameter wide enough to soak rice-paper sheets
1 dry dish towel and either a plate or cutting board to turn rice-paper onto

  1. Prep all herbs and veggies into separate bowls and create your assembly line. Carrots and cucumber first followed by the herbs, then your protein and cabbage at the end. Have a plate ready to place your completed spring rolls on, as well the cabbage to separate the spring rolls as the paper wrappers love to stick to each other.  (If you are making ahead and storing, you can also cover with a damp paper towel and plastic wrap, then place directly in fridge)*If you are making the sauce below, prep those veggies after chopping the spring roll ingredients then make the sauce before starting your spring roll assembly line.
  2. Fill your pan with 2-3 inches room temperature to slightly warm water and place at the beginning of your assembly line with the dry dish towel and cutting board or plate where you will be assembling your spring rolls.
  3. Soak the first rice-paper wrapper in the water until it looses it’s rigidity, about 30 seconds, but is still slightly firm. You’ll just have to try a few times and sacrifice a few rice-papers to get the hang of seeing and feeling when the rice paper is ready to be rolled. You don’t want it TOO soft or else it will easily tear. 
  4. Once the rice paper is ready to be rolled, move onto the paper towel and place another rice paper in the water. Gently dab off the water from the rice paper, it will still be damp and wet but it shouldn’t be soaked. Gently transfer to the cutting board and fill with your ingredients. Arrange a few carrots and cucumber centered in the top 1/3 of the rice paper closest to you, leaving about 3/4 – 1 inch border on each side for rolling. Place the herbs, protein and cabbage in the roll making sure to not fill TOO large to wrap. Fold the top of the rice paper closest to you over the heap of ingredients as tightly as you can without breaking the rice paper. Delicately fold in each side of the rice-paper burrito style and roll away from you to wrap up the spring roll, making sure to keep the rice-paper as taut/tight to the ingredients as you can. You might need to fold in the sides another time or two as you get to the end of the rolling process. The spring roll will seal itself against the rest of the rice-paper.* be sure to keep an eye on the sauce, stirring every few minutes to mix the ingredients together 
  5. Place on one of the large cabbage leaves on your display plate and repeat step 4 until you’re done making spring rolls.

Other roll ideas:
Marinated Baked Tofu with bean sprouts and sliced red peppers
Sashimi with pickled ginger & wasabi or wasabi dipping sauce
Asian Marinated flank steak with fresh ginger and garlic ginger dipping sauce

Garlic Ginger Dipping Sauce
Yield enough for about 6-8 spring rolls
3 cloves fresh garlic, minced (or 1 1/2 tsp jarred minced garlic)
1- 1 1/2 tbsp fresh ginger (or 1 1/2 tsp dried ginger)
1 tbsp toasted sesame oil
1/3 low sodium soy sauce
1/4  c.rice vinegar (or white wine vinegar works as well)
1/4 c. tsp crushed red pepper flakes ( unless you like it SPICY, stick to this ratio or it might overpower the rolls)
1 tbsp sugar

Combine all ingredients in small pot and cook over low heat until mixture bubbles. Can be stored in airtight container and refrigerated for up to three days after making.

Quinoa Veggie “Fried Rice”

601230_10152624692795131_821917340_nI LOVE finishing things. It’s weird. The joy that I get from the last bit of toothpaste used up, or taking the last olive of the jar, or finishing a pen….okay that last one is quite a feat ADMIT it… but I digress! The female + Type A + Project Manager/List Lover in me LOVES to feel that sense of completion. Once something is opened in our house it immediately goes into that awkward “use me up” stage and has a bullseye on it. So, the half used bag of quinoa was starting to get on my nerves. Seriously, it was taunting me EVERY time I opened the pantry cabinet and I’d had enough of being laughed at by Quinoa!

Don’t worry, I’m not crazy. The quinoa didn’t actually laugh at me. But I vowed to incorporate into more meals because we both LOVE it and it’s quite the superfood! The mister taught me an amazing trick that makes the quinoa taste AMAZING! Have you ever tried toasting it first!? Serious, life meet changed! Check out the nutrients and protein that this little grain punches in my post for toasted quinoa here.

photo 4

Well, I just have a little extra time on my hands these days So I decided to take up my reoccurring vow to cook through at least a FEW of my million recipes I’ve carefully drooled over and curated on my Pinterest boards. One of the dishes I REALLY wanted to try was for Quinoa Veggie “fried rice”. The mister has commented a few times that he REALLY likes fried rice while I’m not a big “rice” fan, BUT we both love quinoa. I found an AMAZING looking picture on Pinterest, pulled that quinoa out of the pantry and away I went!

I adapted the recipe since I prefer to use recipes as guidelines and then just change it up and see what happens and it was delicious!!

photo 2Quinoa Veggie “Fried Rice”:

Recipe adapted from Dam Delicious Blog Post
Yields 4-6 servings

INGREDIENTS:

  • EVOO
  • 4 eggs
  • 2 cloves garlic, minced
  • 1 small onion, diced
  • 4-5 large mushrooms, sliced (or to taste if you’d like more)
  • 1 head broccoli, cut into florets
  • 1 zucchini, chopped
  • 1 can corn
  • 1 large carrot, peeled and finely chopped
  • 2 cups toasted cooked quinoa (recipe for toasted quinoa here)
  • soy sauce (to taste)
  • 3 green onions, sliced
  • Baby Bok Choy, base cut off so leaves are free, amount to taste

DIRECTIONS:

  1. Heat dash of EVOO (extra virgin olive oil) in a  Wok (or medium skillet) over low heat. Add garlic and onion, and cook, stirring often, until onions become translucent, about 4-5 minutes.
  2. In the mean time, start the quinoa  (full recipe here). Short recipe: Toast quinoa until it starts to pop, like popcorn and the outer shells turn a light to dark brown. Rinse under cold water and return to pan. Add water (1 cup water for ever half cup dry quinoa) and bring to a boil, continuously stirring. Reduce to a simmer and cover for 10 minutes then “fluff” with a fork or spatula.
  3. Add mushrooms, broccoli and zucchini. Cook, stirring constantly, until vegetables are tender. Add a bit of water and soy sauce, cover with large lid and let steam for 5-7 minutes.
  4. Add corn, carrots and quinoa. Cook, stirring constantly, until tender.
  5. Push all veggies to one side of the Wok and crack the eggs into the hotter side of the pan and “beat” in the pan, turning once cooked on the bottom. Mix into the veggies and combine all the goodness.
  6. Stir in green onions and bok choy.
  7. Add quinoa, mix thoroughly and let heat for 3-5 minutes.

Options:

  • Cook eggs in Wok or Skillet first- fry until cooked through, about 2-3 minutes per side, flipping only once. Let cool before dicing into small pieces and add with the green onions at the end
  • Use 1/2 cup corn and half cup peas
  • Include fresh ginger
  • Grate carrots instead of chop them
  • Omit the Boc Choy
  • Make a sauce for the dish and drizzle it over the cooked veggies at the end

Toasted Quinoa

Quinoa has grown in popularity in the past few years as a “super food” and a building block for gluten-free eating. But, did you know that it’s been around for thousands of years?

That’s right! It was used by the Incas over 5,000 years ago! Now it’s making a “superfood” name for itself again as a staple in pantries and meals everywhere. The Whole Foods Blog had this to say about our little grain, “Quinoa (pronounced KEEN-wah) has all the goodness of whole grains — the B vitamins, the fiber, the minerals — and it’s actually a small dried seed that’s been cultivated for thousands of years in South America. This little powerhouse has the highest protein content of any other grain. And since it contains all eight essential amino acids, quinoa is considered a complete protein.”

Toasted Quinoa
Forbs published an article on the 7 Health Benefits of Quinoa , which stated that Quinoa is not only one of the most protein-rich foods we can eat but it is a complete protein containing all nine essential amino acids. Spoiler alert, it also contains almost twice as much fiber as other grains…think feeling fuller longer! It also contains iron which supports increased Brain function, regulation of body temperature, enzyme activity and energy metabolism. Quinoa also packs Lysine, which is essential for tissue growth and repair, and magnesium that helps to relax blood vessels and thereby to alleviate migraines. Other health benefits of magnesium include transmission of nerve impulses, body temperature regulation, detoxification, energy production, and the formation of healthy bones and teeth. It also packs Riboflavin (B2) for improved energy metabolism within brain and muscle cells and manganese, which is an antioxidant that helps to prevent damage of mitochondria during energy production as well as to protect red blood cells and other cells from injury by free radicals.

Quinoa is a pretty amazing kitchen staple, and can be used in many dishes as a main protein source, side dish or substitute for rice, potatoes or even pasta. You can cook the quinoa according to the package instructions, OR you can liven up your meal and add another layer of amazing dynamic flavor punch! Yep, I said flavor punch! Toasting quinoa before cooking opens up the nutty, toasted and almost smoky flavor. Cook up a batch to use during the week for quick dinners or add to salads for lunch. You can even cook quinoa for breakfast!

What is YOUR favorite quinoa recipe?

Toasted Quinoa
1/2 c quinoa
1 c water or chicken broth
Salt and Pepper to taste

  • Pour quinoa into pot on stove top over medium/high heat
  • Toast until it starts to pop, like popcorn and the outer shells turn a light to dark brown
  • Rinse the quinoa in a strainer under cold water and return to pot (always rinse your quinoa, like you would rice)
  • Add water to the pot and bring to a boil, continuously stirring
  • Reduce to a simmer and cover for 10 minutes then “fluff” with a fork or spatula and serve


Slow-Cooker Braised Short Ribs with Honey Garlic Glaze

plated upWell Seattle, we’re back. Back to the rain, wind and grey skies. Three weeks in Hawaii was quite a nice time to thaw out but, until the sad realization that I had to actually trade my daily uniform of shorts, a tank top and my  bathing suit for real clothes pales in comparison to the AMOUNT of real clothes I have to wear hit me. Currently, I’m sipping hot water and alternating sitting on my hands while I sit here in my coat and scarf….I’m INSIDE! What gives!

Cold weather typically sends me reaching for the Crockpot, or curling up in front of the heater without moving. Since I was craving short ribs, the crock pot won. When we were on Kona, we made a …few…trips to Roy’s Waikoloa. Okay okay, we ate there THREE nights in a row! Can you blame us!? They closed our Seattle location so we had to eat all we could get! Well, on night two as we were bellied up to the bar sharing their AMAZING appetizer canoe, (yes, CANOE!) we saw the couple next to us dig into their amazing looking dinner and we flagged down our bartender Brandon (he was AWESOME if you visit that location) and he informed us that it was the Slow Braised Char Broiled Beef Short Ribs. So, night three you know what we ordered?

Yep, Ribs! It was SUCH an incredible dish that when we got home we immediately started searching for the recipe to try our hands at recreating such an impeccable dish! After an absurd time googling various versions and combinations of the words “Roy’s Waikolaa Short Ribs entrée Recipe” I found one that was said to be biased on the Roy’s recipe so I gave it a try! (Original recipe found here) I didn’t have all the ingredients so I altered a bit.

Delicious food deserves pictures…

Slow-Cooker Braised Short Ribs with Honey Garlic Glaze
Adapted from Roy Yamaguchi
Yield: 2 large portions

For the short ribs:
2 pounds bone-in beef short ribs
Salt and pepper
EVOO
Beef stock, enough to fully cover the short ribs (about 32 ounces)
6 cloves garlic, sliced thick
1 large onion, sliced
1 stalk celery, sliced thick
2 carrots, sliced thick
2 bay leaves
1 inch piece of peeled ginger, FRESH ginger

Honey Garlic Glaze:
1/2 cup Dijon mustard
1/4 cup honey
1 clove garlic, minced fine
1/4 cup sliced green onions, both white and green

  1. Allow the ribs to come to room temperature for thirty minutes.  Season all sides of the ribs well with salt and pepper.
  2. Heat olive oil in a medium skillet over high heat.  Brown the ribs well on all sides, about two minutes per side.
  3. In your slow cooker make a bed with the garlic,  onions, carrots, celery, bay leaf and ginger.
  4. Place the browned ribs on top and add enough beef stock to just cover and Cook (Low for 8 hours or High for 4).
  5. Prepare the glaze, cover and refrigerate until meat is done, or you can make it right before you pull it out. I like to have as FEW dishes as possible so I’m a “make ahead” kinda girl! The picture above shows you, if for some reason you wanted to eyeball the dijon, what’s left over after using a half cup. I was worried I’d have too much left over but hey, egg salad here we come!
  6. When the timer goes off, remove the lid and take the initial wiff of your amazing deliciousness! The meat will be very tender and you may lose a few bones (which is a GOOD thing!) Remove the ribs from the slow cooker and, while still warm, pour the glaze over the ribs making sure they are well coated.  Allow the ribs to sit for at least thirty minutes  (or store in the refrigerator overnight).
  7. While the ribs rest heat your grill, or a skillet, to medium high heat.  Grill, or sear, the ribs for about one minute per side, or until the glaze sets and the ribs are brown and crusty.
  8. Enjoy! I served with toasted quinoa and Blasted Broccoli

Red Pepper Overload…Homemade Herbs De Province Ratatouille

Ratatouille Being sick sucks . Plain and simple. Truth fact. The End. Well… okay NOT “the end” but it feels like it! The problem with being sick is that I’m a “doer”. I like to “do” things, accomplish, check off my long to DO list. Now that we’ve established this. Guess what sickness resigns you to? Yep, you guessed it… BEING! I don’t “be”… I DO! When one is sick, they’re told to “just be” and rest. Yeah, go ahead. See how well THAT goes over. This time the stupid flu won this round and I was resigned to exploring what a “be”- er feels like. Two days on the couch with the only excursion to the gym where all I was allowed to do was steam. On day three, which is today, I’m feeling a little better and my stir crazy is kicking in!

Soooo… I decided to use up the 10 Red Peppers hanging out on my balcony. What!? They were on SALE! How can someone who LOVES peppers pass up 10/$10!? Well, thankfully it was cold enough outside to keep them fresh for four days because I completely forgot them! That is, until I was So completely dying for lack of DOING anything! So, I decided use up the veggies in the fridge to make some Ratatouille and make a jar of home Roasted Red Peppers. There are still three left over, so I’m thinking of trying some quinoa stuffed peppers tomorrow night! I’ll keep you posted!

I realized, as I was chopping my veggies and already elbow deep in delicious simmering goodness of Ratatouille, that I didn’t have the Herbs de Province that I needed for the flavor of the dish. Of COURSE I didn’t have herbs de province, why would I? I use it ALL the time and added it to my “next time I’m down at Pike Place list” which has been put on hold due to FREEZING temperatures. No one wants to walk in THAT weather. ANd of course, no fresh basil either. Well, what are you going to do? Give up the whole shabang? No chance, not when I’m THIS stir-crazy! Do you think that stopped me!? No way! There are plenty of spices in my cabinet and a half bottle of red wine within arms reach, something can be done! And if not, there’s the wine! 🙂

I have to say, this was lauded as THE BEST batch of Ratatouille I’ve made yet! It’s even better when you let it

Homemade Herbs De Province Ratatouille:

3/4 sliced red onion,
a good handfuls of fresh chopped garlic
EVOO for sautéing
2 Red Peppers
1 Eggplant
1/2   c Red Wine to simmer veggies in
4  Zucchini
Homemade Herbs de Province –Mix together and add more spices to taste 
1/2 tsp each of ground rosemary, ground thyme
1 tsp dried oregano, dried basil
1 tsp + some of dried parsley
1 14 oz Can fire roasted Tomatoes
(Follow the original Ratatouille recipe for cooking instructions)