Pumpkin Seed Butter (Gluten-Free, Dairy Free)

FullSizeRenderLast summer I got hooked on pumpkin seed butter. Before that, I didn’t even know such a thing existed. I felt pretty nut-butter gourmet knowing that there was macadamia butter as well as cashew butter. I knew that you could grind your own; I’ve seen and even used the machines in my local Whole Foods to make fresh almond butter. But those machines were big, and scary, not to mention loud and quite menacing to look at. The though had NEVER dawned on me that it was something that could be made at home. Until a combination of a strong desire for a food processor, DIY itch and budgeting came together. Random components, but quite a story!

This recipe was adapted from the the kitchn’s Pumpkin Seed Butter recipe. I LOVE that they say it was inspired by a nut butter that they tasted at the Portland Farmers Market because I’m pretty sure it’s the same nut butter that hooked me on Pumpkin Seed Butter. Nut-Tritious Foods is a wonderful little company based out of  Vancouver, Washington.  They do a great job of educating customers why cold-pressed nut butters are better for you. I pulled the info below from their about page because it’s REALLY important to know!

“… we COLD-PROCESS and don’t use heat to get our nut butter into the tub. Heat will oxidize the healthy fats (poly- & mono-unsaturated) and make them more like a saturated fat! Most all jar nut butters have been heat processed – you can tell by the ‘nutcrete’ in the bottom of the glass jar.” An additional note, the heat processing method allows the nut butter to sit on the shelf in a jar until it’s purchased. Personally, I’d much rather have the fresh stuff that I know is perishable and know that I’m getting the most nutrition out of my consumption.

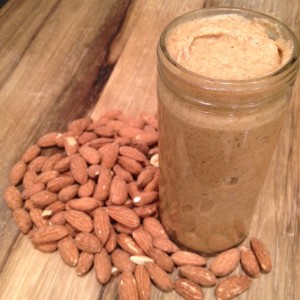
Check out my Almond butter recipe here.

Pumpkin Seed Butter

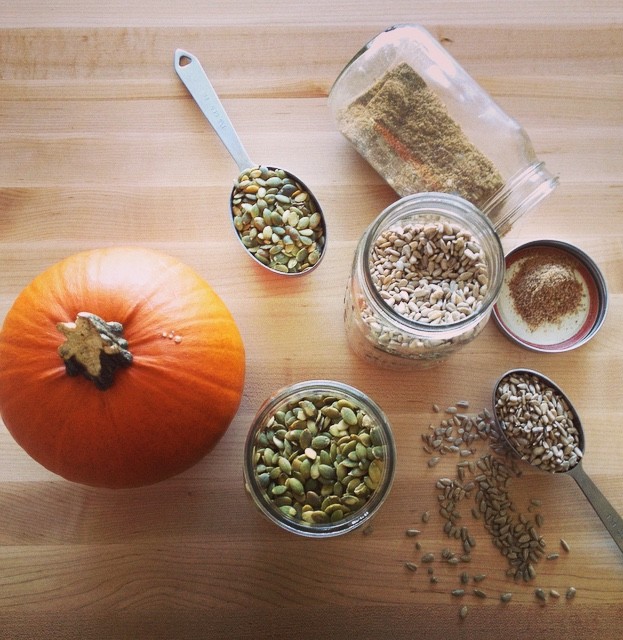
2 cup raw pumpkin seeds, without shells
1/2 cup ground sunflower seeds
1/4 cup flax meal*
1/4 cup  grapeseed oil
1 spoon of honey (to taste)
pinch grey salt

*Flax Meal: You can easily make flax meal in a coffee

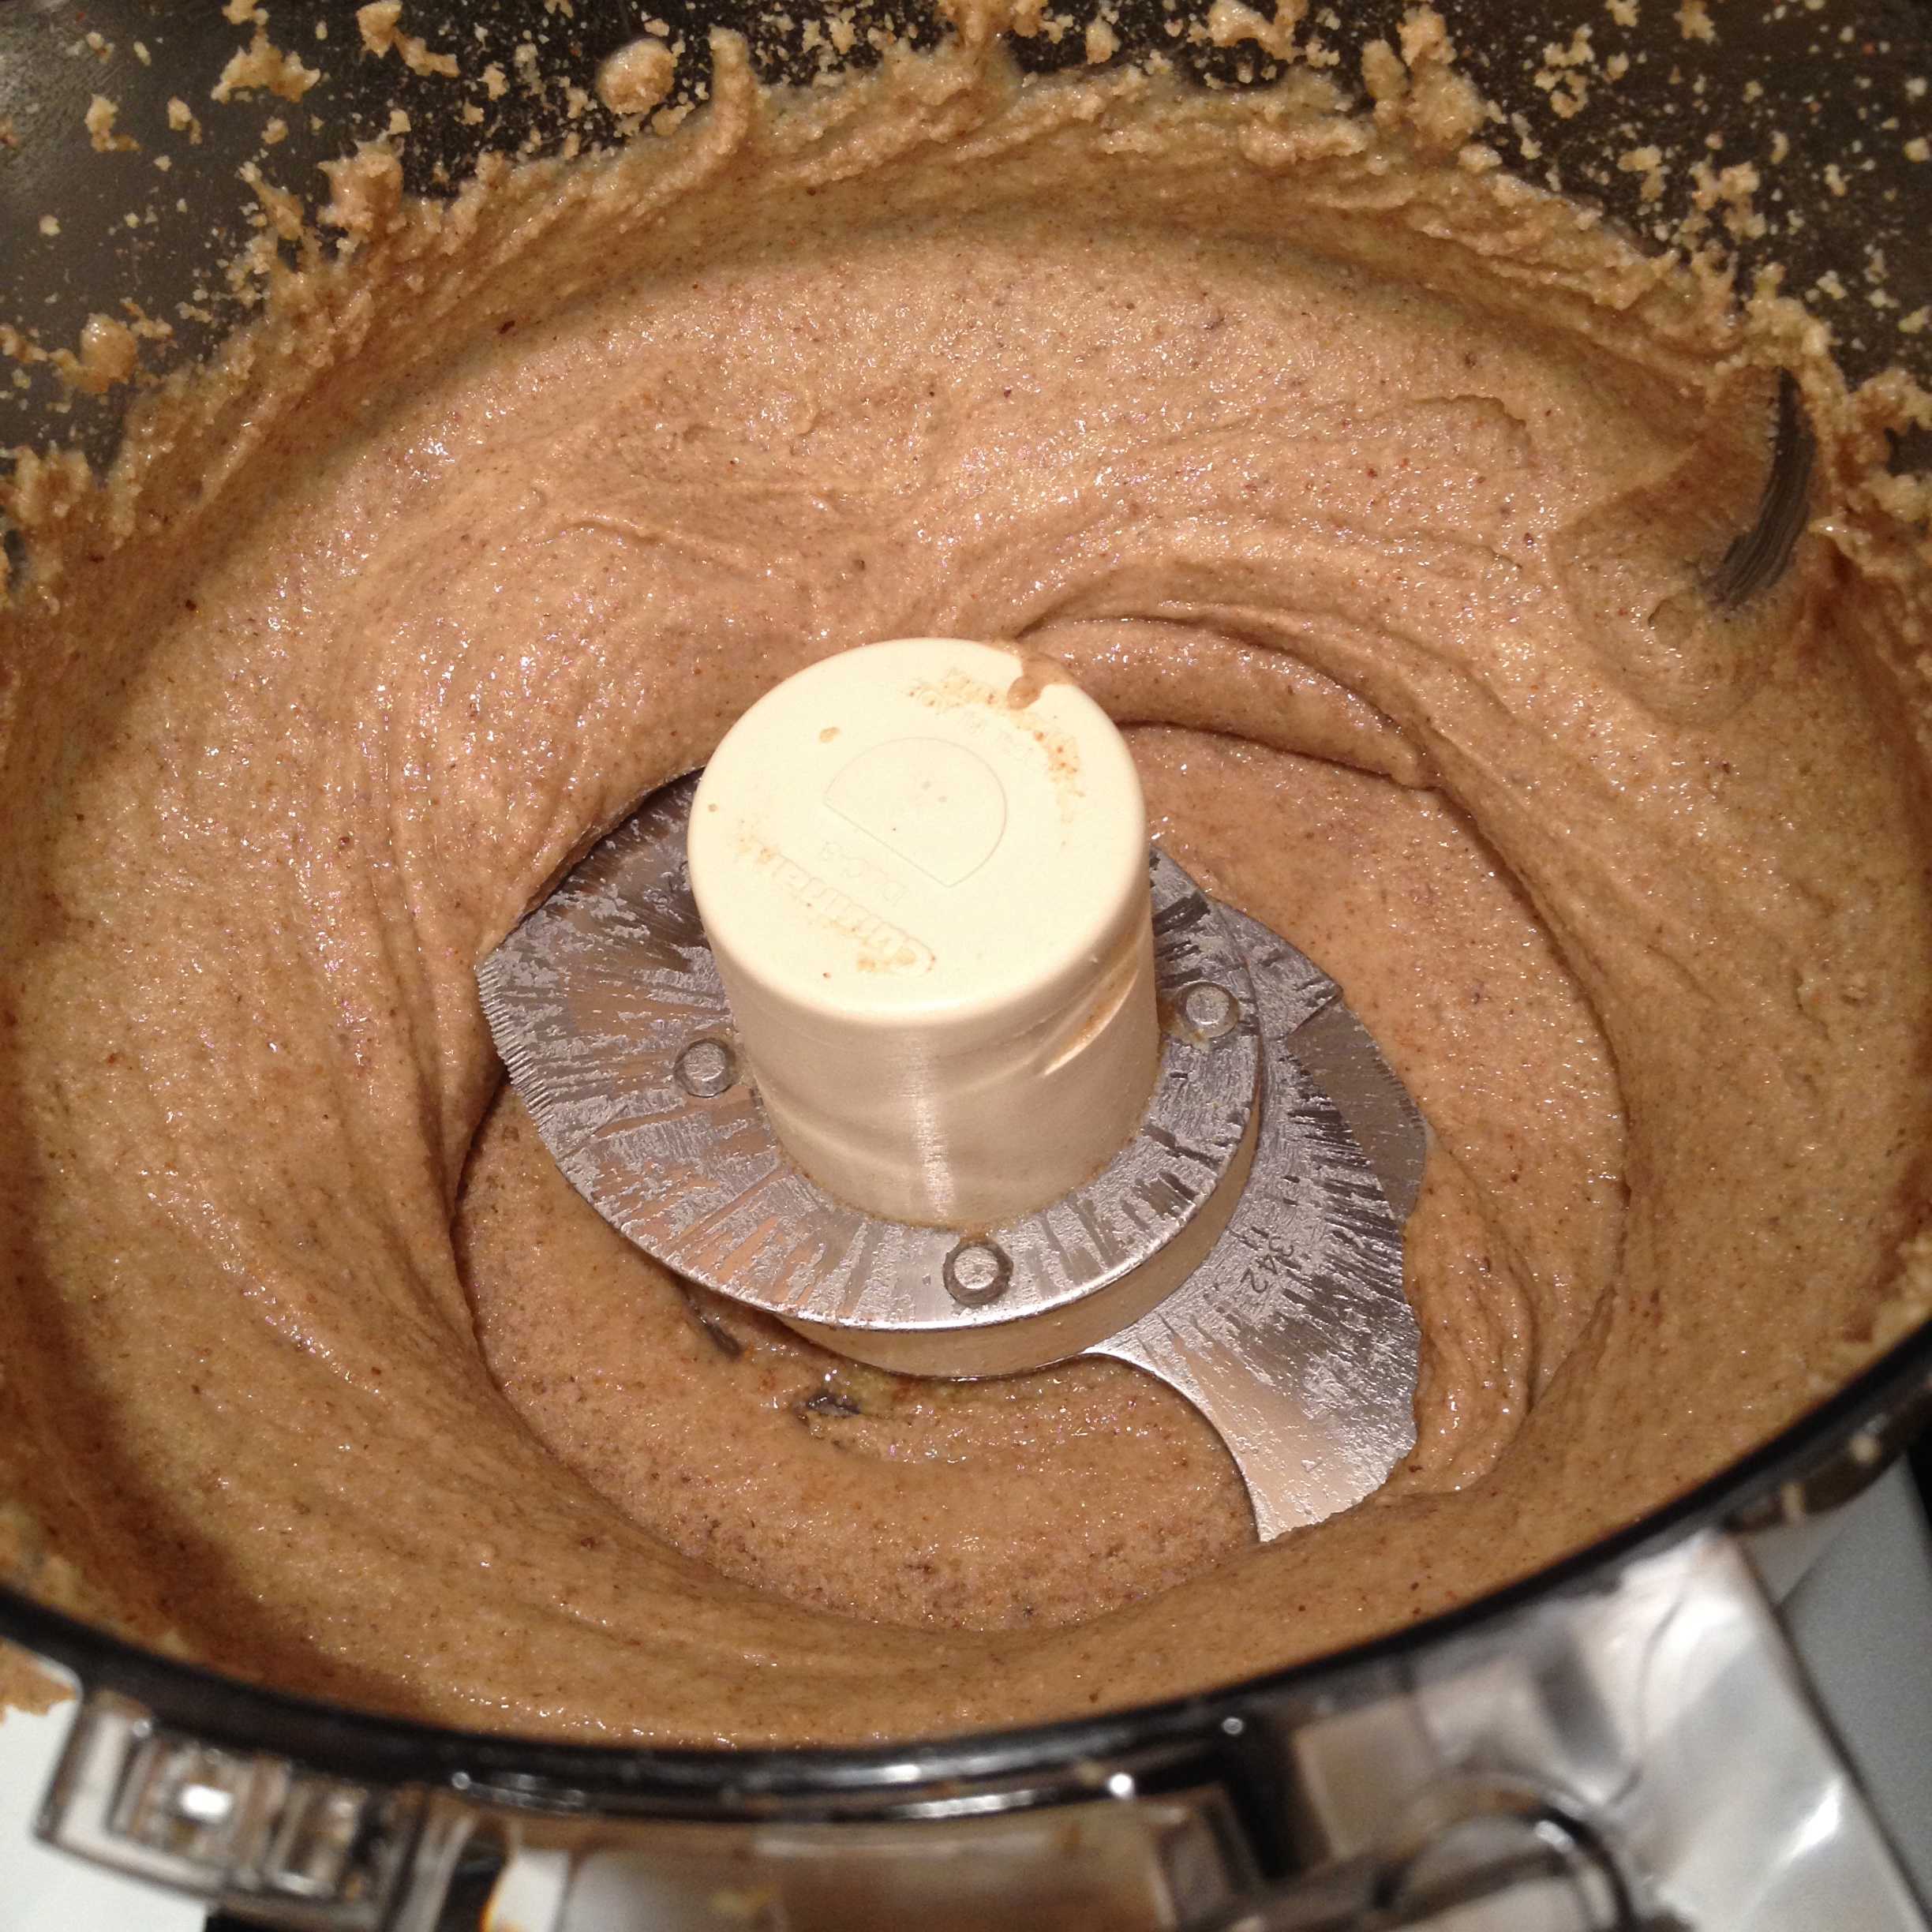
Combine  pumpkin seeds, sunflower seeds , and flaxseed meal in your food processor. Blend until the ingredients are well chopped and blended. You’ll need to stop and scrape the sides down so all the ingredients get blended together.

Add the honey and blend until the nut butter starts to form. This can take up to ten full minutes so have patience! Once you see the play dough texture, where the seed butter starts to form a ball and move around the bowl you’re getting close! Add the oil and continue to blend 5-10 minutes more until the butter is consistently smooth. Your food processor might get warm but don’t worry too much, you can always let it cool a little bit and then blend away. I used the 1/4 cup of oil and it was just fine, but you may want to add more depending on how you like your nut butter.

Place in an airtight container (tupperware or glass jar) and store in refrigerator up to 2 weeks.

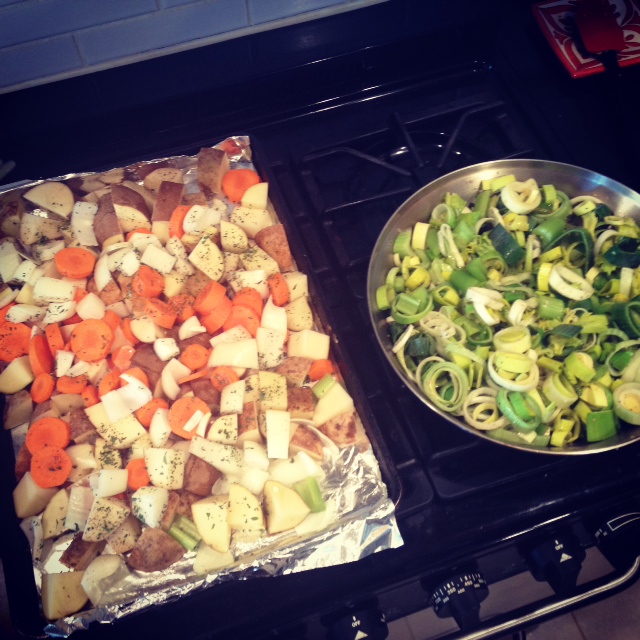
There are plenty of additions to this recipe, you can mix up the ratios. You can choose olive oil or coconut oil. You might want to add salt, or use salted pumpkin seeds. You can also pre-heat the oven to about 350 and roast the seeds on a parchment paper or foil wrapped cookie sheet for 10-15 minutes. If you oven roast them, stir the seeds once or twice during cooking and let them cool before adding to the food processor. There is also a delicious looking adaption for Maple Pumpkin Seed Butter and Chocolate Pumpkin butter.

Quick & Easy Fall Meal: Delicata Squash, Quinoa, Chicken

Screen Shot 2014-09-17 at 8.54.40 PMThere are nights that you get home and the LAST thing you want to do is cook. But, a bowl of cereal just isn’t going to cut it either. Image one of those days then add a three day moving process where so many things wen’t wrong you’ve lost count, and you just want it all to be over. That’s how the past week has been. I’ve been tired before, but I’m pretty sure I’ve never felt this level of exhaustion…falling into bed because I can’t bear to keep my body upright or my eyes open any longer. But I also can’t seem to stomach the idea of consuming another meal that doesn’t come from my own kitchen. I vowed that tonight was be the night, without and idea of what magic would happen to result in a consumable meal.

photoA quick triage of the fridge, pantry and cooking dishes quickly indicated that tonight was going to be a “throw together” meal and it was time to get a little creative. This was one of the meals where I just started chopping, sautéing and hoping that adding enough herbs would do the trick to result in a meal that was worth eating. There are a few kitchen staples that are always on hand (a post to come about that!) so that I can throw together a decent meal on little time and minimal ingredients and effort.  One of my go-to fall meals is a simple combination of toasted quinoa, butternut squash and toasted chickpeas. I decided to do a variation on this meal with some delicata squash I picked up at the market and a few frozen chicken breast I had in the freezer. I have to admit, there were a few points in the evening that I started to calculate how quickly a pizza could be delivered but the end result was just delicious! This is for sure getting added to the “fall staples” list! Delicata squash are a city chef’s dream. They’re much smaller than other fall and winter squash (save maybe acorn squash) so you’re not lugging 15 pounds of squash home and you don’t have to peel them! They’re super simple to thin slice and pan cook or roast in the oven on a foil sheet at 425 to get that delicious, caramel, melty, amazing squashey goodness!

To make this recipe vegetarian, substitute the chicken with toasted chickpeas.

Delicata Squash, Quinoa, Chicken

1 medium Delicata squash
2 chicken breast
1/2 cup dry quinoa
Fresh chopped or dried parsley
Cracked pepper to taste
Grapeseed oil

  • In a medium stock pot, toast the quinoa over medium heat, moving the quinoa in the pan, until you see it start to brown. Remove from heat, wash, place back in pan with 1 cup water, cracked pepper and fresh chopped or dried parsley. Cover and bring to a boil then turn off the heat and let it sit until the rest is ready.
  • Meanwhile, pre-heat a pan with grapeseed oil or any other high cooking heat oil. Wash Delicata squash exterior, cut in half, scrape out seeds and slice thin then add to the pre-heated pan with some fresh cracked pepper and parsley. Move in pan until lightly browned.
  • Cube the chicken and add to pan with the squash. Add cracked pepper and parsley to taste.
  • Move contents of pan chicken and squash are browned. Cut one of the pieces of chicken in half to assure it’s cooked throughout.
  • Serve in a bowl with peanut sauce, fig or stone fruit compote, or balsamic drizzle.

Kombucha, Som, Pok Pok and a new Kitchen

Dear friends! As you can tell, I’ve been on a bit of a writing hiatus the past few… months! Works been busy, personal life has been busy, there’s been travel and apparently it’s important to sleep every now and then?! What a cramp on a busy gals schedule hey? But i’ve dearly miss and you and even though I haven’t been posting, I have still been cooking up a storm and gathering new recipes to share! We had the weekly staples- batches of kombucha,and almond butter.We traveled to visit our family and threw in a few beer soaked grilled bratwurst, paleo chocolate chip banana bread and Pecan Pies with fresh homemade crust (of course!). I can’t visit without baking a few pies! One of my favorite parts about visiting family is playing the role of both ‘imported resident chef’ and ‘kitchen instructor’. I have So much fun teaching the niece and nephews to cook! We had a ball in the kitchen and they do great!

photoBut, as I was saying. This entire summer has been booked SOLID with both work and play. And just when I thought things would calm down in the fall, our landlord decided to sell the condo after four years of renting so we had to find a new place. Luckily, we found a place that we just LOVE and we move this weekend. THIS WEEKEND! A matter of hours away! I’m so excited I can barely handle it! I can’t wait to unpack and organize the new kitchen! With the fast pace of the last 3 months, cooking as been more of a chore than it usually is. I’ve really leaned on simple recipes, the local pho restaurant, and cereal for dinner. But with a new kitchen comes new recipes and excitement to cook! Which brings me to my fall and winter sports.

I HATE to, and won’t, drive in snow and/or ice… so my fall/winter sports consist of cooking, baking, menu planning from the ridiculous amount of time I spend on Pinterest (A Byte of Life boards here), testing out my wine cellar, catching up on all the shows that everyones been raving about and listening to the rain falling outside. Oh, and pumpkins! I LOVE PUMPKIN!  I’ll eat slow roasted pumpkin right off the baking sheet! And Gingerbread. I LOVE gingerbread! But back to the point- my winter sports are gingerbread and/or pumpkin flavored, with a side of wine, and a good show in the background.

This year, I have a new hobby to add to the list. Pok Pok. If you’ve NEVER been to Pok Pok, you HAVE to go to either Portland or New York and experience their wings and one of their drinks with their drinking vinegar called som. Som is a drinking vinegar that has been an age old practice in many cultures around the world for it’s health benefits. Pok Pok has been serving their drinking vinegars since 2005, both as a cocktail mixer and diluted with soda as a soft drink. They use organic cane sugar for sweetener and let me tell you, while I’m not a soft drink person in the slightest, this stuff is downright addicting! You can purchase the Pok Pok Som online form both Pok Pok and ChefShop.com. A girlfriend and I just took an amazing cooking class at ChefShop.com so you can expect future blog post about them too!

Well, their chicken wings are known nation wide, and their cocktails are red-eye flight worthy. This, coming from a confirmed wine and anti-chicken wing girl. Let’s just keep this short and say that Pok Pok changed my life, as evidenced by the fact that after the first bite I waived down the waiter and asked if I could PLEASE purchase their cookbook but only if the amazing chicken wings were included. He handed me a copy to review. Each page coated in plastic which was an amazing idea because I was pouring over it as I was elbow deep in eating amazing chicken wings,The Pok Pok cookbook holds a special spot on my shelf , I personally confirmed that the chicken wing recipe is included, and it has been added to the list of fall and winter hobbies.

Tune in for more amazing thai inspired recipes from the Pok Pok cookbook, updates from this years International Food Bloggers conference (last years post) and to see how the Som Kombucha turns out! I had a bit of Som leftover and had a batch of kombucha ready tonight so I figured I’d do a little variation on my blueberry ginger kombucha and try some ginger som kombucha. I’ll let you know how it goes!

Banana Bread {Paleo, Gluten-Free, Dairy-Free, Sugar-Free}

photo 2


It feels like fall in the city. The weather had been grey and gloomy all week, which is quite a change from last weeks sunburn weather! Grey clouds always get me in a comfy cozy mood, and inspire me to drink tea and curl up with a good book and a blanket. But, what’s tea without a little tea treat, am  right?

This amazing banana bread entered into my heart a few weeks ago when I had a day off and went to go visit my sister at work. She’s been on this “Paleo Kick” that I usually roll my eyes at, but I have to say this recipe immediate became a kitchen staple and has now replaced my  tried and true Banana Bread recipe that is YEARS old! It’s THAT good kids! 

Gluten-free cooking is nothing new to me. I LOVE baking with Bob’s Red Mill All-Purpose Gluten-Free Baking Flour and have made quite a few goodies with it. Most recently I made a Strawberry Basil BreadGingerbread cookiesChocolate Chip Cookies, amazing Vanilla Cupcakes, and even tried my hand at Vegan Gluten-Free Donuts! To be clear, I am NOT a big believer in following every food fad that comes along, and most definitely did NOT jump on the Paleo band wagon when it came in vogue, nor am I on that bandwagon now. This bread is quite simply one of the most delicious healthy baked goods I’ve ever had. It’s mainly bananas and eggs, a little homemade almond butter, gluten-free flour, and some apple sauce to hold it all together. That’s it! No added sugars. No two stick of butter and 5 cups of refined white flour. Just simple, regular ingredients you can pronounce and happily eat.

IMG_7780 

There are many variations you can try with this recipe and I list a few at the end of this recipe. Next time I might throw in some blueberries, or try coconut flour to make a bit more of a dessert style bread. What variations would you, or are you, going to try?

Paleo Banana Bread
Adapted from Civilized Caveman Cooking Creations Recipe 
Prep Time: 10 mins | Cook time: 30-45 minutes

Ingredients
2 1/2 cups  yellow bananas, mashed (approx. 4 bananas) 
4 eggs
1/2 cup homemade almond butter
4 tablespoons Apple sauce (original recipe called for melted grass-fed butter or coconut oil)
1/2 cup gluten-free flour
2 tsp cinnamon (original recipe called for 1 tbsp but that’s a little heavy for a summer bread)
1 teaspoon baking soda
1 teaspoon baking powder (gluten-free or homemade)
1 teaspoon vanilla
pinch of sea salt

Instructions
1. Pre-heat your oven to 350 degrees fahrenheit
2. Combine your bananas, eggs, and nut butter, and apple sauce and mix well
3. Add in in the flour, cinnamon, baking soda, baking powder, vanilla, and sea salt and mix well
4. Grease a 9×5 glass (see notes) loaf pan with a fat of your choice (I use Rice Bran oil)
5. Pour in your batter and spread it evenly throughout
6. Place in your preheated oven and bake for 55-60 minutes or until a toothpick inserted into the center comes out clean (If you use a metal pan it will probably bake in 35-40 minutes so start checking at 35 to ensure the middle stays moist)
7. Remove from oven and flip your bread out onto a cooling rack
8. Slice and serve

Variations
1. Alternate Nut Butter: You can use any almond butter you desire: coconut, sunflower seed, macadamia nut, etc
2. Alternate Flour: My sister uses coconut flour, but I bet that almond flour or macadamia nut meal could be delicious
3. Flavors: Cranberry Orange – Only use 3 tablespoons of butter. Add zest of one whole orange diced, juice of one whole orange, and 1 cup dried cranberries or fresh if you want
4. Flavors: Chocolate Blueberry – Add 1 cup of fresh blueberries and 1/2 cup of cocoa powder
5. Flavors: Pumpkin Pecan – Reduce the almond butter to 1/4 cup and add 1/2 cup of pumpkin puree and 1 cup of roughly chopped pecan pieces

If you want to make these into muffins, use the same recipe and for mini muffins bake approximately 25 mins and normal size muffins 30-35 minutes.


Strawberry Basil Bread {Gluten-Free}

IMG_7300Updated Post: When the mister starts his taste-tester review with “I already convinced myself that I would NOT like this, but, it’s actually AMAZING!” you get pretty thrilled. And yes, he did speak in ALL CAPS for that last word, just in case you were wondering if I embellished the story at all. “And you used the bullshit {aka Gluten-Free} flour for this?” he asked. “Yes, I sure did”. To which he responds: “It’s not ridiculously sweet, and if you hadn’t told me there was basil in here I would have never known. This is REAAAALLLLY good!” Now that, ladies and gentlemen, is a seal of approval on a recipe if I’ve EVER heard one! Updated recipe below and images are my own! Enjoy!!!

————–

Hello friends! I’m so sorry it’s been ages since I posted and we’ve been stuck on Blueberry Kombucha and Summer Sangria for… let’s just leave it at a “while”. Starting a new job sure has a way of changing nearly everything about life as you know it! I’ve been in my new job about 4 months now, and loving it. I’m also loving having a little bit of mental brain power when I get home in the evening, which has been lacking for about four months now. Between not having mental energy and somehow just really busy, I’ve found a little space where I simply just decide to relax a little instead of burning the midnight oil EVERY night. Hmm, guess you can teach a moderately aged dog a new trick hey? Needless to say, writing on the blog has been sitting on the “to do” list for a while and that list has been taking a little rest and relaxation time as well. For those of you still burning the midnight oil every single night: you should try the whole relaxing thing every now and then. It’s actually quite nice once you start to get used to it. And to my mother and father who I’m convinced are my only readers, you were right. J

Like many 9-5 worker bees, evenings usually consist of getting home after work, and if I’m good and motivated, the gym. Then, I’m off! Figuring what to cook up for dinner, thinking about packing both lunches for the next day, triage height of the laundry pile, and trying not to see the “to do” pile of papers and other things that have been taking a little relaxation break which has whittled out a few of them but there sits the remainder that still, at some point, to get done. We worker bees cherish our weekends to sleep in, brunch, relax, and yet still get to all the chores that we push-off during the week. My push-off pile takes the form of a pile of papers tucked into my shelf in the closet. On the top of that pile is deliciously summer recipe for strawberry basil bread that I decided this past Sunday, needed to become a real, baked, edible thing.

That’s not to say I’ve baked it. Because, well, I haven’t. You know that bit about the road to hell being paved with good intentions and all? That road never met a week of long work-days and a weekend of 80 degree and blindingly sunny Seattle days! In addition, when I purchased the basil on my few hours of shopping and running errands this weekend, I did have the best intentions of using most of it for the bread and then looked next to the basil and you know what was staring up at me? Sitting there looking ever so plump and inviting were gorgeous heirloom tomatoes. Somehow, four of them jumped into my basket, as did rosemary crackers, mozzarella, and a bottle of delicious Italian Chianti. Can you guess how much basil was left for baking the bread? I bet you can! I had even picked up extra strawberries this weekend so I could bake! Well, the sunshine and Caprese won over the baking, and I’ll pick up more basil at Pike Place tomorrow after work and bake this week.

The recipe was passed along to me by a friend who’s gluten-free. I’ll be making the recipe with Bob’s Red Mill Gluten-Free flour so I can share it with her but you can use regular flour if you prefer. I’m also I’m going to sub out the heavy cream because 1) I feel compelled to somehow tinker with and personalize every recipe possible, and 2) heavy cream just seem so “Fall-ish” doing without it makes it feel like a more a summer bread. Hey, I never claimed to be logical!  Other than that the recipe is pretty straight forward and a little out of the realm of what I would usually bake so I’m pretty excited to give it a go! I’ll be sure to update this post with my own pictures and a description of how it turns out!

Strawberry Basil Bread
Adapted the Recipe By Rebecca Franklin posted on About.com
Prep: 10 min | Cook: 50 min
Yield: 1 9×5 Loaf

Ingredients:
3 cups Bob’s Red Mill Gluten-Free flour
1 1/2 cups organic granulated sugar
1 teaspoon baking soda
7 ounces plain Greek-style yogurt + 3 tablespoons
3 eggs, brought to room temperature
1/2 cup extra virgin olive oil
1 teaspoon vanilla extract
1 tablespoon chopped, fresh basil leaves (about 4 large leaves)
12 ounces fresh, washed, chopped strawberries

Preparation:

Pre-heat the oven to 350F and prepare a 9-inch by 5-inch loaf pan with a light coating of vegetable oil spray.

photoIn a large bowl, stir the flour, sugar, and baking soda together. In a separate bowl, lightly beat the yogurt, eggs, oil, cream, and vanilla together until the mixture is smooth. Add the wet ingredients to the dry ingredients and stir until the batter is nearly smooth with only a few, small lumps remaining. Gently fold the chopped basil and fresh strawberries into the batter.

Spoon the strawberry-basil batter into the prepared loaf pan and bake it for 45 to 55 minutes, until it tests done in the center.

photo 2Allow the bread to cool in the pan for 15 minutes before loosening the sides and transferring it to a wire rack to continue cooling.


Homemade Almond Butter

photoLet me start this story by giving a little background on the hardware featured in this particular post. I’d been eying food processors like a kid looks at the passing candy store window, or cat looks at a fish bowl. I WANTED a food processor for reasons I can’t quite explain. The strong urge to rice cauliflower isn’t something that normal people think of, but I’ve also never claimed nor do I want to be “normal”…not if it means giving up dreams like rice-ing cauliflower. But, this particular post is about nut butter so I shall continue. The story is, I got hooked on the stuff then went into budget mode and got the DIY itch at the same time and scoured the internet for almond butter recipes.

We used to get a tub of fresh cold-pressed almond butter, and one of pumpkin seed butter each week. But, two tubs of $8/each nut butter per week got me thinking, “I HAVE to be able to same something close at home that could do the trick!” So, off to Costco I ventured to live out my food processor dreams. After extensive food processor research (yep, that’s a thing!) I decided to purchase the Cuisinart Prep 11 Plus™ 11-Cup Food Processor With Blade Storage (link takes you to Amazon.com- but I purchased at my local Costco for $140). I liked this one because not only was it cheaper than the ones I found on Amazon, but it came with the extra blades AND a nifty little blade holder, AND still had the Cuisinart warranty. Pretty good life choice if you ask me!

I won’t lie, there was a little intimidation when I started researching some nut and seed butter recipes. They warned that it would take up to 20 minutes to make nut butter. Who’s got the time! BUT, my amazing, lovely, wonderful food processor did the trick much quicker and is sturdy enough that I don’t have to stand and hold it. I could turn it on and do other chores in the kitchen in-between checking on the butter progress. I’d love to say that the first batch was an incredible success, that it was as if I had been making nut and seed butter all my life and that I was a natural…what, with my infinite patience and such. But alas, I was not an instant success. I did not make fantastic, amazing nut and seed butter the first time I tried. The first almond butter tasted weird because I used flax oil instead of flax meal. The flax oil had a very…”earthy” taste which tasted healthy but wasn’t amazingly tasty. But, with a very patient taste tester and a few batches, the recipe was pretty dialed in!

IMG_5705Homemade Raw Almond Butter
Yield: one pint
Time: 10-15 minutes 

Ingredients
4 cups almonds
1/2 cup  sunflower seeds
1/4 cup flax-seed meal
1/4 cup  grapeseed oil

Directions
Combine  almonds and flaxseed meal in your food processor. You’ll need to stop and scrape the sides down so all the ingredients get blended together. Keep blending until you see the nut butter starts to form into a play dough texture . This can take up to ten full minutes so have patience! Once you see the play dough texture, where the seed butter starts to form a ball and move around the bowl you’re getting close! Add the oil and sunflower seeds and continue to blend about 5 minutes more until the nut butter is consistently smooth. Your food processor might get warm but don’t worry too much, you can always let it cool a little bit and then blend away. I used the 1/4 cup and it was just fine, but you may want to add more depending on how you like your nut butter.

Place in an airtight container (Tupperware or glass jar) and store in refrigerator up to 2 weeks.

There are plenty of additions to this recipe, you can mix up the ratios. You can try using coconut oil. You might want to add salt, or use salted almonds. You can also pre-heat the oven to about 350 and roast the almonds on a parchment paper or foil wrapped cookie sheet for 10-15 minutes. If you oven roast them, stir the almonds once or twice during cooking and let them cool before adding to the food processor. You can also try adding honey if you like it a little sweeter, or even add cinnamon.

What is your favorite almond butter variation?


Potato, Carrot Leek Soup (Dairy Free, Soy Free, Gluten-Free, Vegan)

photo 1It has officially gotten cold in Seattle. Not “girl” cold where it’s 50 degrees and my tosies get a little chilly. I’m talking Midwest, you can see your breath, chill hits to your bones cold. We’ve had low 30’s for about a week now and even my poor parsley I forgot on the patio was frozen to the bone! With cold like this, a big bowl of warm homemade soup is just the ticket to help you thaw out! After being used to cooking an ENTIRE Thanksgiving feast, four pies seemed like a walk in the park! I opted for the my go-to holiday hits and baked four fresh crusts from scratch  for pumpkin pies and two pecan pies. Of course, I home-roasted the pumpkins using my recipe HERE.
we would up with all of the veggies that I had drug up my parents house with the best intentions of cooking up for my family. What do you do with bunches of leeks and a massive yellow onion?

Well, you buy potatoes and carrots and make soup of course! I wrote this recipe from looking at a few different ones, and deciding that I didn’t want dairy OR soy in my soup…and using this a little as a kitchen soup recipe to clean out the fridge. The recipe  is sweet because it’s relatively low maintenance and you can make it in your VitaMix or if you have a food processor. Super simple, SUPER delicious, and super healthy! No diary, no soy, gluten-free, and  can be made vegan if you substitute out the chicken bullion.


photo 3Potato, Carrot Leek Soup (Dairy Free, Soy Free, Gluten-Free, Vegan)
prep time: 10 min | cook time: 1 hr
5 leeks
2 ½ tsp minced garlic (or 5 fresh cloves)
5 stalks celery + the center lighter part with the leaves
dried Parsley (or fresh!)
5  medium russet potatoes
2-3 large carrots
½ large yellow onion
2 tbsp chicken bullion ( I swear by Better Than Bouillon Organic Chicken Base, Reduced Sodium)
8 cups water
1 tsp ground rosemary
1 tsp fresh thyme
2 bay leaves
fresh sea salt and pepper

Pre-heat oven to 400.

photo 2photo 1 copyWash, peel and chop all vegetables. To clean the leeks, cut just above the roots and just below where the dark green leaves start to branch off. Wash the body of the leek and peel the outside layer off. Cut into disks. For the dark leaves, cut the tips off and be sure you have washed them well. Then slice and set aside. For the potatoes, I usually cut the potato in half, then half again and cut into chunks.

Misto spray a cookie sheet then place carrots, potatoes and onion on cookie sheet. Dust with fresh cracked pepper and dried parsley (unless you have the fresh stuff- in that case add when you puree the soup).  Cook 40 minutes or until potatoes are soft in the center. Turn veggies once or twice so that all surfaces get browned.

While those veggies are in the oven, get out a large pan and sauté the garlic. Add the leeks, separating the layers of the disks, and the celery. Then add a little fresh cracked pepper and some salt. Sauté until all the veggies are cooked. As I turn the leeks and celery in the pan, I’ll do a light olive oil Misto spray just so everything gets a little charred in the pan and I’ll also coat with pepper. Also, any of the leek that is still held together in the little disk, separate the different layers as you cook.  I never measure pepper and I like the flavor so I usually just cook by sight and will add until I feel like it’s seasoned.

To make the broth, bring the water in a 10-cup stockpot then stir in the chicken bullion. Add the rosemary, thyme and bay leaves. Bring to a boil and simmer for 10-15 minutes.

Once all veggies are cooked and the broth has simmered, remove the bay leaf and get your vita mix ready. Place 1/3 of each of the ingredients in the blender and blend on medium until thoroughly puréed.  Once puréed, place back in the stockpot and repeat until all of the ingredients are puréed. Simmer soup for 10-15 minutes and serve.

Can be frozen up to 4 months in a freezer Ziplocs bag or Tupperware. .

Garlic Ginger Dipping Sauce

Dinner is served
Dinner is served

Garlic Ginger Dipping Sauce

Yield enough for about 6-8 spring rolls
3 cloves fresh garlic, minced (or 1 1/2 tsp jarred minced garlic)
1- 1 1/2 tbsp fresh ginger (or 1 1/2 tsp dried ginger)
1 tbsp toasted sesame oil
1/3 low sodium soy sauce
1/4  c.rice vinegar (or white wine vinegar works as well)
1/4 c. tsp crushed red pepper flakes ( unless you like it SPICY, stick to this ratio or it might overpower the rolls)
1 tbsp sugar

Combine all ingredients in small pot and cook over low heat until mixture bubbles. Can be stored in airtight container and refrigerated for up to three days after making.

Pairs well with Chicken Spring Rolls or you can marinate chicken in it and bake in the oven or grill!


Wine Marinated Crispy Chickpeas (Vegan, Vegetarian, Meat-Free, Dairy-Free)

Simple Tasty Winter Meals(Vegan, Vegetarian, Dairy-Free, Meat-free)
It’s “officially” fall in the Pacific Northwest. All of the normal indications are here: I need sunglasses, a jacket, a scarf, a tank top, gloves and an umbrella all in the course of about five minutes. The sun is setting earlier, waterproofing boots is on my to-do list, and my shorts get packed away.

Another indication that it’s fall is here is the lack of daylight. There is an impending sluggish feeling that starts to set in when we realize that we go to work when it’s dark and leave work it’s dark. Unless you’re one of the lucky few that has a window near your cubicle or in your office, it’s possible to only catch a glimpse of real “light” through ever distant windows on the run from the  much needed afternoon coffee break to back to back afternoon meetings.

When the rain starts, the fall flavor craving starts. These cravings battle the ever sluggish feelings and makes us torn when it comes to dinner. Either it’s the event that keeps me going during the day and I can’t wait to rush home and cook something that I’ve pinned, liked, saved or stashed. Or, the last thing I want to do is be in the kitchen as a continuation of my daily servitude but am conflicted when I mentally explore the ease of ordering pizza.

Marinated Chickpeas

1 can chickpeas, drained
White Wine
Minced garlic
Dried Parsley, garlic, rosemary pepper
EVOO or cooking spray

  1. Open the can of chickpeas, drain and rinse
  2. Marinate the chickpeas in spices, white wine and a few dashes of balsamic in a bowl or tupperware
  3. When you’re about 17 minutes away from the other dishes being ready, pre-heat a pan with some EVOO or cooking spray
  4. Remove the chickpeas from the marinade, I use a slotted spoon to do so, and toast on medium-high until the exterior starts to brown (usually about 10-15 minutes)
  5. Shake the pan every few minutes  to move the chickpeas around so they brown evenly
  6. Once they’re browned to your linking, remove from the heat and serve

I usually pair with baked butternut squash, sauteed garlic kale or kale chips and toasted quinoa.

Cooking Notes:

The Wine:  I NEVER cook with a wine I wouldn’t drink. So, choose whichever you’d like. Anything from a Chardonnay to Riesling works. I usually use a traditional table white wine or a dry Pinot Grigio

Marination Time : Since this is a go-to meal I usually only marinate them for about an hour, but if you can remember in the morning to prepare them it will taste MUCH more delicious

Vegan Blueberry Lemon Poppy Seed Bread

It’s 3:15 am… a time of… well not really day OR night… it’s a time no person should ever experience let alone when they’re SO worn out and sleepy all they want to do is go back to sleep. I’ve you’ve been following A Byte of Life, you’ll have read the post on Spain (also found here) which was a MOST incredible trip! We were seriously debating how long we could just fall off the grid and NOT come home! But alas, common sense or something to that nature won and we got on the multiple planes home. Oh hey jet lag, how are you? Are YOU the reason I’m up at 3:15am!?

Turning to my tried and true comfort, I started googling for recipes. If I can’t sleep I may as well bake right!? My love for lemon poppy-seed is almost as strong as my love for a good bottle of red wine, and thankfully, the mister LOVES a good lemon poppy-seed ANYTHING! The request was made and I had a mission ahead of me: your mission, should you choose to accept it, is to create a delicious lemon poppy-seed baked good that’s not super sweet and melts in your mouth Well, now that’s a fun challenge!

Lemon Blueberry Poppyseed Bread

Vegan Blueberry Lemon Poppy Seed Bread
—-
1/4C canola oil
1/4 C  honey
1/4C applesauce
1/4 C soy milk
zest & juice of 1 lemon
—-
2 C Bob’s Red Mill Gluten-Free flour
3/4 tsp baking soda
1/2 tsp salt
2 tbs poppy seeds
1 C fresh blueberries (put in freezer for about 30 minutes before using)
—-
Pre-heat oven to 375
Combine the oil, applesauce, soy milk, honey , lemon juice and zest in a bowl
Sift together the flour, baking soda and salt. Add the poppy seeds and mix to combine.
Add to the wet ingredients and incorporate
Fold in frozen blueberries. Note that the batter will be thick
Place into a greased loaf pan, sprinkle raw sugar on top
Bake at 375 for 35 minutes(turning once half way through cooking)

Tasting notes:
It’s not your typical fluffy, white flour, white sugar lemon loaf you’d get at Starbucks. This is a more rustic bread and it was quite good! The gluten-free flour lends to a bit more of a mealy texture. Next time I’d add a bit more lemon juice. It’s not a sweet bread at all, so you’d need a lemoncello glaze, or blueberry jam/lemon curd/clotted cream to make it more pastry-ish.

All in all, it’s a good solid rustic breakfast bread…and…I better go taste another slice before posting this review 🙂