Quinoa Veggie “Fried Rice”

601230_10152624692795131_821917340_nI LOVE finishing things. It’s weird. The joy that I get from the last bit of toothpaste used up, or taking the last olive of the jar, or finishing a pen….okay that last one is quite a feat ADMIT it… but I digress! The female + Type A + Project Manager/List Lover in me LOVES to feel that sense of completion. Once something is opened in our house it immediately goes into that awkward “use me up” stage and has a bullseye on it. So, the half used bag of quinoa was starting to get on my nerves. Seriously, it was taunting me EVERY time I opened the pantry cabinet and I’d had enough of being laughed at by Quinoa!

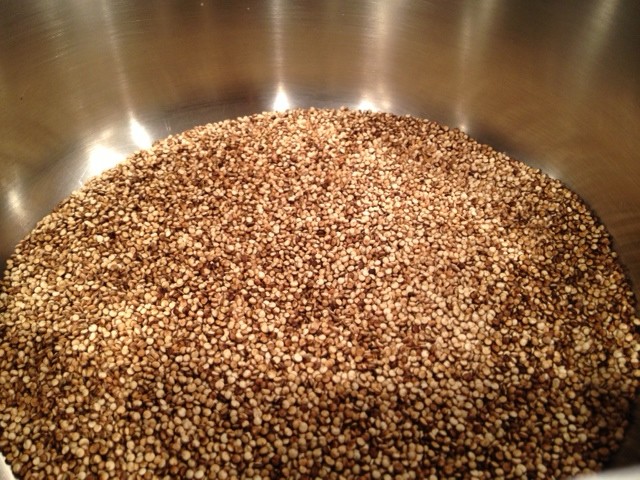
Don’t worry, I’m not crazy. The quinoa didn’t actually laugh at me. But I vowed to incorporate into more meals because we both LOVE it and it’s quite the superfood! The mister taught me an amazing trick that makes the quinoa taste AMAZING! Have you ever tried toasting it first!? Serious, life meet changed! Check out the nutrients and protein that this little grain punches in my post for toasted quinoa here.

photo 4

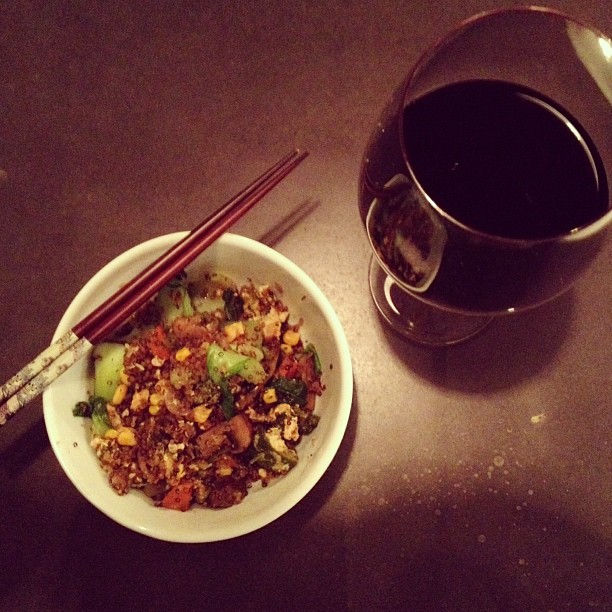
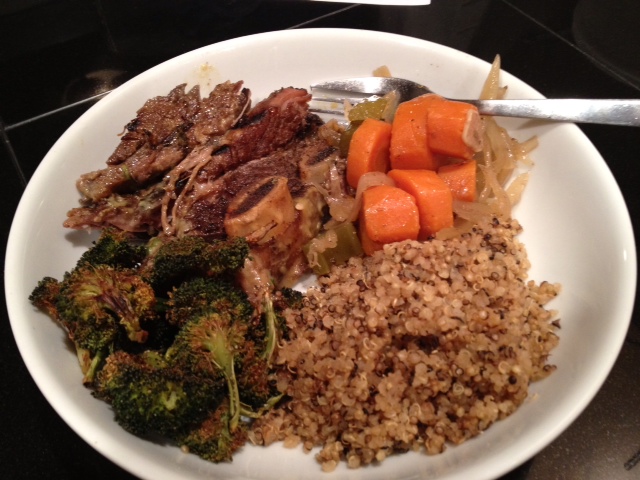
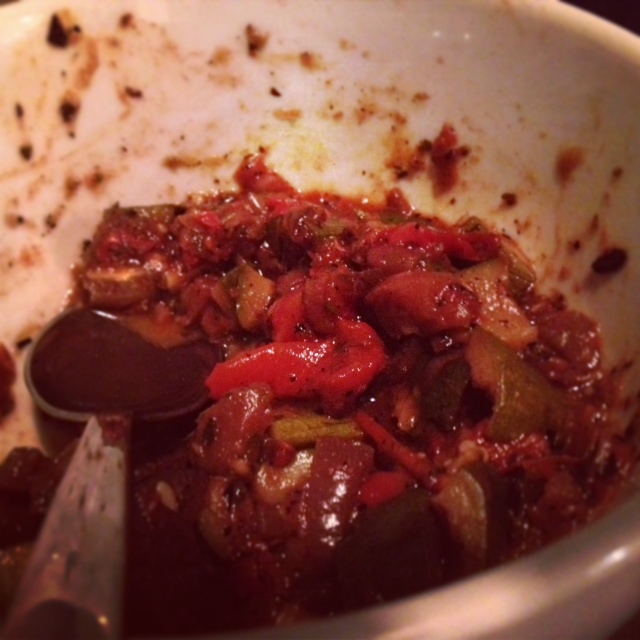
Well, I just have a little extra time on my hands these days So I decided to take up my reoccurring vow to cook through at least a FEW of my million recipes I’ve carefully drooled over and curated on my Pinterest boards. One of the dishes I REALLY wanted to try was for Quinoa Veggie “fried rice”. The mister has commented a few times that he REALLY likes fried rice while I’m not a big “rice” fan, BUT we both love quinoa. I found an AMAZING looking picture on Pinterest, pulled that quinoa out of the pantry and away I went!

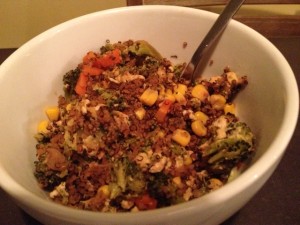
I adapted the recipe since I prefer to use recipes as guidelines and then just change it up and see what happens and it was delicious!!

photo 2Quinoa Veggie “Fried Rice”:

Recipe adapted from Dam Delicious Blog Post
Yields 4-6 servings

INGREDIENTS:

  • EVOO
  • 4 eggs
  • 2 cloves garlic, minced
  • 1 small onion, diced
  • 4-5 large mushrooms, sliced (or to taste if you’d like more)
  • 1 head broccoli, cut into florets
  • 1 zucchini, chopped
  • 1 can corn
  • 1 large carrot, peeled and finely chopped
  • 2 cups toasted cooked quinoa (recipe for toasted quinoa here)
  • soy sauce (to taste)
  • 3 green onions, sliced
  • Baby Bok Choy, base cut off so leaves are free, amount to taste

DIRECTIONS:

  1. Heat dash of EVOO (extra virgin olive oil) in a  Wok (or medium skillet) over low heat. Add garlic and onion, and cook, stirring often, until onions become translucent, about 4-5 minutes.
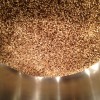
  2. In the mean time, start the quinoa  (full recipe here). Short recipe: Toast quinoa until it starts to pop, like popcorn and the outer shells turn a light to dark brown. Rinse under cold water and return to pan. Add water (1 cup water for ever half cup dry quinoa) and bring to a boil, continuously stirring. Reduce to a simmer and cover for 10 minutes then “fluff” with a fork or spatula.
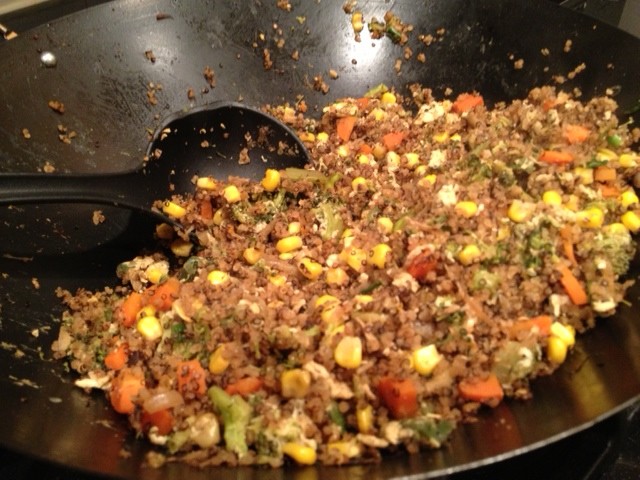
  3. Add mushrooms, broccoli and zucchini. Cook, stirring constantly, until vegetables are tender. Add a bit of water and soy sauce, cover with large lid and let steam for 5-7 minutes.
  4. Add corn, carrots and quinoa. Cook, stirring constantly, until tender.
  5. Push all veggies to one side of the Wok and crack the eggs into the hotter side of the pan and “beat” in the pan, turning once cooked on the bottom. Mix into the veggies and combine all the goodness.
  6. Stir in green onions and bok choy.
  7. Add quinoa, mix thoroughly and let heat for 3-5 minutes.

Options:

  • Cook eggs in Wok or Skillet first- fry until cooked through, about 2-3 minutes per side, flipping only once. Let cool before dicing into small pieces and add with the green onions at the end
  • Use 1/2 cup corn and half cup peas
  • Include fresh ginger
  • Grate carrots instead of chop them
  • Omit the Boc Choy
  • Make a sauce for the dish and drizzle it over the cooked veggies at the end

Toasted Quinoa

Quinoa has grown in popularity in the past few years as a “super food” and a building block for gluten-free eating. But, did you know that it’s been around for thousands of years?

That’s right! It was used by the Incas over 5,000 years ago! Now it’s making a “superfood” name for itself again as a staple in pantries and meals everywhere. The Whole Foods Blog had this to say about our little grain, “Quinoa (pronounced KEEN-wah) has all the goodness of whole grains — the B vitamins, the fiber, the minerals — and it’s actually a small dried seed that’s been cultivated for thousands of years in South America. This little powerhouse has the highest protein content of any other grain. And since it contains all eight essential amino acids, quinoa is considered a complete protein.”

Toasted Quinoa
Forbs published an article on the 7 Health Benefits of Quinoa , which stated that Quinoa is not only one of the most protein-rich foods we can eat but it is a complete protein containing all nine essential amino acids. Spoiler alert, it also contains almost twice as much fiber as other grains…think feeling fuller longer! It also contains iron which supports increased Brain function, regulation of body temperature, enzyme activity and energy metabolism. Quinoa also packs Lysine, which is essential for tissue growth and repair, and magnesium that helps to relax blood vessels and thereby to alleviate migraines. Other health benefits of magnesium include transmission of nerve impulses, body temperature regulation, detoxification, energy production, and the formation of healthy bones and teeth. It also packs Riboflavin (B2) for improved energy metabolism within brain and muscle cells and manganese, which is an antioxidant that helps to prevent damage of mitochondria during energy production as well as to protect red blood cells and other cells from injury by free radicals.

Quinoa is a pretty amazing kitchen staple, and can be used in many dishes as a main protein source, side dish or substitute for rice, potatoes or even pasta. You can cook the quinoa according to the package instructions, OR you can liven up your meal and add another layer of amazing dynamic flavor punch! Yep, I said flavor punch! Toasting quinoa before cooking opens up the nutty, toasted and almost smoky flavor. Cook up a batch to use during the week for quick dinners or add to salads for lunch. You can even cook quinoa for breakfast!

What is YOUR favorite quinoa recipe?

Toasted Quinoa
1/2 c quinoa
1 c water or chicken broth
Salt and Pepper to taste

  • Pour quinoa into pot on stove top over medium/high heat
  • Toast until it starts to pop, like popcorn and the outer shells turn a light to dark brown
  • Rinse the quinoa in a strainer under cold water and return to pot (always rinse your quinoa, like you would rice)
  • Add water to the pot and bring to a boil, continuously stirring
  • Reduce to a simmer and cover for 10 minutes then “fluff” with a fork or spatula and serve


Slow-Cooker Braised Short Ribs with Honey Garlic Glaze

plated upWell Seattle, we’re back. Back to the rain, wind and grey skies. Three weeks in Hawaii was quite a nice time to thaw out but, until the sad realization that I had to actually trade my daily uniform of shorts, a tank top and my  bathing suit for real clothes pales in comparison to the AMOUNT of real clothes I have to wear hit me. Currently, I’m sipping hot water and alternating sitting on my hands while I sit here in my coat and scarf….I’m INSIDE! What gives!

Cold weather typically sends me reaching for the Crockpot, or curling up in front of the heater without moving. Since I was craving short ribs, the crock pot won. When we were on Kona, we made a …few…trips to Roy’s Waikoloa. Okay okay, we ate there THREE nights in a row! Can you blame us!? They closed our Seattle location so we had to eat all we could get! Well, on night two as we were bellied up to the bar sharing their AMAZING appetizer canoe, (yes, CANOE!) we saw the couple next to us dig into their amazing looking dinner and we flagged down our bartender Brandon (he was AWESOME if you visit that location) and he informed us that it was the Slow Braised Char Broiled Beef Short Ribs. So, night three you know what we ordered?

Yep, Ribs! It was SUCH an incredible dish that when we got home we immediately started searching for the recipe to try our hands at recreating such an impeccable dish! After an absurd time googling various versions and combinations of the words “Roy’s Waikolaa Short Ribs entrée Recipe” I found one that was said to be biased on the Roy’s recipe so I gave it a try! (Original recipe found here) I didn’t have all the ingredients so I altered a bit.

Delicious food deserves pictures…

Slow-Cooker Braised Short Ribs with Honey Garlic Glaze
Adapted from Roy Yamaguchi
Yield: 2 large portions

For the short ribs:
2 pounds bone-in beef short ribs
Salt and pepper
EVOO
Beef stock, enough to fully cover the short ribs (about 32 ounces)
6 cloves garlic, sliced thick
1 large onion, sliced
1 stalk celery, sliced thick
2 carrots, sliced thick
2 bay leaves
1 inch piece of peeled ginger, FRESH ginger

Honey Garlic Glaze:
1/2 cup Dijon mustard
1/4 cup honey
1 clove garlic, minced fine
1/4 cup sliced green onions, both white and green

  1. Allow the ribs to come to room temperature for thirty minutes.  Season all sides of the ribs well with salt and pepper.
  2. Heat olive oil in a medium skillet over high heat.  Brown the ribs well on all sides, about two minutes per side.
  3. In your slow cooker make a bed with the garlic,  onions, carrots, celery, bay leaf and ginger.
  4. Place the browned ribs on top and add enough beef stock to just cover and Cook (Low for 8 hours or High for 4).
  5. Prepare the glaze, cover and refrigerate until meat is done, or you can make it right before you pull it out. I like to have as FEW dishes as possible so I’m a “make ahead” kinda girl! The picture above shows you, if for some reason you wanted to eyeball the dijon, what’s left over after using a half cup. I was worried I’d have too much left over but hey, egg salad here we come!
  6. When the timer goes off, remove the lid and take the initial wiff of your amazing deliciousness! The meat will be very tender and you may lose a few bones (which is a GOOD thing!) Remove the ribs from the slow cooker and, while still warm, pour the glaze over the ribs making sure they are well coated.  Allow the ribs to sit for at least thirty minutes  (or store in the refrigerator overnight).
  7. While the ribs rest heat your grill, or a skillet, to medium high heat.  Grill, or sear, the ribs for about one minute per side, or until the glaze sets and the ribs are brown and crusty.
  8. Enjoy! I served with toasted quinoa and Blasted Broccoli

Red Pepper Overload…Homemade Herbs De Province Ratatouille

Ratatouille Being sick sucks . Plain and simple. Truth fact. The End. Well… okay NOT “the end” but it feels like it! The problem with being sick is that I’m a “doer”. I like to “do” things, accomplish, check off my long to DO list. Now that we’ve established this. Guess what sickness resigns you to? Yep, you guessed it… BEING! I don’t “be”… I DO! When one is sick, they’re told to “just be” and rest. Yeah, go ahead. See how well THAT goes over. This time the stupid flu won this round and I was resigned to exploring what a “be”- er feels like. Two days on the couch with the only excursion to the gym where all I was allowed to do was steam. On day three, which is today, I’m feeling a little better and my stir crazy is kicking in!

Soooo… I decided to use up the 10 Red Peppers hanging out on my balcony. What!? They were on SALE! How can someone who LOVES peppers pass up 10/$10!? Well, thankfully it was cold enough outside to keep them fresh for four days because I completely forgot them! That is, until I was So completely dying for lack of DOING anything! So, I decided use up the veggies in the fridge to make some Ratatouille and make a jar of home Roasted Red Peppers. There are still three left over, so I’m thinking of trying some quinoa stuffed peppers tomorrow night! I’ll keep you posted!

I realized, as I was chopping my veggies and already elbow deep in delicious simmering goodness of Ratatouille, that I didn’t have the Herbs de Province that I needed for the flavor of the dish. Of COURSE I didn’t have herbs de province, why would I? I use it ALL the time and added it to my “next time I’m down at Pike Place list” which has been put on hold due to FREEZING temperatures. No one wants to walk in THAT weather. ANd of course, no fresh basil either. Well, what are you going to do? Give up the whole shabang? No chance, not when I’m THIS stir-crazy! Do you think that stopped me!? No way! There are plenty of spices in my cabinet and a half bottle of red wine within arms reach, something can be done! And if not, there’s the wine! 🙂

I have to say, this was lauded as THE BEST batch of Ratatouille I’ve made yet! It’s even better when you let it

Homemade Herbs De Province Ratatouille:

3/4 sliced red onion,
a good handfuls of fresh chopped garlic
EVOO for sautéing
2 Red Peppers
1 Eggplant
1/2   c Red Wine to simmer veggies in
4  Zucchini
Homemade Herbs de Province –Mix together and add more spices to taste 
1/2 tsp each of ground rosemary, ground thyme
1 tsp dried oregano, dried basil
1 tsp + some of dried parsley
1 14 oz Can fire roasted Tomatoes
(Follow the original Ratatouille recipe for cooking instructions) 

Hawaiian Poke & Ginger Ono Sashimi

Sam-Style Poke 
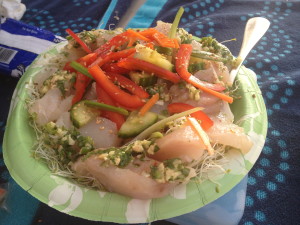
Aloha! We’re celebrating my parents 30th anniversary in  Hawaiian WARMTH and relaxing style! (For some reason they decided to invite us along, so we bought our plane tickets before they had time to change their minds!)

While relaxation is the name of this game, there are a few things I wanted to do: paddle board, sleep, eat my weight in pineapple and consume as much fresh fish and shrimp as I can possibly hold! Browsing around the ABC store in Downtown Kona (We needed to stock up on some “beverages” for our beach happy hour) Mom came across Sam Choy’s Little Hawaiian Cookbook for Big Appetites and it had some delicious looking recipes so we picked it up and had a tried a few for our sunset picnic at the beach! 

And here is a shot of our Beach Picnic! IMG_0794

Sam Stye Poke (Photo from Recipe Book)

Sam-Style Poke

Serves 8

2/3 c Sam’s Secret Sauce (see below)
2 lbs finely diced ‘ahi (yellowfin tuna)
4 tsp ‘inamona (which is crushed and roasted kukui nuts, can sub 4-6 tsp crushed cashews for same taste)
1 c rinsed and chopped ogo (seaweed)
1 tbsp sesame oil
1 tsp soy sauce

Sam’s Secret Sauce

2 c water

2 tbsp Hawaiian Salt
2 Hawaiian chili peppers, finely chopped (or red pepper flakes)

Make Sam’s Secret Sauce first by combining all ingredients and stirring until salt dissolves and set aside (not heated, just mix at room temperature). Cut the ‘ahi into chunks, no more than an inch square. Sometimes ‘ahi has white bands, or strings, of fat and with the raw fish you’ll want to remove some of this if you can so you might have to determine the size of the poke around whatever size results after removing the strings.  Combine ‘ahi with ‘inamona (or crushed cashews), ogo (seaweed), sesame oil, and soy sauce. Mix thoroughly. Add Sam’s secret sauce and marinate for 60 minutes in refrigerator.

There are a few ways you can serve this dish but we found that serving on rustic bread, cut into “serving sizes” and toasted in the oven was by far the most delicious! Just make sure they’re not TOO done… some of ours came out a bit too toasted and scraped our mouths! You could also serve on cucumber slices!

Ginger Ono
Ginger Ono

Ginger Ono

Serves 6 

Local Pepe’ekeo Dip
1/2 c oil 

1/2 tsp salt
1 clove garlic, minced
1/4 c ginger, minced
1/4 c green onion, minced
1/4 c lightly packed Chinese Parsley, minced (We used Cilantro and it was delicious)
1/8 tsp White Pepper
1/4 Tsp red pepper flakes or 1 fresh Hawaiian chili pepper, minced

1 lb Raw Ono
1 1/2 c assorted sprouts
1/2 cup Local Pepe’ekeo Dip (recipe above)


Make the Local Pepe’ekeo Dip first.

In a small sauce pan heat the oil then add the salt and cook for 2-3 minutes. Remove from heat and let cool. Stir in garlic, ginger, green onions, Chinese Parsley/Cilantro, white pepper and red peppers. Chill. To serve, thinly Slice raw ono. Line small platter or individual plates with sprouts of our choice. Arrange ono slices on sprouts. Spook the Local Pepe’ekeo Dip over the fish and serve chilled.

Homemade Pizza

IMG_3399
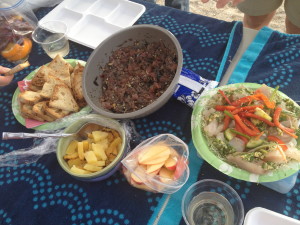
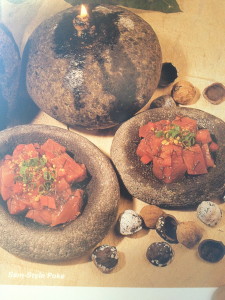
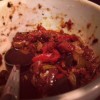
Pizza…is…DELICIOUS! With a plethora of options, toppings, styles, crusts and meals that it can be served for Pizza is pretty much an ultimate food. Eat it cold the next morning or  poach an egg on it and Viola, Breakfast! It’s the perfect brown bag lunch or picnic lunch option. It can be served flatbread style is an appetizer or tapas course, or loaded with amazing toppings and served as a dinner delight! Now, there is some debate between Pizza and flatbread so let’s review the three-step by step criteria for granted a place in the hierarchy of acceptable pies.

IMG_3383
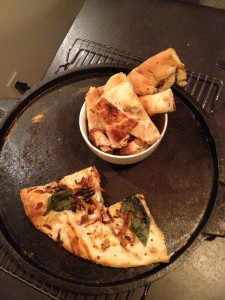
CRUST: This can be a chat of endearment or an all out fight in certain areas of the world. There are crust aficionados that take this topic very seriously. Whether you’re in thin crust camp or a lover of the thick bready crust, this is the foundation of the dish. With Pizza it seems that there can be variation in the crust whereas a flatbread will typically be a little thicker on the crust but there could be blurred lines here so let’s proceed.

BASE LAYER: Then you have the cheese vs. sauce or olive oil assessment. I call this the base layer since it seems to set the tone for how the rest of the topping architecture. With the increase in food allergies and culinary progression pizzas without cheese is no longer a cardinal sin. It is now more common to find pizzas and flatbread without cheese, topped with a traditional tomato sauce or simply brushed with olive oil. This too can be a blur in the pizza or flatbread debate, so it seems that we must proceed to the last criteria.

IMG_3603
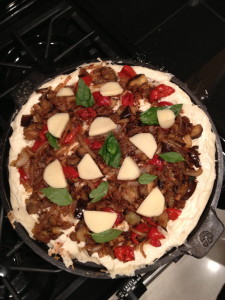
TOPPINGS: Now we have the “finitura” (finishing touch in Italian), the toppings.  If you saw broccoli on a pizza you might do a double take and wonder if your mother was in the kitchen sneaking in your daily dose of veggies. But on a flatbread, you wouldn’t think twice (I would think?) It seems that a flatbread is a trendy version of a pizza? Maybe we just needed to change the name and feel better about eating pizza with our wine, a ritual that is not only perfectly acceptable but the highlight of my week when it occurs!
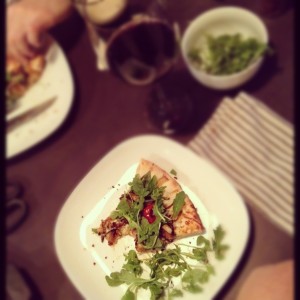
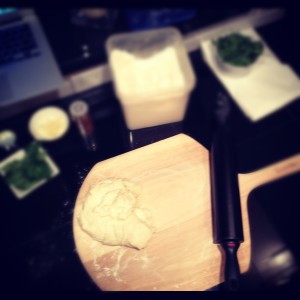
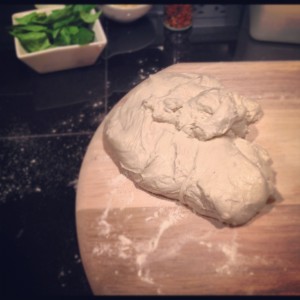
So my verdict: Flat bread is to pizza what sliders are to burgers…an open interpretation depending on the chef’s whim and creativity.

With that, I give you my current recipe for the crust, now the flatbread or pizza question is up to you to decide! BON APPETIT!!

IMG_3398

Homemade Pizza

Prepare the dough according to the directions below

IMG_3604


Cast Iron Pizza Stone
Clean Kitchen shears for cutting
Pizza Paddle (super hand for transfering to the already HOT cast iron!)

Toppings
Onion, sliced
Garlic, thinly sliced or minced
Eggplant, cut in strips or wedges
Peppadew, cut in half out of the jar (I like the flavor of this brand)
Cracked pepper
Fresh or dried parsley
Fresh Basil
Shredded Mozzarella
Scamorza Mozzarella, sliced into medallions
For Serving: Balsamic, olive oil, red pepper flakes, and arugula

Sprayed the cast iron before and pre-heat in the oven on “broil” for 15+ minutes then turn down to 475
In the meantime, chop and saute the onion, garlic, sliced eggplant and peppadew with parsley and cracked pepper on the stove.
When the cast iron is ready dusted it with flour and assemble the pizza right on the pizza stone. It will be HOT and a little hard to spread out the dough so be careful!

One light layer of shredded mozzarella, then add the sautéed onion, garlic, eggplant and seared peppadew.
Add fresh basil then the medallions of Scamorza cheese and another light layer of Mozzarella.
Cook at 475 for 8-12 minutes, until edges started to bubble up and show signs of crisping.
Remove and cut in the traditional style, with clean kitchen scissors.
Serve with balsamic, olive oil, red pepper flakes,  arugula and plates/cooking.

Notes-
We loved that the cast iron kept the pizza warm even 20+minutes after we took it out of the oven!
I used too much of the dough so the crust was too thick so less dough next time and spread the topping to the outer edges.
It was perfectly seared on the bottom and the dough didn’t stick to the cast iron pan as we expected it would, it actually slid right off.

IMG_3607Olive Oil Dough
Makes 4-1 lb loaves
Originally found on http://www.mybakingaddiction.com/no-knead-pizza-dough-recipe/

Ingredients:
2-3/4 cups lukewarm water
1-1/2 tablespoon granulated yeast (2 packets)
1-1/2 tablespoons Kosher salt
1 tablespoon sugar
1/4 cup extra virgin olive oil
6-1/2 cups unbleached all-purpose flour

Directions:

In a 5 quart bowl mix the yeast, salt, sugar, and olive oil with the water without kneading. Think of the motion of a dough hook working the dough and mix that way. You might need to wet your hands a little and mix by hand but I found a spatula to do just fine. (Notes: Original recipe called for using a standing mixer fitted with the dough hook attachment but I don’t have that so I went with the old fashion handmade tactics).

Transfer dough into another large bowl. The dough will be a little sticky but will stick together pretty well. Cover (not airtight), and allow to rest at room temperature until dough rises and collapses (or flattens on top), approximately 2 hours.

The dough can be used immediately after the initial rise, though it is easier to handle when cold. Refrigerate in a lidded (not airtight) container and use over the next 12 days.

If you like more of the deep dish style, and care to explore out of the pizza stone category, here is a cool recipe I found on Flourishing Foodie for Cast Iron Pizzas!


.


Cauliflower Pizza Crust

Pizza w/ Cauliflower Crust 
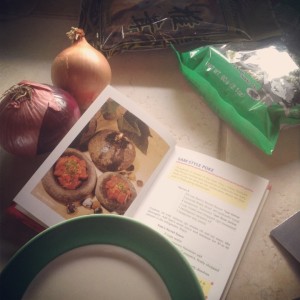
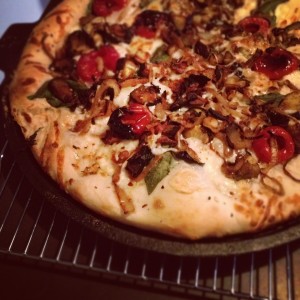
We…LOVE…Pizza! There have been a few kitchen adventures making regular pizza and I’ve got that queued up so in the next week so you’ll just have to stay tuned! In the course of my many Pinterest adventures I found quite a few recipes for Cauliflower pizza crust which intrigued me! I like pizza, I like cauliflower…sounds like a win/win situation! Less bread and more veggies and an alternative spin “cooking adventure” to try!? Count me in!
My mister is pretty adventurous  but when I start to mess with the crust of his pizza he’s not as excited as I am SO, I monopolized on the few days at home with my family for the holiday and mum and I ventured into bread free pizza world!

IMG_0405
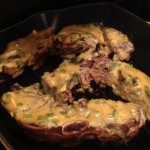
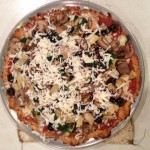
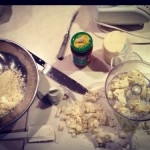
While the flavor of the cauliflower was DELICIOUS with the other italian pizza deliciousness, the texture of the crust wasn’t as “bread alternative” option as I would have hoped. It would make a great quiche or casserole, which is usually a swear word to me, but with the melty top and the crumbly bottom that word just seemed appropriate. So, in short I give you a “DELICIOUS work in progress, the Cauliflower crust”! Play, alternate toppings, crust consistency and leave your comments below! We’re in this together and we MUSt find the perfect Cauliflower crust!
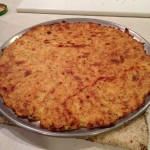
Bon Appetit!!

Cauliflower Crust Pizza (Toppings of your choice)

Crust Ingredients
3 cups cauliflower “meal”
1 cup grated low-fat mozzarella cheese
5 T  corn meal
3 T finely grated Parmesan cheese
2 tsp. dried oregano
1 tsp. garlic powder
pinch of salt
2 eggs, beaten (*make that three, one egg fore each cup of cauliflower “meal”)

Pizza Toppings
pizza sauce (we used store bought!)
grated mozzarella cheese
sautéed red onion, black olives, artichoke hearts, mushrooms
arugula

Instructions:
Preheat oven to 460F

Chop cauliflower into chunks and place in food processor (or a larger cheese grater) until it resembles a coarse “meal” texture then microwave covered in a bowl for 8-9 minutes or until it’s soft and cooked. (The Cauliflower will release natural moisture, so don’t add any when you microwave it). In the mean time, slice and sauté the red onion, black olives and artichoke hearts then place on a paper towel to dry. You don’t want extra moisture. Saute the mushrooms, flash saute some arugula with the mushrooms then add the other veggies and saute.
cooked crust
In a medium bowl mix the mozzarella, corn meal,  parmesan, spices and eggs and add the cauliflower when it’s done, mixing well. Coat a pizza pan with non-stick spray and transfer the “dough” to the pan then Use your fingers to spread out onto the pan, getting it as thin as you can. Cook in the pre-heated oven for 17-18 minutes until the crust is golden brown.

photo

Remove from the oven and coat with pizza sauce, a layer of mozzarella cheese, veggies and a light top layer of cheese then put back in the oven to melt the cheese for 5 minutes.  Remove and serve!

*Note: The flavors were PERFECT, but the crust was crumbly and we think it needed more moisture so I made the notation to add another egg into the mixture. The ratio should be one egg to every cup of cauliflower “meal”. I’ll update this post on the next “go around”!

Home Roasted Pumpkins

As the weather starts to turn, I start to crave warm comforting foods. My mind becomes preoccupied with slow-cooker Soups, fresh out of the oven baked goods, fresh gingerbread and roasted pumpkin. A few years ago, I roasted my first pumpkin and have been hooked on home roasting ever since. There might be a common misconception that roast pumpkins is tedious, messy, hard, impossible or time consuming. Well, all of the above are wrong! It’s ridiculously easy, cleaner than the carving process and once you hack it, rub it with olive oil and place it in the oven you free for the next 45 minutes!

With the first pumpkin spotting for the season, I have had it on my mind to start my pumpkin roasting. I’ve been pinning recipes on my Pumpkin & Winter Squash Pinterest board, drooling over recipes and even quite nearly gave in and ordered a Starbucks Pumpkin Loaf with my Americano last week. Breathe a sigh of relief, I have held out! I wanted my home roasted pumpkin to make some muffins and I wasn’t going to settle for anything less!

My lovely pumpkin and I had a 3/4 mile walk home in the Seattle drizzle three weeks ago. On that walk I learned a few things, first,  it’s truly the simple joys in life that matter most and for me that simply joy was fixating on a pumpkin and finally picking one up, grinning ear to ear as we walked home! Second, a 7 pound pumpkin gets heavy after a few blocks and seems to double in weight every block there after! And third, taking a pumpkin for a walk sure get’s you noticed… “hey nice pumpkin”, “my my, that’s a nnniiicceee looking pumpkin you have there”, and my favorite, “your pumpkin is nice, want to talk to me?”


Lovely photo from David Lebovitz- Roasted Pumpkin Wedges


Now, I have to admit that the poor thing sat on the counter and stared me down for the past 3 weeks and finally…FINALLY last night I figured that Halloween was the perfect night to roast a pumpkin! We don’t get trick or treaters, nor are we too into dressing up and going out to celebrate so pumpkin roasting it was! The nice thing about pumpkin, is that it’s not a sweet squash like butternut can be, it’s not stringy like spaghetti squash, and it’s not nutty flavored like acorn… it’s just the perfect mix of them all and quite delicious! I call it the tofu of squash, you can literally use it in ANY type of meal!!!I challenge you, find a meal that it wouldn’t go good in because it’s delicious in pasta, baked goods, ice cream, sauces, oatmeal, smoothies, sandwiches, spreads, soups, desserts, by it self… see!? It’s amazing!!

Home Roasted Pumpkin
Pumpkin
Rimmed Baking sheet
Foil
Cutting board and knife
Spoon to scrape seeds and bowl to hold seeds

How To:
First, wash and dry the outside of your pumpkin. The outside flesh is tough and the pumpkin is round…and I’m pretty clumsy… annddd my wielding a knife is a good idea HOW!? Just to be safe,  I opted for the horizontal half method. Using a sharp knife cut out the stem of the pumpkin as if you would to create a Jack o Lantern then cut the pumpkin in half from top to bottom.

Pre-heat the oven to 450 (*Tip- I increased the heat from the suggested 400 to 450 because I’m impatient and wanted dinner and it actually turned out just fine. The temp and amount of roasting time depends on your preferred texture and firmness for the pumpkin.) De-gut the pumpkin and separate out the seeds in the bowl to roast later. Be sure to remove all the stringy parts since they don’t taste as good.

De-gut the pumpkin

Prep the Pumpkin- now at this part you have an option. I wanted half my pumpkin to puree for baked goods and half to cut into chunks and add to salads and pasta for the next few days. So, for my recipe I roasted half the pumpkin whole, and the cut the other half into wedges, rubbed the outside with olive oil and laid out on the aluminum foil lined baking sheet. Be sure to use a baking sheet with edges because the pumpkin holds water that actually releases during cooking so you’ll need those rimmed sides of the baking sheet to keep it contained.

Bake at 450 for 30 minutes, flip and cook for 15-20 minutes more or until pumpkin is cooked your desire. To tell if it’s done, carefully press the outside of the pumpkin skin making sure not to burn yourself (yes, that’s more a note to myself!) and it should yield to a gentle press.

Remove from the oven and let the pumpkin cool on a wire rack. Once it’s cool, use a spoon to scoop out your roasted pumpkin or a fork to peel away the skin from the wedges. The flesh of the pumpkin should fall away from the outer shell. I place the pumpkin in a strainer for about 10 minutes to let the additional water drain so it doesn’t get mushy.

At this point, the fun just continues and you can prepare the pumpkin for whatever you have in mind! Blend it up to make a puree, slice up the wedges, mash it with herbs, bake it into delicious goodies, blend up a smoothie or make a pumpkin spice latte, mix with your oatmeal…the options are endless!

Storing: The pumpkin will last in an air-tight container in the fridge for about a week. You can also freeze it for future use, and I wouldn’t let it go more than a few months in the freezer.

Roasting the seeds
Wash the seeds and separate from the stringy pumpkin parts. Pat them dry with a paper towel then lay them out on a greased cookie sheet. Dust with sea salt, or whatever your preferred spice or seasoning is and toast in 325 degree oven for about 20-25 minutes, stirring the seeds around on the tray half way through the cooking.

Check out a few ideas on my Pumpkin & Winter Squash Pinterest board for inspiration!

What do you plan to do with your roasted pumpkin! Post pictures and recipes below!