Pecan Brittle

IMG_1066 Tis the season for joy, decorations, lots of food, family and giving.  Most people these days have a good sized Christmas shopping list to take care of. You’ve got your immediate family, significant other, siblings, nieces, nephews, co-workers, friends, neighbors, acquaintances….it’s likely quite a list! Then, there is always that person who got you something and you didn’t get them something but now you have to think quick because they’re handing you a present and you have no idea how to dig out of this one gracefully.

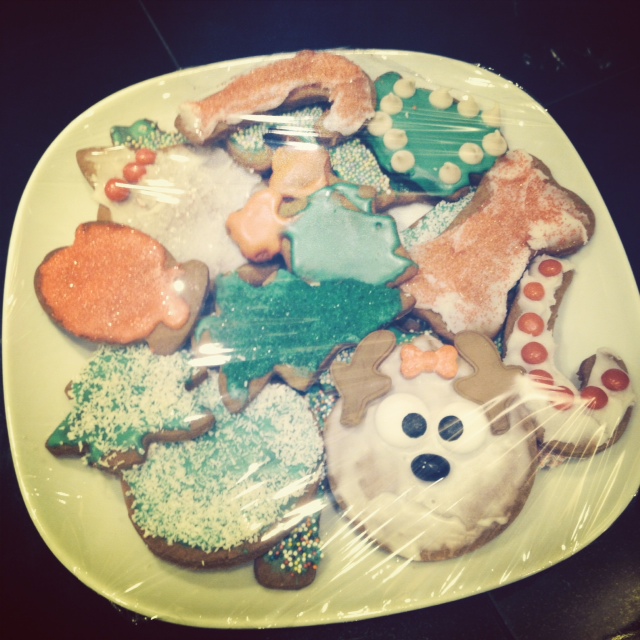
Well, what if I told you that there is an awesome one-size fits all option that will knock out a solid half of your Christmas list and it comes with a homemade touch? It can even be make last minute or say, Christmas eve day before you head to that evening party you don’t have a hostess gift for! What to get the guy who has everything? Food. Stocking stuffers for the kids? Food. Co-workers, neighbors, that person who got you a gift and you didn’t get them one? Food. Food is a universally accepted amazing gift that, when homemade, has a perfect thoughtful holiday gifting touch! 

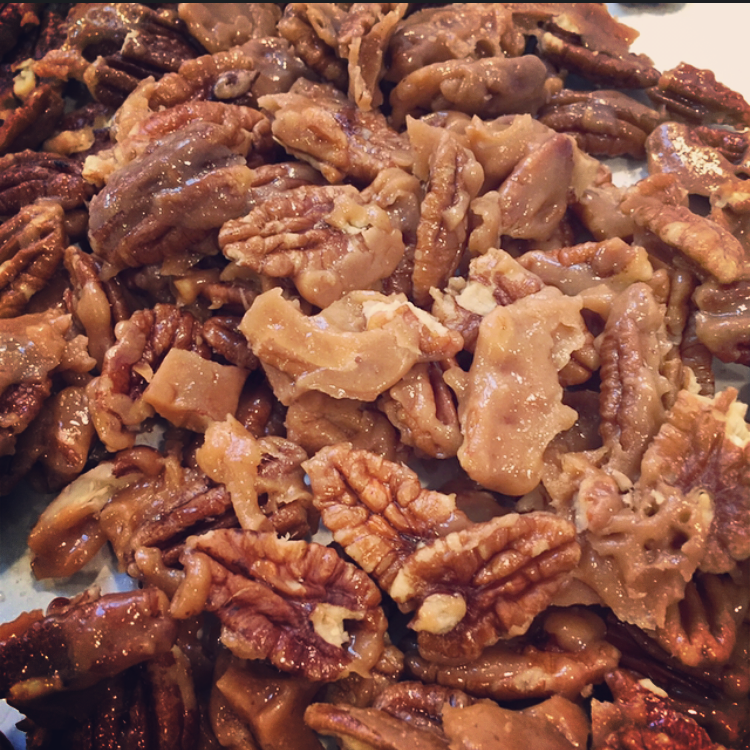
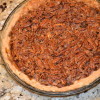
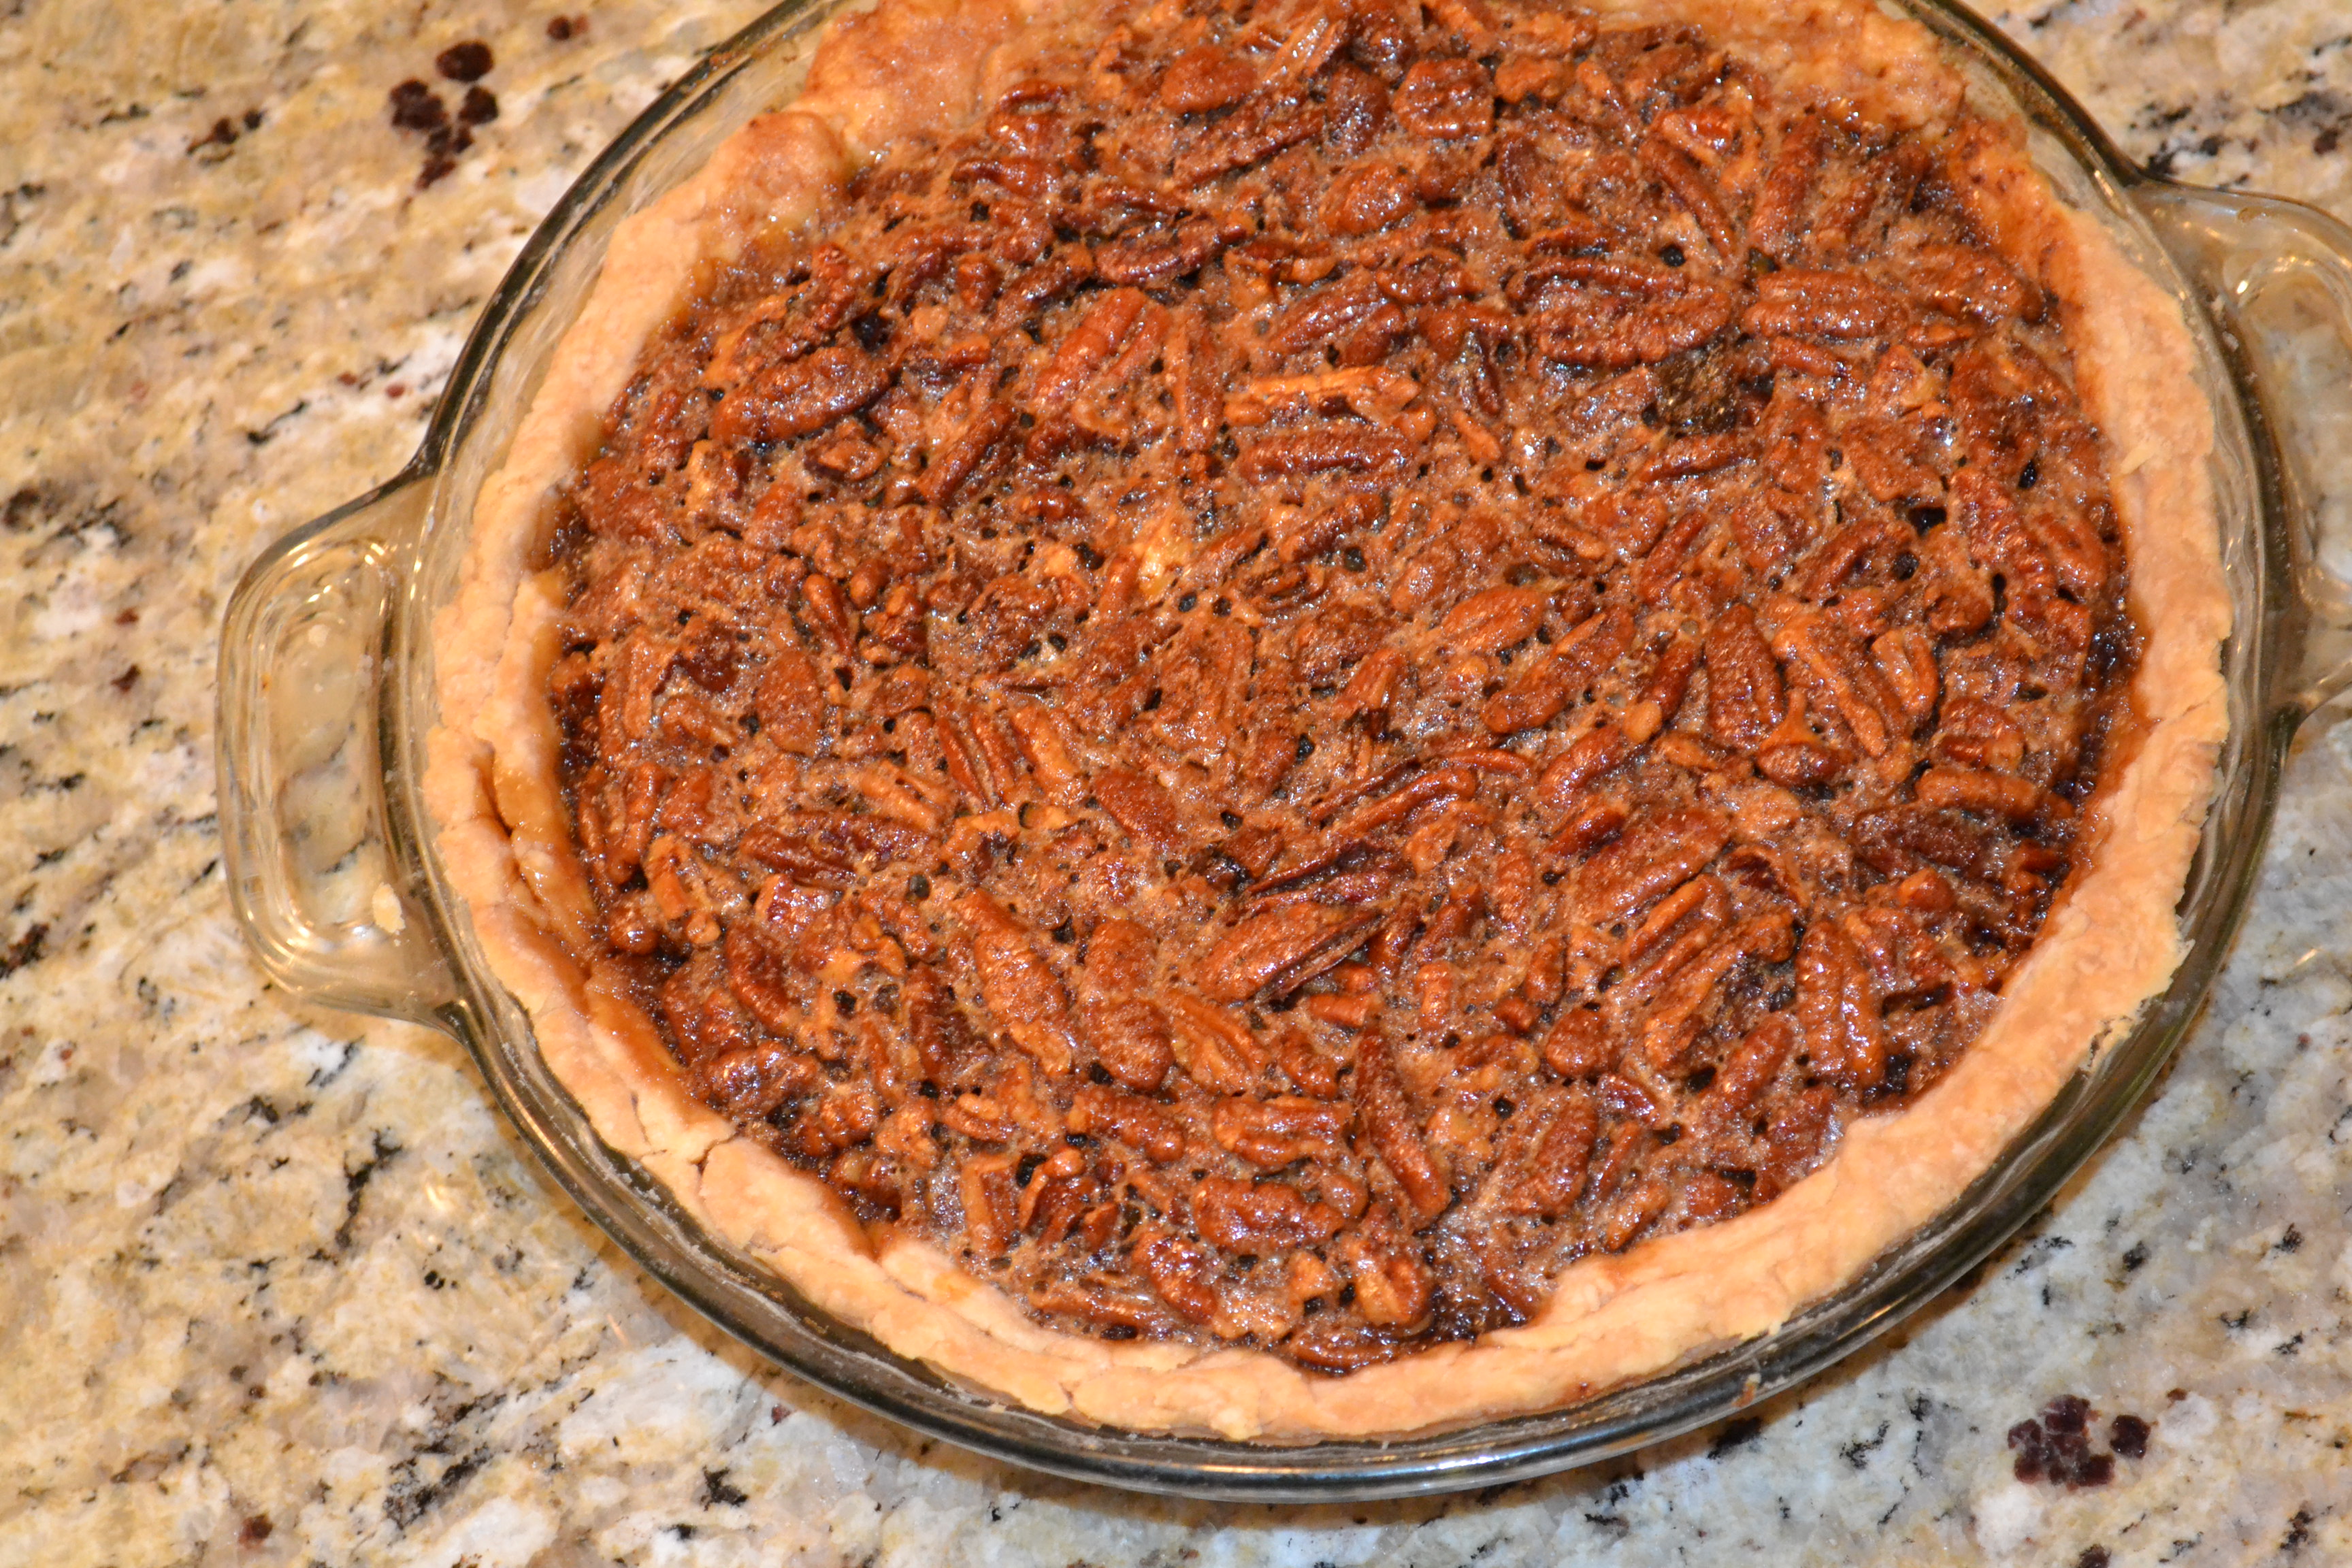
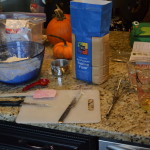
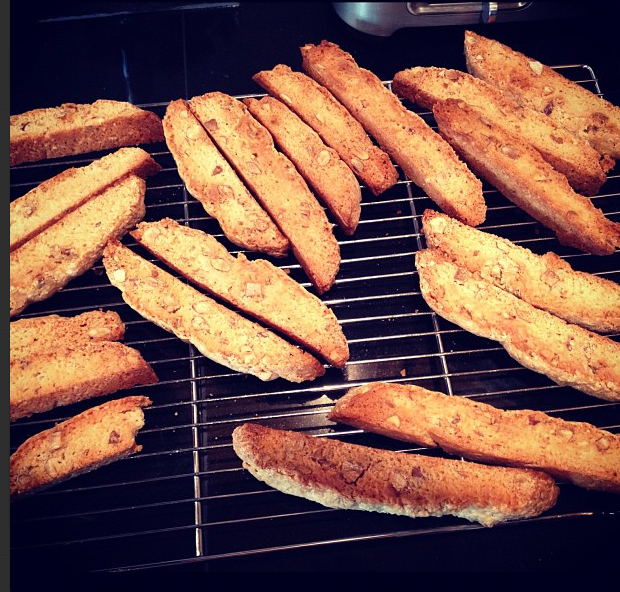
I count my blessings this time of  year because I truly enjoy cooking and being in the kitchen and homemade goodies are always well received! I’ve always tried to make as many of my gifts as I can. Homemade notecards, scarves, loaves of bread, cookies in a jar. Well, this year mum and I decided to try a new recipe from a friend of hers that has used it the past few years. We made pecan brittle, or candied pecans, or whatever it is you’d like to officially call it. It’s a buttload of butter and sugar mixed together with pecans. It’s Christmas crack. It’s sugary, crunchy, melty, yummy, addictive and down right deviously delicious.  And yes, I did say a buttload. It was pretty fun actually, we spent a weekend making these addictive morsels, Cranberry Grand Marnier Cake Muffins and Canned 48 jars of Cranberry Jelly. It was a gift making extravaganza!

IMG_1063These little guys hit it out of the park. They were THE perfect gift that had the thoughtful, homemade touch but could be made in larger quantities to check multiple people off the list. It’s actually a pretty easy recipe, when you start getting into candy thermometers it’s out of my league and attention span. The only thing to note about this recipe, which we learned the hard way, was that you can’t just double it or make batch after batch without cleaning the pan. Because you’re basically making caramel if you try to make a new batch with residue from the previous recipe it just messes everything up. Don’t ask me how or why… I didn’t major in science but just take it from us and quickly wash the pan after each batch, okay?!

Candied Pecans// Pecan Brittle 

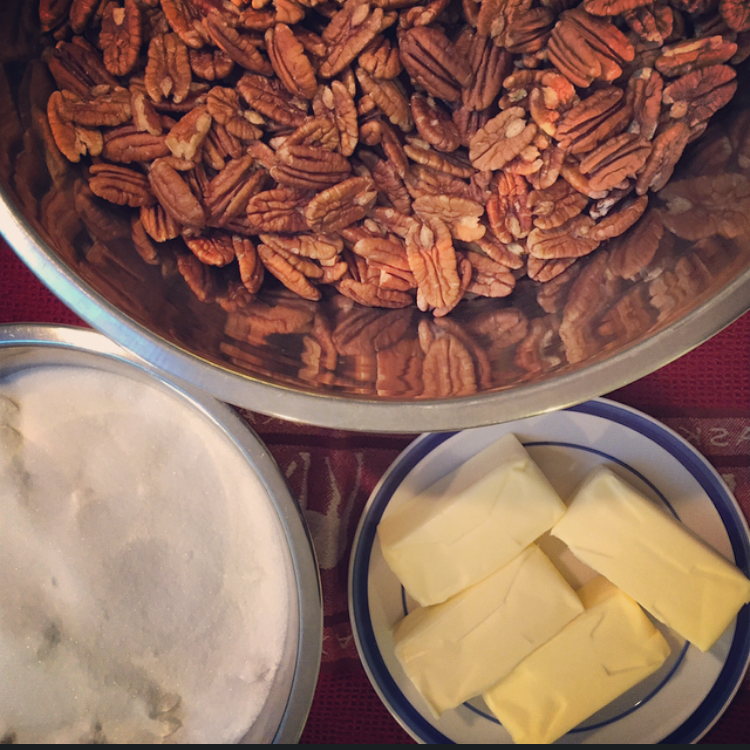
8 tablespoons butter (one stick)
1 cup sugar
3 cups of pecan halves

Directions
Line a baking skeet with parchment paper and set the baking sheet to the side of stove top.


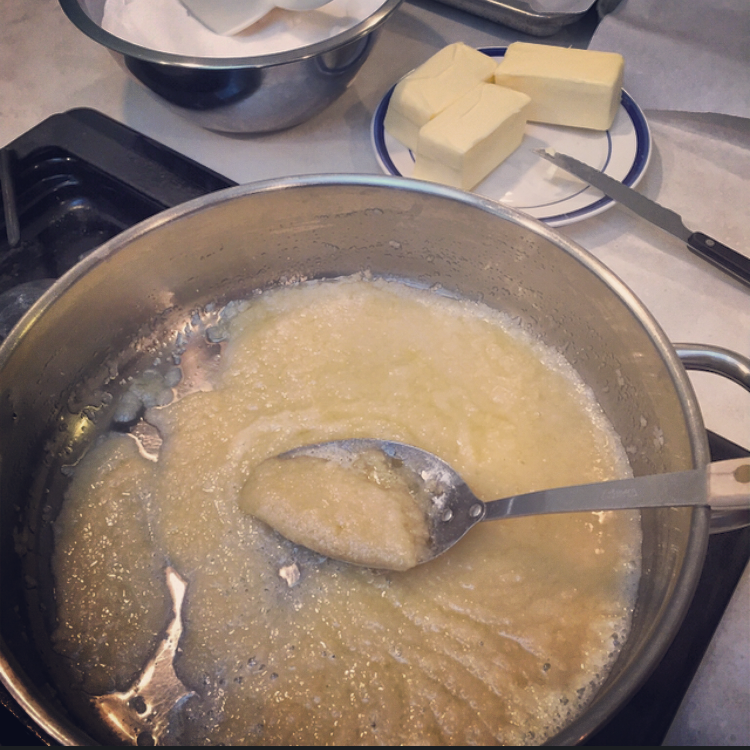
We used a stainless stele copper-clad bottom 10-inch skillet but a cast iron skillet would have worked better. Heat your pan over medium low heat. A fork works best to stir the butter and sugar mixture, and fold in pecans.

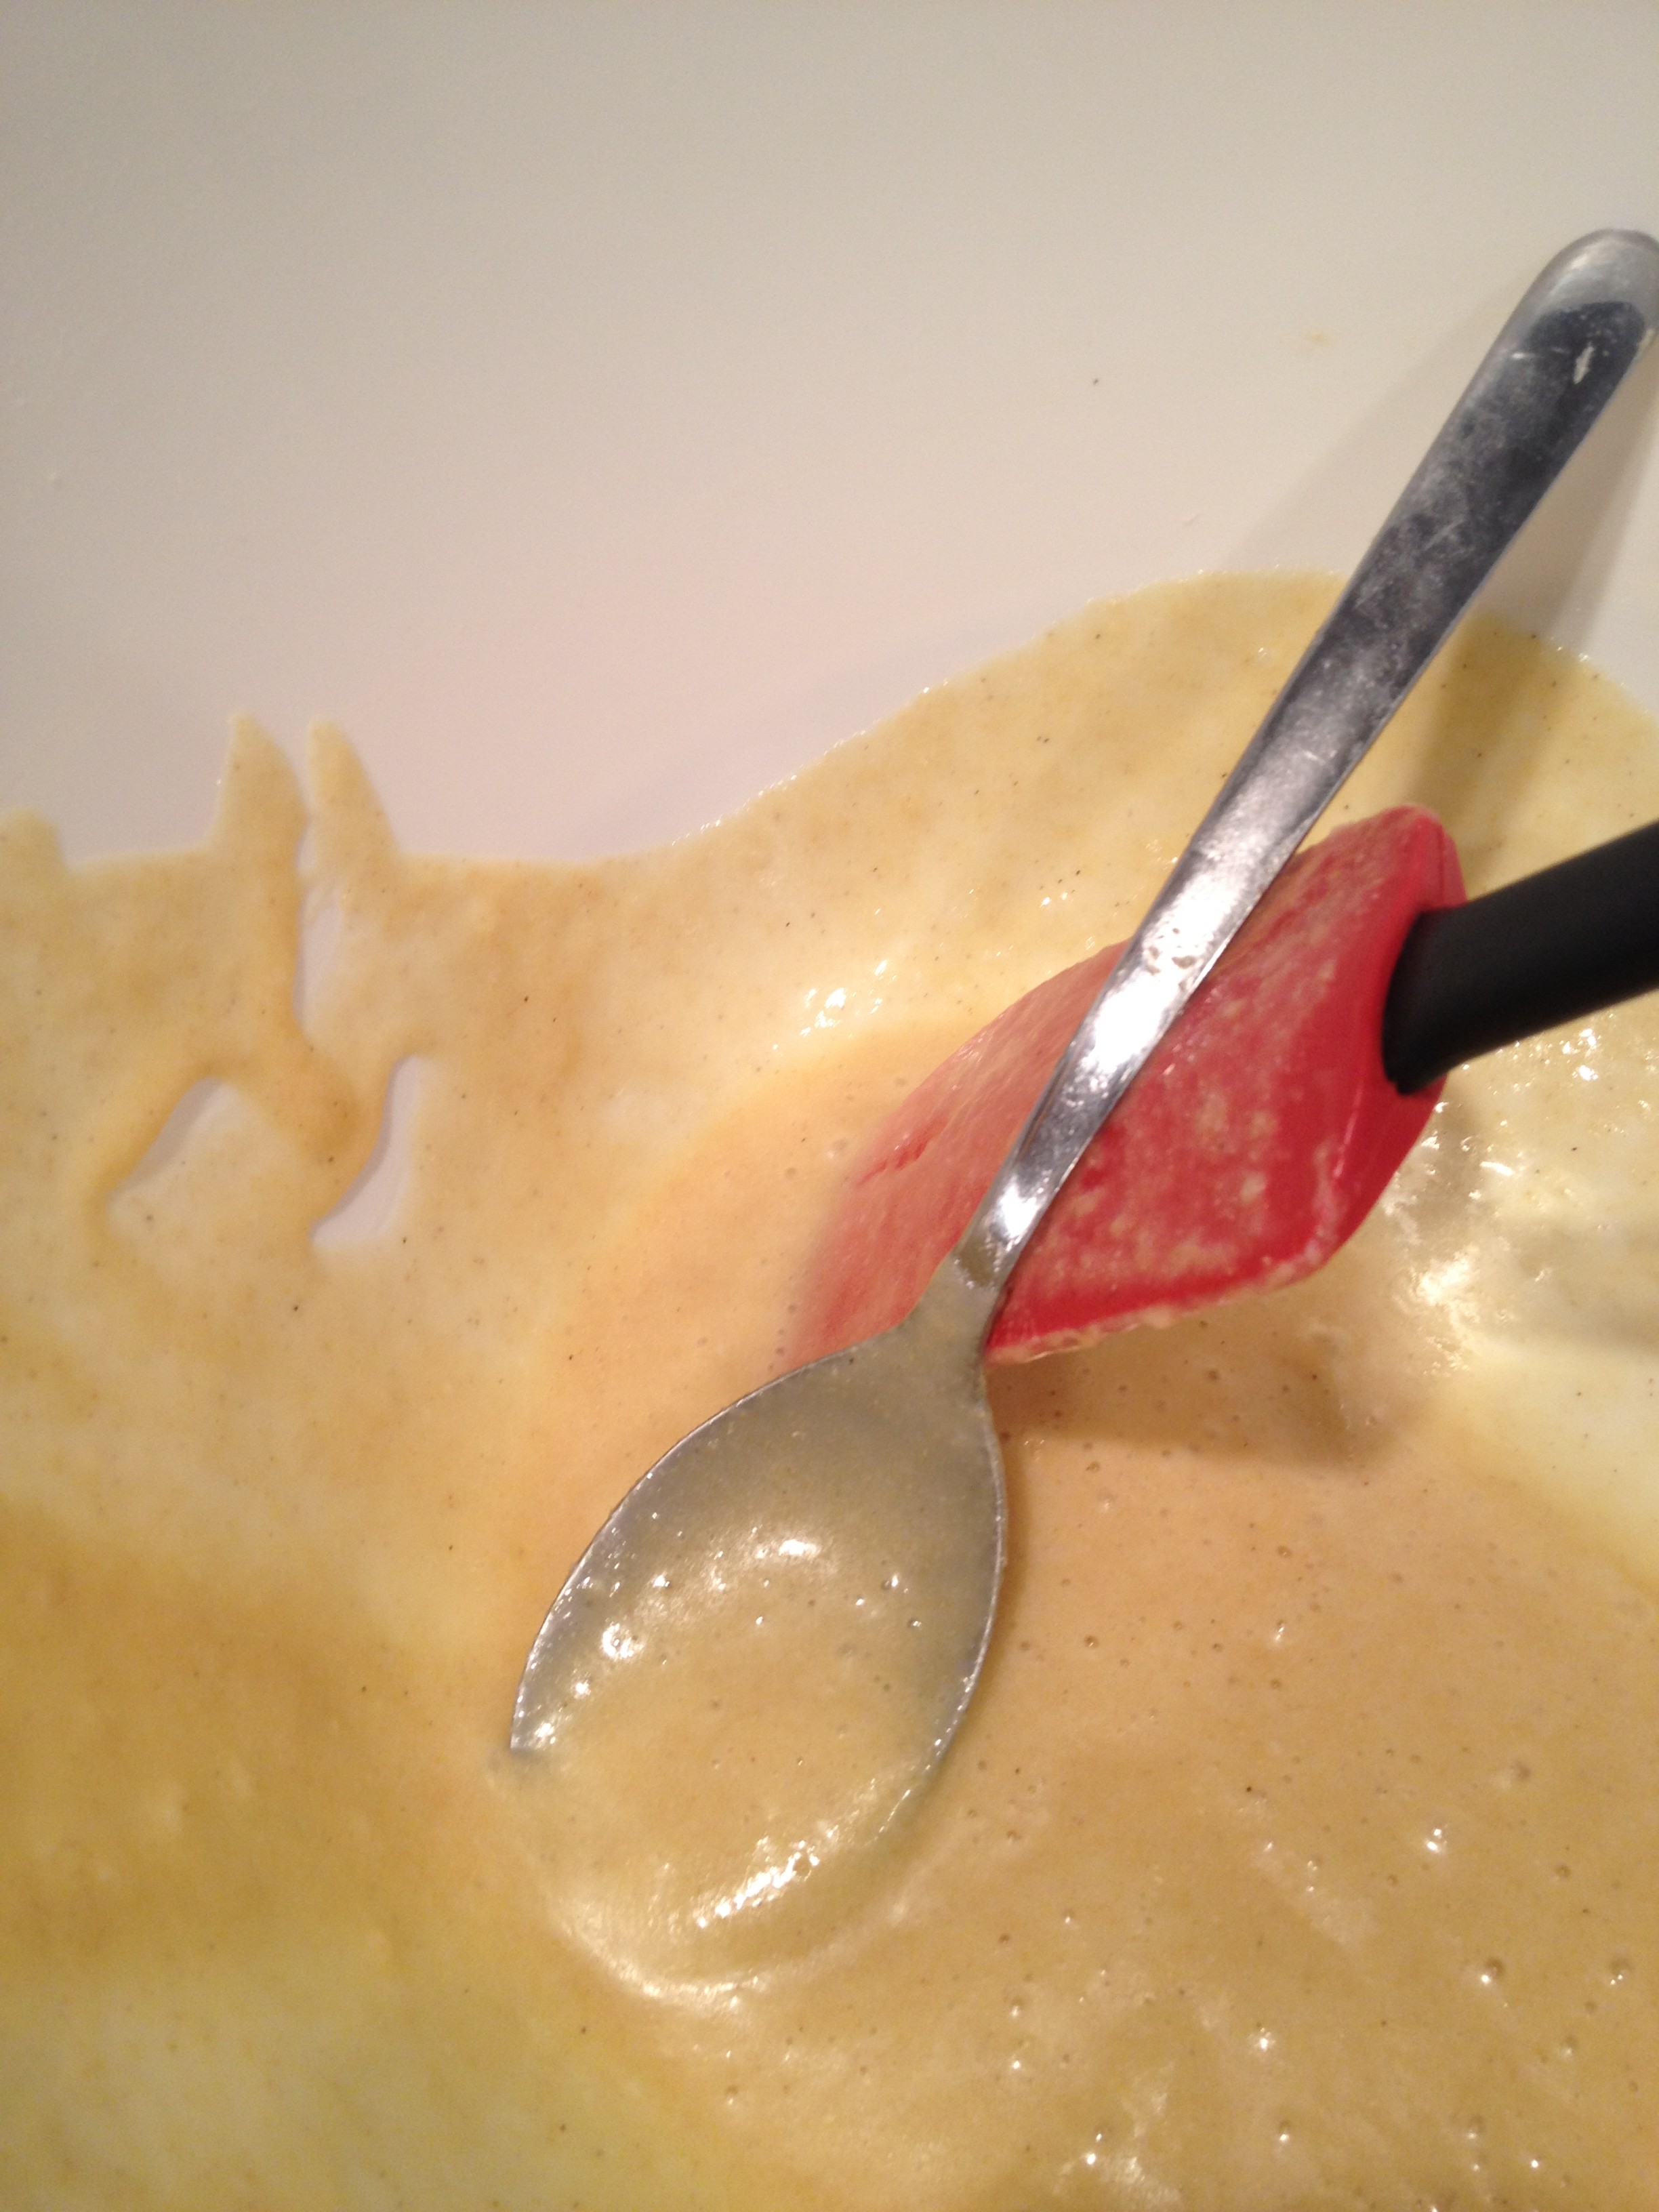
Once pan is fully heated, add 3 tablespoons of the butter and stir until melted. Add the full 1 cup of sugar to the melted butter and continue to stir until the mixture is pale and thoroughly mixed (no butter chunks or large chunks of sugar). Constantly stir the mixture, which should be thickening, so you don’t burn the butter or the sugar.

IMG_1064

Add the 3 cups of pecan halves and fold into the mixture. Continue to cook over medium-low heat, stirring constantly.

IMG_1067

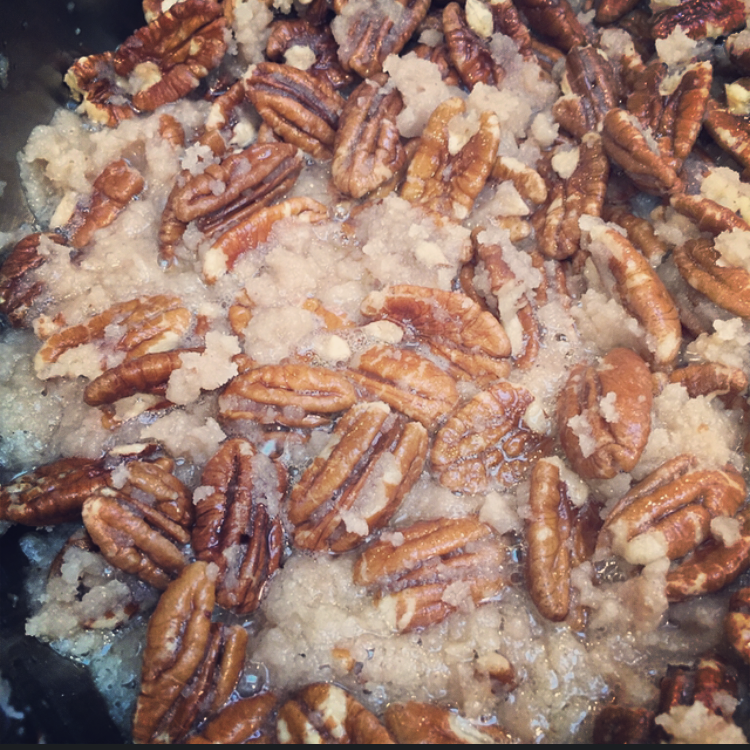
Watch for the mixture to bubble, and at that point it should start to turn a golden-brown color similar to toffee.

IMG_1065

This process takes about 6-9 minutes to see the toffee color. Be patient and make sure you cook the long enough so you don’t have clumps or sugar or butter.

You will start to see clarified butter separating from the mixture and this indicates that they’re done.

IMG_1068

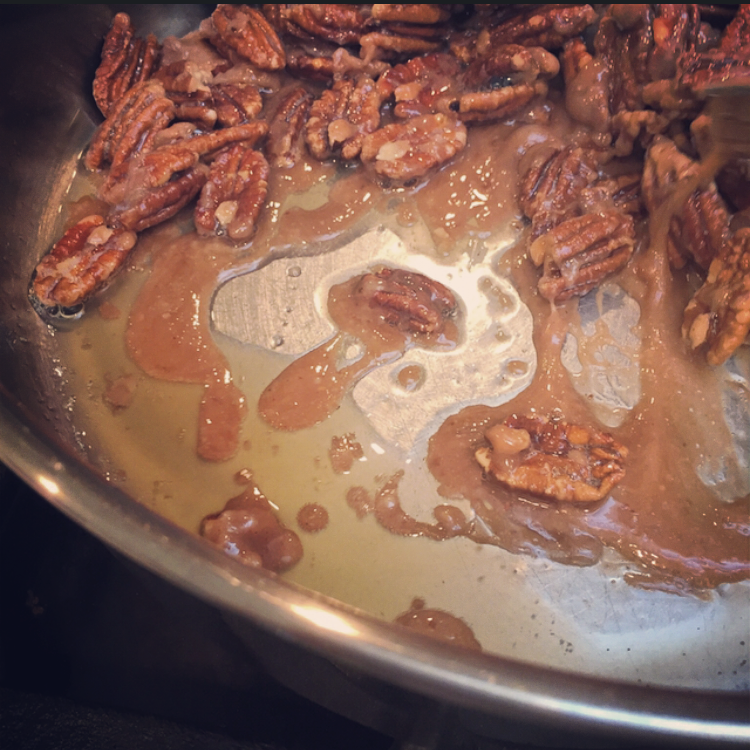
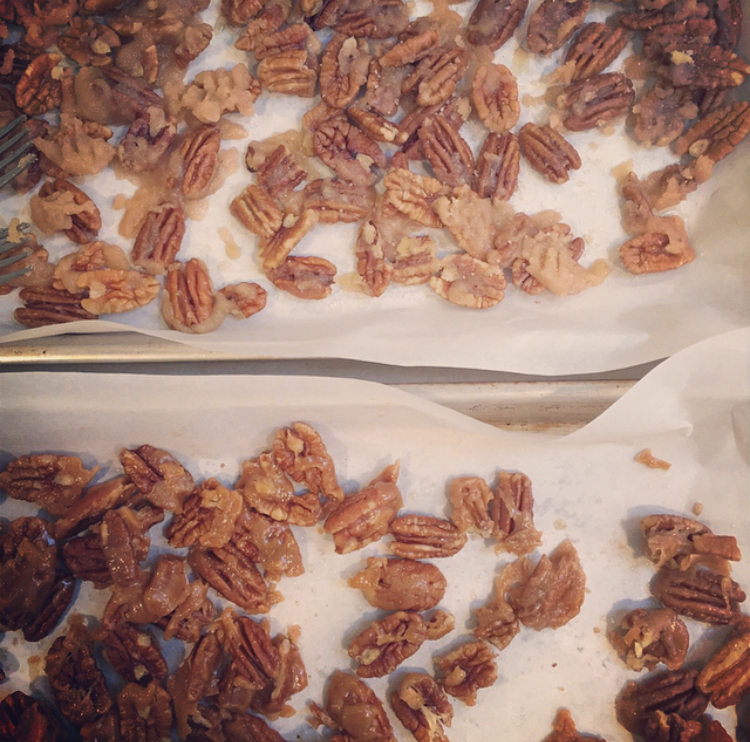
Remove skillet from heat. Tilt the pan and spoon out the clarified butter (or tilt the pan and scoop out the mixture to the prepared parchment lined baking sheet. Using two forks, quickly separate the pecan halves and make sure they are all laying flat.   

Let the candied pecans cool completely. Break pecan mixture into small pieces and package or store in an airtight container.

IMG_1070

These are a nice snack but are also amazing to sprinkle in salads, add to roasted beets, used when baking seasonal bread or as part of a cheese plate. You could use them as a pancake, waffle or ice cream topping or even crush a few on top of cheese cake. Are there other ways that you use candied pecans or could think of to enjoy pecan brittle?

Torrija: Churro French Toast

DSC_0390Think of the best dessert you’ve ever tasted. Sit with that taste for a moment, thinking of the texture, flavor, temperature and atmosphere where you first consumed said dish. Now, double that goodness. That is what it’s like to eat a churro in Spain. Before we took our trip to Spain (you can read my recap of our two week long adventure here)

It was in Madrid that we discovered the famous Churros con Chocolate at Chocolateria San Gines. This place served one thing churros and dipping chocolate. I am not one with a sweet tooth, I’d much rather have a cheese plate and another glass of wine to finish off a night, but even I had to admit that they were delicious freaking churros!

Churros are traditionally served with cup of very thick but not too sweet chocolate to dip the churros in. As there is usually more chocolate the churro, the locals would all drink the remaining chocolate in the mug. While we stood in the long line, waiting for our chance at our own order of this delicious crispy and chocolate heaven, we observed how the locals were “doing it” and were a little grossed out when we saw them drink the chocolate. But, their chocolate isn’t like American chocolate. It wasn’t obsessively  sweet or rich in a sugary way. It was a much more european take on traditional chocolate that was actually quite delightful even to a chocolate averse gal such as myself.

Screen Shot 2014-11-08 at 6.43.23 PMWhile doing some weekend reading around Easter, yes that holiday that was monthly ago, the mister came across a recipe in Seattle Times and put it on the “to make” request list. Since I’m not a big dessert person and this recipe looked like it would take some effort we put it on the backburner. For our first official gathering we hosted at our new place after moving a month ago, we invited two of his friends and one of their girlfriends over and the thought stuck… I’ll have three HUNGRY men and two gals and our theme is taco night. The only logical next thought was FRENCH TOAST CHURROS!!!! So, I dug up the recipe and call ahead to one of our local bakeries, Macrina Bakery, and reserved two loaves of challah bread!

The original recipe calls for serving these delectable treats with a Sherry Caramel Sauce (which you can find in the original recipe link below) but we opted for vanilla bean ice cream.

IMG_9454I won’t lie, this recipe was a little bit of work but it was delicious! Gooey in all the right places, crispy on the edges, and much more satisfying in smaller portions that anticipated, it was a hit! In hing sigh, we barely used 1/3 loaf of the challah since the had such a good blend of rich flavors so I would only get one loaf next time, and a much smaller one at that! The amazing local shop where we get all our spices, Market Spice in Pike Place Market, had the aniseed and any local liquor store should have the anisette which is a is an anise-flavored liqueur. You need such a small amount for this recipe and we could only find it in the traditional 750ml bottle so I’ll be looking up a few cocktail and baking recipes to use that up! Overall, this recipe was such a fun experience to make and it was quite tasty!

Torrija
Serves 6
Original Recipe

Ingredinets:
1 loaf fine-crumb white bread (Aragona uses challah)
1½ cups milk
½ cup cream
¼ cup sugar
1 tablespoon aniseed
Pinch of salt
2 eggs
1½ ounces anisette
Extra-virgin olive oil for frying

IMG_9457Directions:
To prepare the bread: Preheat oven to 325 degrees. Cut bread into 4-by-1-inch logs. Toast in a single layer on a sheet pan until cut surfaces are just dried slightly, but not colored. Allow to cool. (Or, cut bread into logs and air dry on a rack for several hours.

To make the custard: Combine the milk, cream, sugar, aniseed and salt in a heavy saucepan. Scald over low heat until bubbles form around the edges, and a skin forms on the surface. Do not boil.

In a separate bowl, beat the eggs briefly. Slowly pour about one third of the scalded-milk mixture into the eggs to temper them, whisking constantly to avoid cooking eggs.

IMG_9456Slowly whisk the tempered-egg mixture back into the pot with remaining milk. Cook over medium heat, stirring constantly, until custard thickens enough to coat the back of a wooden spoon (about 10 minutes). Pour thickened custard into a shallow baking dish to cool. Add the anisette when the custard has cooled.

To cook the bread: Place dried bread pieces in a single layer in the custard. Allow to soak 3 to 5 minutes, flipping halfway through, until bread is saturated. Work in batches if necessary. Drain bread on a rack over the baking dish for several minutes.

Heat several tablespoons of olive oil in a heavy-bottomed pan over medium heat. Brown the bread pieces on all sides, working in batches.

Serve hot or room temperature with ice cream!

IMG_9463

Sugar Cookies

photo 1 copy 2We don’t really “do” Valentine’s day. A lot of women need the flowers, and the chocolate, and the expensive dinner, and the presents. Me? I figure when you add that all up you can afford a pretty damn good bottle of wine so… it’s really a no brainer: skip all that and pop a bottle of the “good stuff”. Stay home!  Whip up a homemade pizza, cue up a movie, and pop that quality bottle of booze that you’re celebrating…er… I mean… stare into the eyes of your Valentine and… oh let’s be real- pop open that bottle! There is one way that I celebrate this “holiday” and that, my friends, is with cookies.

I’ve always loved the idea of holidays with corresponding baking assignments. I was that kid in school that liked homework, just  because I could color code it into my “pre-historic spreadsheet” (aka- paper planner) of “things to accomplish”. The difference between color coded due dates and color coded cookies is desire. Now, that’s a word we hope would be aligned with this heat shaped holiday. But, not in the way you might initially think. I desire to bake these festive, holiday corresponding cookies. Despite a full work day, plus being dumb enough to go to the newly opened Seattle Zara and waiting for a half hour for the waiting room alone, to spring for an Uber home even when you don’t really have the budget but your amazing outfit completing shoes are killing you and you still have dinner to make AND you also want to make 4 dozen cookies for your office. That, my friends, is desire. Trust me, I wanted to NOT bake these cookies! I’d LOVE to be sound asleep at 12:32 instead of writing up this blog post but that also takes desire. “You have a new subscriber” e-mails have increased in the past few weeks and I wouldn’t want to leave you guys high and dry on blog posts! Although, I hope NONE of you are awake right now looking for this recipe. Make these delicious cookies or something else from my Delicious Desserts Pinterest board for some post-holiday treating.

On this day of love, I want to say that I love you guys! You are the reason I am up past 12:30am after a full day of work! You are the reason that I write, and I wish I could share these delicious cookies with each of you, but I can only share the recipe for now. Love to all of you on this heart-shaped holiday!!! XOXO

Heart Shaped Valentine’s Day Sugar Cookies

Makes 36 medium cookies | Hands-On Time: 25m | Total Time: 1hr 15m

Recipe from Real Simple

Ingredients

2 1/2 cups all-purpose flour, spooned and leveled, plus more for the work surface

1/4 teaspoon baking soda

1/4 teaspoon kosher salt

2 1/2 cups sticks of unsalted butter, at room temperature

3/4 cup granulated sugar, more to sprinkle on top

1 large egg

1 teaspoon pure vanilla extract

Directions

In a large bowl, whisk together the flour, baking soda, and salt.

Using an electric mixer, beat the butter and sugar until smooth. Add the egg and beat until fluffy, about 2 minutes. Beat in the vanilla.

Reduce the mixer speed to low and gradually add the flour mixture, mixing until just incorporated (the dough will be stiff). Shape into a disk. Wrap in plastic wrap and refrigerate until firm, at least 1 hour.

Remove from the fridge and pre-heat the oven to 350 degrees.

On a floured surface, roll the dough to ¼ inch thick. Using cookie cutters, cut into shapes. I use a Silpat for my baking, but you can also use parchment paper or cooking spray. Space cookies 1½ inches apart. Sprinkle with a little additional sugar.

Bake until just beginning to brown at the edges, 10 to 12 minutes. Cool slightly on baking sheets, then transfer to wire racks to cool completely.

Store in an airtight container at room temperature for up to 1 week.

Best Pecan Pie…EVER

DSC_0762I’m not sure there’s much I need to say past the title. Once you make this pie, the taste speaks for itself! I started making this pie a few years back when I traveled with the mister and wanted to impress his family during Thanksgiving. Thankfully, this little wonder earned a spot in both their hearts and their stomachs and I was welcomed with open arms and second helpings into the family. If you need a “recipe to impress”, I suggest giving this little ditty a try but the clincher is to make your own homemade pie crust as well! You can find my homemade pie crust recipe HERE. If possible, give it a try at home before you’re under the pressure to cook and impress!

Pecan Pie

Makes filling for one pie
Prep:15 mins |Cooking: 60-70 mins

  • 1 cup Karo® Light
  • 3 eggs
  • 1 cup sugar
  • 2 tablespoons butter, melted
  • 1 teaspoon Vanilla Extract
  • 1-1/2 cups (6 ounces) pecans
  • 1 (9-inch) pie crust (homemade recipe HERE)

Preheat oven to 350°F.
Mix corn syrup, eggs, sugar, butter and vanilla using a spoon. Stir in pecans. Pour filling into pie crust.
Bake on center rack of oven for 60 to 70 minutes (see tips for doneness, below). Cool for 2 hours on wire rack before serving.

RECIPE TIPS

Pie is done when center reaches 200°F. Tap center surface of pie lightly , if it’s done the center should spring back when pressed.

If pie crust is over browning, cover edges with foil.


Gingerbread Cookies

photoLast year I posted my recipe for gluten-free gingerbread cookies. This year, we get the good old-fashioned gluten goodness version! Any of you that had a flash back to Will and Grace, and remembered Grace’s “Good Old Fashioned” parties… you just earned an extra gingerbread cookie for being amazing! I LOVE Christmas time. I love the cheer, bundling up with mittens and scarves, waterproofing my boots and pulling out the long jackets, that first red Starbucks Holiday cup, the smell of Christmas trees, and the ever-present smell of amazing baked goods. During the holidays, we can endure much stress. Between hosting, cleaning, shopping, decorating, hosting again, attending, participating, family, guests, New Year New You, drinking, and the ever-present baked treats…we seem to endure quite a bit of bodily and mental stress during the 8 weeks between pre-Thanksgiving to post New Years Resolutions. We need extra care, rest, and vitamins during this time.

Lucky for you, I know exactly the remedy for holiday stress. My dad was always so good about taking is vitamins. My mother would call from the living room, “And WHAT are YOU getting into!”.  To which my father , who, inevitably at that point would have one hand elbow deep in the cookie jar, would reply, “Oh, just taking my vitamins darling” then he’d wink at me and take a bite of the first of TWO successfully pilfered cookies. To this day, I can’t look at a cookie without first thinking of the word, “VITAMIN!”. So, during these potentially stressful times, we need to be sure to take our vitamins and my vitamin of choice are gingerbread cookies. Each year, I do a holiday party where I bake a ridiculous amount of gingerbread, fashion them into little men, women, dog bones, Christmas trees and a multitude of other shapes and invite 20 of my closest friends over to decorate them. Little, do they know… and some of them read this blog so my secret is out now… but I somehow always thankfully end up with about 4 plates of extra cookies! Some people might pull the “oh I wish it wasn’t in the house” card and, on other sweets I might say the same. But NOT for gingerbread cookies.

Cookies These are my vitamins! I literally eat a gingerbread cookie most days annually between December-February. THis is one way to beat the holiday stress, make sure to take your vitamins each day! If gingerbread is also your “vitamin” of choice, I’ll give you a life tip, they’re equally as good with coffee in the morning as they are with a glass of good red wine in the evening! Second (shameless plug ahead) is to read my article that was originally posted on LevoLeague.com and picked up by the Huffington Post; Holiday Stress 7 Ways to Ditch the Worry.  Now, my fine feathered friends, you are ready for the holiday season! Stock up on the red wine and bubbly, practice your 7 holiday stress tips and eat your “vitamins” daily!!


Gingerbread Cookies

Ingredients
2 1/2 cups  flour
1 1/2 tsp double-acting baking powder
1/2 tsp baking soda
1 tsp ginger
1 tsp ground cloves
1/2 tsp nutmeg
1/2 tsp salt

1/2 cup sugar
1/2 cup shortening
1/2 cup light molasses
1 egg

Ornamental Cookie Frosting (also listed in this post below)

In a small bowl, stir together the flour, baking powder, baking soda, ginger, cloves, nutmeg, and salt and set aside.
In a medium bowl, place the remaining ingredients, and stir to combine.
Add the dry ingredients to the wet ingredients and stir well to combine.
Cover the bowl, place it in the refrigerator, and chill the dough for 1 hour or more.
Lightly oil (or mist with olive oil in a Misto Sprayer) two non-stick cookie sheets and set aside.

Sprinkle a little flour over a work surface where you can roll out the cookies.
Divide the chilled dough into quarters, work with only one-quarter of the dough at a time, and keep the remaining dough covered and chilled until needed.
Working in batches, roll out the quarter of dough to 1/4-inch thickness, and cut into desired shapes with cookie cutters.

Carefully transfer the cut cookies to the prepared cookie sheet and bake at 350 degrees.

For softer cookies: bake 6 minutes (the cookies will feel slightly soft to the touch) and allow them to cool on the baking sheet 2-3 minutes before transferring them to the cooling rack.

For crispier cookies: bake 9-10 minutes and transfer to cooling rack right away. We prefer the crispy cookies!

Repeat the rolling and cutting-out procedure for the remaining cookie dough.

Store the cookies in an airtight container for up to a week.

Ornamental Cookie Frosting
from: Good Housekeeping Cookbook

1 1/4 c confectioners sugar (or powdered sugar)
1/8 tsp cream of tartar
1 egg white

Just before using, pull out your kitchen aid standing mixer or hand mixer and a bowl. Mix the sugar and cream of tartar together. Add the egg white and mix at high-speed until it’s so stiff that a knife drawn through leaves a clean path.

Divide into small bowls and add your food coloring. Use directly from the bowls or you can place into pastry bags or grab a freezer style ziplock bag and cut one side of the bag.

Classic Pie Crust

flare-iphoto-export-405809485The holidays are my favorite time of the year! Families come together, everyone is (mostly) joyful, houses and trees are decorated, ovens are pre-heated and baking can be considered a seasonal sport. Well, maybe not to some, but in our home baking is my winter sport. One of the most versatile and impressive things that you can learn to make is a pie crust. Whether it’s for a main dish or a desert, a homemade pie crust is SURE to impress. The original recipe calls for a food processor, but I don’t own a food processor so think that making this recipe by hand mixing counts as “adapting” the recipe. There is something so satisfying about hand making a pie crust and then watching it bake and hearing the chorus of “mmmmm’s” with that first bite of fresh-baked pie. Even if you only do it once and check it of your kitchen bucket list, I would recommend making this pie crust by hand at least once.

This recipe is good for two bottom crusts, or one pie that require a lattice or curst on top. It’s a very versatile crust as well since it’s not too sweet and holds up to liquid when baking. You can use this crust in my Home roasted Pumpkin or Pecan Pie recipes.  Or, you could easily use it in apple or other fruit pies and tarts. Check out the Real Simple 26 Holiday Pie and Tart Recipes for some inspiration. You can also use this as the base for a homemade chicken pot pie, simple Quiche to use Thanksgiving  leftovers or prepare a simple christmas brunch.

flare-iphoto-export-405809571


Basic Pie Dough
Adapted from Everyday Food, November 2006
Yield Makes two 9-inch crusts

Ingredients

  • 2 1/2 cups all-purpose flour, (spooned and leveled)
  • 1 teaspoon salt
  • 1 teaspoon sugar
  • 16 tablespoons cold (2 sticks) unsalted butter, cut into pieces
  • 1/4 to 1/2 cup ice water

Directions without food processor

  1. Combine flour, salt, and sugar in a medium-sized bowl and whisk to combine ingredients. Grab two knives or a pastry cutter and cut the butter until the mixture resembles a coarse meal with just a few small pieces of the butter left over.
  2. Sprinkle with 1/4 cup ice water. Mix until dough is crumbly but holds together when squeezed with fingers (if necessary, add up to 1/4 cup more water, 1 tablespoon at a time). To help ensure a flaky crust, do not over mix!
  3. Transfer half of dough (still crumbly) onto a piece of plastic wrap. Form dough into a disk 3/4 inch thick; wrap tightly in plastic. Refrigerate until firm, at least 1 hour (and up to 3 days). Repeat with remaining dough. (Disks can be frozen, tightly wrapped, up to 3 months. Thaw before using.) Makes 2 disks.

Directions with food processor

  1. Combine flour, salt, and sugar; pulse to combine. Add butter; pulse until mixture resembles a coarse meal with just a few small pieces of the butter left over.
  2. Sprinkle with 1/4 cup ice water. Pulse until dough is crumbly but holds together when squeezed with fingers (if necessary, add up to 1/4 cup more water, 1 tablespoon at a time). To help ensure a flaky crust, do not over process.
  3. Transfer half of dough (still crumbly) onto a piece of plastic wrap. Form dough into a disk 3/4 inch thick; wrap tightly in plastic. Refrigerate until firm, at least 1 hour (and up to 3 days). Repeat with remaining dough. (Disks can be frozen, tightly wrapped, up to 3 months. Thaw before using.) Makes 2 disks. 


Donuts: Vegan & Gluten-Free

IMG_1701Everyone has a hankering for a donut from time to time. Yes, this includes the healthiest of people! Now, if you’re silently saying, “Why no, I can resist a fluffy, melt in your mouth, little bit of heaven pastry goodness” then 1- you’re either lying or crazy or 2- your just bitter because you’re gluten- intolerant. Well, harbor bitterness NO longer my friend! We have a family member that is gluten intolerant and on his last trip to see us I had the itch to bake.On my recipe hunt, I found QUITE a few recipes for donuts, and once I got my drooling problem under control, created a Pinterest board to keep all my lovely donut finds in one place. But, as I started clicking through the recipes I found that many of them were fried, used gluten-filled flours, and called for  xanthan gum or other additives.

coffee 1While I’m a FIRM believer that deserts should never be desecrated and demoted into the “light” or “non-fat” categories and should remain their butter or chocolate anchored selves, I do also believe it moderation. So, I set out to focus on the baked donut recipes and FINALLY found one that didn’t call for xanthan gum or some other additive that I can’t pronounce or state with confidence what exactly it is. The gal over at Vegan YumYum had a delicious recipe for mini-baked donuts which called for regular flour so I made a few alterations and gave it a shot! I also did my research on baked donuts, and decided to go with the affordable Norpro 6-Count Nonstick Donut Pan from Amazon and purchased a 4-pack of the Bob’s Red Mill All-Purpose Gluten-Free Baking Flour as well. With a few toppings gathered and the ingredients for the glaze in hand, I was ready to BAKE my Vegan* gluten-free goodness! *In order to make these donuts vegan, use the egg replacer in the recipe instead of the egg. 

display 3The donuts turned out to be a success, both men in the house had seconds and my gluten-loving one didn’t complain about the taste or texture. They are not going to be a complete replacement for the real deal full butter and flour style of donuts, and if you prefer a good fried old fashioned donuts beware that this will not replace that hankering and you better go get one..or two immediately! The texture was a bit different but the taste, especially buy the time the various toppings and glaze were applied it all tasted like a delicious donut! I followed the glaze recipe on the same website, and used sprinkles, shaved chocolate, coconut and cinnamon as toppings! You can take a glance at all our delicious toppings below

What’s your favorite donut topping?

Mini Baked Donuts
Recipe adapted from Vegan YumYum
Yield: Her recipe makes 20 mini-donuts but since I purchased the  large donut pan, the recipe wound up  yielding 10-12 donuts… I can’t remember because we were chowing on the  first batch  while the second batch when in!!!

Dry Ingredients:

1 Cup Bob’s Red Mill Gluten-Free Flour
1/2 Cup Organic Sugar
1 1/2 tsp Baking Powder
1/4 tsp Salt
1/4 tsp (scant) Nutmeg
1 tiny pinch or shake Cinnamon

Wet Ingredients:
1/2 Cup Soymilk
1/2 tsp Apple Cider Vinegar
1/2 tsp Pure Vanilla Extract
1 Egg (Or you can use Egg Replacer for 1 Egg)
4 Tbs Earth Balance

batterready for ovenPreheat oven to 350º F. In a large bowl, combine dry ingredients with a whisk to mix thoroughly. Combine wet ingredients in a small sauce pan over medium low heat and mix until earth balance is melted. This mixture should NOT get too hot, you should be able to stick your finger in the mixture. It should feel slightly warm. Add wet to dry and mix until just combined. It should form a very soft dough. Using a tablespoon measure, scoop out dough into your un-greased nonstick donut pan. If you’d like “pretty” donuts, Smooth out the top of the dough with your fingers.

As you can see, the dough sits just below the rim. If you over fill, your donuts will come out looking like it has a little muffin top. Bake for 12 minutes. They should not be browned on top, but a tester will come out clean. Invert hot pan over a cutting board or cooling rack to release donuts. Allow to cool completely before decorating.

Glaze with Sprinkles

1/2 Cup Powdered Sugar (lump free!)
1 Tbs Soymilk
Bowl full of sprinkles (aprox. 1/3 cups

Whisk soy milk and powdered sugar together. Dip the “bottom” half of the donut (the side with the nicer shape) into the glaze, let some drip off, then dip glaze-side down into sprinkles. Transfer to a wire rack that has been set on top of some parchment paper. The excess glaze will drip through the rack onto the paper for easy cleaning later.

Vegan Almond Biscotti


Screen Shot 2013-05-31 at 8.40.03 AMI love biscotti. It’s crunchy, flavorful with barely a hint of sweetness, and is convenient consume. Paired it with a foamy cappuccino it’s one of the most amazing afternoon treats on cold afternoon. It’s almost summer and this crazy gal is writing about cold days and biscotti? Well, up in Seattle the spring is a time a taunting. It will be gorgeous, no jacket and sun glasses weather for a few days then dissolve into a week of grey skies and soggy drizzle. The up-side is that it’s not freezing like it is during the winter.

When it’s grey or cold out, I get a baking itch. In high-school I developed a dairy allergy, which made baking a much harder task. This was before food allergies were really main stream. It proved quite a task to learn the alternatives for cooking and baking without dairy. I’ve long tweaked and updated different recipes, but this one has been a tried and true biscotti recipe for years.

So, while you may think that biscotti and baking are reserved only for the fall or winter time, but you can personalize this recipe for whatever season you crave biscotti. Give this recipe a spring twist and sub the nuts for poppy seeds and add a little lemon!

Biscotti Vegan Almond Biscotti

Ingredients
3 cups all-purpose flour
1 tablespoon baking powder
1/2 teaspoon salt
1 1/2 cups unbleached cane sugar
3/4 cup smooth unsweetened applesauce
1 -3 tablespoon vegetable oil
 (I used one tbsp apple sauce)
1 ½ teaspoon vanilla extract
 (can also use 1 tsp each vanilla and almond)
1  cups almonds, chopped & toasted

Directions

  1. Pre-heat oven the 325°F
  2. Chop and toast the almonds and put them in the pre-heating oven to toast
  3. Lightly oil two cookie sheets.
  4. In a large bowl, whisk together the flours, baking powder, and salt.
  5. In a medium bowl, whisk together the sugar, applesauce, oil (1 TBS for a hard biscotti, 2-3 TBS for a softer biscuit), and extract.
  6.  
Stir the sugar mixture into the flour mixture, add the nuts
  7. With floured hands, shape the dough into two 3-inch wide “logs” about 3/4 inch thick, with the ends squared off and place on cookie sheets
  8. Bake the logs for 25 minutes.
  9. Remove the pans and reduce the oven heat to 300°F.
  10.  
Cool the logs on a rack for 15 minutes.
  11. Cut the logs carefully with a sharp bread knife straight across into 1/2 inch wide slices.
  12. Place the slices cut side down on the cookie sheets
  13. Bake 5-10 minutes, or until golden on the bottom then turn slices over and repeat on the other side.
  14. Cool on racks, then store airtight for up to two weeks.

Variations

  • Use the original recipe’s method -1 tbsp oil instead of apple sauce which will change the consistency a bit
  • Sub almonds for different nuts (Pistachio, Walnut, hazelnut), chocolate chips, currants, dried cranberries
  • Try cutting the sugar
  • Use 1/2 whole wheat flour and 1/2 white
  • Dip the biscotti in white or dark chocolate for a sweet treat

Chocolate Chip Cookies (From the Flying Apron Cookbook)

Fresh Flying Apron Cookies (Gluten-Free, Dairy- Free)There are some days you just NEED a cookie. Yep, you heard me, NEED. Cookies have that magic power to transport you out of your current location and into a place of yumminess. Like a shield that goes up, even if just for a moment as you take that fist glorious bite of fresh baked gooey sweet bliss, you are hidden from the world and it can’t get you.

Well, today is one of those days and its not even 8am. Goody. Lets just say that I didn’t get to consume the better part of my morning coffee because my jeans go thirsty (and selfish) and wanted a drink. Rude. The .ease they could have done was ask. But, then I would have said no, AND wondered why my pants were talking. So, already one of “those days”. While I yearn for a fresh baked cookie (with how this days going, obsess might be a better word) and try to hide the coffee on my jeans from my client meeting today, I wanted to post a recipe for one of m FAVORITE cookies from a local vegan bakery, The Flying Apron. If you’re smart enough to whip up a batch, save me one! I’ll bring the pants and we can wring out a cup of coffee to share!

Chocolate Chip Cookies
From: The Flying Apron Cook Book
makes: 25 cookies

2 ¾ c. brown rice flour
1 ½ + 1 tbsp c. garbanzo flour
1 tsp baking powder
½ tsp baking soda
¾ tsp salt
1 c. canola oil
1 c. organic whole cane sugar
1 tsp vanilla
1 c. rice milk
1 c. (8 oz) dairy-free dark chocolate chips

Preheat the oven to 350
Combine flours through salt in a large bowl
In the bowl of a standing mixer combine canola oil, cane sugar and vanilla until well mixed
With the mixture at low speed, add the flour mixtures and the rice milk alternately, a little at a time until smooth, about 3 minutes
Stir in chocolate cips

Scoop dough onto greased baking sheet and bake until golden and slightly firm to the touch, about 17 minutes.

Grandma Lu’s Famous Peanut Butter Cookies

photoCase of the Mondays…still? Yeah, me too. Seattle grey days always seem to get me in that “blah” mood. Today  was a blah day. Cold, soggy, and oh SO very grey. It just so happens that this very morning I was climbing up on the counter tops in search of that new jar of Almond butter when lo and behold I found two sealed jars of Adam’s Natural Creamy Peanut butter. I’ve gotten the mister to come over to the Almond butter loving side of life and we completely forgot there was even a stockpile of the Peanut butter up there.

My first thought was well “great”…what the heck am I going to do with two whole jars!? Until it hit me yesterday afternoon as I was doing the *fun* task of cleaning out my inbox, paying bills and weekly scheduling of all meals/appointments/laundry lists/errands I have to run.. yeah a pile of fun right? Well, the glass of wine helped BUT it struck me that two of the best things to combat a case of the “Monday’s” are wine and baking! Baking…cookies…extra peanut butter…GRANDMA’S RECIPE! I’ve been dying to post this one on the blog for all of you!

photo (1)
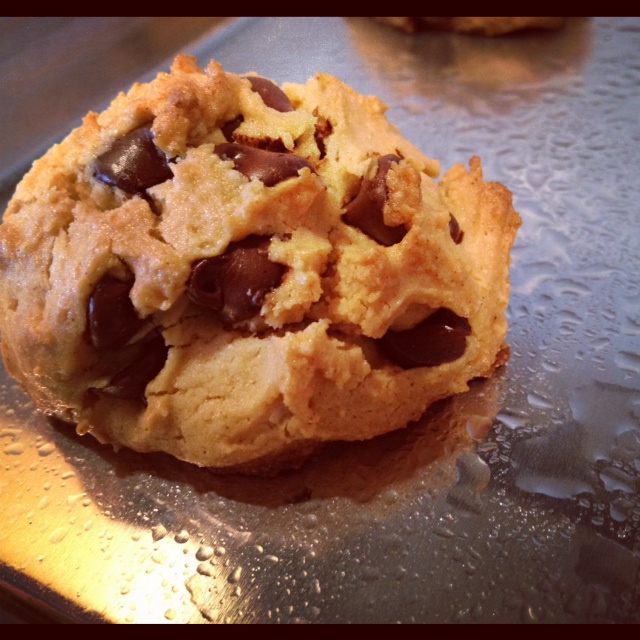
This was my wonderful Grandma Lu’s recipe for Peanut Butter cookies. She’s one of the main reasons that I really love baking. My sister and I were fortunate enough to spend time with her when we were young and I always remember her mixing and baking, cracking jokes and generally being the life of the party because we all know that parties always migrate to the kitchen no matter what! Well, my Grandma was one of my favorite people in the whole world and her recipe is my piece of her that I carry on.  I  don’t remember when  asked her to write it down for me, but I know I was young and some part of my old soul mentality knew that I wanted to remember not only the recipe IN her own handwriting, but all the wonderful memories I have of her.  I’m baking them to surprise the mister, he’s had a “monday too”… so I hope that you’ll pour a glass of wine and toast us with a fresh-baked cooked! We’ve survived another monday!

Grandma Lu’s Famous Peanut Butter Cookies 

2 1/4 c flour
1 c creamy peanut butter
2/3 c honey
1/2 c sugar
1/2 margarine soft
2 eggs
1/2 tsp baking powder

Pre-heat oven to 350
Mix all ingredients well
Shape into 1 1/2″ balls
Flatten with fork  in a criss-cross pattern
Bake for 15 minutes