Strawberry Basil Bread {Gluten-Free}

IMG_7300Updated Post: When the mister starts his taste-tester review with “I already convinced myself that I would NOT like this, but, it’s actually AMAZING!” you get pretty thrilled. And yes, he did speak in ALL CAPS for that last word, just in case you were wondering if I embellished the story at all. “And you used the bullshit {aka Gluten-Free} flour for this?” he asked. “Yes, I sure did”. To which he responds: “It’s not ridiculously sweet, and if you hadn’t told me there was basil in here I would have never known. This is REAAAALLLLY good!” Now that, ladies and gentlemen, is a seal of approval on a recipe if I’ve EVER heard one! Updated recipe below and images are my own! Enjoy!!!

————–

Hello friends! I’m so sorry it’s been ages since I posted and we’ve been stuck on Blueberry Kombucha and Summer Sangria for… let’s just leave it at a “while”. Starting a new job sure has a way of changing nearly everything about life as you know it! I’ve been in my new job about 4 months now, and loving it. I’m also loving having a little bit of mental brain power when I get home in the evening, which has been lacking for about four months now. Between not having mental energy and somehow just really busy, I’ve found a little space where I simply just decide to relax a little instead of burning the midnight oil EVERY night. Hmm, guess you can teach a moderately aged dog a new trick hey? Needless to say, writing on the blog has been sitting on the “to do” list for a while and that list has been taking a little rest and relaxation time as well. For those of you still burning the midnight oil every single night: you should try the whole relaxing thing every now and then. It’s actually quite nice once you start to get used to it. And to my mother and father who I’m convinced are my only readers, you were right. J

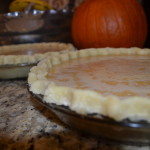
Like many 9-5 worker bees, evenings usually consist of getting home after work, and if I’m good and motivated, the gym. Then, I’m off! Figuring what to cook up for dinner, thinking about packing both lunches for the next day, triage height of the laundry pile, and trying not to see the “to do” pile of papers and other things that have been taking a little relaxation break which has whittled out a few of them but there sits the remainder that still, at some point, to get done. We worker bees cherish our weekends to sleep in, brunch, relax, and yet still get to all the chores that we push-off during the week. My push-off pile takes the form of a pile of papers tucked into my shelf in the closet. On the top of that pile is deliciously summer recipe for strawberry basil bread that I decided this past Sunday, needed to become a real, baked, edible thing.

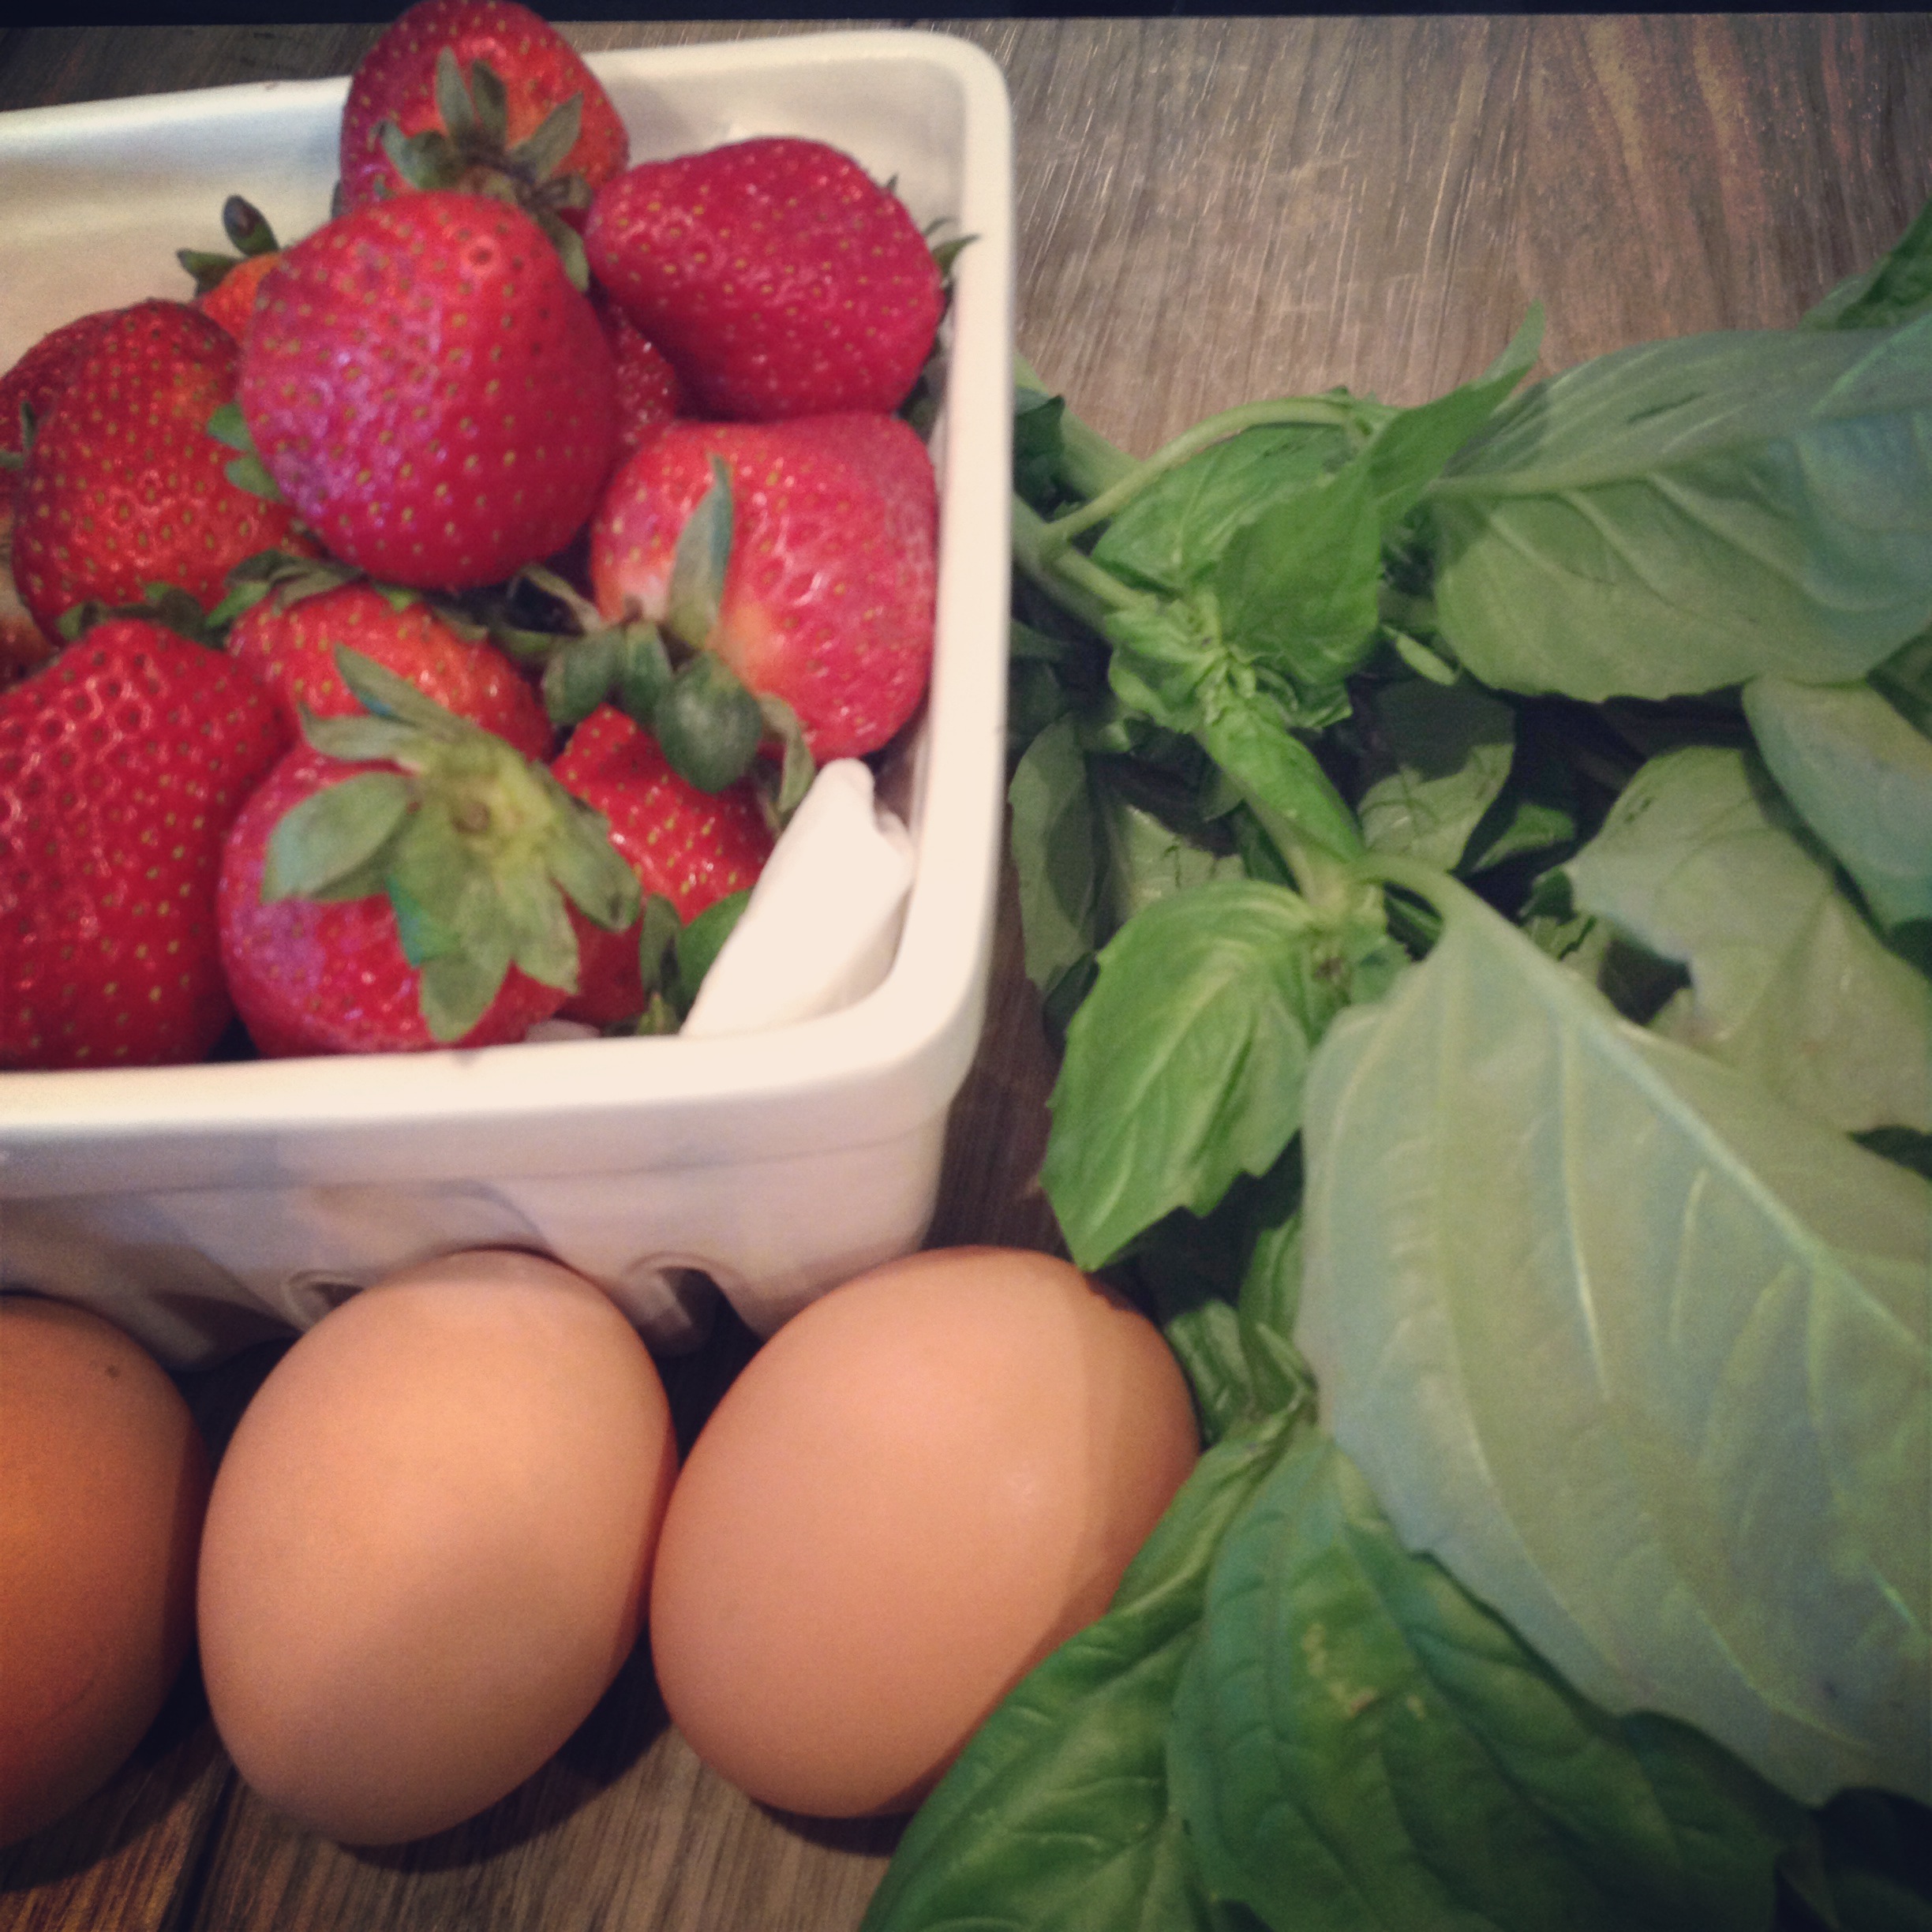
That’s not to say I’ve baked it. Because, well, I haven’t. You know that bit about the road to hell being paved with good intentions and all? That road never met a week of long work-days and a weekend of 80 degree and blindingly sunny Seattle days! In addition, when I purchased the basil on my few hours of shopping and running errands this weekend, I did have the best intentions of using most of it for the bread and then looked next to the basil and you know what was staring up at me? Sitting there looking ever so plump and inviting were gorgeous heirloom tomatoes. Somehow, four of them jumped into my basket, as did rosemary crackers, mozzarella, and a bottle of delicious Italian Chianti. Can you guess how much basil was left for baking the bread? I bet you can! I had even picked up extra strawberries this weekend so I could bake! Well, the sunshine and Caprese won over the baking, and I’ll pick up more basil at Pike Place tomorrow after work and bake this week.

The recipe was passed along to me by a friend who’s gluten-free. I’ll be making the recipe with Bob’s Red Mill Gluten-Free flour so I can share it with her but you can use regular flour if you prefer. I’m also I’m going to sub out the heavy cream because 1) I feel compelled to somehow tinker with and personalize every recipe possible, and 2) heavy cream just seem so “Fall-ish” doing without it makes it feel like a more a summer bread. Hey, I never claimed to be logical!  Other than that the recipe is pretty straight forward and a little out of the realm of what I would usually bake so I’m pretty excited to give it a go! I’ll be sure to update this post with my own pictures and a description of how it turns out!

Strawberry Basil Bread
Adapted the Recipe By Rebecca Franklin posted on About.com
Prep: 10 min | Cook: 50 min
Yield: 1 9×5 Loaf

Ingredients:
3 cups Bob’s Red Mill Gluten-Free flour
1 1/2 cups organic granulated sugar
1 teaspoon baking soda
7 ounces plain Greek-style yogurt + 3 tablespoons
3 eggs, brought to room temperature
1/2 cup extra virgin olive oil
1 teaspoon vanilla extract
1 tablespoon chopped, fresh basil leaves (about 4 large leaves)
12 ounces fresh, washed, chopped strawberries

Preparation:

Pre-heat the oven to 350F and prepare a 9-inch by 5-inch loaf pan with a light coating of vegetable oil spray.

photoIn a large bowl, stir the flour, sugar, and baking soda together. In a separate bowl, lightly beat the yogurt, eggs, oil, cream, and vanilla together until the mixture is smooth. Add the wet ingredients to the dry ingredients and stir until the batter is nearly smooth with only a few, small lumps remaining. Gently fold the chopped basil and fresh strawberries into the batter.

Spoon the strawberry-basil batter into the prepared loaf pan and bake it for 45 to 55 minutes, until it tests done in the center.

photo 2Allow the bread to cool in the pan for 15 minutes before loosening the sides and transferring it to a wire rack to continue cooling.


Summer Sangria & Salad Shirazi

Image from TotalWine.com

Friends, we can officially say that we’re closer to warm weather than we have been in MONTHS! I LOVE warm weather eating and drinking, but specifically eating and drinking alfresco. I’m a sucker for rooftop’s, balcony’s, patio’s, and picnic’s!  Get me outside breathing the fresh Spring or summer air, put delicious food in front of me, and a drink in my hand and you’ll see one happy gal! I love the transition to warm weather, and eating delicious salads like the one we’ll get to in a minute, but there is one part of the transition that is hard for me. I know, I know, that sounds ridiculous! But here’s the deal: I’m a red wine kinda gal. Not the fruity, light stuff that’s easy to drink in the heat. No, I’m a Malbec, Chianti, Barolo (younger so it’s not as fruity), or Cab kinda gal. Those delicious wines that are not quite as common place at, say a summer picnic! Well, there are two things that changed my life: Spain & Australia.

We took a trip to Spain two years ago, you can read the write up here, and fell in LOVE with Sangria but never really knew what wine I should use to use to make it. That’s where Australia comes into the picture. I lived there my senior year of high-school and fell in love with the country. So, once I got back to the States and started drinking wine, I was drawn to the Australian wines, specifically Shiraz! I was approached by a company to partner in posting an article featuring two of their recipes. Low and behold what recipes do they ask me to do a write-up on and feature? Sangria with Shiraz and a delicious summer salad! It was meant to be! I’ll stop the yapping and let you get to the reading and the drinking, but I had to layer in my little story for you. Below is their article and the recipe for the AMAZING Sangria! Cheers! (My own pictures of these dishes to come soon!! Stay tuned!)

Australia has become quite known for its Shiraz, a great-tasting wine with aromas that vary between fruity cherries, plums and raisins, to complex chocolates, coffee, and earth. The wine can also vary between fresh and fruity to highly concentrated and intense.

The renewed popularity of Australian Shiraz can be widely attributed to Michael Fragos, chief winemaker of Chapel Hill in McLaren Vale, which supplies wine for M&S. Fragos has been touted as one of the few winemakers who have gone to great lengths to promote his country’s wines, travelling across the globe to educate the media and wine connoisseurs about their recent developments. Thanks to winemakers like Fragos, the Australian wine market has flourished, and the land’s own wines have become well-known.

This is probably why, when people hear the word “Shiraz”, they immediately think of the deep, delicious red wine. Unbeknownst to many, Shiraz is also the name of something different entirely: a city in Iran, which has been as a regional trade center for over a thousand years. Shiraz is known as the city of poets, literature, wine, and flowers, and it’s also become famous for a deliciously refreshing summer salad that hails from the beautiful city.

Today, we feature recipes that honor Shiraz — both the deliciously deep red wine of Australia, and the city which gave birth to a light salad — right in time for the summer.

Summer Sangria
Ingredients:
· A bottle of Australian Shiraz
· 1 lemon, sliced into wedges
· 1 orange, sliced into wedges
· 1 lime, sliced into wedges
· 2 tbsp of sugar
· A splash of lemonade or orange juice
· 1 cup of frozen strawberries
· 1 small can of diced pineapples
· 4 cups of ginger ale

Pour the Shiraz into a large pitcher, and squeeze the juice from the fruit wedges into the pitcher. Toss in the wedges as well, leaving out the seeds if you have the time. Add the pineapple cubes (with the juice!) and the sugar, gin, and lemonade. Allow the mix to chill overnight, or for 24 hours if you can. The next day, add in the ginger ale, berries, and ice just before serving.

Salad Shirazi
Ingredients:
· 1 large cucumber
· 1 large onion
· 1 large tomato
· 1-2 tbsp of olive oil
· 1/4 cup of lemon juice
· Parsley
· Salt, to taste

Simply chop the vegetables into evenly-sized pieces, and toss everything together with the olive oil, lemon juice, parsley, and salt. This will make a great side salad that goes well with everything.

Blueberry Ginger Kombucha

photoContrary to what you might think, making your own Kombucha is NOT that hard. It’s actually QUITE easy. You simply brew some tea, add organic sugar, let it cool to room temperature and then pour into a jug with your SCOBY and let it chill for a week or two. Viola, homemade Kombucha! I’ve been making my own kombucha for almost two years now and decided that it was time to start experimenting with some flavoring. Regular brewed kombucha is completely drinkable, but it’s just that… drinkable. Not super exciting. So, it was time to add some excitement to my kombucha making routine! Watch out kids, magic is about to happen!

Remembering back to when I first started drinking kombucha I LOVED the Gingerberry flavor from Synergy Organic. Off to the inter-webs I flew and found some great tips from a website called Cultures for health. Their  Kombucha FAQ listed some delicious recipes, pointers on second fermentation and flavoring, and many other kombucha resources as well as a place to purchase your SCOBY. Well, I blueberry juice and gingered up and have been trying my hand at a few batches of homemade gingerberry kombucha. The second fermentation process is a great way to add some flavor to your brewed kombucha. “A byproduct of fermentation is that the sugar is turned into carbon dioxide giving the kombucha the fizzy texture it is often known for.” ( Quote from the  Kombucha FAQ ). I have two glass bottles that I use for my second fermentation. There is no rhyme or reason to these bottles, or pro/con of using one over the other can I can tell so far. One is the KORKEN bottle from Ikea. It’s $3.99 and is a nice round shape that should fit in the door of most refrigerators. The other is the square glass bottle from Cost Plus which is $5.99 and is a bit taller yet equally as useful. Bottle shape and size is really up to your personal preference. Just make sure it’s a glass bottle and that it has the sling top, which allows the bottle to burp (lovely description, I know!) and release the carbon dioxide as it ferments. If you don’t have a bottle that burps, you’ll have a bottle that bursts. I for one don’t need to come home to glass and kombucha scented kitchen. You can find some GREAT tips on second fermentation from Cultures for Health: Flavoring and Bottling Kombucha. They’re a GREAT resource that I’ve used many times along my Kombucha journeys. I am also lucky enough to have my very own kombucha guru on speed dial who can answer my “am I going to die if I drink this” and “should it look like that” questions. That is one of the MAJOR benefits of having friends that are also obsessed with making their own kombucha and I highly  recommend having a few on retainer! The “if flavoring with…use…” below is from the Cultures for Health website and remember, the flavor will develop during the second fermentation period so go easy on flavoring the first time you make it and adjust on the second batch. If flavoring with…use…

  • Fresh, frozen, or dried fruit…start with 10% to 30% fruit and 70% to 90% Kombucha.  Fresh fruit yields the best flavor.
  • Juice… start with 10-20% juice and 80-90% Kombucha.
  • Herbs… the variety and strength of herbs varies so greatly, experiment and come up with the best ratios and combinations for your taste preferences.
  • Flavor extracts such as almond extract or vanilla extract… start with 1/4 teaspoon extract per cup of kombucha and adjust to taste.

I’ve only used fruit juice and various types of ginger so far, so please comment and let me know what flavors you try!!! Blueberry Ginger Kombucha  1/2 c 100% blueberry juice 1 tsp chopped ginger 7 c  Homemade Kombucha 2 sling top glass bottles Mix half the blueberry juice and ginger in  each of the glass bottles and shake to mix. Add 3 1/2 cups of the homemade kombucha to each bottle, making sure that you leave room in the bottle between the kombucha and the opening. Leave on the counter for 2-14 days. Once you achieve the desired flavor and carbonation, re-bottle and keep in refrigerator to consume at your leisure.

Homemade Almond Butter

photo
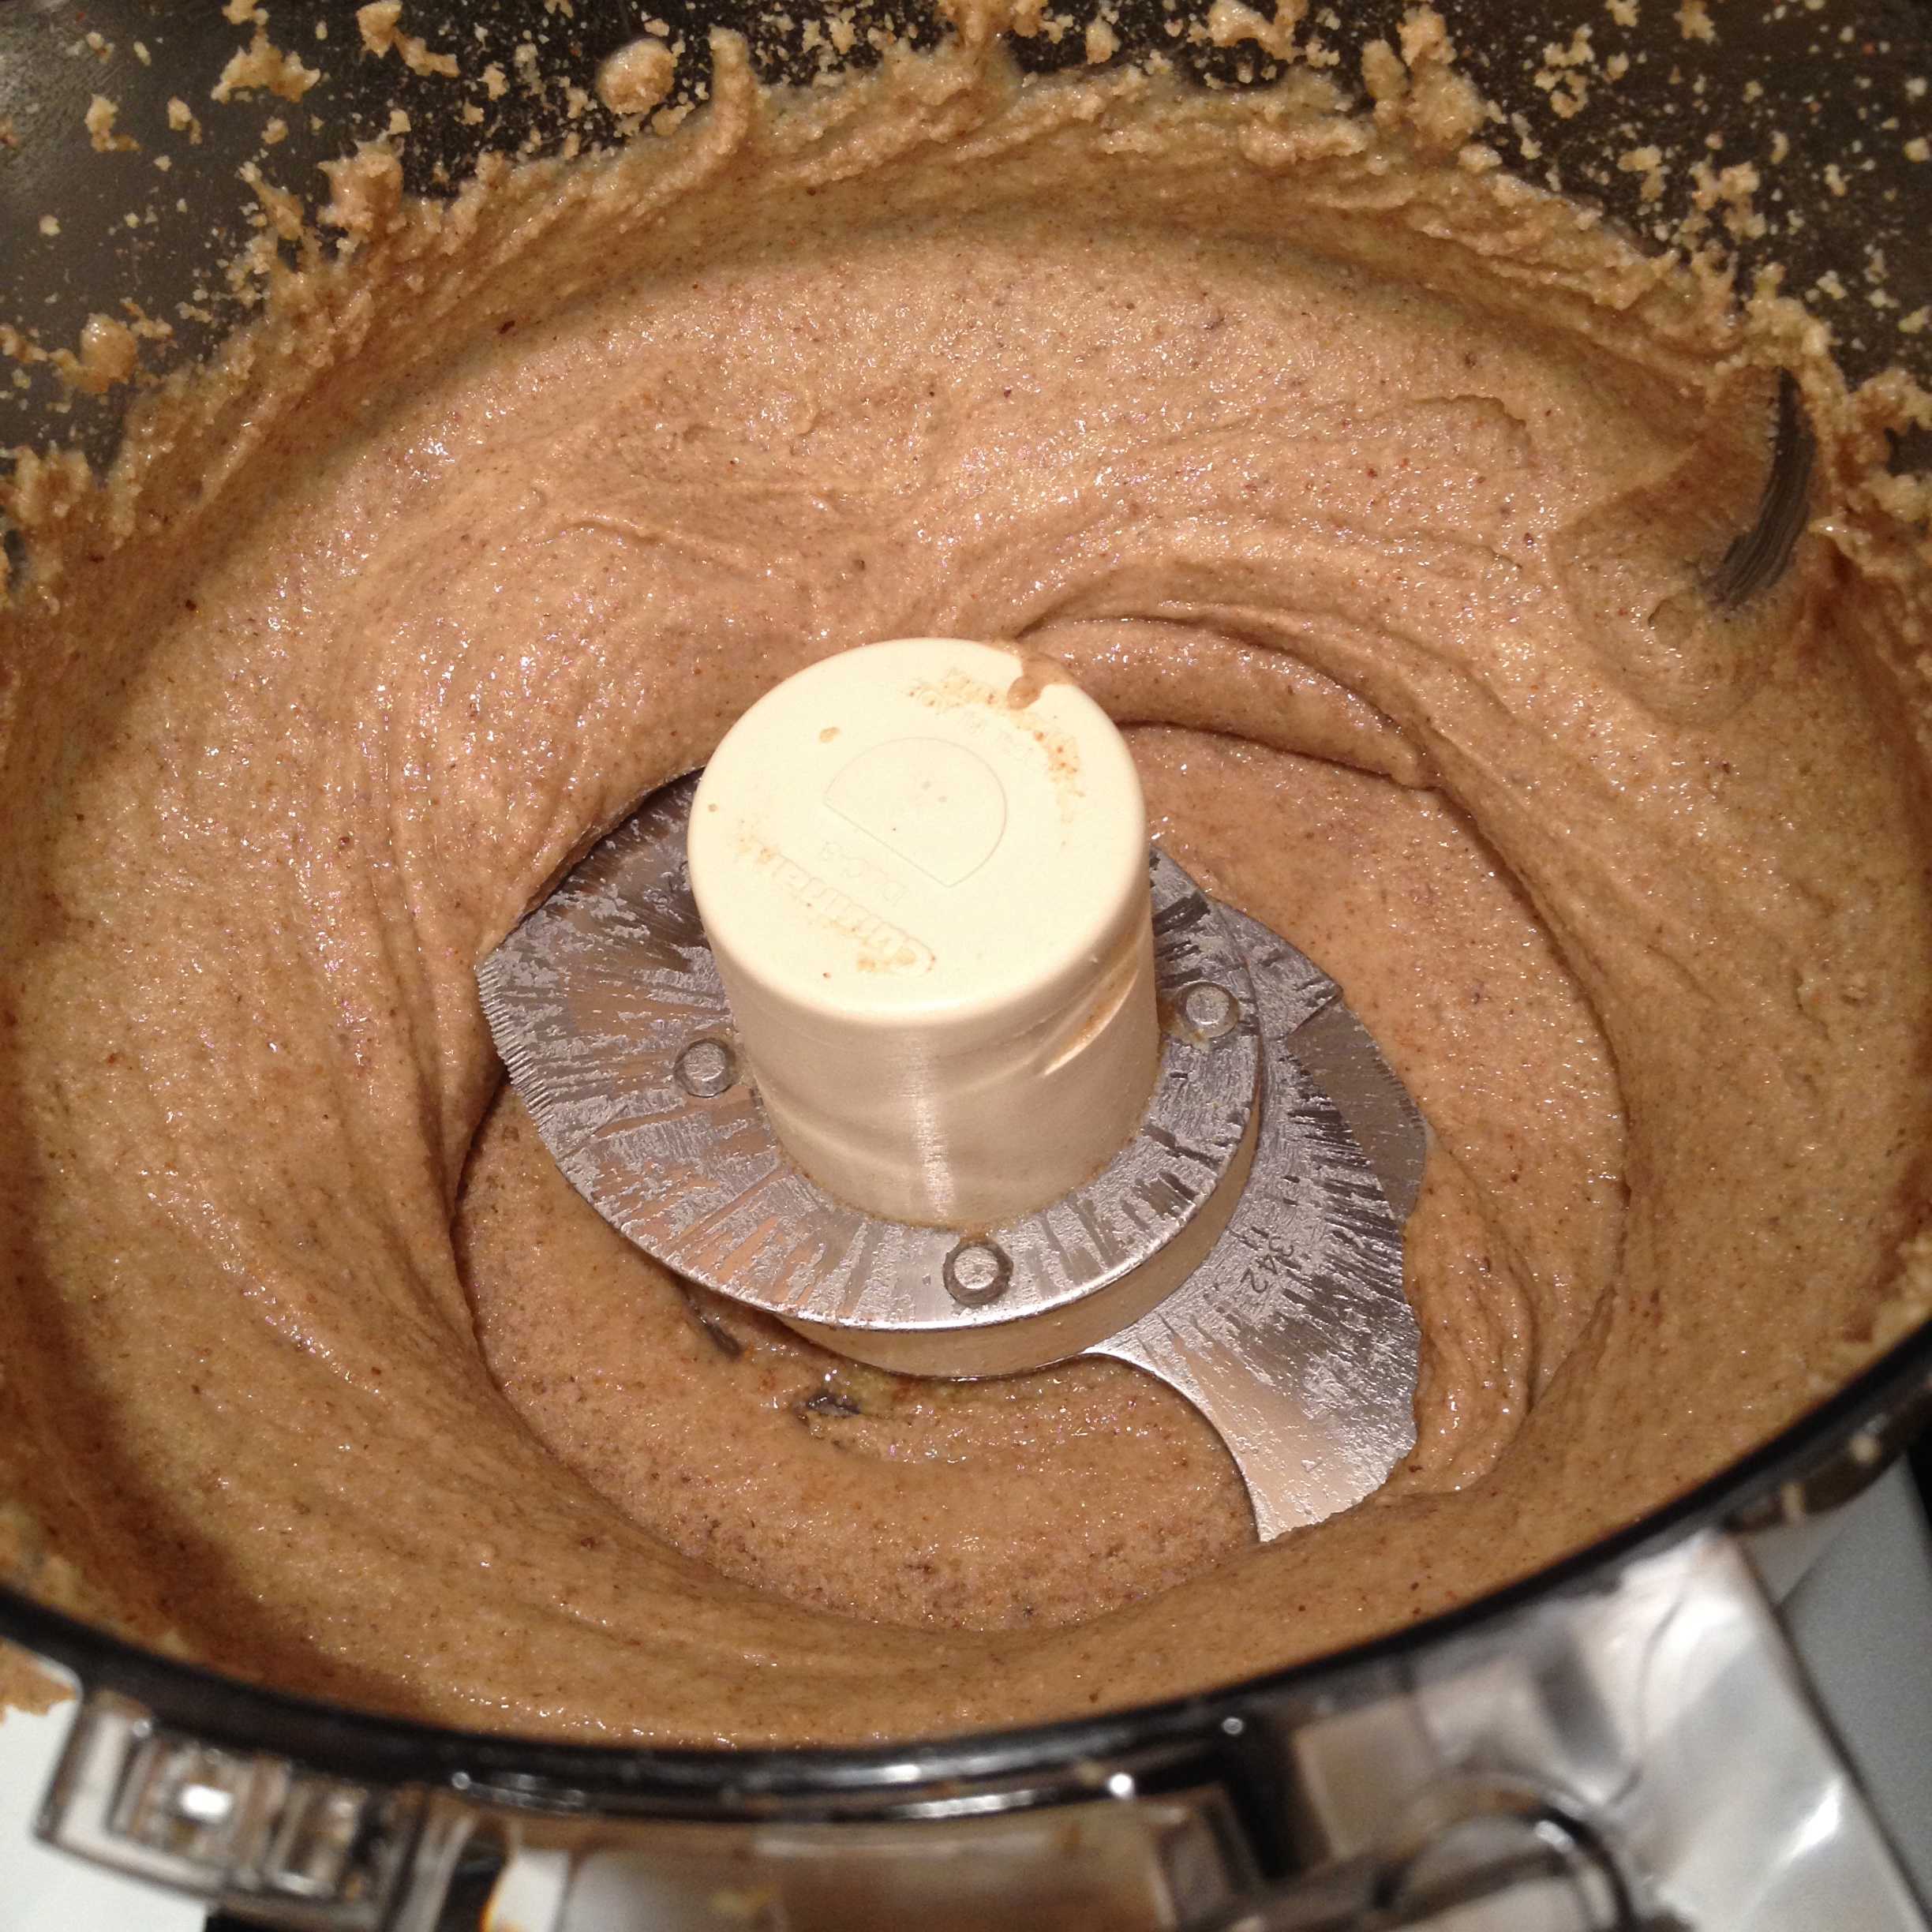
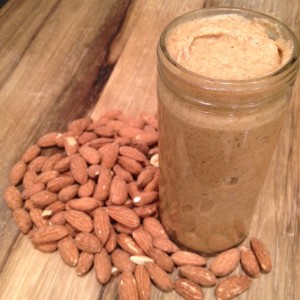
Let me start this story by giving a little background on the hardware featured in this particular post. I’d been eying food processors like a kid looks at the passing candy store window, or cat looks at a fish bowl. I WANTED a food processor for reasons I can’t quite explain. The strong urge to rice cauliflower isn’t something that normal people think of, but I’ve also never claimed nor do I want to be “normal”…not if it means giving up dreams like rice-ing cauliflower. But, this particular post is about nut butter so I shall continue. The story is, I got hooked on the stuff then went into budget mode and got the DIY itch at the same time and scoured the internet for almond butter recipes.

We used to get a tub of fresh cold-pressed almond butter, and one of pumpkin seed butter each week. But, two tubs of $8/each nut butter per week got me thinking, “I HAVE to be able to same something close at home that could do the trick!” So, off to Costco I ventured to live out my food processor dreams. After extensive food processor research (yep, that’s a thing!) I decided to purchase the Cuisinart Prep 11 Plus™ 11-Cup Food Processor With Blade Storage (link takes you to Amazon.com- but I purchased at my local Costco for $140). I liked this one because not only was it cheaper than the ones I found on Amazon, but it came with the extra blades AND a nifty little blade holder, AND still had the Cuisinart warranty. Pretty good life choice if you ask me!

I won’t lie, there was a little intimidation when I started researching some nut and seed butter recipes. They warned that it would take up to 20 minutes to make nut butter. Who’s got the time! BUT, my amazing, lovely, wonderful food processor did the trick much quicker and is sturdy enough that I don’t have to stand and hold it. I could turn it on and do other chores in the kitchen in-between checking on the butter progress. I’d love to say that the first batch was an incredible success, that it was as if I had been making nut and seed butter all my life and that I was a natural…what, with my infinite patience and such. But alas, I was not an instant success. I did not make fantastic, amazing nut and seed butter the first time I tried. The first almond butter tasted weird because I used flax oil instead of flax meal. The flax oil had a very…”earthy” taste which tasted healthy but wasn’t amazingly tasty. But, with a very patient taste tester and a few batches, the recipe was pretty dialed in!

IMG_5705Homemade Raw Almond Butter
Yield: one pint
Time: 10-15 minutes 

Ingredients
4 cups almonds
1/2 cup  sunflower seeds
1/4 cup flax-seed meal
1/4 cup  grapeseed oil

Directions
Combine  almonds and flaxseed meal in your food processor. You’ll need to stop and scrape the sides down so all the ingredients get blended together. Keep blending until you see the nut butter starts to form into a play dough texture . This can take up to ten full minutes so have patience! Once you see the play dough texture, where the seed butter starts to form a ball and move around the bowl you’re getting close! Add the oil and sunflower seeds and continue to blend about 5 minutes more until the nut butter is consistently smooth. Your food processor might get warm but don’t worry too much, you can always let it cool a little bit and then blend away. I used the 1/4 cup and it was just fine, but you may want to add more depending on how you like your nut butter.

Place in an airtight container (Tupperware or glass jar) and store in refrigerator up to 2 weeks.

There are plenty of additions to this recipe, you can mix up the ratios. You can try using coconut oil. You might want to add salt, or use salted almonds. You can also pre-heat the oven to about 350 and roast the almonds on a parchment paper or foil wrapped cookie sheet for 10-15 minutes. If you oven roast them, stir the almonds once or twice during cooking and let them cool before adding to the food processor. You can also try adding honey if you like it a little sweeter, or even add cinnamon.

What is your favorite almond butter variation?


Sugar Cookies

photo 1 copy 2We don’t really “do” Valentine’s day. A lot of women need the flowers, and the chocolate, and the expensive dinner, and the presents. Me? I figure when you add that all up you can afford a pretty damn good bottle of wine so… it’s really a no brainer: skip all that and pop a bottle of the “good stuff”. Stay home!  Whip up a homemade pizza, cue up a movie, and pop that quality bottle of booze that you’re celebrating…er… I mean… stare into the eyes of your Valentine and… oh let’s be real- pop open that bottle! There is one way that I celebrate this “holiday” and that, my friends, is with cookies.

I’ve always loved the idea of holidays with corresponding baking assignments. I was that kid in school that liked homework, just  because I could color code it into my “pre-historic spreadsheet” (aka- paper planner) of “things to accomplish”. The difference between color coded due dates and color coded cookies is desire. Now, that’s a word we hope would be aligned with this heat shaped holiday. But, not in the way you might initially think. I desire to bake these festive, holiday corresponding cookies. Despite a full work day, plus being dumb enough to go to the newly opened Seattle Zara and waiting for a half hour for the waiting room alone, to spring for an Uber home even when you don’t really have the budget but your amazing outfit completing shoes are killing you and you still have dinner to make AND you also want to make 4 dozen cookies for your office. That, my friends, is desire. Trust me, I wanted to NOT bake these cookies! I’d LOVE to be sound asleep at 12:32 instead of writing up this blog post but that also takes desire. “You have a new subscriber” e-mails have increased in the past few weeks and I wouldn’t want to leave you guys high and dry on blog posts! Although, I hope NONE of you are awake right now looking for this recipe. Make these delicious cookies or something else from my Delicious Desserts Pinterest board for some post-holiday treating.

On this day of love, I want to say that I love you guys! You are the reason I am up past 12:30am after a full day of work! You are the reason that I write, and I wish I could share these delicious cookies with each of you, but I can only share the recipe for now. Love to all of you on this heart-shaped holiday!!! XOXO

Heart Shaped Valentine’s Day Sugar Cookies

Makes 36 medium cookies | Hands-On Time: 25m | Total Time: 1hr 15m

Recipe from Real Simple

Ingredients

2 1/2 cups all-purpose flour, spooned and leveled, plus more for the work surface

1/4 teaspoon baking soda

1/4 teaspoon kosher salt

2 1/2 cups sticks of unsalted butter, at room temperature

3/4 cup granulated sugar, more to sprinkle on top

1 large egg

1 teaspoon pure vanilla extract

Directions

In a large bowl, whisk together the flour, baking soda, and salt.

Using an electric mixer, beat the butter and sugar until smooth. Add the egg and beat until fluffy, about 2 minutes. Beat in the vanilla.

Reduce the mixer speed to low and gradually add the flour mixture, mixing until just incorporated (the dough will be stiff). Shape into a disk. Wrap in plastic wrap and refrigerate until firm, at least 1 hour.

Remove from the fridge and pre-heat the oven to 350 degrees.

On a floured surface, roll the dough to ¼ inch thick. Using cookie cutters, cut into shapes. I use a Silpat for my baking, but you can also use parchment paper or cooking spray. Space cookies 1½ inches apart. Sprinkle with a little additional sugar.

Bake until just beginning to brown at the edges, 10 to 12 minutes. Cool slightly on baking sheets, then transfer to wire racks to cool completely.

Store in an airtight container at room temperature for up to 1 week.

Mango Margaritas + Cilantro Lime Tacos

photo I’m sure you’ve all heard the phrase, “When life gives you lemons…” which is followed by some wise phrase like “make lemonade” or “add vodka”. Personally I prefer the second option, or making the first option then adding the second. All of this is supposed to remind us that we can either look at life as a sour lot that’s been handed to us, or we can add a little goodness and make a delightful treat out of it. Well, lemons are quite an option-filled food. You can add them to all kinds of things, but you can’t eat them straight. At least I don’t, gross! On Thursday, I discovered something in the fridge that I never thought I’d find. Forgotten mangos! I LOVE mangos, they might just be my favorite fruit! Well, immediately that phrase “when life gives you lemons” came to mind so I turned to the mister and suggested that we  take our life given mangos and add tequila, and a few delicious cilantro lime chicken tacos! And that’s exactly what we did. Friday night was dubbed celebration taco margarita night. Coming back to the whole life giving you lemons thing seemed quite fitting since mangos are delicious and we were simply adding another layer of delicious AND we were celebrating not only the weekend, but my job transition. Friday was my last day at my old job which I loved, and Monday is my first day of a new job, which I’m THRILLED about. It felt like live was not giving me sour lemons, but delicious mangos and it only seemed fitting that we add a little tequila and some good friends to celebrate! Let’s end this long-winded intro and get to the good stuff, MANGO MARGARITAS! For the tacos, I used my Cilantro Lime Chicken recipe and served with my Grilled Cabbage Slaw.

Pre-tequila arrival... margarita bar set up and ready to rock!
Pre-tequila arrival… margarita bar set up and ready to rock!

Mango Margaritas Fresh mango, cubed or pruréed (You may also want to retain a few slices for a garnish) Ice Tequila Cointreau or Triple-Sec Sugar Limes, juiced and zested (You may also want to retain a few slices for a garnish) 1/2 of one lime, un-juiced to wet the rim for the salt Sea Salt Cayenne Pepper (if you like a spicy margarita like me) Shaker and Mudler, and zester First, wash the mangos, peel, cut and cube them. You can either keep them in chunks or throw it in the blender and make puree. If you do the puree route, you can add a little cayenne on this step if you all prefer spicy margaritas. We just cut ours into chunks so everyone could personalize their drink. Then, get your shaker and add  2 shots of tequila, a “dink” of Cointreau or triple sec, fresh lime juice, 2 spoonfuls of sugar, and 2-3 ice cubes. You can also add orange juice if you prefer a more smooth margarita. Shake well. Take the half lime and rub it over the rim of your glass then dip in the salt. Pour your margarita into the glass and garnish with a lime or mango wedge if you like! There you go! Fresh Margaritas!

Butternut Squash Couscous (Vegetarian, Vegan, Meat Free, Dairy Free)

photoThe way that I describe this dish, is a middle eastern version of fried rice. It’s a great meal the throw together and one that you can experiment with spices that you don’t likely use in your daily cooking. The original recipe calls for a steaming method of cooking, which is the traditional method. I neglected to read the directions before I started the recipe and didn’t think we even owned a steamer! Well, after I completely revamped the entire cooking method, I realized that we DO have a steamer so I guess I’ll try that next time!

Couscous is very low in fat, and has about the same in protein, fiber and carbs as quinoa. Quinoa beats couscous in the mineral content, but couscous packs an amazing 87% of your daily suggested intake. About 55mcg is suggested daily and couscous has 43mcg per once cup serving. Selenium has antioxidant properties, can help the body regulate the thyroid hormones, support a healthy immune system, and aid in metabolism. One of selenium’s most important roles is as an antioxidant helping to prevent cell damage due to free radicals. (Sources: WebMD and Eating Well)

One VERY important thing that I did not note, until I’d already washed and set aside four cups of couscous, is the water to couscous ratio in this recipe. Much like rice or quinoa, there is a two to one ratio for water to couscous. Now, this recipe called for 4 cups of dry couscous. Four cups of dry couscous is quite a large portion, borderline obscene actually. I only realized this fact at the very moment where I was pouring the 8 cups of water and 4 cups of couscous  into my stove top pan and it was nearly brimming over. And, I hadn’t event started it boiling yet! My denial for the amount of couscous I was in the middle of making could no longer be indulged and I pulled out the large stock pot and transferred my absurd amount of couscous into the larger pot. While there was much more couscous than I would normally cook, about 9 servings worth, the ratio of the other ingredients worked perfectly. The only thing I would change is to maybe try cutting the couscous by half. 

To serve, mix the roasted zucchini and butternut squash, chickpeas, raisins and sautéed onion together in a bowl and add a little more chopped parsley. (Typically, chickpeas from a can are already cooked but double-check.) Add in the couscous and stir well. The couscous will be a little gummy which is possibly due to my cooking method and not steaming it as directed. Garnish with more fresh  parsley if you wish. You can also add grilled chicken or tofu to this if you want more protein like I usually do.

Squash Couscous
Yield: 9 cups of couscous + a good amount of veggies for 4 people 
Recipe and method adapted from the recipe on Canadian Living
*Note: Due to preference and feeding two people versus 6, I suggest cutting the couscous, chicken stock and water in half. If you LOVE couscous or have a lot of people to feed, keep the recipe as is!

Ingredients
1 1/2 lb (one medium large)  butternut squash, peeled and chopped in 2 inch cubed
2 large zucchini, sliced into 2 inch cubes
1 medium yellow onion, diced
1/2 cup raisins
2 cups  ( 1  15 oz can)  chickpeas, drained and rinsed
1/4 c chicken bullion paste for chicken stock
8 cups water
2 tbsp chopped fresh parsley
1 tsp ground ginger
1/2 tsp pepper
1/4 tsp salt
1/2 tsp turmeric
4 cups Israeli couscous ( I only had 3 cups, so I added one cup of the golden small couscous
additional parsley to garnish

Directions
Wash and chop the zucchini and butternut squash. Don’t forget to de-seed the squash. Lay out on aluminum foil on a baking sheet and roast at 450 for 30-45 minutes. Turning every 10 -15 min. Wash the couscous and set aside.

Chop the onion and fry it on the stove with some olive oil in a large stock pot. Set aside in a large bowl which you’ll use to mix up the rest of the ingredients. Drain and rinse the chickpeas and add to the bowl, along with the raisins and some more parsley (to taste). Add the zucchini and butternut squash to this bowl once they’re browned on all sides.

Bring 8 cups of water to a boil in the large stock pot you used for the onions. Stir in the 1/4 cup of bullion, parsley, ginger, pepper, salt, and turmeric. Let boil together for a few minutes. Add the couscous and let it come back to a boil. Be sure to stir it all up every few minutes. Cook until the couscous soaks up the broth and get’s to a consistency you like.

Add the couscous to your large bowl with the onions, raisins and chickpeas, zucchini and butternut squash and stir. Garnish with additional parsley if you wish.

Tonight we’re eating this with some delicious bone in pork chops that are currently brining, but you can serve with grilled chicken, boiled eggs, firm tofu, or grilled steak. The options are endless!

Morning Things: Muffins and Coffee

photoSome days you just wake up and want a muffin and a nice BIG cup of coffee. This was one of those mornings. Luckily, it’s also a weekend morning so I was able to enjoy all of the above, in the comfort of my PJ’s and completely homemade. Whenever I get a hankering for muffins, it’s usually for carrot raisin or bran muffins. Some people might protest and say that if it has vegetables in it, it’s not a “real muffin”. Well, most store bought muffins are really just cupcakes without frosting or generic blueberry. Neither of which are very appealing to me. I love to bake, and I do love a good muffin, but I need my PROTEIN in the morning to get going. Protein and a large cup of coffee. That’s where these little guys are a life saver for me. I use chickpea flour, which has higher protein that other flours, greek yogurt, AND walnuts! It’s got everything you need: protein, carbs, healthy fats, it’s filling, convenient and delicious. I don’t taste the chickpea flour but I love the extra protein that these little guys pack in!

Check out my muffin recipe here: Carrot Raisin Muffins
And if you love the mug, you can get a handmade one here: Hand Painted Mug on Etsy 

Restaurant Review: Grog (Ballard)

IMG_4746Grog
5410 Ballard Ave NW, Seattle, WA 98107

For the review we have The Long Version, and The Short Version. It’s kind of like one of those pick your own adventure stories!

The Long Version
Last week, we were lucky enough to score a last minute invite to the private opening night if Grog. Ballard has long been my list of places I’d like to spend more time and explore. Not only is it home to my favorite Sunday market, but it seems that every time you sneeze or turn around, some new restaurant that threatens to be “the next big thing”  is popping up.

We almost didn’t make the 9pm event cut off because we were touring around Ballard, observing how little parking there is as we looked for a spot. Now, let me stop and say this is a Fiat we were trying to park. Not some Goliath sized monstrosity of a mack truck. We’d already braved the wind and the rain. We’d braved leaving the comfortable walkability of Belltown. We had places to be, small plates to order and cocktails (yes, note the “s” at the end) that had my name written all over those lovely little frosted glasses. Come hell or high water, there was not turning back now for an issue as measly as not finding parking. I knew there was goodness awaiting us!

Photo from the Grog WebsiteOn to Grog! The place was packed when we walked in and it was a pleasure to see the assortment of people. How boring is it when you walk into a new establishment only to see a certain “type” of person, multiplied and filling the room. For me, if the drink and food menu pass the test, the next hurdle is the people that gather. Grog was a pleasant and welcoming mix of all styles, which not only made for fun people watching, but, made it feel like that kind of bar where nobody knows your name but your drinking family nonetheless. We secured two bar stools and moved our attention to the most important matter of the evening, what’s on the menu!

IMG_4741Round one. Little did we know at the time, but this was going to be a night of rounds. Yes, there’s that little “s” for the plural once again!  But, isn’t that the way all epic nights start out? He ordered a “Ben Nevis” cocktail and I went with the Dainty Canal. For food, we opted for the Spice Market Short Ribs and Julio’s Citrus Salad to share. The salad was colorfully festive to look at while the lime, and grapefruit made it refreshing to eat. I was excited to try the “Rooster powder” and it added a nice slightly spicy sensation, as well as helping with the “colorful” part! The Short Rib was dressed with a tasty Chinese 5 spice and a peanut hoisin sauce which nicely complimented the little bit tougher cut of meat. Portion size was good and its plate presentation was lovely! As someone who likes the very buttery tender cuts, I’m glad I ordered the short ribs try but they weren’t my favorite. Oh no, my favorite of the night is yet to come.

Joe, the “under the radar’ mastermind behind Grub, was making the rounds and stopped to see how we were doing. It wasn’t until he walked away and we got a tip from a near by cocktail sipper, that we found out Joe was the one who expertly envisioned and created this amazing little cocktail haven. From the Spice trade and sailor infused theme, to the local sources spices (from World Spice in Pike Place Market) and teas (Miro Tea just down the street in Ballard), attention to detail was the name of the game. The small touches of menu flare, from the bottle hiding in the “o” in the establishment name at the top of the menu, to the font and ever so subtle ship in the background brought the theme together. Event the selection and naming of the food and drinks added to the unique and nuanced nautical decor. This is defiantly a bar you want to drink at a handcrafted cocktail at.

Each of the menu items, both food and cocktails has a story behind the name. The Dainty Canal was a lovely way to start the evening. But, as I mentioned this was a night of rounds. We had been seated across from the right person for a good night and managed to befriend a certain “executive chef” (ahem- for the company behind that very nights debut) who expertly Sherpa-ed (yes, I’m using a tense of “Sherpa!) our food and cocktail experience to a WHOLE new level! Talk about drinking family treating you right!

IMG_4754I snuck in a round two drink order of “The Long Rifle” (did I mention the nuance in the naming!) and instantly fell in love with grapefruit beer. That is a MUST order right there! My favorite however was not round 2 as I thought at the moment of my first sip of The Long Rifle. Round three was where the “favorites” began and we received two lovely martini glasses filled with the “Black Flag”- my favorite drink of the night. Coming from a mostly wine person who’s not cocktail averse but simple cocktail uneducated, this little treat was a fast favorite for me! “I’m afraid to put my glass down because then my drink will be too far away”… that was my directly quote folks! Shortly after we started our love affair with our drinks, two delicious looking plates were placed in front of us. Now, when a chef befriends you and asked if he can order some food for you, you say “yes please”. But, when a chef befriends you, asks if he can order for you and then get’s that little “grin” and disappears, you better get outright excited! He had ordered us the Popcorn Chicken and the Sichuan Sandwich.

The Popcorn chicken had a perfectly crunchy but not battered and deep-fried crunch to it. You could smell the fish sauce before you saw the meal, but it worked with the other flavors of the dish very well. Served with sushi rice, this would have been a meal in itself!!

Now, cue drum roll for my favorite dish of the night: the Sichuan Sandwich. Soft, buttery and flavorful pork belly, Sichuan peppercorns and pickled vegetables on a simple and perfectly appropriate fluffy roll.  The seasoning, texture, and flavor were just off the charts. It looks like any other sandwich when you see it coming, but wait for that first bite! Oh MAN it was good! Pair that sandwich with a freshly mixed black flag and you’re in for an amazing treat!

Just when we thought we had reached the edges of gastrosatisfaction, the donuts arrived. Yes, this already amazing bar serves donuts. These are not just any donuts, they taste like the best bite of a Cinnabon. Cinnamon spice toasted bites of oooey goooey heaven are served with an amazing cardamom vanilla pudding. Fresh donuts that melt in your mouth.. AND…dipping pudding? Be still my beating heart!

Needless to say, my heart beats for the moment I get to go back and re-live that first bite into the Sichuan sandwich washed down with a swig of a black flag. Now, THAT is good living folks!!

IMG_4746The Short Version
We fell in LOVE with
-Food:  The Sichuan pork sandwich: perfectly seasoned and cooked to crispy perfection. The soft unassuming toasted bun mixed with the pickled veggies and perfectly balanced mayo make this a new “go to” order
-Cocktail: The Black Flag- love at first sip!

Needs a little dialing in
-Popcorn chicken: loved the light crunch on the outside, but you do smell the fish oil before you see the dish, and the salt needs to be dialed back.
-Ribs: While the taste and presentation were great, it’s a bit if an adventure to cut through that hunk o meat…and not something you’ll want to tackle after a few rounds of drinks!

To summarize, I have a home bar that I Sad isn’t stumbling distance but is completely worth the drive and parking adventure to go enjoy. If you know what’s good for you, you’ll be seen drinking and eating at this new Ballard hot spot.


Pumpkin Pie

DSC_0787

There is a special feeling of accomplishment and “arrival”reserved for the moment when you look at your LOVELY freshly baked pumpkin pie cooling on the rack,  knowing that you both roasted the pumpkins used in the pie AND made the crust from scratch. You “can” use the canned stuff, but roasting your own pumpkins just puts this already delicious recipe over the edge of deliciousness! Roasting pumpkins isn’t as hard as you may think and it truly is worth the time for some AMAZING tasting pumpkin pie! You can find my simple recipe HERE.

I like to use organic local pumpkins whenever available. The nice thing about doing pumpkin pie, is that you can roast extra pumpkin and use it later in the week! I usually roast a pumpkin to make puree for the pie, and roast a pumpkin to roast in chunks to use with toasted quinoa and roasted chickpeas for dinner, or tossed in a salad.

Pumpkin Pie

Prep:15 mins |Cooking: 55 mins

Ingredients

3/4 cup granulated sugar
1 teaspoon ground cinnamon
1/2 teaspoon salt
1/2 teaspoon ground ginger
1/4 teaspoon ground cloves
2 large eggs
1  15 oz. canned Pumpkin or 1 3/4 cups pumpkin puree
1 12 fl. oz. can Evaporated Milk
1 unbaked 9-inch deep-dish pie shell (homemade recipe HERE)
Whipped cream (optional)

Directions

Mix sugar, cinnamon, salt, ginger and cloves in small bowl. Beat eggs in large bowl. Stir in pumpkin and sugar-spice mixture. Gradually stir in evaporated milk.
POUR into unbaked pie shell.
BAKE in preheated 425° F oven for 15 minutes.
Reduce temperature to 350° F; bake for 40 to 50 minutes or until knife inserted near center comes out clean.
Cool on wire rack for 2 hours.


RECIPE TIPS
Pie is done when center reaches 200°F. Tap center surface of pie lightly – it should spring back when done. For easy clean up, spray pie pan with cooking spray before placing pie crust in pan. If pie crust is over browning, cover edges with foil.
To use prepared frozen pie crust: Place cookie sheet in oven and pre-heat oven as directed. Pour filling into frozen crust and bake on preheated cookie sheet.
High Altitude Adjustments: Reduce sugar to 2/3 cup and increase butter to 3 tablespoons. Reduce oven temperature to 325°F.